I promised I show y'all how I did my "cheater" FBA on the Jalie 2794 Sweetheart top, and also how I did the double band neckline finish. Well, let's make it happen!
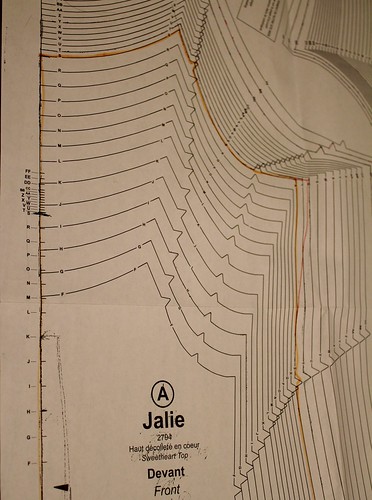
Let's start with the FBA. For knit tops, I find the easiest way to do an FBA is to blend the sizes of the front pattern piece at the underarm, and then just ease the excess side seam length into the back. It's easy and it works well. Here is how I usually do it. With the Sweetheart Top, the bodice front is in two pieces, right at the underarm, so I had to modify the FBA a little bit.
Starting with the main front pattern piece, the change looks about the same. For reference, my upper bust measurement corresponds to the size S, while my full bust is a U, so those are the two sizes I'm using. Use the sizes that are correct for you.
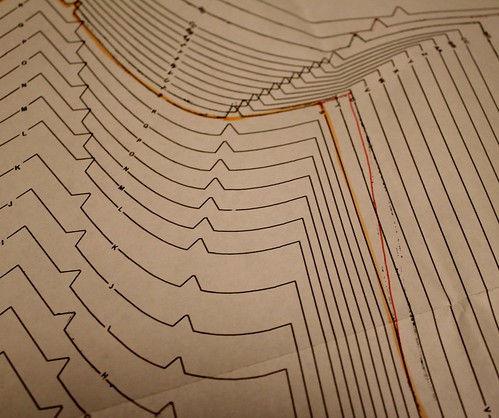
Here it is a little closer up. You can see that I used the size S line (in yellow) for the majority of the pattern piece, and only blended out to the U in the underarm/side seam area. Since the size S works for my waist measurement, I blended back to the size S at the area of the waist notch (Thank you Jalie for putting a notch there! So useful!!). The red line is the pattern changes I made.
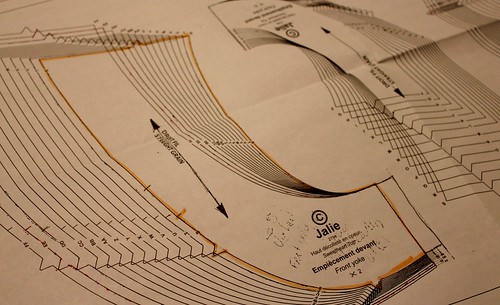
For the curved "fauxlero" piece I couldn't just grade out a size at the side seam because of the way the pattern piece is nested. Instead, I measured the amount of the change in the underarm area of the front pattern piece (the distance between the red and yellow lines in the above pic) and added that amount to the side seam. In the pic, the original pattern piece is yellow, and my addition is black. Making the change this way ensures that all of your notches will still match up, which is really critical in the construction of this top.
Of course, with all of these changes at the underarm, you've changed the shape of the armhole slightly, and need to alter the sleeve to compensate.
This part is super easy, and just involves grading out the front part of the sleeve to your full bust size. In the pic, the original pattern is yellow and the alteration is red. As you can see, you don't alter the sleeve cap shape, you just extend the length of the cap in the front only to the larger size. Remember, you didn't alter the back at all, so don't mess with the back part of the sleeve.
Now assemble your top per the instructions! When you get to the side seams, you may not even notice that the front is slightly longer than the back. Just stretch the back slightly as you go to match the front.
Now, how about that double band?
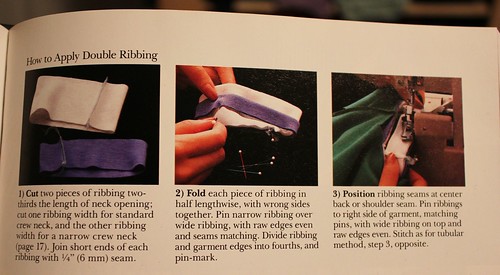
The first time I came across this technique was in the Singer Sewing Reference Library Sewing for Children book. This whole series is wonderful, although most of the pictures are quite dated, and you have to really look past the bright 80s colors and styles to get to the meat. It's well worth the effort though.
Here is all the book had to say about this technique. This method has the two bands applied in the round, which doesn't work for the Jalie top, so I'm going to show you how to do it flat, step-by-step.
What you'll need
Your garment - In my mockup, we'll pretend the pink piece is my garment
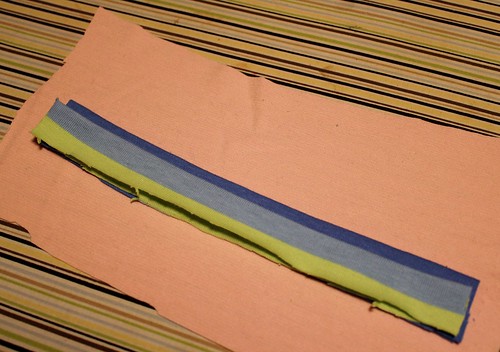
Two bands, cut to the length specified by your pattern, with one band the width your pattern specifies, and the other 1/4 to 1/2 inch more narrow. The more width you take off, the narrower your inner band will be and the more of your outer band will show. In the sample, the stripe is about 1/4 inch more narrow than the solid blue.
First, prepare your bands. Fold them in half lengthwise and press them wrong sides together. You want the right sides to show when you are finished. Give them a nice firm press, so that they are curling or shifting.
Stack the bands on top of each other, matching all the cut edges. The wider band should peek out above the narrower one, just as it will on the finished garment.
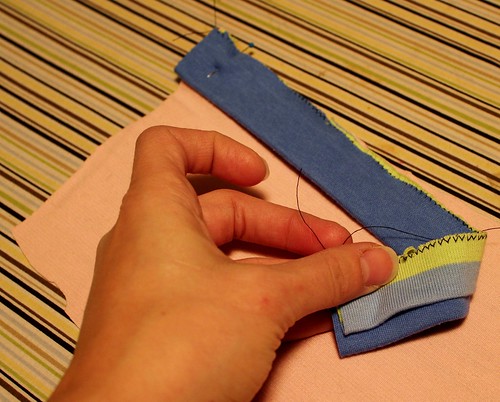
This step is optional, but I find that basting the two bands together helps prevent them from slipping and keeps them an even width. I like to use a narrow zigzag stitch to do this, as it holds down the curling cut edges, while still allowing you to stretch the band when you apply it to your garment.
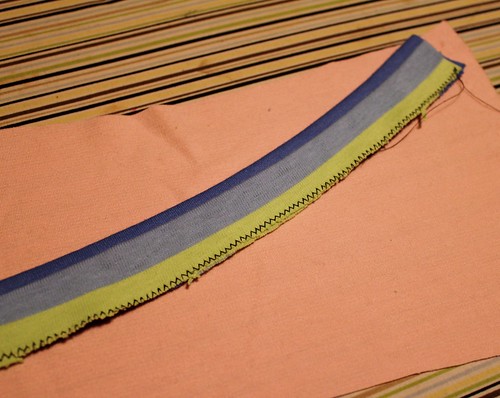
Here is how it looks once basted. See how well that tamed the curling of the stripe fabric? It's much easier to get a good result this way.
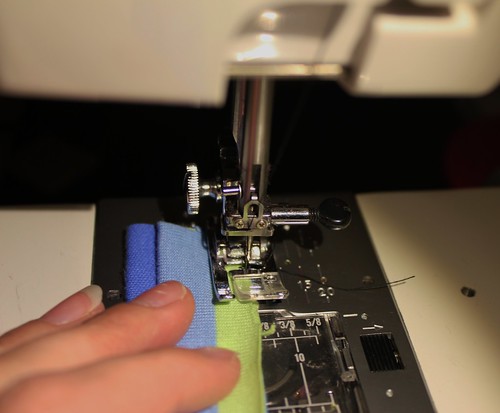
Now, pin your band into your garment, with the narrow band facing the right side of the garment. It is hidden between the wider band and the garment as you stitch.
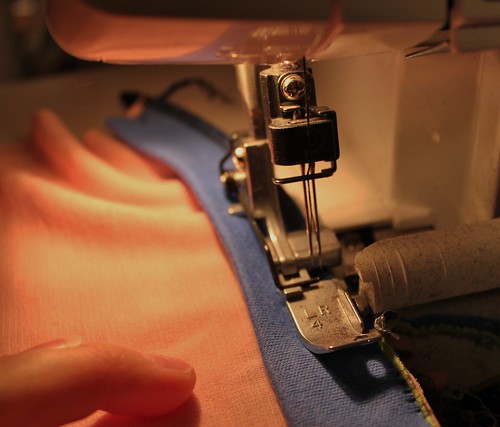
Sew the band on as your typically would. I like to serge it on, with the serger blade trimming off my basting. Be sure to stretch the band as you sew to fit your garment.
Here's how it looks stitched on. The narrower band is still tucked away between the other layers. You can see how the shorter band is curving my garment nicely into shape.
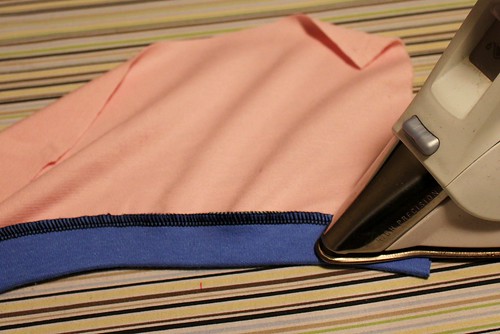
Give the band a press from the wrong side, with the seam allowance toward the garment.
Flip it over and voila, you have two bands! If you like, you can topstitch the bands down at this point to control the seam allowance. Edgestitching the narrow band also gives an interesting look.
The curved underarm section of the "fauxlero" is topstitched here, so you can see how it flattens the band and keeps it in place nicely.
I think this technique has a lot of potential, and not just in children's wear. I hope it has given you something to think about. Now, get those machines humming!
Thursday, January 10, 2013
Wednesday, January 9, 2013
Jalie 2794 Sweetheart Tops
Rawr! I'm so ready to jump in to Jungle January!!
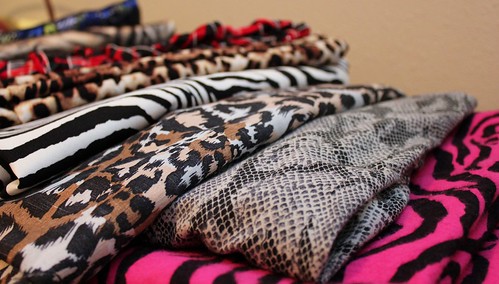
As soon as prttynpnk announced that she was hosting this little online get together, I ran to my stash and pulled out a few favorite animal prints. Hmmm, I may need an extension...
Myra shares my love of all things furry, so I knew I'd be sewing up some jungle-y goodness for her as well.
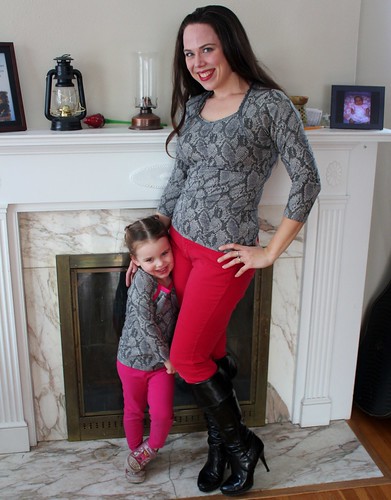
We decided to get rolling with a few quick Jalie Sweetheart tops, Mommy-daughter style.
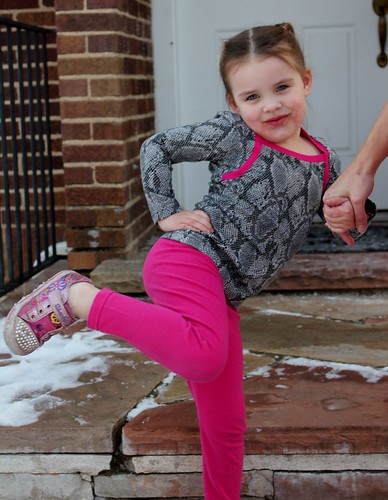
Myra's is a size 104, with the sleeves lengthened to her wrist, rather than 3/4. I've made this tee for her before (already traced! Woo-hoo!), and I knew it was a little low cut, so I raised the neckline about 1/2 inch. She insisted that there be some pink, so I made the bands in hot pink to match her favorite leggings.
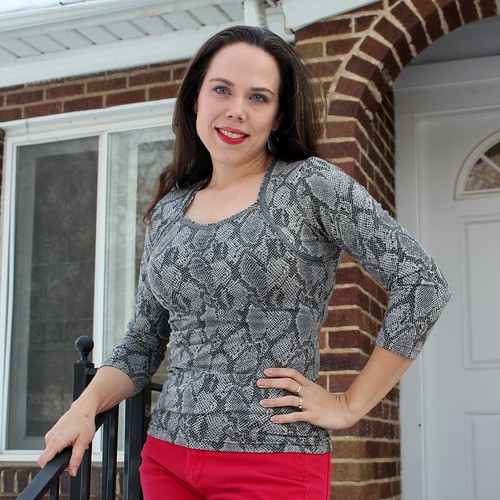
Mine is a size S, with a cheater FBA out to size U and an inch added to the neckline. As drafted, it shows bra, so I wasn't taking any chances. Due to the construction of the front, the FBA was a little tricky. I'll show you how I did it in a separate post.
ETA: I added a tutorial for the FBA and the double band neckline. You can find it here.
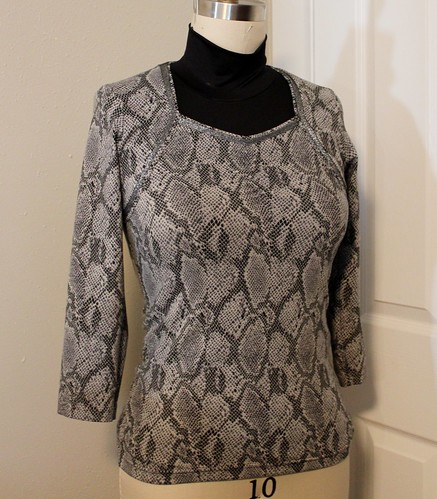
I'm really thrilled with the neckline finish on this one. I was debating what fabric to use for the bands, so I posted the question to my sewing sisters on Instagram and Facebook. There was a pretty even split between using the metallic vs. self fabric. Then Karla suggested using both, and yeah. I had to do it, and I LOVE it. The method is surprisingly easy. I'll post a little mini-tutorial along with the FBA discussion. (See link above.)
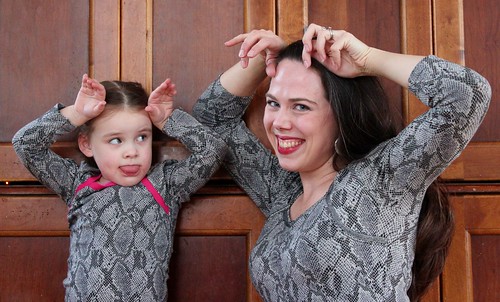
Our photo shoot was pretty fun. Myra insisted that we be silly, so she pulled some funny faces.
But we both really love our new tops!
Myra insisted I show you this one. I'm not sure what we're supposed to be here, but it's definitely silly!
Linked up!
As soon as prttynpnk announced that she was hosting this little online get together, I ran to my stash and pulled out a few favorite animal prints. Hmmm, I may need an extension...
Myra shares my love of all things furry, so I knew I'd be sewing up some jungle-y goodness for her as well.
We decided to get rolling with a few quick Jalie Sweetheart tops, Mommy-daughter style.
Myra's is a size 104, with the sleeves lengthened to her wrist, rather than 3/4. I've made this tee for her before (already traced! Woo-hoo!), and I knew it was a little low cut, so I raised the neckline about 1/2 inch. She insisted that there be some pink, so I made the bands in hot pink to match her favorite leggings.
Mine is a size S, with a cheater FBA out to size U and an inch added to the neckline. As drafted, it shows bra, so I wasn't taking any chances. Due to the construction of the front, the FBA was a little tricky. I'll show you how I did it in a separate post.
ETA: I added a tutorial for the FBA and the double band neckline. You can find it here.
I'm really thrilled with the neckline finish on this one. I was debating what fabric to use for the bands, so I posted the question to my sewing sisters on Instagram and Facebook. There was a pretty even split between using the metallic vs. self fabric. Then Karla suggested using both, and yeah. I had to do it, and I LOVE it. The method is surprisingly easy. I'll post a little mini-tutorial along with the FBA discussion. (See link above.)
Our photo shoot was pretty fun. Myra insisted that we be silly, so she pulled some funny faces.
But we both really love our new tops!
Myra insisted I show you this one. I'm not sure what we're supposed to be here, but it's definitely silly!
Linked up!
Labels:
girls,
Jalie 2794,
misses,
top
Monday, January 7, 2013
Simplicity 6276
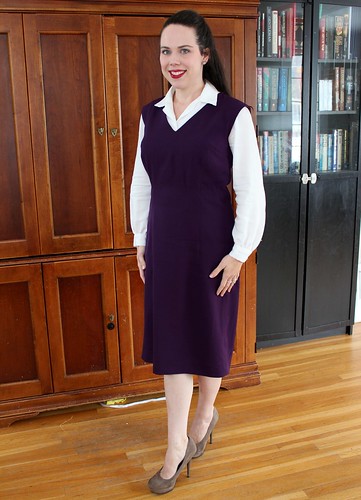
This dress has been a long time coming! I made my first muslin early in December, but I kept getting distracted by shiny things. I told myself I was not allowed to do any Jungle January garments until I finished this, so here it is...
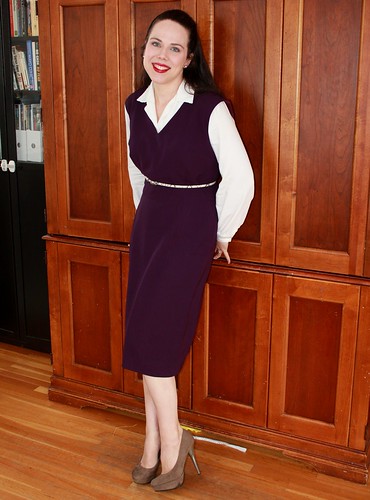
The pattern is Simplicity 6276, printed in 1965. The fabric is a lovely rayon/wool blend garbardine from FabricMart. I'm so glad I bought this in several colors. It was a dream to sew and wore beautifully.
My BSF, Carrie sent the pattern to me, along with a whole bunch of other fabulous finds. She's the best! The pattern is wonderful, and includes the jumper/dress, which I made, as well as four variations of a basic darted blouse. Since the jumper was the simplest sew, I decided to make it first, but I LOVE those blouses. There's something that I find irresistible about a vintage blouse pattern.
So, fit - the bane of every sewist, right? This pattern is a size larger than I generally sew, as well as being a relatively unfitted style, typical for the 60s. I knew I would need to make a lot of adjustments to be happy with it, so naturally I started with a muslin, but really I should have graded down a size first. You can see that the shoulders are a little wide in front and there is a bit of extra room in the bust area (!!!).
In back, there is a little extra room in the lower back, and again, the armhole has a dropped shoulder. The upper back fits well, thanks to the shoulder darts. I did have to make a square shoulder adjustment to this dress, which isn't typical for me. As drafted, the shoulders sloped pretty considerably.
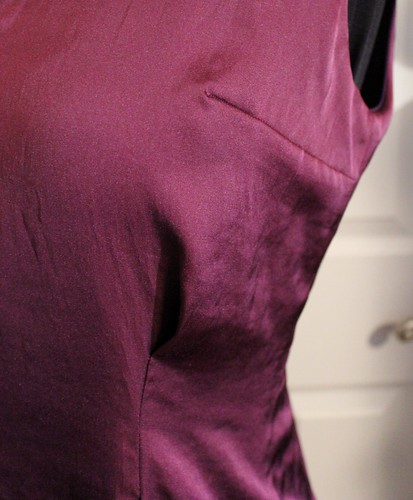
In my first muslin, the fit was quite shapeless through the waist, so I added vertical darts both front and back.
I draped them in on my first muslin, then refined them on the pattern tissue. It wasn't at all difficult to do, but it makes a great deal of difference to the fit.
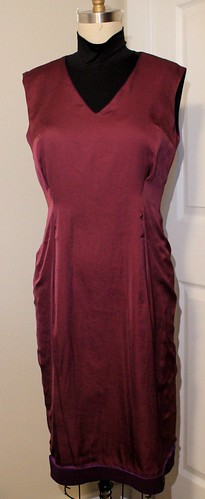
The pattern calls for facings to finish the neck and armholes, but I like a lined dress, particularly in the winter. I used Trena's tutorial for an all machine clean finish lining insertion. I love that tutorial. It works beautifully every time.
For the darts in the lining, I sewed release tucks in the vertical darts to leave some ease in the lining, as the charmeuse lining (also from FabricMart) had no give, while the gabardine did have a bit of stretch. I did fully sew the horizontal bust dart, as I wanted a smoother finish over the bust. Horizontal tucks tend to bunch a little, which isn't attractive at the bustline.
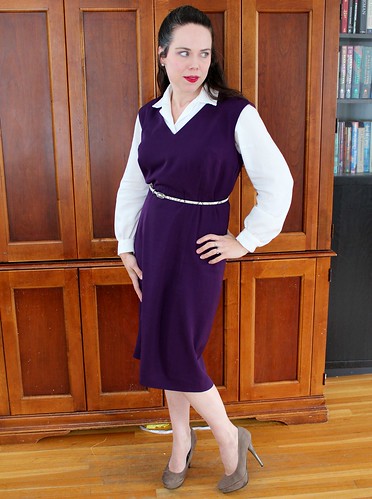
Despite the vertical darts, this is still a pretty unfitted jumper, so I belted it at my natural waist. Yes, my waist really is all the way up there. I wore it with my Ottobre Woman blouse, which I think fits with the style of the jumper. I think it will also look nice with a turtleneck, so I suspect it will get a good amount of wear, despite the fit imperfections.
The pattern is Simplicity 6276, printed in 1965. The fabric is a lovely rayon/wool blend garbardine from FabricMart. I'm so glad I bought this in several colors. It was a dream to sew and wore beautifully.
My BSF, Carrie sent the pattern to me, along with a whole bunch of other fabulous finds. She's the best! The pattern is wonderful, and includes the jumper/dress, which I made, as well as four variations of a basic darted blouse. Since the jumper was the simplest sew, I decided to make it first, but I LOVE those blouses. There's something that I find irresistible about a vintage blouse pattern.
So, fit - the bane of every sewist, right? This pattern is a size larger than I generally sew, as well as being a relatively unfitted style, typical for the 60s. I knew I would need to make a lot of adjustments to be happy with it, so naturally I started with a muslin, but really I should have graded down a size first. You can see that the shoulders are a little wide in front and there is a bit of extra room in the bust area (!!!).
In back, there is a little extra room in the lower back, and again, the armhole has a dropped shoulder. The upper back fits well, thanks to the shoulder darts. I did have to make a square shoulder adjustment to this dress, which isn't typical for me. As drafted, the shoulders sloped pretty considerably.
In my first muslin, the fit was quite shapeless through the waist, so I added vertical darts both front and back.
I draped them in on my first muslin, then refined them on the pattern tissue. It wasn't at all difficult to do, but it makes a great deal of difference to the fit.
The pattern calls for facings to finish the neck and armholes, but I like a lined dress, particularly in the winter. I used Trena's tutorial for an all machine clean finish lining insertion. I love that tutorial. It works beautifully every time.
For the darts in the lining, I sewed release tucks in the vertical darts to leave some ease in the lining, as the charmeuse lining (also from FabricMart) had no give, while the gabardine did have a bit of stretch. I did fully sew the horizontal bust dart, as I wanted a smoother finish over the bust. Horizontal tucks tend to bunch a little, which isn't attractive at the bustline.
Despite the vertical darts, this is still a pretty unfitted jumper, so I belted it at my natural waist. Yes, my waist really is all the way up there. I wore it with my Ottobre Woman blouse, which I think fits with the style of the jumper. I think it will also look nice with a turtleneck, so I suspect it will get a good amount of wear, despite the fit imperfections.
Labels:
dress,
misses,
Simplicity 6276,
vintage
Thursday, January 3, 2013
Shieldmaiden cowl
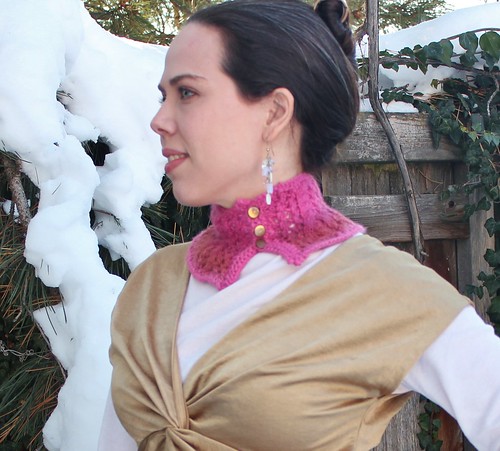
I actually knit this on the drive to Texas, so it is in fact, a 2012 project, but I only just blocked it and added the buttons a few days ago.
Isn't it lovely? The pattern is The Shieldmaiden, and you can find it here.
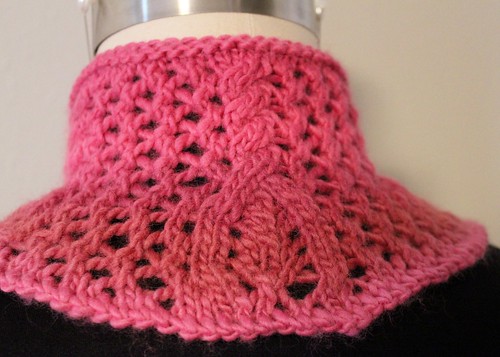
Here is a better look at the cable and lace pattern. This cable was a little tricky to work, but the instructions were very good, so I didn't have any trouble with it. This is my first time knitting from a chart, so I was pleased that it went so smoothly.
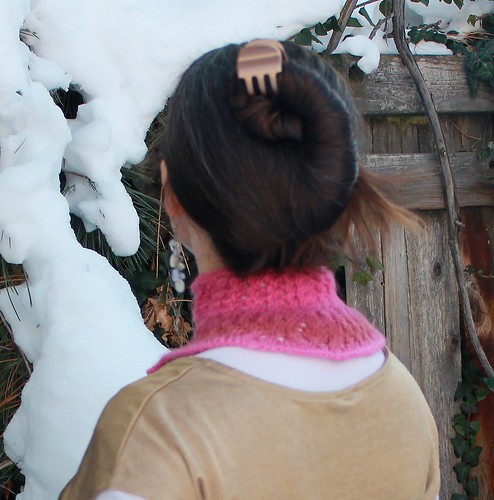
Not only is it lovely, it actually does a great job of keeping my neck cozy. It extends far enough down in back to cover any gaps above the collar of my coat, but isn't so long as to get in the way. It's really quite a nice design.
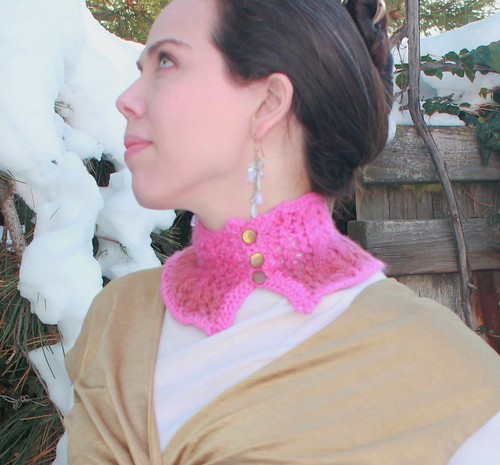
It comes up nice and high on my neck, too. Since the pattern is so lacy, it is very stretchy, which makes it quite comfortable. The worsted weight yarn keeps the drafts out as well.
Here's how it looked before I blocked it. The yarn is Knit Picks Chroma Worsted, which has a nice halo. I chose it because I liked the rustic look of the unplied yarn, which I thought went well with this design. All my ravelry notes are here.
Isn't it lovely? The pattern is The Shieldmaiden, and you can find it here.
Here is a better look at the cable and lace pattern. This cable was a little tricky to work, but the instructions were very good, so I didn't have any trouble with it. This is my first time knitting from a chart, so I was pleased that it went so smoothly.
Not only is it lovely, it actually does a great job of keeping my neck cozy. It extends far enough down in back to cover any gaps above the collar of my coat, but isn't so long as to get in the way. It's really quite a nice design.
It comes up nice and high on my neck, too. Since the pattern is so lacy, it is very stretchy, which makes it quite comfortable. The worsted weight yarn keeps the drafts out as well.
Here's how it looked before I blocked it. The yarn is Knit Picks Chroma Worsted, which has a nice halo. I chose it because I liked the rustic look of the unplied yarn, which I thought went well with this design. All my ravelry notes are here.
Tuesday, January 1, 2013
2012: Year in Review
I hope that everyone has had a wonderful New Year celebration. 2012 was an excellent year around here, and I have high hopes for 2013!
I did a lot of crafting in 2012. I sewed 162 items! That's pretty awesome, particularly since I tackled a few major, time intensive projects, so it wasn't all just easy and quick sewing. I sewed up 215 yards of fabric. That sounds like it should have put a dent in my stash, but I bought 382 yards. Eeep. I think it's time for a bit of a fabric fast.
I've really been enjoying the Top 5 lists that have been floating around the interwebs, so here is my version.
My Top 5 individual makes are:
1) Simplicity 3503 maxi dress. I wore this dress all summer long. It is comfortable, cute and easy to wear. Total win.
2) My Image Cardigan. This has been one of my go to toppers when it's chilly out. It goes with pretty much every single thing in my wardrobe.
3) Simplicity 2256 jacket. This was my first hand tailored jacket. I wear it all the time. It is cozy and seriously classy.
4) Vogue 8601 jacket. Another fabulous jacket that goes with everything. I get constant unsolicitations when I wear this.
5) Tanit-Isis 50s shrug in mohair knit. Cuddly and soft, this one gets compliments everywhere I go as well.
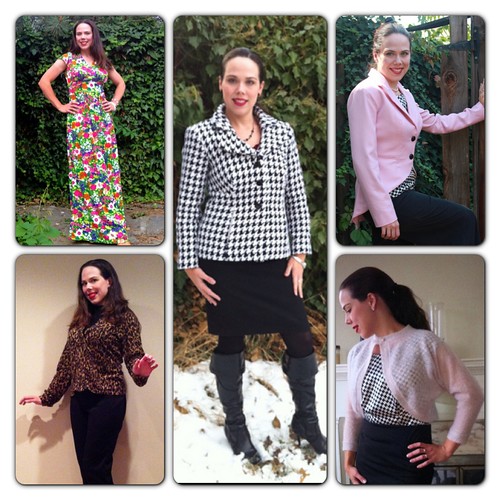
While I am generally not a TNT sewist (call it crafting ADD) I actually sewed a lot of repeats this year, and each of them belonged on the top 5 list, so I made a separate Top 5 Patterns of 2012 list, just for them. Here they are:
1) Sewaholic Renfrew
I've made it three times so far and I love each and every one. It is a rare week indeed in which I do not wear at least one of these tops. I love this pattern so much.
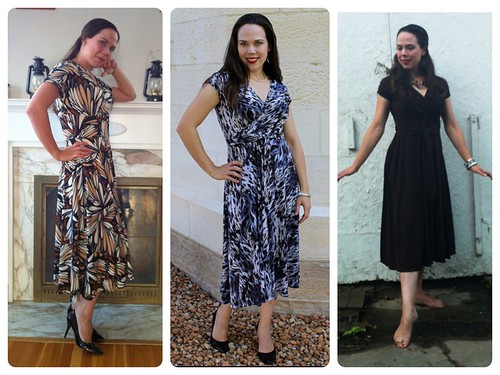
2) Vogue 1027/Tiramisu
OK, that's 2 patterns, but they are similar. These dresses are absolutely the darlings of my closet. They are insanely comfortable and yet, I feel instantly "dressed" when I wear them. I love that they are truly go everywhere dresses. I have worn them to church, weddings, grocery shopping, playdates, real dates - you name it, this dress works.
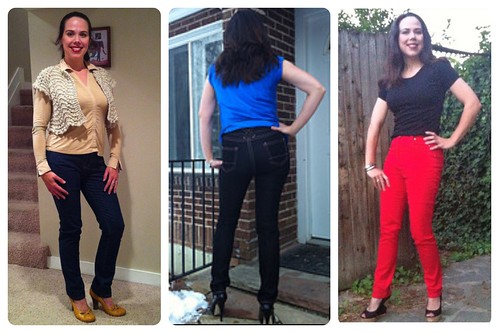
3) Vogue 8330
I love these jeans so much that I have literally worn out the black and blue pairs. The red pair is still in my closet in heavy rotation. I'll be making these again in 2013.
4) Vogue 1059
On the other end of the pant spectrum, these wide leg trousers are amazing. I love wearing them. The skinnies are nice and trendy, but I feel classic and elegant when I wear these. And I do wear them. Nearly every day.
5) Vogue 8747
While I am generally a knit top wearer, every closet needs a nice blouse or two, and I really like this one. The shape and general style are very classic, but the shaped neckline and bust gathers give it a nice oomph. This basic gets worn a lot.
So, that was the good of 2012, but every sewist has a few duds. Here are my Top 5 Fails of 2012;
1) Elastic Waist Maxi. I think this was a good idea, but poor execution. The waistband is a little big and the hemline is a bit long, so I'm just not comfortable in it. It will likely get refashioned, as I like the fabric.
2) New Look 6082. I just don't think these were a good look for me. Audrey Hepburn I am not. They have already been donated.
3) My Image Long Cardigan. The leopard cardigan from this same pattern made my Top 5 wins list, but this longer one just really isn't my style. I don't hate it and wear it occasionally, but it always feels a little contrived. Perhaps I should cut it short and see if I like it better.
4) Vogue 1050. I really like this pattern, but these pants were just a smidge too tight and the fabric I used had zero give. They've been donated, but I want to try the pattern again in the spring.
5) Ottobre Woman blouse. Due to wacky pattern drafting, this one fits strangely. It's fine for layering, but I don't wear it alone.
At the end of 2011, I made a few goals that I also wanted to review:
1) Make a tailored coat and jacket. This one is actually already in progress. The coat is cut out and the tailoring has begun. For the jacket, I am planning to pull out one of my SISC projects and make Vogue 8601.
I did a lot of crafting in 2012. I sewed 162 items! That's pretty awesome, particularly since I tackled a few major, time intensive projects, so it wasn't all just easy and quick sewing. I sewed up 215 yards of fabric. That sounds like it should have put a dent in my stash, but I bought 382 yards. Eeep. I think it's time for a bit of a fabric fast.
I've really been enjoying the Top 5 lists that have been floating around the interwebs, so here is my version.
My Top 5 individual makes are:
1) Simplicity 3503 maxi dress. I wore this dress all summer long. It is comfortable, cute and easy to wear. Total win.
2) My Image Cardigan. This has been one of my go to toppers when it's chilly out. It goes with pretty much every single thing in my wardrobe.
3) Simplicity 2256 jacket. This was my first hand tailored jacket. I wear it all the time. It is cozy and seriously classy.
4) Vogue 8601 jacket. Another fabulous jacket that goes with everything. I get constant unsolicitations when I wear this.
5) Tanit-Isis 50s shrug in mohair knit. Cuddly and soft, this one gets compliments everywhere I go as well.
While I am generally not a TNT sewist (call it crafting ADD) I actually sewed a lot of repeats this year, and each of them belonged on the top 5 list, so I made a separate Top 5 Patterns of 2012 list, just for them. Here they are:
1) Sewaholic Renfrew
I've made it three times so far and I love each and every one. It is a rare week indeed in which I do not wear at least one of these tops. I love this pattern so much.
2) Vogue 1027/Tiramisu
OK, that's 2 patterns, but they are similar. These dresses are absolutely the darlings of my closet. They are insanely comfortable and yet, I feel instantly "dressed" when I wear them. I love that they are truly go everywhere dresses. I have worn them to church, weddings, grocery shopping, playdates, real dates - you name it, this dress works.
3) Vogue 8330
I love these jeans so much that I have literally worn out the black and blue pairs. The red pair is still in my closet in heavy rotation. I'll be making these again in 2013.
4) Vogue 1059
On the other end of the pant spectrum, these wide leg trousers are amazing. I love wearing them. The skinnies are nice and trendy, but I feel classic and elegant when I wear these. And I do wear them. Nearly every day.
5) Vogue 8747
While I am generally a knit top wearer, every closet needs a nice blouse or two, and I really like this one. The shape and general style are very classic, but the shaped neckline and bust gathers give it a nice oomph. This basic gets worn a lot.
So, that was the good of 2012, but every sewist has a few duds. Here are my Top 5 Fails of 2012;
1) Elastic Waist Maxi. I think this was a good idea, but poor execution. The waistband is a little big and the hemline is a bit long, so I'm just not comfortable in it. It will likely get refashioned, as I like the fabric.
2) New Look 6082. I just don't think these were a good look for me. Audrey Hepburn I am not. They have already been donated.
3) My Image Long Cardigan. The leopard cardigan from this same pattern made my Top 5 wins list, but this longer one just really isn't my style. I don't hate it and wear it occasionally, but it always feels a little contrived. Perhaps I should cut it short and see if I like it better.
4) Vogue 1050. I really like this pattern, but these pants were just a smidge too tight and the fabric I used had zero give. They've been donated, but I want to try the pattern again in the spring.
5) Ottobre Woman blouse. Due to wacky pattern drafting, this one fits strangely. It's fine for layering, but I don't wear it alone.
At the end of 2011, I made a few goals that I also wanted to review:
1) Make a tailored coat and jacket. This one is actually already in progress. The coat is cut out and the tailoring has begun. For the jacket, I am planning to pull out one of my SISC projects and make Vogue 8601.
Done! I made both of the jackets referred to in my goal! Since they have been worn so much, I'm definitely planning more jackets for the coming year, and I'd also like to make an actual coat as well.
2) Complete (yes, complete!) my SISC projects. Believe it or not, I have actually already made 4 of them, but I seem to have stalled. The coat in progress will be SISC #5, and then I will get back on track with them.
Hmm, didn't quite manage this one, although I did get very close. The only projects I didn't complete were the Colette Ceylon and Vogue 8543. I definitely want to make both of these this year. The Vogue pattern is a suit, so that means a jacket to tailor! Yay!
3) Keep better track of my fabric ins and outs, with the goal of sewing more fabric than I buy. I have been keeping track of what I sew, but not of what is coming in. I'd like to actually sew up some of this beautiful fabric that is filling my sewing room!
Done! Sort of. I've been very good about maintaining my sewing spreadsheet, which includes my fabric ins and outs. The other part of the goal, not so good. So, for 2013 here is my goal. I will NOT buy more fabric in any given month if I have not sewn up at least that much yardage the month before. That means my fabric budget for January is 11 yards, since that I what I sewed up in December. Hopefully, that will keep me net negative for the year.
4) Sew an LBD. This goal has been on the books for 3 years now. I think the time has come...
Done! I made Burda 7189 as part of my Fall Wardrobe. It is a great versatile piece that I wear fairly often. Win!
5) Knit socks. I have conquered sweaters, mittens, gloves, scarves, hats and cowls. It's time for socks.
Also done! I knit a pair of socks to learn on, and then proceeded to start a real pair out of sock yarn. Unfortunately, I just couldn't get interested in these socks. They have been frogged and sock making if off my to do list.
I think for 2013, I'm going to forgo goal-making. I'm going to sew what I want, and what my family needs and just enjoy the process of creating and learning. Here's to 2013, y'all! I hope it is a wonderful, productive and creative year for you. Thank you for following along and cheering along my creative process. I appreciate each one of you who comes by and reads this old blog. Thank you, my friends!
Subscribe to:
Posts (Atom)