If you've been hanging out in blogland lately, then you've probably already heard the scoop about The Rambo Project, by 
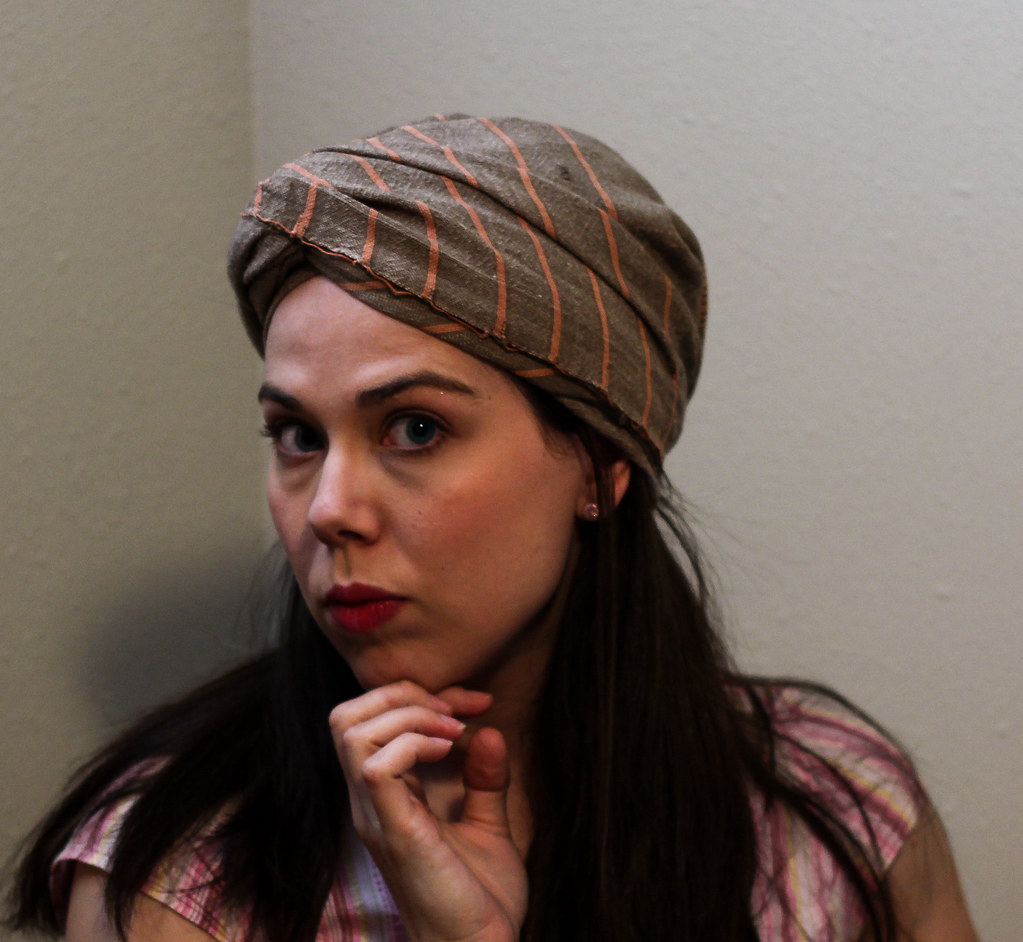
Seamstress Erin. Basically, she has the coolest friend ever, who had an in with a costume department, and handed over some old costumes from Rambo III! Awesome, right?!! She sent around a few turbans that were worn in the actual movie by the terrorist bad guys, and our challenge was to turn our turbans into wearable garments.
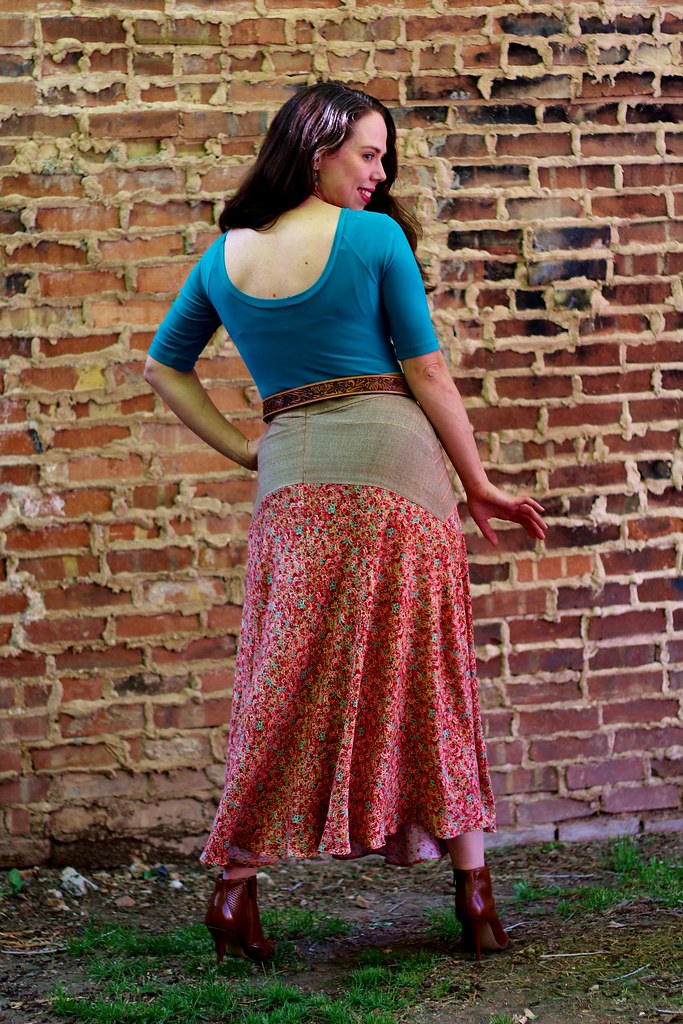
And here is mine! Can you spot the turban?
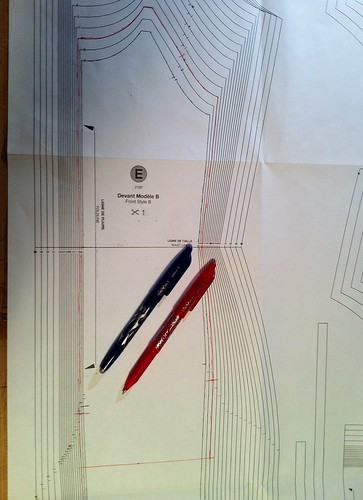
Here's a hint... My turban started out as a relatively small piece, only around 10 inches wide and maybe a yard long. The stripes were all concentrated on one end, and were a bit irregular, so that added to the cutting challenge. I really wanted to maximize the stripes!
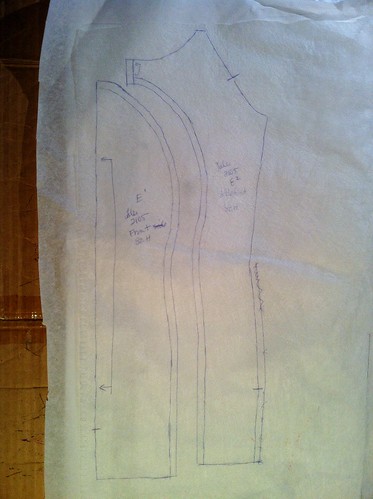
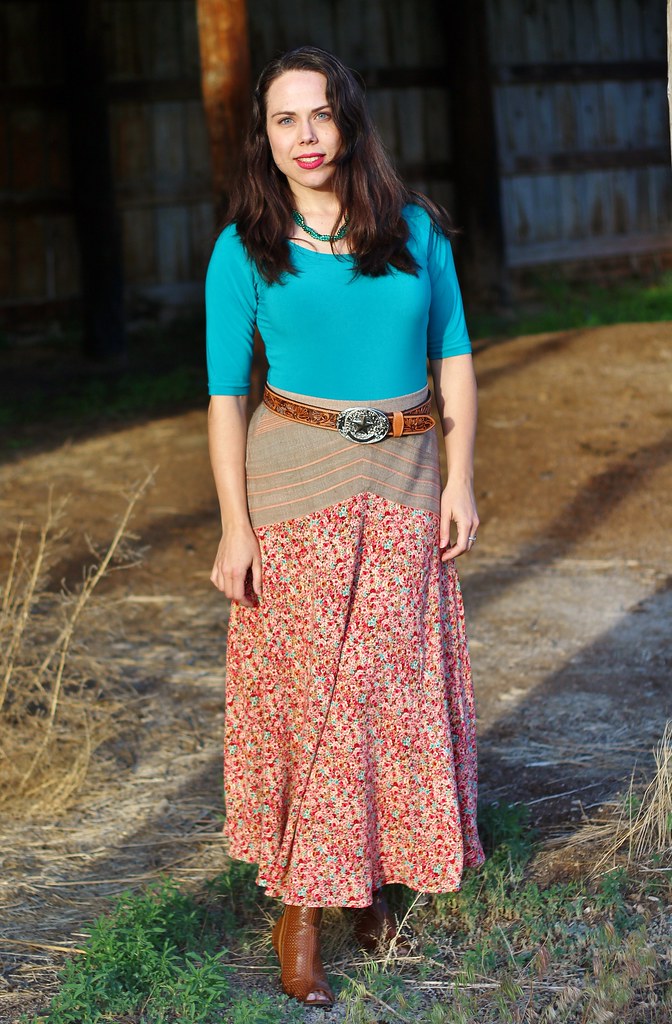
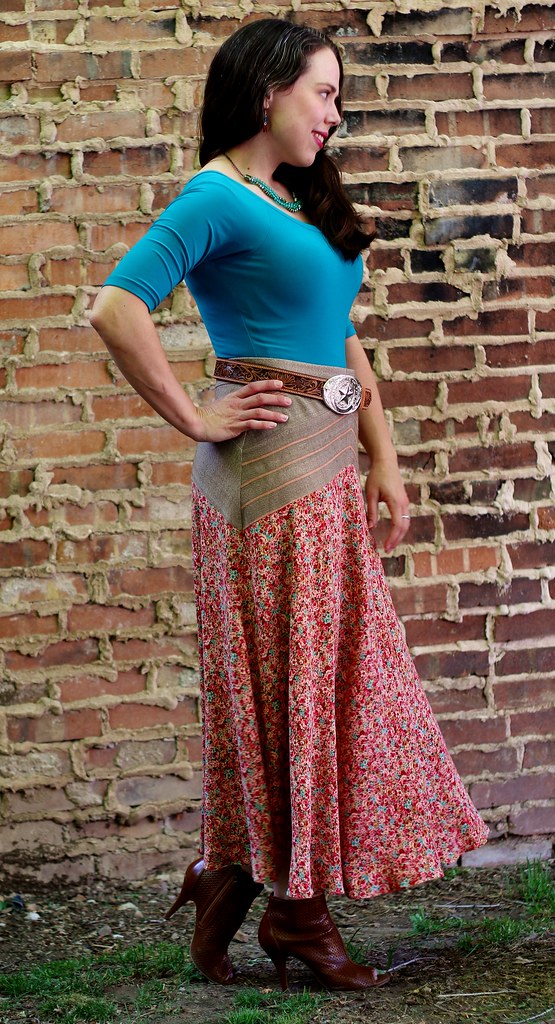
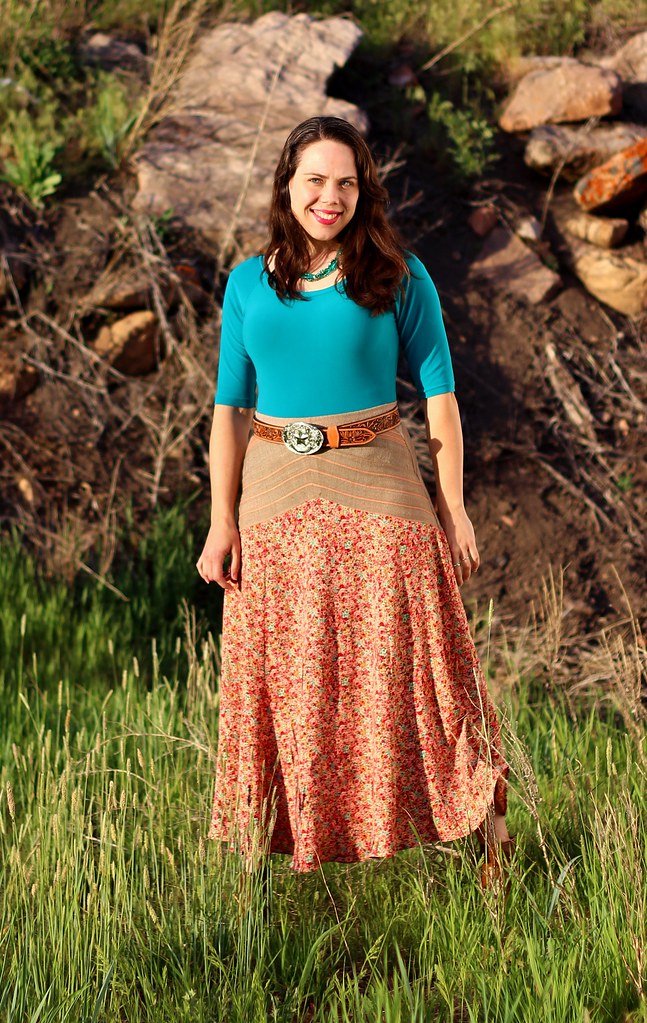
I decided to highlight the stripes by making them the focal point of the yoke of the Sewaholic Gabriola maxi skirt, which is totally made for stripes!
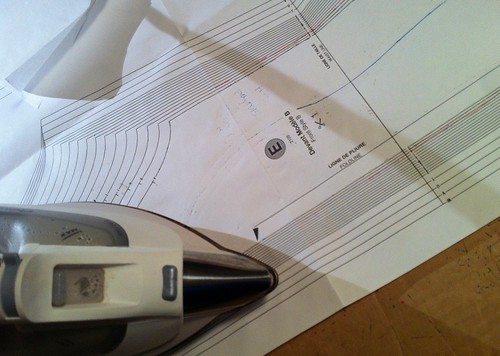
I only had enough stripe for the front yokes, so the back is the solid taupe that made up most of the length of the turban. And hey, no stripe matching at the side seams!
I did match up the stripes at the front yoke, which was actually a bit tricky, since the turban fabric was weirdly stretchy and also a bit irregular. I persevered though, and I am glad I did!
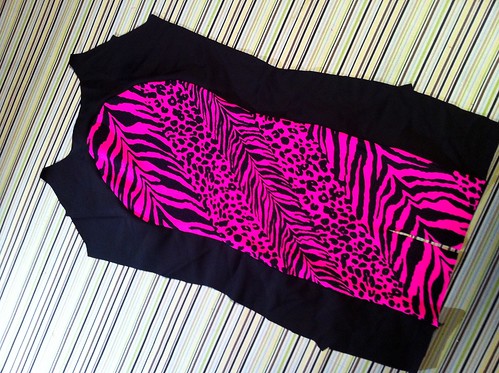
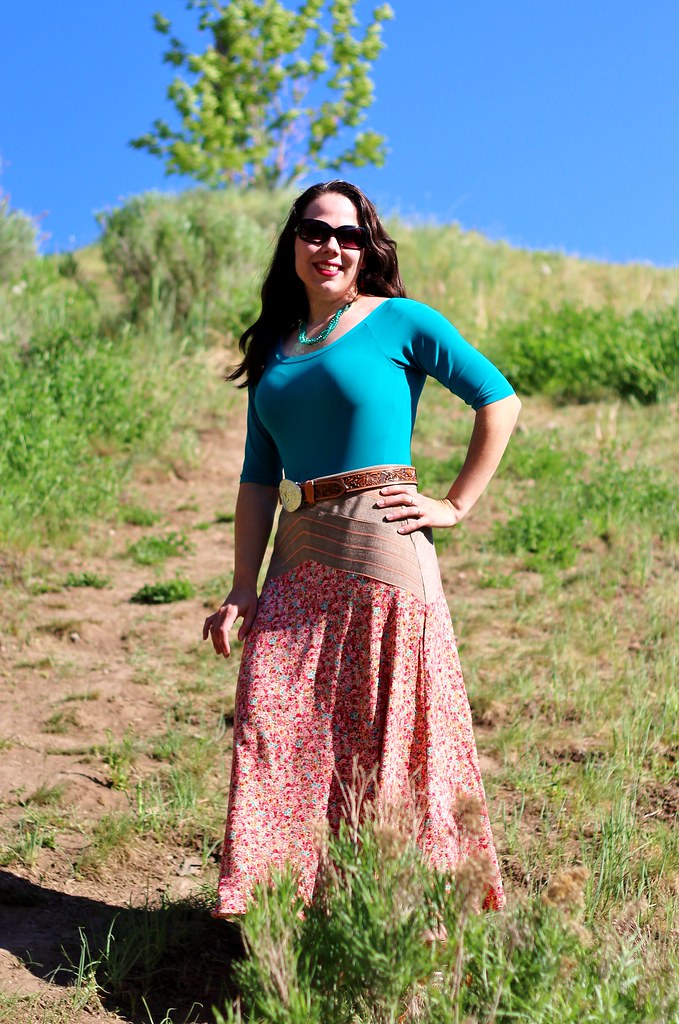
Since clearly I was not going to get an entire skirt out of the teeny shreds of turban I had left after cutting the yoke, I knew this was going to require a second fabric. But these aren't colors that are dominant in my wardrobe, so at first I really didn't know where I wanted to go with it. I decided to just drape the turban over my fabric shelves and see what worked. It fell on this floral, which I wouldn't have thought of, but the colors are perfect.
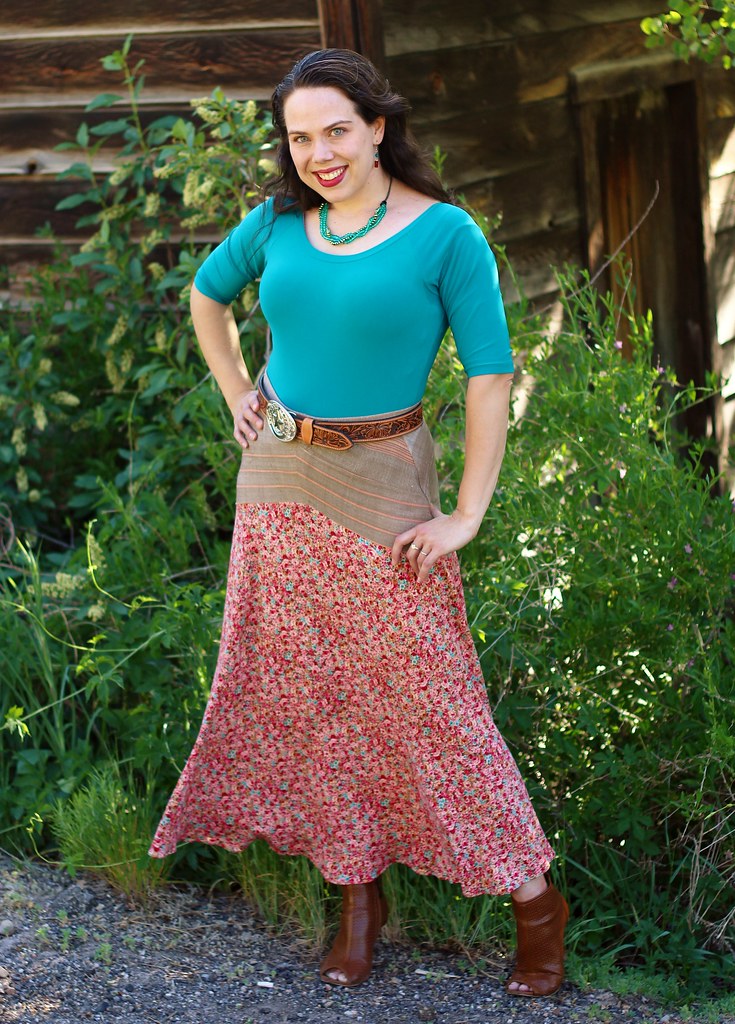
So I pulled out the floral and found that it is a stretch linen with roughly the same stretch and weight as the turban fabric! What are the odds! This fabric came in a mystery bundle from FabricMart. Such a win with this one! I did have to shorten the skirt a bit, since I only had 1 3/4 yards of my perfect floral linen. The end result, after taking of 6 inches at the cutting stage and then a few more when I evened the hem is a slightly above ankle length that I really like. I made this for kicks, but I am going to wear the heck out of it. And make more this length.
So, after the skirt was made, I realized that I had no tops to go with it. Fortunately, another FabricMart mystery bundle (can you tell I LOVE those?), had provided me with this lovely teal ITY, which is exactly the same color as the teal flowers in the linen print. Since Heather has been teasing us with all her lovely 
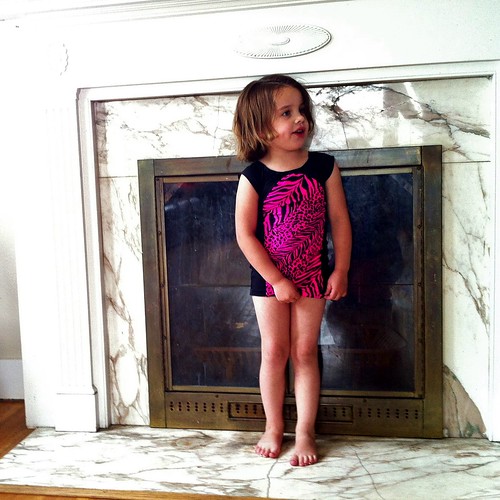
Nettie bodysuits, I decided to try my hand at one. But I didn't have the heart for PDF assembly, so I went with a pattern I already had, Jalie 2105 (now OOP).
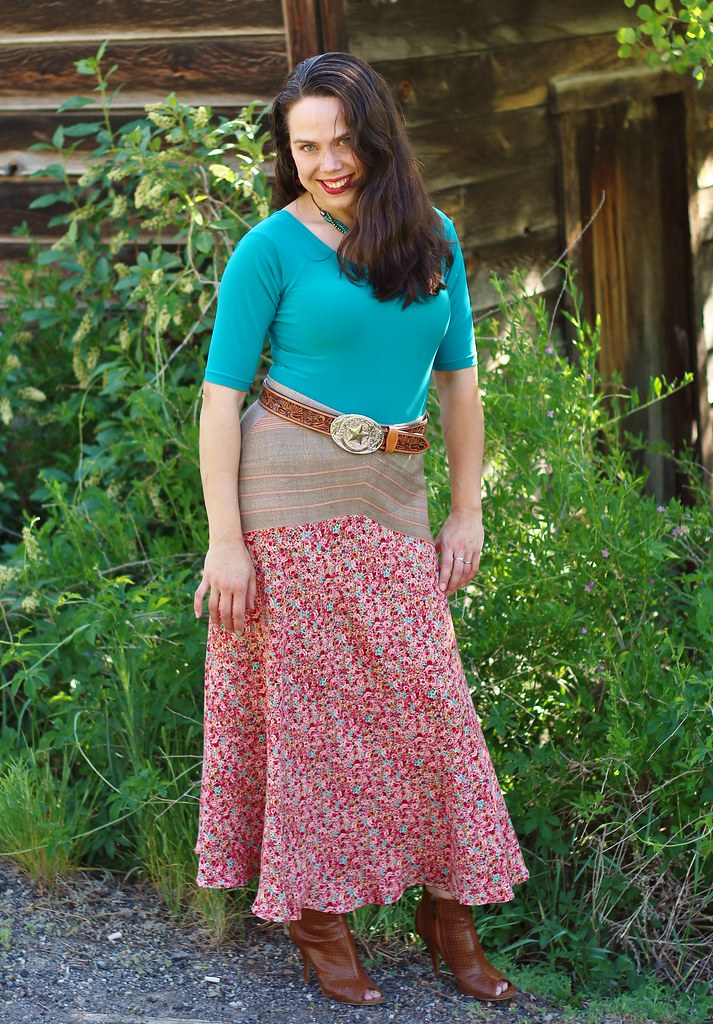
Since the Jalie pattern is for a leotard, I did have to make a few adjustments. I left the crotch seam open and installed a snap placket there, and instead of elastic in the neckline, I used a self fabric band.
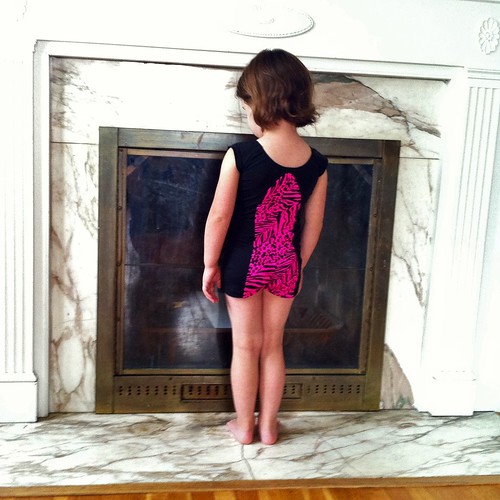
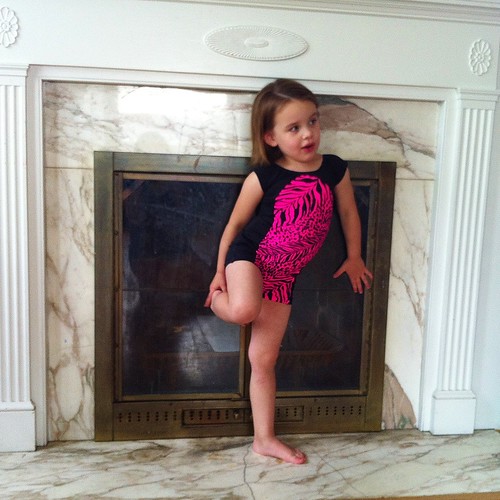
The low, scooped back makes me feel like a ballerina. A super sexy ballerina! The one thing that I would do different here, for next time would be to move the snap placket forward. It's placement is a bit, ahem, inconvenient as it is, although it is still comfortable to wear.
Overall, I'm pretty thrilled with my girlification of Rambo! Be sure to head over to Seamstress Erin's blog to check out the other ways that creative sewists have given new life to these old costumes.
Showing posts with label Jalie 2105. Show all posts
Friday, June 20, 2014
Saturday, May 18, 2013
Jalie 2105 leotard and how to colorblock
Myra has been asking for a new leotard for gymnastics for a couple of weeks now. Her current leo has long sleeves and full length legs and it's getting a little too warm in the gym for that.
I decided to jump on the SCUBA trend, which I think lends itself really well to a gym leotard. I skipped the zipper, since I didn't think it would be comfortable for gymnastics, but went for some colorblocking and a wetsuit like shape.
I used Jalie 2105, which is unfortunately out of print. I'm glad I snapped it up when I did. This is the third time I've used it and I know I will use it again. For this version, I shortened the leg and sleeve to give her a cap sleeve, shortie leotard that should be comfortable in the summer heat.
I extended the neon pink animal print colorblocked area in back as well, although the back panel is narrower. It's pretty pointy at the top, which was kind of a pain to sew.
The fabrics I used were a black milliskin matte spandex, originally from Spandex World, but left over from these bike shorts I made for Mitch. The neon pink animal print was a recent purchase from Spandex World. It's a cotton/lycra spandex, so it has a spongy softness that is very comfortable. Myra really likes it. But then. it's neon pink animal print, so that was a given.
Today's Tip
Today I wanted to show you how easy it is to colorblock any pattern, and share with you one of my favorite marking tools.
The first step in colorblocking any pattern is to decide where you want to "cut up" the pattern. I like to draw right on my pattern pieces before I trace them. It saves me the step of then retracing to add seam allowances.
I use these amazing Frixion pens. I first heard about them from Elizabeth, and they have changed my life. They are completely erasable with a touch of heat. I use them to mark patterns, fabric, pretty much everything. A shot of steam or a touch of the iron removes the mark. So, I use the Frixion pens to outline the size I'm using.
Then in a separate color (so that I don't get confused), I draw my colorblocking line or lines. Now I'm ready to trace. Trace each side of the pattern piece as a separate piece, and remember to add a seam allowance along both sides of the colorblocking lines.
My final front pattern pieces look like this. I used a 1/4 inch seam allowance on the seam that joins my colorblocked section as that is the seam allowance used throughout the pattern. Again so I don't get confused; you can use whatever SA you want.
Now you can take your iron to your pattern pieces and it'll look good as new. Love those Frixion pens.
Now reassemble the panels you colorblocked before you start construction on the garment. Once they are put back together, you can treat them just like the pieces they were originally and follow the pattern instructions as written. Or not. You're the sewist. If you choose to line your garment, you can use the original pattern pieces to reduce the seamlines in your lining.
I decided to jump on the SCUBA trend, which I think lends itself really well to a gym leotard. I skipped the zipper, since I didn't think it would be comfortable for gymnastics, but went for some colorblocking and a wetsuit like shape.
I used Jalie 2105, which is unfortunately out of print. I'm glad I snapped it up when I did. This is the third time I've used it and I know I will use it again. For this version, I shortened the leg and sleeve to give her a cap sleeve, shortie leotard that should be comfortable in the summer heat.
I extended the neon pink animal print colorblocked area in back as well, although the back panel is narrower. It's pretty pointy at the top, which was kind of a pain to sew.
The fabrics I used were a black milliskin matte spandex, originally from Spandex World, but left over from these bike shorts I made for Mitch. The neon pink animal print was a recent purchase from Spandex World. It's a cotton/lycra spandex, so it has a spongy softness that is very comfortable. Myra really likes it. But then. it's neon pink animal print, so that was a given.
Today I wanted to show you how easy it is to colorblock any pattern, and share with you one of my favorite marking tools.
The first step in colorblocking any pattern is to decide where you want to "cut up" the pattern. I like to draw right on my pattern pieces before I trace them. It saves me the step of then retracing to add seam allowances.
I use these amazing Frixion pens. I first heard about them from Elizabeth, and they have changed my life. They are completely erasable with a touch of heat. I use them to mark patterns, fabric, pretty much everything. A shot of steam or a touch of the iron removes the mark. So, I use the Frixion pens to outline the size I'm using.
Then in a separate color (so that I don't get confused), I draw my colorblocking line or lines. Now I'm ready to trace. Trace each side of the pattern piece as a separate piece, and remember to add a seam allowance along both sides of the colorblocking lines.
My final front pattern pieces look like this. I used a 1/4 inch seam allowance on the seam that joins my colorblocked section as that is the seam allowance used throughout the pattern. Again so I don't get confused; you can use whatever SA you want.
Now you can take your iron to your pattern pieces and it'll look good as new. Love those Frixion pens.
Now reassemble the panels you colorblocked before you start construction on the garment. Once they are put back together, you can treat them just like the pieces they were originally and follow the pattern instructions as written. Or not. You're the sewist. If you choose to line your garment, you can use the original pattern pieces to reduce the seamlines in your lining.
Labels:
activewear,
girls,
Jalie 2105,
leotard,
SwimAlong
Friday, October 26, 2012
Jalie 2792 leotard, but with legs
Last week at gymnastics, Myra managed to put a hole in her old leo (which was also getting small). I am darn pleased we actually got an entire year's worth of wear out of it actually, but it was time for a new one.
Despite the fact that it is actively snowing outside, Myra had to try it out immediately.
I blended two Jalie patterns to get the final look that I wanted. The bodice (above the waist) is from Jalie 2792 and the legs (below the waist) is from Jalie 2105 (OOP). Both patterns had the waistline marked, which made blending them very easy.
I really like the upper bodice of 2792, particularly the option of the keyhole in back. It's so pretty! 2105 is a great basic leotard, but the neckline is wide and a bit low in back and tended to slip down Myra's shoulders. This one seems more secure.
Up close, you can see that the back keyhole actually has a closure at the neckline that allows for ease of dressing. I elected to use my coverstitch binder on the openings, rather than the stitched on bands from the pattern. In retrospect, I should have cut off the seam allowances of the neckline and keyhole, at least right at the area where they insert into the clasp. As you can see, they are all bunched up in there, and getting them in was a bit challenging.
Since Myra chose a solid pink for her fabric, I added a little stretch piping (from Sew Sassy) to make it a little more interesting. I sewed it between the yoke seams on front and back, then sewed up the side seams. The piping matched up beautifully with just a little basting. I am very pleased.
Myra gave it a workout in the living room and says she likes it. We'll see how it performs on Monday at the gym, but for now I think we have a winner!
Linked up!
Linked up!
Labels:
activewear,
girls,
Jalie 2105,
Jalie 2792,
leotard
Saturday, October 8, 2011
Jalie 2105
Also entitled, "How I avoided sewing a Rapunzel costume and instead sewed Spandex". No, really Myra did need a new leotard for gymnastics. Her class is early enough in the morning that it is still quite chilly and her thin Texas blood needed more coverage.
This pattern is Jalie 2105, which is actually for a ballet leotard. I love that it has long legs and 3/4 sleeves, which gives Myra lots more coverage, both for the morning chill and for the inevitable bumps and bruises.
The fabric is from SpandexWorld. Myra likes the sparkle of the hologram spandex, but it is a little itchy. the lilac sleeves are a heavier weight milliskin, which is very nice and was quite pleasant to sew, for spandex.
Her gym is pretty dark, but the flash did weird things to the fabric, so this is the best picture I managed (out of 160) that shows the proportions of the leotard. The sleeves are right at elbow length on Myra, and the legs are just below the knee. Size-wise, she is an F based on her measurements, but her length is in the G, so I lengthened the body to accommodate her long torso. Jalie provides a girth measurement that is really helpful in determining the length to use.
The biggest challenge I had with the last leotard was the neckline. I really appreciated everyone who chimed in with advice and help. I managed to get my hands on several Stretch & Sew patterns (Thanks to Mom and Debbie!!) and got some swim elastic in place of the knitted elastic I used last time.
I also decided to try out the coverstitch, since I coverstitched the hems. Boy, did it look like a hot mess when it came off the machine!
Fortunately, it lies nice and flat on Myra. Pardon the grumpy face. I think she was a little tired of the camera at this point. I really am happy with this neckline, but I sort of wish I hadn't changed two things at once, since now I'm not sure if it is the swim elastic, coverstitch or both that made it lay so nice and flat. I really do like the softness of the swim elastic though, and I think that was probably the major contributor. The coverstitch actually feels a little flimsy as compared to the triple zigzag. I guess we'll see how this wears.
I'm really glad that I'm taking the plunge into activewear. Although we're heading into our first real winter ever, I'm sort of excited for summer swimwear! Fortunately, gymnastics is year round and Myra is a clotheshorse. She's already requested a pink sparkly one.
So, today is the first day of Sewing Summit!! I am beyond excited!! I can't wait to hang out with all the awesome sewists. I even made a new top to wear. Hopefully i can get some fun pictures at the Summit!
Labels:
activewear,
girls,
Jalie 2105,
leotard
Subscribe to:
Comments (Atom)


.jpg)
