Hey all! Sorry I just dropped off the earth for a week there! It wasn't intentional, but I've been working on my coat, and making good progress, then the household was hit with the crud that's been going around, so the weekend was sort of shot. The coat should be done in a day or two, but before the big reveal, I wanted to talk a little about the tailoring I did on this one.
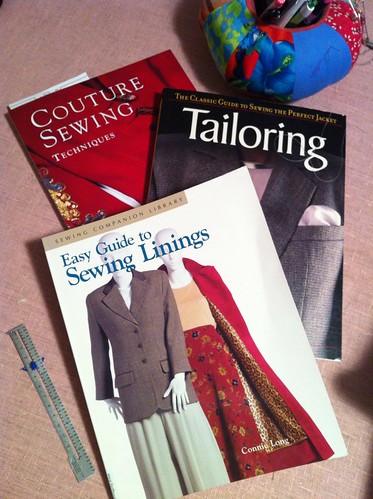
For this coat, I decided to try the machine method of tailoring. I've use the fusible method and the handsewn method, so this is my first attempt at tailoring by machine. I used my usual favorite tailoring resource, Tailoring: The Classic Guide to Sewing the Perfect Jacket. I have an older edition than the one in the link, but the material is the same. I really love this book, and if you are even remotely interested in tailored garments, you really should have it in your personal library.
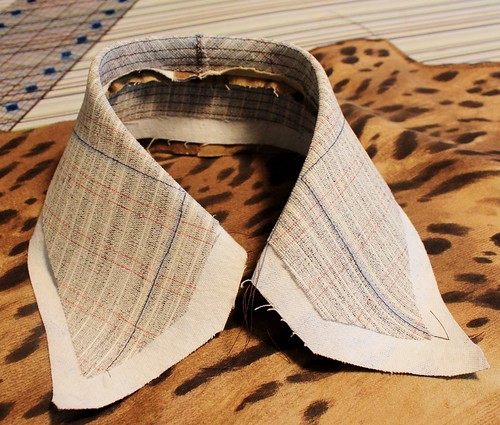
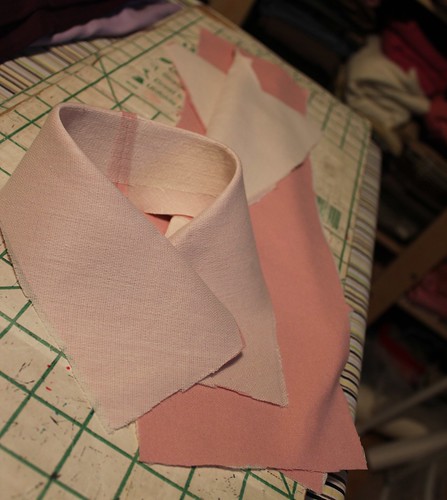
Anyway, here is my undercollar. All of the padstitching is done via curved lines of machine stitching. This particular pattern had a separate partial collar band which really helped shape the collar as well. I padstitched it separately and then sewed the two together.
Here you can see the major down side to machine tailoring - all of the stitching is visible from the right side of the undercollar. I did increase the contrast on this photo to make it really stand out, but IRL it does show. Since this fabric is a thin, smooth poplin, hand padstitches would have shown as well, so I decided that it wasn't a dealbreaker for me, particularly as I don't wear my collar up.
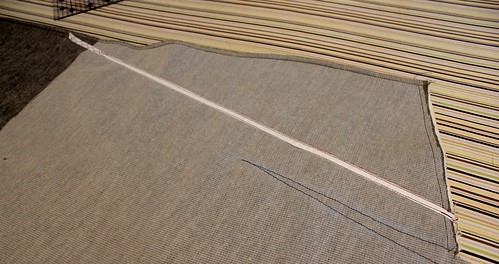
For the chestpiece, I sort of did my own thing. My outer fabric is a stretch poplin, and I really wanted to preserve the stretchiness in the body of the coat, so instead of tailoring with rigid canvas, I decided instead to underline the entire coat with a beefy wool jersey (for warmth, too) and use fusible tricot in the upper half of the coat, above the waist. I also taped the roll line. I really think that of all of the many things we do when we tailor a coat or jacket, taping the roll line makes the biggest difference, particularly when you consider how easy it is to do.
Again, this was done using the machine method, so the lines of stitching show, but are hidden under the lapel when the coat is worn.
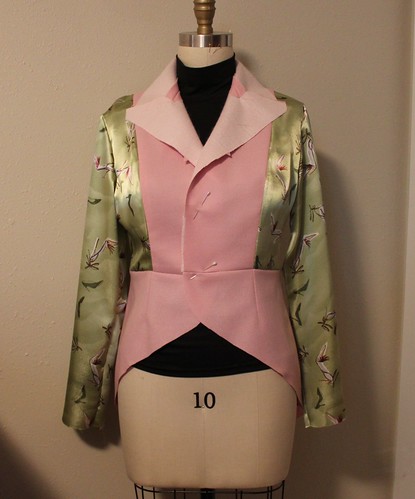
Here's a little preview of how it all came together. The structure of the collar is really nice and crisp, and the body of the coat feels nice and substantial thanks to the wool jersey underlining. I can't wait to get it all finished and show it to you!!
Hey, sorry for disappearing off the face of the earth there! My mojo kind of tanked last week and I really didn't do anything, not even blog surfing. I have been following along with the Mini Wardrobe SAL at PR, and after seeing a few fabulous jackets on the thread there, I was ready to jump back into making mine.
I always start a lined jacket with the lining. It sort of acts as a final muslin of sorts, making sure that the fit is where I want it, before I start working on the much more time and labor intensive shell.
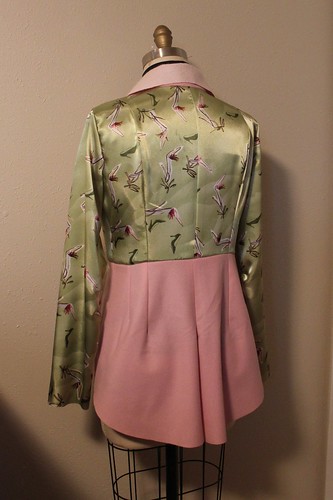
I'm happy, so we're moving forward. You may notice that I have elected to line the peplum part of the jacket with fashion fabric rather than lining. Since the hemline in front is cut away, I feared that the lining would show, and while I LOVE my lining fabric, I didn't always want it on display. If my fabric were thicker, I think this wouldn't have worked well, but this is quite a lightweight wool.
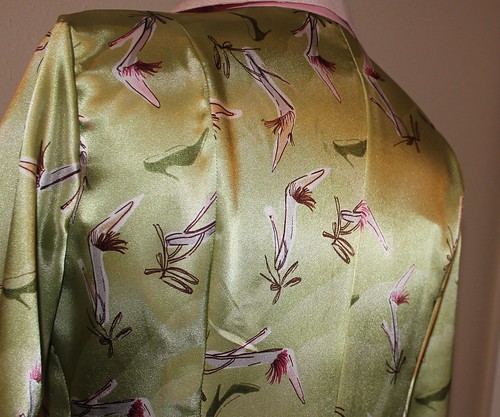
Speaking of the lining fabric, isn't it adorable??? Shoes are my other (non-textile) obsession, so I had to have this fabric. It's poly charmeuse, but the print was so cute, I didn't care. I think it's absolutely divine with this wool. The pale pink is a perfect match.
The sleeve is shaped with darts, but in the lining, I just made tucks. They're a bit easier to sew, and the released section gives the lining a bit of ease for movement. I generally convert darts to tucks in a lined garment for this very reason.
Since the lining made me happy, I went ahead and started on the shell. After the mojo crash last week, I knew I wouldn't have the stamina for hand tailoring, so I'm trying the fusible approach. So far, it is looking pretty good and it certainly is easier and faster. I feel like a bit of a cheater though. I guess we'll see how the jacket comes out in the end.
Tailored clothing has been shaped by a variety of techniques involving everything from interfacing to hand sewing. I know as a new sewist, I was very intimidated by these techniques, but there are a lot of resources out there to help you learn them.
Here are some of the books that I used in tailoring my coat. All of these were useful to me in some ways, although if you only have Tailoring:The Classic Guide to Sewing the Perfect Jacket, you'll have what you need. This book takes you step-by-step through the process of making a beautifully tailored jacket using hand, machine and fusible tailoring techniques, which you can mix and match to meet your needs.
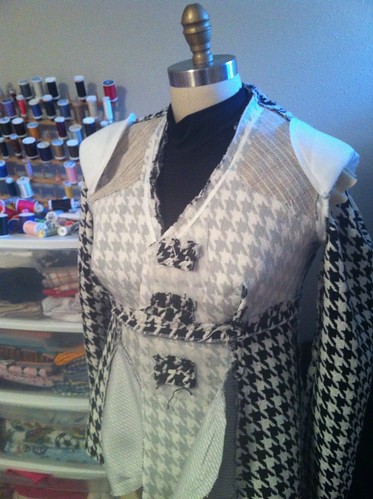
Here is the coat sans lining so that you can see the structural components that I included in the body of the coat. I used a combination of fusible interfacing to block fuse the bodice. I machine stitched on my hair canvas chest piece, but hand sewed the taping on the roll line (which in my case was also the neckline seam).
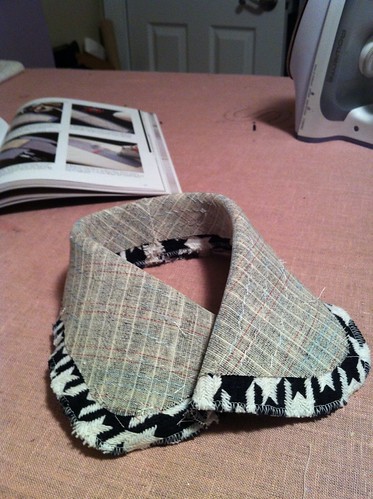
The undercollar (and the lapel facing, although that is not pictured here) were interfaced with hair canvas and padstitched by hand. Although there are machine and fusible methods for shaping the undercollar, I really think that you can't beat the shape you get by hand tailoring here. This was one of the things that really put me off of had tailoring a garment though. I was afraid of the padstitching! Once I saw it done in person, though I realized that it was easier than I was making it out to be. I wish I could come and padstitch with each of you, but since I can't, I made a video so that you could see what it looks like.
Once all the stitching is done, you can see the shape that it gives the undercollar.
See how much structure it has? That curved shape will allow it to lay close to the body and maintain its shape.
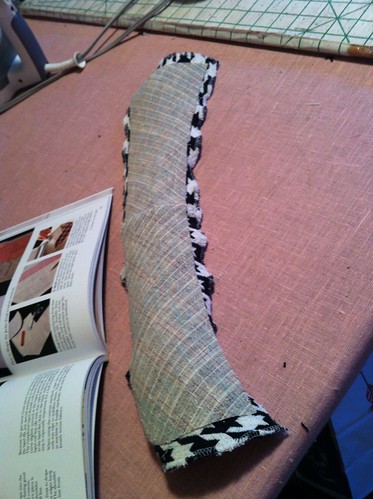
After your padstitching is done, you want to steam your undercollar into shape around your tailor's ham. You just pin it on, with the stand folded down along the roll line and blast it with your steam iron until it is damp. You will then want to let it completely dry, so set it aside and work on something else.
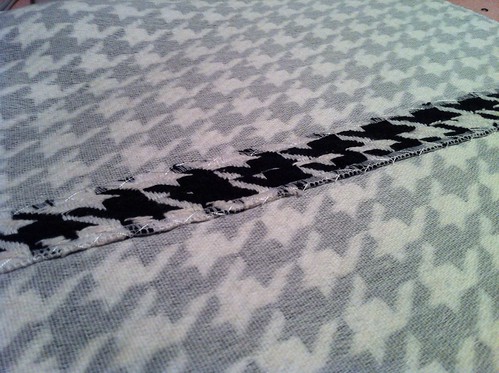
Another useful technique that I used on this coat was catchstitching the seam allowances by hand. In this bulky coating, it really helped control the loft of the fabric to give a really precise and flat seam.
Can you see the difference? These are the shoulder seams of the coat. Both seams have been sewn, pressed and steamed, but the seam on the left has also been catchstitched in place. See how much smoother and flatter it lies? It was a bit time consuming, but I think the results were worth the effort.
Obviously, one blog post won't teach you everything you need to know about tailoring, but if you are interested in learning more, I highly recommend the book I referenced above as well as a few blogs that I found useful:
Made By Hand - The Great Sartorial Debate - This is a wonderful blog, written by a professional tailor. He showcases his own amazing work as well as taking apart bespoke garments to examine. Fascinating! Sherry's RTW Tailoring Sew Along - A collection of tutorials to help achieve a high-end RTW finish to your tailored garments. The focus is on industry secrets, many techniques are by machine rather than hand. Gertie's Lady Grey Sew Along - Gretchen, of Gertie's New Blog For Better Sewing, takes us along as she hand tailors her Lady Grey coat. She has tons of tips, tricks and great tutorials.
Tomorrow I'll talk about a couple of finishing touches - lining your jacket and making bound buttonholes. Stay tuned!