Showing posts with label fitting. Show all posts

Thursday, April 11, 2013

Pants, pants, pants, pants...Pants!

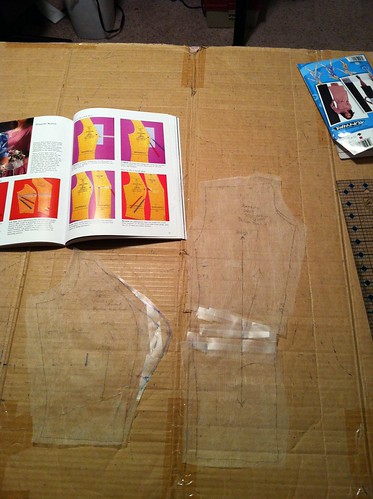
I mentioned that one of my major projects this month was going to be pants for the hubby. He has a very hard time finding well fitting pants in RTW - y'all know the story - which means it's no treat for me to fit him either. Still, the man needs pants that fit, so I toiled on. Our first wearable muslin is in process, but I noticed something really interesting as I was going through the muslin process, and I wanted to share it with you.
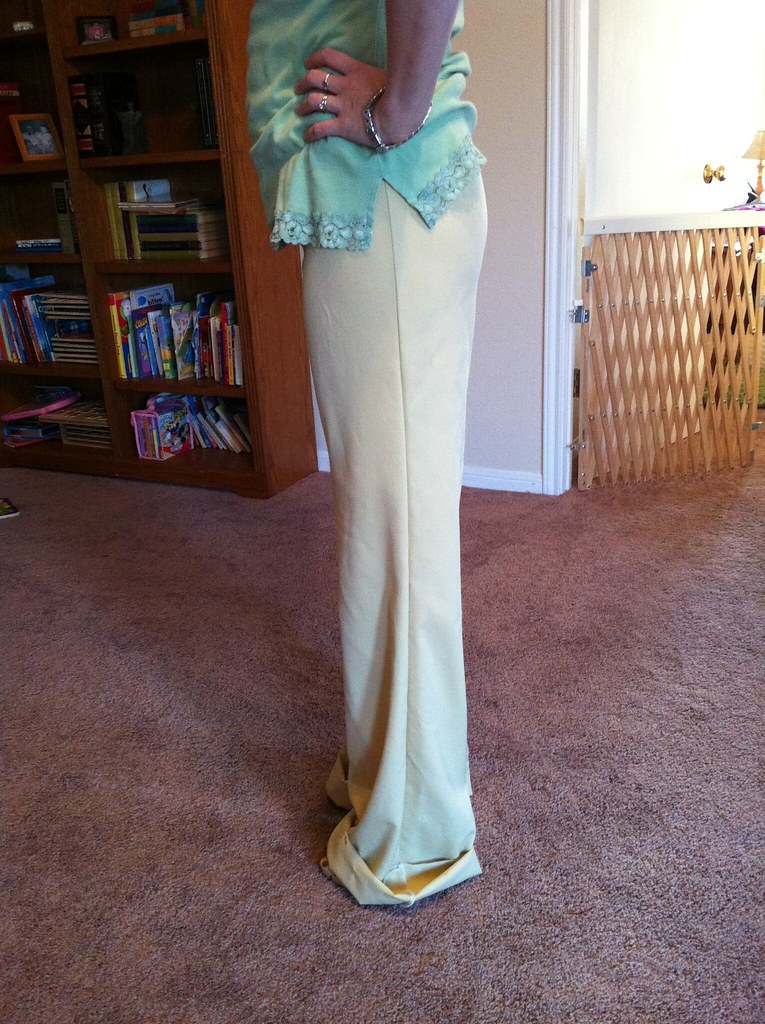
And here it is. My hubby and I have exactly the opposite fitting challenges when it comes to making pants. Can you see how different our shapes are from the side? His waist sits very low, while mine is quite high. The curve of his buttocks starts almost immediately after his waist, while I have a "ski slope" (Thank you Heather, for that term) down to my actual butt. The shape of his butt is much more round, while mine is flat. After having this epiphany, I realized that this was why I was having such trouble fitting his pants. I was trying to make them work like mine, and they don't.
So, for my low-butted, long & high waist, the alterations I make are these. This is Jalie 2908. The orange line is the original pattern, and the red is mine. You can see I raised the waistline - an inch at CB, tapering down to 3/4 inch at the side seam. The front is raised 3/4 inch all around as well. For the crotch, I have to scoop out the curve to allow for my lower backside, but since my butt is flat, I don't need any extra space down there really, so I leave the hip line and the crotch hook alone.
Here is Mitch's pant pattern. This is BWOF 10/2005-132. Again, the original pattern (without seam allowances) is in orange. The red line is the altered pattern. You can see that I shortened the rise quite a bit. I also shortened the darts significantly, although that isn't as obvious here. Joost reminded me that darts should point to the area of maximal fullness, which on Mitch is quite close to his waist. While Mitch's rise is fairly short, she still has a fairly long total crotch length, since he is quite full back there. I added length back to the crotch hook, giving the length he needed to go over his buttocks, but without increasing the rise, which would have just put us back to square one. Since his fullness is much higher than mine, instead of scooping out the crotch curve, I actually had to flatten it a bit. I also added width to the hip area, to go around the circumferential length, which balanced out the additions elsewhere.
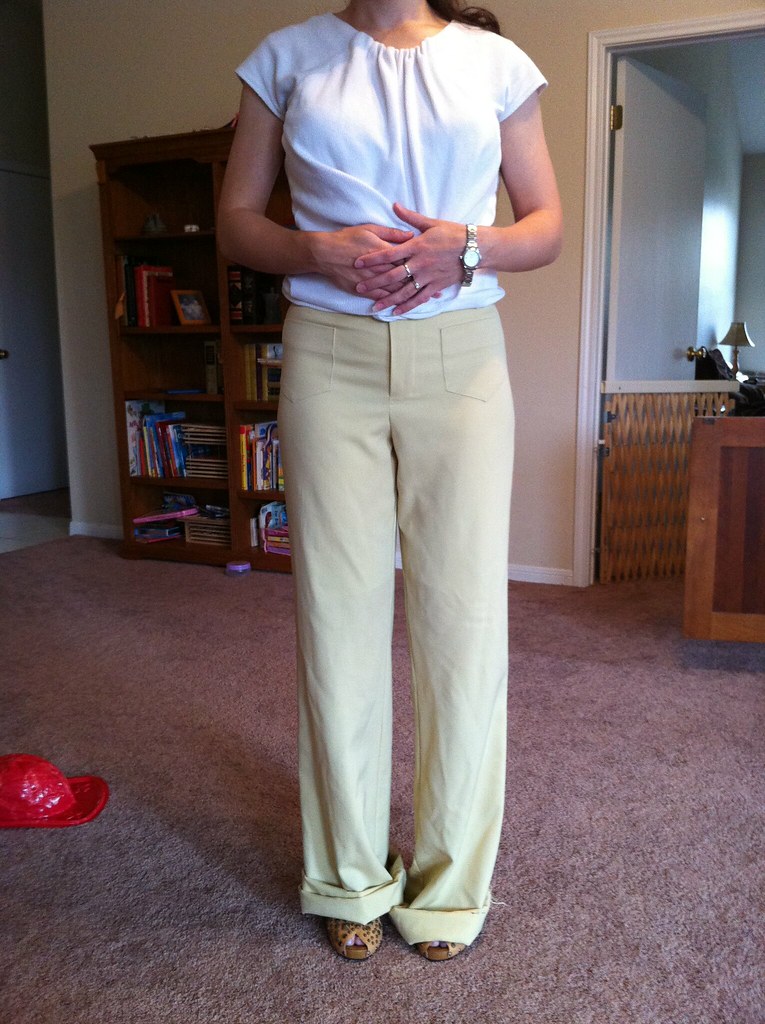
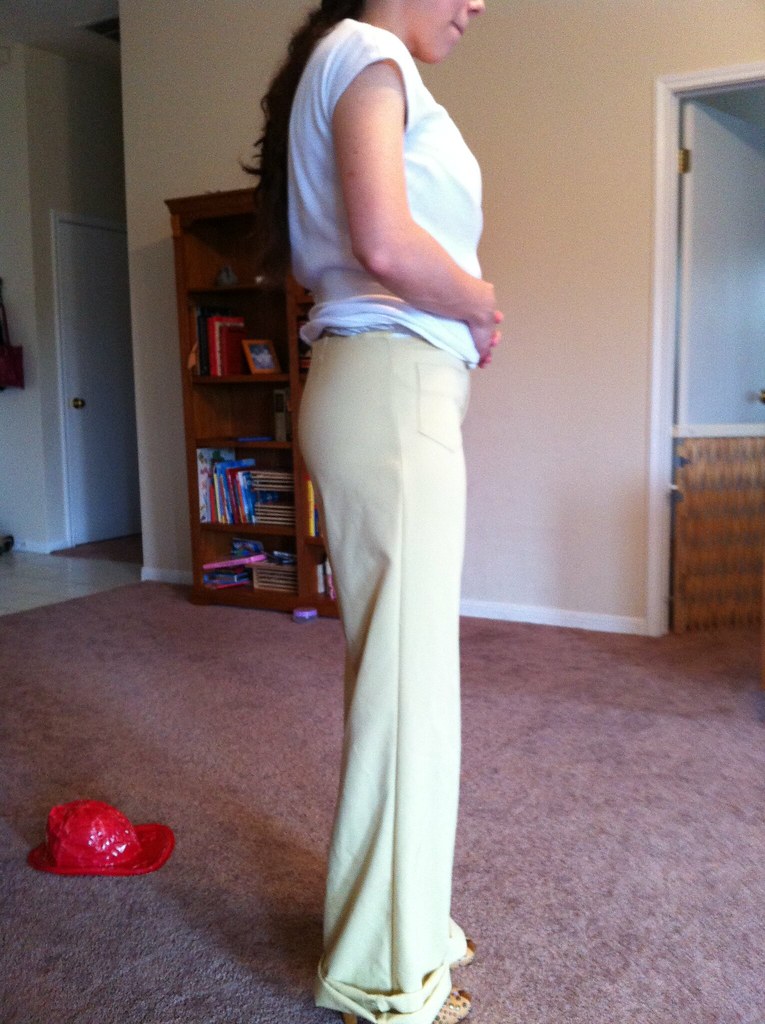
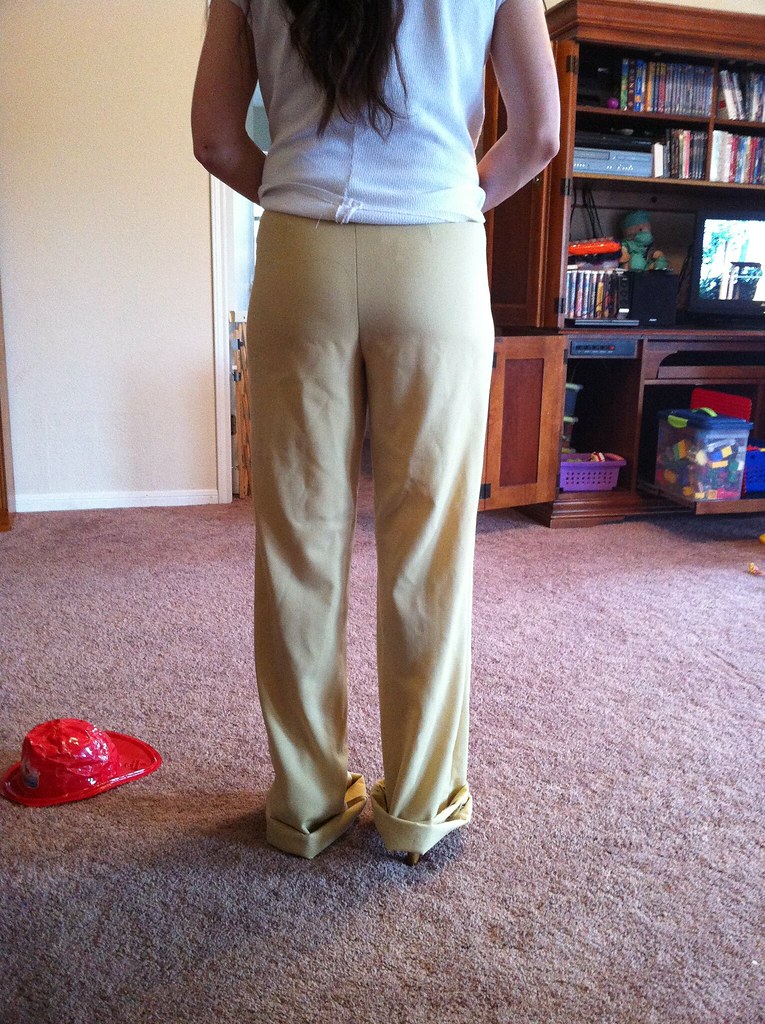
Here is the final muslin, with the changes as above. I could probably tighten up the fit in the thigh area, but Mitch likes his pants on the more relaxed fit side, so I'm leaving it for this first version, which I'm making in a pretty stiff cotton canvas. Hopefully, I can show you the fruit of my labors soon.

Sunday, April 15, 2012

Princess Seam FBA

I had a couple of questions regarding my princess seam FBA method, so I thought the easiest way to tell you about it was to show you how I go about it. I've spent some time really struggling with FBAs, particularly on garments with a waistline seam. The traditional method of doing an FBA, where you slash and spread, adding a horizontal dart, also adds width to the waist, which I don't need. (Don't be a hater - that's just the way I'm built.) I've dealt with this by deepening or adding a vertical underbust dart, which helps, but I end up with big honking darts that are tricky to sew without dimpled points. So a princess seamed bodice allows me to have a snug fit in the waist, while still allowing plenty of space for the girls, without gigantic darts.
We don't always want to look like this...
I've tried a lot of methods for doing an FBA on a princess seamed bodice, but many of them still add width in the waist, since they are basically just a slight modification of the traditional method. My favorite method (and the one I used on this dress and this dress) can be found in the book The Perfect Fit.
Basically, you add width to the side princess panel at the bust point (where you are the fullest) and then taper out to nothing at the notches. You do need to make sure to also lengthen the front princess panel, also at the bust point. I always have to shorten the neckline of my tops, so that is why my front princess panel isn't evenly lengthened.

Another option is to muslin your bodice (or tissue fit) and leave the princess seam open between the notches. It will gape open over your bust when you try it on for fit. Measure the widest opening and add half of that measurement to your side princess panel, again lengthening the front princess panel to fit. If you have a lower bust, this is a particularly useful method, as you can easily move the bust point at the same time by adding fullness where you need it, without any regard for where the pattern has it.
My typical method is a combination of these. I make the flat pattern alteration as above, then make my muslin and alter it if I need to using the open seam method. It's taken me a few tweaks to get it just right, but I think it was worth it. Now I have a princess seamed bodice I can count on, and no more Madonna boobs.

Friday, January 20, 2012

Fitting Simplicity 2256

The first step in any sewing project is to get a perfect fit. If you aren't happy with the fit of your garment, then you have wasted your own time, money and fabric! This is a lesson it took me a lot of time (and wasted fabric!) to learn, but I know that spending a little time getting the fit just right before you cut your fabric will save much pain and suffering later. I always start by tissue fitting my pattern on my dress form to see if I need to make any major changes.
I trace all my patterns onto tracing medium (Soil Separator paper is my personal favorite), then sew it together to see how it looks. You can just cut out your pattern tissue in your correct size and pin it together on the seamline as well. After making any major changes to the tissue pattern, I cut out a muslin. Now, I don't always muslin every pattern, although there are certainly sewists who do. For this project, since I knew I would be putting a lot of work into it, I wanted to get the fit absolutely perfect before I cut into my precious coating.
My first muslin wasn't too bad, particularly since I had already fixed the swayback in the tissue. In the heavier fabric I used for my muslin, it was clear that I needed a little more room in the bust,
As well as some additional ease across my broad back. After a 3/4 inch FBA and a 5/8 inch broad back adjustment, I made a quick bodice only muslin to check the darts and alignment. I also tried out gathers in place of the darts, which didn't work at all, so I'm glad I muslined it first. After finalizing the dart placement, I sewed muslin #3.
And it worked! I'm happy now with the dart placement and the amount of ease in the bodice.
In back, the adjustment there gives me enough ease to move, without being to large. You can see on the sleeveless side, I tried a shoulder dart, but didn't like the way it looked, so I ended up easing the back shoulder (which I had lengthened with my broad back adjustment) into the front. One thing to remember is that even if you don't think you'll need to adjust the sleeve, you need to set them in to make sure that the back of your garment fits well, as the sleeve effects the fit there.

So in the end, I only had to make a few adjustments to this pattern and they were all pretty standard adjustments for me. I did a small FBA, a broad back adjustment and a small swayback adjustment.

My favorite fit resources are:
Fit For Real People by Pati Palmer and Marta Alto - While the styles are dated, you can't beat the fit information.
The Perfect Fit: The Classic Guide to Altering Patterns - This book has great fit methods, but is often a little light on the explanations. I wouldn't use it as my primary fit resource, but I've learned a lot from it about alternate ways to fit a garment. It is particularly helpful in "non-standard" situations.
Fast Fit by Sandra Betzina - This book helps "diagnose" fit problems by focusing on how an ill fitting garment might appear and what the problem is. Her fit solutions are good, although they don't always apply to every situation.
Debbie Cook's FBA tutorials - Debbie taught me how to do an FBA! I cannot recommend her tutorial's highly enough. They are clearly written and easy to follow. She covers how to do and FBA for many different situations, such as on a dolman sleeve or a twist top.
Sigrid's Sewing Tutorials - Sigrid has collected many sewing tutorials from all over the web and collated them into one blog. Very helpful!

I hope this is helpful. Tomorrow I'll chat a little about tailoring. Stick around for that!

Wednesday, November 23, 2011

Whisker relief!

A big thank you to Tanit-Isis and Anonymous! I think I fixed that pesky front crotch curve.
Better, yes? Here is how it looked before.
So, Tanit-Isis got me thinking about the shape of the curve, but I wasn't sure what to do about it. Anonymous (who are you? You are a genius!) pointed me it the direction of the Savvy Sewer Salon over at Sawyer Brook Fabrics. Jennifer Stern had hosted a couple of sew alongs and addressed several fit issues, including this one (You'll find that thread here.). When the wee one went down for a nap, I decided to give it a try. It worked! And it only took about a 1/8 inch change to totally change the fit of these pants.
The original stitching line is in red, with the new stitching line in tan. You wouldn't think that teeny change would make any difference at all, but it did and I am thrilled!!

Thank you both for commenting and getting my mind working!!

Pant's fitting woes

I've started in on my new jeans. I'm using Vogue 8330, which is an OOP pattern from 2006 or so.
It has several positive reviews on PR and I like the shape of it. I've been wanting to make a pair of "skinny" jeans for a while as I wear the RTW pair I bought often, even though it isn't all that great a fit. Anyway, I started out with some flat pattern alterations. This pattern is quite low rise, which isn't a great look for me, so I added some height to the rise and made my now usual crotch alterations (scoop out and lower the back, lengthen front hook slightly). Then I whacked a muslin out of some crazy orange stretch sateen, which has a similar weight and stretch to my denim.
This is back version 2.0, after I took 2 1/2 inches off the CB waistband and darted the yoke by the same amount. I'm pretty darn pleased with the fit back there, actually. There are a few under the seat wrinkles, but without them I can't sit down. Wearing ease is a must.
In front, I'm not so pleased. Those darn crotch wrinkles - what is that about?? I looked them up in The Perfect Fit, which said that this was a full thigh problem. I can buy that, so I tried releasing the side seams, but that actually made it worse! Sandra Betzina's Fast Fit says I need more space in the inseam, and I was about to try that alteration when the small people woke up and I had to stop playing sewing.

So ladies, what do you think?? I know there has been a lot of discussion about these particular wrinkles out there in the blogosphere lately. I always see them in RTW. Do I just live with them, or is there something I can do to fix this??? This is why I sew! I'm off to check out Sunni and Sarai's pant fit tutorial's. If y'all have any suggestions, I am all ears!

Thursday, May 5, 2011

A fit...

I may have mentioned a few things this week that I've been looking forward to. Well, yesterday I had the opportunity to go down to Austin with my Mom and sister to have a pant sloper fit! So fun!!
Sorry for the fuzzy picture. I don't think Rina is used to the fussiness of the iPhone camera. Anyway, this is me in my pants muslin, getting the side seams adjusted. I am now the happy owner of a perfectly fit Vogue pant fitting shell!
Rina and mom both had blouses fit.
Rina gets her muslin fit,
while Mom marks in some darts onto her muslin.
Myra and Duncan came along and both were really well behaved. Whew!
So, if you are in the Austin area, don't miss out on a great opportunity to have a garment or two fit! Sonja's fees are incredibly reasonable and she's very good.

ETA: For Carol, and anyone else interested in this service, you can contact Sonja at the Bernina kiosk at Hancock Fabrics. The number is 512-331-0155.

There may be another fit in the near future, depending on how a certain online sewing machine retailer behaves. Remember that I was expecting my coverstitch machine to arrive? Well, it did, but the case is cracked in such a way that it doesn't align with the throat plate. I was so disappointed! I couldn't even look at it, and boxed it back up without taking a picture. I shot off an email, but 36 hours later, haven't heard back. Do you think it's time for me to pitch that fit yet? I have garments waiting!!

Monday, April 25, 2011

Easter dress and pants fit update

I wore my dress today! You remember, the one I wasn't sure I liked.
And I love it!! The brown accents are fun and I love the length. It feels kicky and fun. The fit isn't bad, but I think I'm just getting more picky about fit. I'd have been thrilled to find anything that fit this well off the rack, so I'm pleased. That said, I think I'm going to need to start looking closer at the fit in my shoulders. I think I may need to start making a broad back adjustment as a standard change for me. I didn't in this dress and it pulls a bit when I cross my arms in front of my chest.

What about those pants I'm working on? I want to thank everyone for the comments, emails and links you all sent me. I love the support from the sewing community! You are all awesome!! Myrna, who has a similar figure to mine, reminded me of a similar journey that she made while fitting pants. Her posts here, here and here, were so helpful! I'm linking them for your benefit, but also so that I can find them again. The old memory just ain't what it used to be...
So, my next step will be to get a flexible curve to measure my own crotch curve more closely, but I did do some tweaking of the current pants to see what I could do just by deepening the crotch curve.
What do y'all think? I'm pretty happy with how well they fall now. It isn't perfect, but I'm calling it good enough.
Here is the altered pattern piece. The original seamline is in blue with my altered seamline in red. I dropped the crotch curve down nearly an inch and pinched out about 5/8 of an inch from the back waist. You can see how different the shape is from the original curve.
Joy had asked how the alteration affected the side seam, and I am happy to say, it is still nice and straight.

Pants fitting is very interesting. Everything is so interrelated, but not at all intuitive for me. I'm excited to have this pair coming along so nicely. Hopefully, I'll have a completed pair to show you in a couple of days. Every time I tried them on, Mitch asked if I was going to line them, so I finally took the hint and am adding a full lining.

Thanks again to everyone who helped me fine tune these. I so much appreciate all the help! It's so great to have so many educated eyes to scrutinize my work. You all rock!

Thursday, April 21, 2011

Pants fitting...

Somehow, I find myself in great need of new pants. Since I got my first burda magazine in April of 2009, I've wanted to sew model 118, these cute pants,
but my issue is in french, so that slowed me down a bit. I'm confident enough now in my pant construction skills to give it a go without instructions. What is slowing me down now is fit.
Here they are from the front. The inseams are sewn, but crotch and side seams are just basted so that I can adjust as needed. I think the fit is pretty good actually from this angle.
The side seams are nice and straight, but from here you can see that the back is not falling quite smoothly.
From the rear, I like the fit through the hips and backside, but I have wrinkles in the legs that radiate from hip to knee,
which disappear when I tug the center back up a bit. This does make the crotch just a wee snug, but it fixes the back wrinkles. So, dear friends, here is where you come in. What do you think is going on here? I'm thinking for this pair that I can make them work by shaving off a bit at the back waist, tapering to nothing at the side seams, then deepening the back crotch curve to compensate. What would you do?

Thursday, March 24, 2011

Simplicity 2996, fitting

I always find it helpful to see the process that others go through to get to the perfect fit, so I thought I'd share a bit of my process. Of course, the disclaimer need be said - this is the way I do it, not the only or even the best way, so I'd love any input about your personal fit journey and what works for you.
I am a big fan of FFRP, and I HATE making muslins, so I do most of my fitting on the pattern tissue.  I'm also an inveterate tracer, so all of my patterns are traced onto soil separator fabric before I start.  The great thing about that is that I can just baste together my main pattern pieces and go from there.  The above image is the front of my dress, without sleeves, collar, pocket, cuffs and facings. This pattern is cup sized, so I didn't have to do an FBA. I cut a size 10 with the D cup front and blended out to a 12 at the waist  and down to the hem. As you can see, the fit is pretty good!
The back. Perfect! I pinned it to my dressform for you to see, but I actually fit it on myself and use a full length mirror, with a hand mirror to check out the back. While fitting it on myself, I pin the pattern to my bra strap at center back to keep it in place. Since I'm essentially trying on my dress, I can check things like hem length and such at this point as well.
For some reason I tend to have too much length at CF, so that little tuck you see is a typical alteration for me.  I'll take that little wedge out of the pattern piece and straighten out the CF lines if needed. Poof, no neckline gaposis!
I think I'm ready to cut fabric!

ETA: Karin asked about the soil separator fabric that I use for tracing. I meant to talk a little about it because I LOVE IT! It is a plumbing product that is used in septic systems. In the states, you can get it at some hardware stores, although my local shops don't carry it, so I order it online. The kind I am using right now is made by Hancor. I order it from amazon.com, where it is called "geotextile fabric". I love this stuff for many reasons - it is sheer enough to easily see your pattern through, but sturdy enough to go through multiple uses. It drapes and can be sewn like fabric. And at 25 dollars for a 100 yard roll, it is about the cheapest tracing medium you can find. I have also used it as stabilizer for embroidery/applique and it works as a lightweight sew in interfacing. Brilliant!