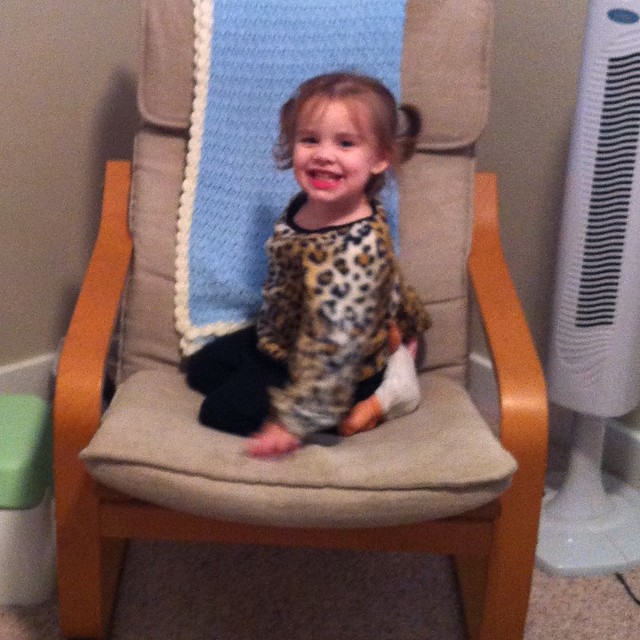
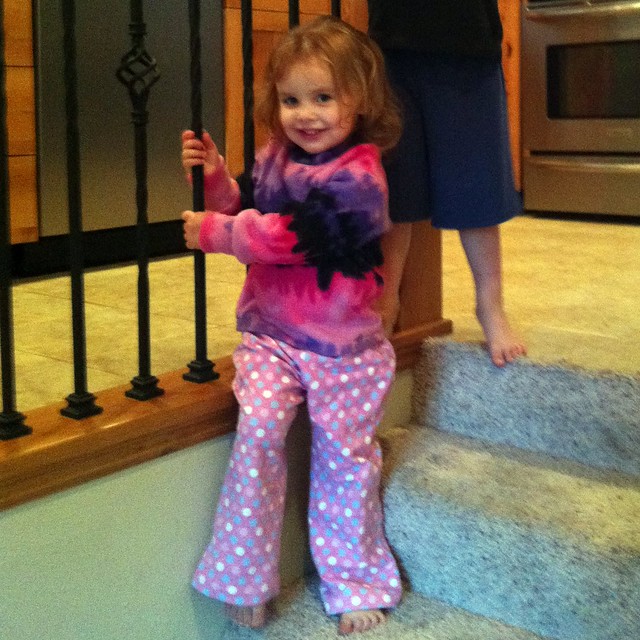
Since I only have one little girl child, and her wardrobe is immense and mostly handmade, I've been in the habit of passing down Myra's clothes to her sweet little cousin. It makes me happy to think that the item that I crafted are of use to her. This winter, Myra has apparently been unusually hard on her clothes, so there wasn't much to send. I decided to take this week to make a few things just for Emma and to try my hand at my first kid SWAP (sewing with a plan).
And here is Emma's first outfit! I think it turned out really cute. Each piece was intended to be a useful individual wardrobe basic as well, so hopefully she can mix and match them a bit.
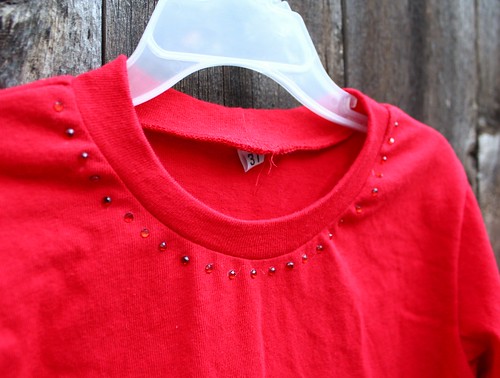
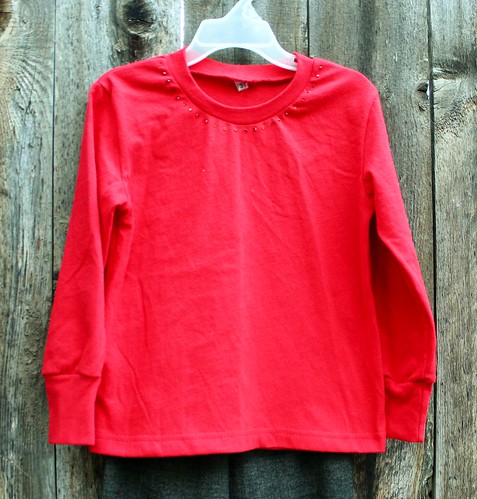
The first thing I made was the red tee. It is a simple long sleeve, cuffed tee. The pattern (and all of the patterns for this outfit) comes from the 01/2010 issue of Ottobre. This is style #22. It's a great wardrobe basic. Emma is an icy blonde, so I thought this saturated pinky-red would compliment her coloring.
Of course, I couldn't stop at "basic" and added a line of hot-fix crystals to the neckline. Every girl likes a little bling!
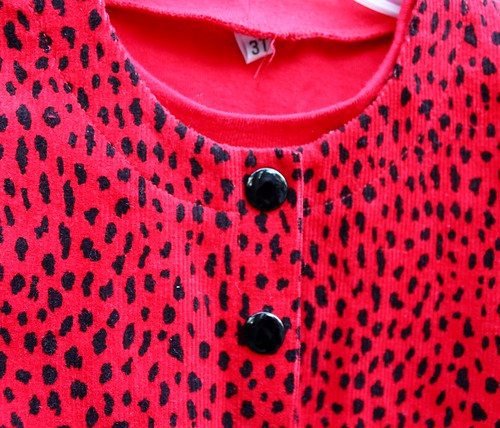
Since Emma lives in a colder climate, I also wanted to make her some layering pieces. I was thrilled that I had enough of this awesome cheetah corduroy to make this jacket! The pattern is # 19 from the aforementioned Ottobre. I lengthened the sleeves for warmth.
I also added some curved patch pockets. Kids need pockets.
The edges are finished with a topstitched facing. I like the clean lines this gives. I used covered snaps for the closure. I really agonized over the closures and went back and forth over several options. So, I did what any Sewcialist would do - I polled Instagram, Twitter and Facebook. The vote was unanimous in favor of the snaps! And I love them. Thanks, y'all!!
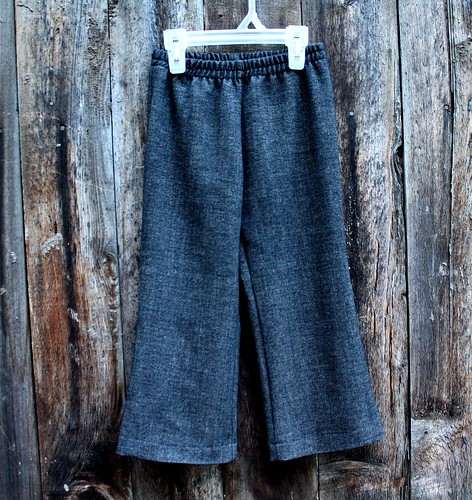
The final piece in the SWAP which works with both outfits, is a basic pair of pants. This is design #13, a simple elastic pant which I've made twice for Myra. I love the shape of it. I made this out of a wool poly suiting with a thick, sweatery feel. It's really the loveliest fabric and should keep Emma nice and cozy. You'll be seeing more of it, since both Myra and Logan requested pants from it when they saw Emma's!
Satshbusting bonus - except for the snaps on the cheetah jacket, every single thing for this ENTIRE SWAP came from my stash!!! Woo hoo!!
Showing posts with label #13. Show all posts
Thursday, October 17, 2013
Thursday, November 8, 2012
Ottobre 06/2012-13: Onni jeans as cords
When this winter's issue of Ottobre came last week, I didn't even bother putting it away. I knew I needed to make the elastic waist jeans for Logan. He just had a major growth spurt and suddenly all his pants are high waters. Not cool. But pants for Logan can be a bit of a challenge. As in, storebought isn't an option. He hates anything on his waist that might bind or scratch, like a button, stable waistband or really anything that isn't a basic elastic waist. If I didn't sew, he would wear sweatpants 24/7.
I love Ottobre, but in Logan's size (now 116) there just aren't a whole lot of options for an elastic waist pant, which is why I jumped on this pattern, #13 from the 06/2012 issue. The details are great, but won't be a problem for my sensitive guy. Although Ottobre says that it is designed as a plus size pattern, I think perhaps these are meant to be a plus size slim pant, so they work well as a relaxed fit jean on an average sized child.
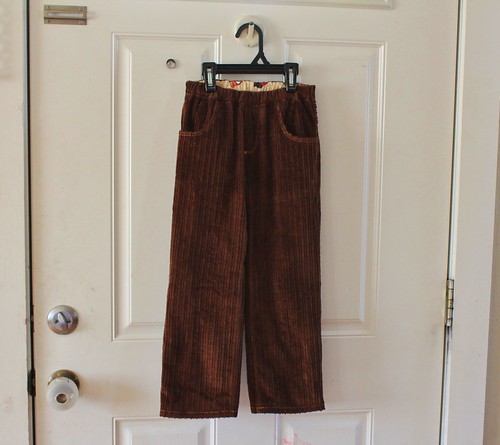
The fabric is a wide wale cotton corduroy from Joann. It's a little on the thin side, so I don't suspect these will wear very well, but it is very soft and Logan likes it. If the pattern is a win, I'll try it out again in something a little sturdier.
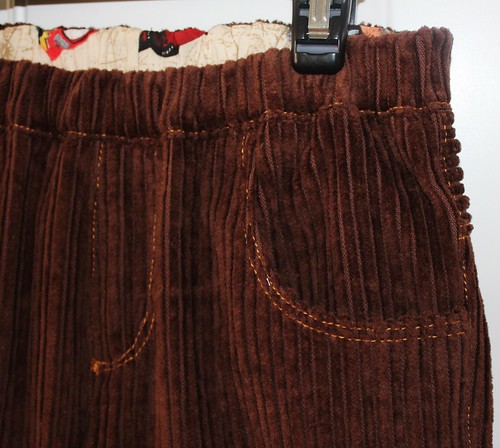
The pattern includes all the jeans style details. There are even belt loops, a coin pocket and rivets, although I omitted them here. The front fly is faux, but topstitched just like "real" jeans. The waistband is basically just a casing for the elastic, but it is a separate piece and is topstitched down. Since the corduroy has a pretty high pile and is a bit bulky, I decided to make the waistband in 2 pieces so that I could face it with a thin cotton.
In back there are typical jeans pockets, which I didn't embellish. Most of the RTW corduroy pants I looked over had plain back pockets, so I went with that. Topstitching wide wale corduroy is a bit dodgy anyway, so I was glad to not have to attempt it here. There is also a back yoke with pretty minimal shaping. It is cut on the cross grain, which looks particularly cool in the cord. I even managed (by complete chance) to match the wales across the yoke pieces. Woo hoo!
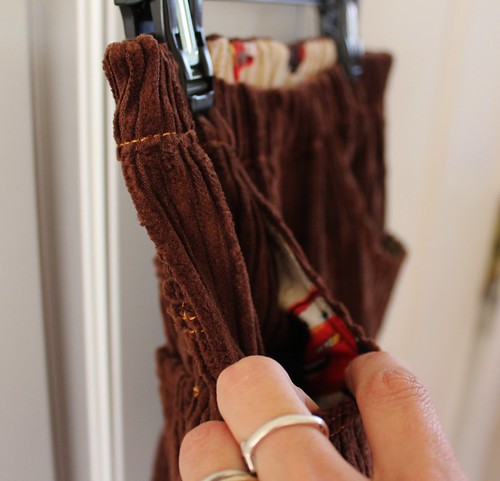
Logan's favorite part is the sneaky peek of Lightning McQueen in the pockets. Mater is in there as well, just a little deeper. Overall, I am pretty happy with this pattern, although I will say that I didn't find it to be as perfectly drafted as your typical Otto pattern. Now, perhaps this was a tracing or seam allowance error on my part, but I found the side seams didn't line up by about 1/2 inch at the top. I ended up just trimming off the excess length from the yoke, and it wasn't a big deal, but if you make this, do be sure to match your side seams based on the notches and hem edge, or you may end up with a twist in the leg.
I love Ottobre, but in Logan's size (now 116) there just aren't a whole lot of options for an elastic waist pant, which is why I jumped on this pattern, #13 from the 06/2012 issue. The details are great, but won't be a problem for my sensitive guy. Although Ottobre says that it is designed as a plus size pattern, I think perhaps these are meant to be a plus size slim pant, so they work well as a relaxed fit jean on an average sized child.
The fabric is a wide wale cotton corduroy from Joann. It's a little on the thin side, so I don't suspect these will wear very well, but it is very soft and Logan likes it. If the pattern is a win, I'll try it out again in something a little sturdier.
The pattern includes all the jeans style details. There are even belt loops, a coin pocket and rivets, although I omitted them here. The front fly is faux, but topstitched just like "real" jeans. The waistband is basically just a casing for the elastic, but it is a separate piece and is topstitched down. Since the corduroy has a pretty high pile and is a bit bulky, I decided to make the waistband in 2 pieces so that I could face it with a thin cotton.
In back there are typical jeans pockets, which I didn't embellish. Most of the RTW corduroy pants I looked over had plain back pockets, so I went with that. Topstitching wide wale corduroy is a bit dodgy anyway, so I was glad to not have to attempt it here. There is also a back yoke with pretty minimal shaping. It is cut on the cross grain, which looks particularly cool in the cord. I even managed (by complete chance) to match the wales across the yoke pieces. Woo hoo!
Logan's favorite part is the sneaky peek of Lightning McQueen in the pockets. Mater is in there as well, just a little deeper. Overall, I am pretty happy with this pattern, although I will say that I didn't find it to be as perfectly drafted as your typical Otto pattern. Now, perhaps this was a tracing or seam allowance error on my part, but I found the side seams didn't line up by about 1/2 inch at the top. I ended up just trimming off the excess length from the yoke, and it wasn't a big deal, but if you make this, do be sure to match your side seams based on the notches and hem edge, or you may end up with a twist in the leg.
Thursday, October 25, 2012
Ottobre 03/2004-13 top and 03/2011-20 patchwork skirt
At Sewing Summit, there was a whole lot of quilting going on. As you all know, I am more emphatically NOT a quilter. While I admire the beauty of a well pieced top, I do not have the patience for perfect corners. But last year, we got these cute charm packs from Oliver & S. So this year, I took advantage of some of the open sewing time at Sewing Summit (where I was surrounded by amazing quilters) to attempt a little simple strip piecing.
Which I made into a skirt, because that is what I do.
I pieced the strips totally randomly, interspersing the Oliver & S charm squares with some Kona cotton solid squares that were also part of our swag last year. Then I gathered the strips like tiers into a twirly ruffled skirt.I used the "Funky Stripes" skirted leggings pattern from the 03/2011 issue of Ottobre to make a pair of little shorts for under the skirt (just like this one) and attached the skirt and shorts to the elastic waistband per the pattern. I bound the hem rather than turning it under, partly to preserve the length, but also because I thought it gave it a quilt-y sort of look that was fun with the patchwork.
Naturally, a new skirt needs a new top. And I had a couple of charm squares left. The top pattern is from the 03/2004 issue of Ottobre. I really love my older issues for great basic shapes. This top has a slight a-line and the sleeves have a bit of a flare that is accentuated with a tiny bit of shirring below the elbow. For the applique, I just turned the three squares on the bias. They came already pinked, so I just left them raw and stitched around them just inside the pinking with a narrow zigzag.
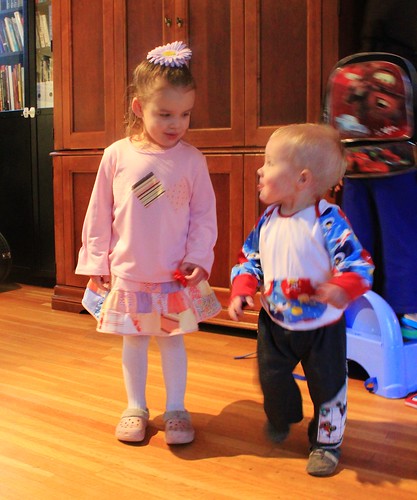
Myra was not in the mood for pictures today, but a little help from Duncan and at least she didn't scowl at me. As I have noted with prior early Otto patterns, the top did run a little wide. I just used a wider seam allowance in the body, but left the extra volume in the sleeves. It still has a pretty loose fit.
Linked up over at The Train to Crazy, Make it Wear it blog party!
Which I made into a skirt, because that is what I do.
I pieced the strips totally randomly, interspersing the Oliver & S charm squares with some Kona cotton solid squares that were also part of our swag last year. Then I gathered the strips like tiers into a twirly ruffled skirt.I used the "Funky Stripes" skirted leggings pattern from the 03/2011 issue of Ottobre to make a pair of little shorts for under the skirt (just like this one) and attached the skirt and shorts to the elastic waistband per the pattern. I bound the hem rather than turning it under, partly to preserve the length, but also because I thought it gave it a quilt-y sort of look that was fun with the patchwork.
Naturally, a new skirt needs a new top. And I had a couple of charm squares left. The top pattern is from the 03/2004 issue of Ottobre. I really love my older issues for great basic shapes. This top has a slight a-line and the sleeves have a bit of a flare that is accentuated with a tiny bit of shirring below the elbow. For the applique, I just turned the three squares on the bias. They came already pinked, so I just left them raw and stitched around them just inside the pinking with a narrow zigzag.
Myra was not in the mood for pictures today, but a little help from Duncan and at least she didn't scowl at me. As I have noted with prior early Otto patterns, the top did run a little wide. I just used a wider seam allowance in the body, but left the extra volume in the sleeves. It still has a pretty loose fit.
Linked up over at The Train to Crazy, Make it Wear it blog party!
Monday, July 23, 2012
Ottobre 03/2012-13
The parade of girlie dresses continues! Just a few more, then I think I'll need to sew some boy stuff.
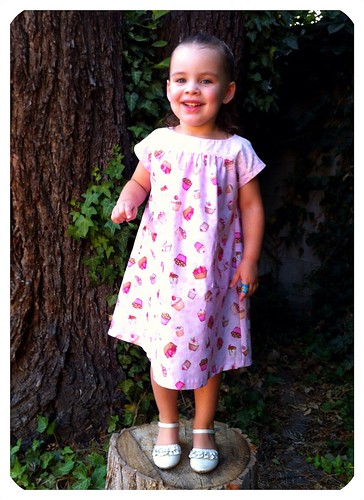
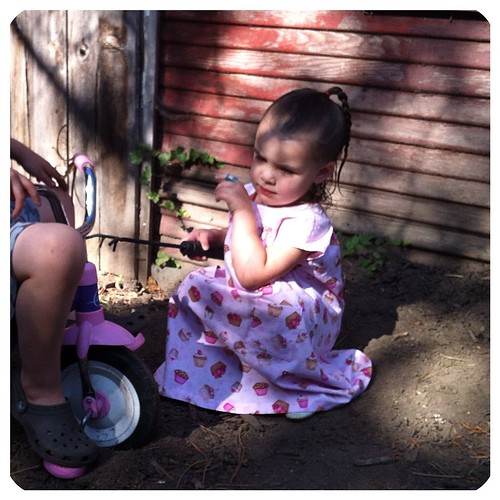
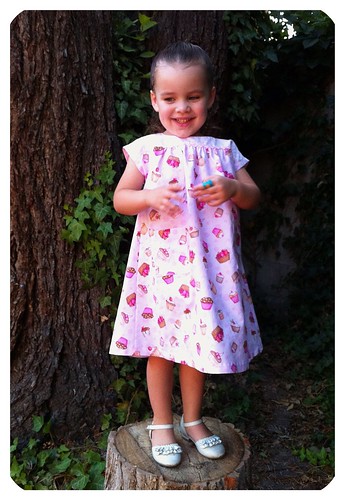
This is Ottobre 03/2012-13, the "Hollywood Cerise" dress. I spotted it as a must-make when I first got my issue of Otto, and I'm not the only one, as there are already a couple of versions of it in the Flickr group.
Myra chose the fabric we used. Bet you'd never have guess that!
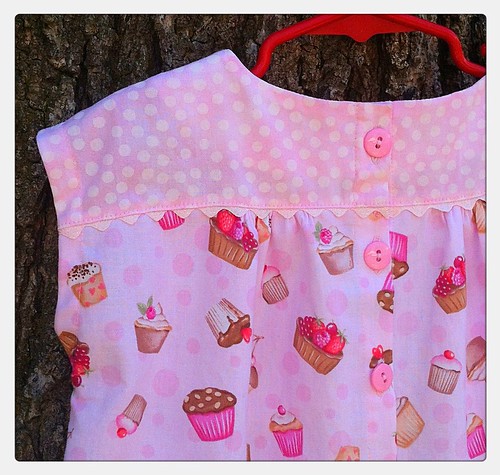
It is quilting cotton, but reasonably nice stuff, particularly the cupcake print.
As you can probably see, this is a ridiculously simple dress - cut on, kimono sleeves, simple fold over placket for the buttons, and a couple of patch pockets.
It is quilting cotton, but reasonably nice stuff, particularly the cupcake print.
As you can probably see, this is a ridiculously simple dress - cut on, kimono sleeves, simple fold over placket for the buttons, and a couple of patch pockets.
I added some glittery ric rac to the yoke seam, but otherwise let the fabric do the talking. The neckline and sleeves are both finished with facings; the sleeves with strips of bias that are topstitched down and the neckline with a shaped facing that I catchstitched to the seam allowances at the shoulder and front yoke seam.
Thursday, December 29, 2011
Ottobre 06/2008-13 & 03/2011-20
Because she needs new clothes...
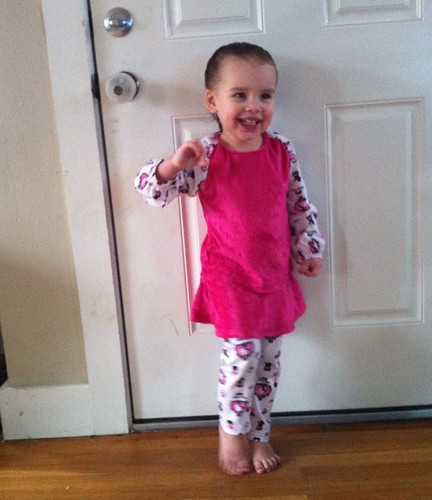
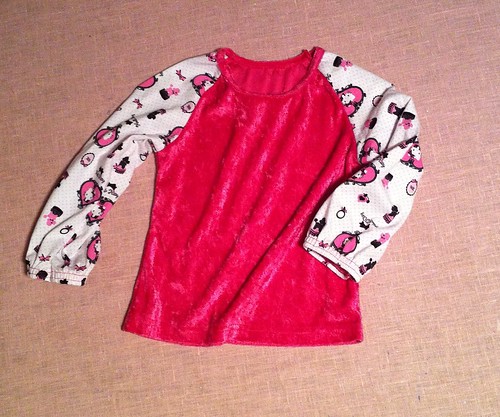
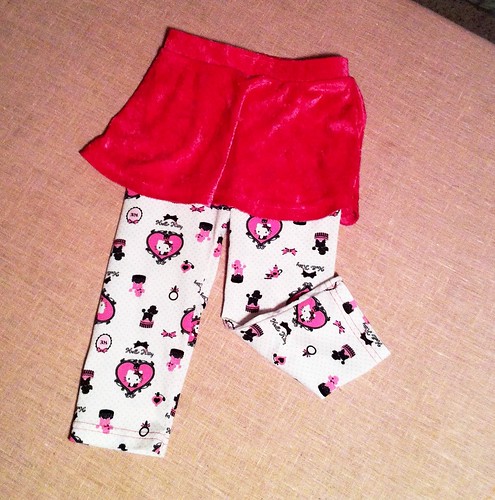
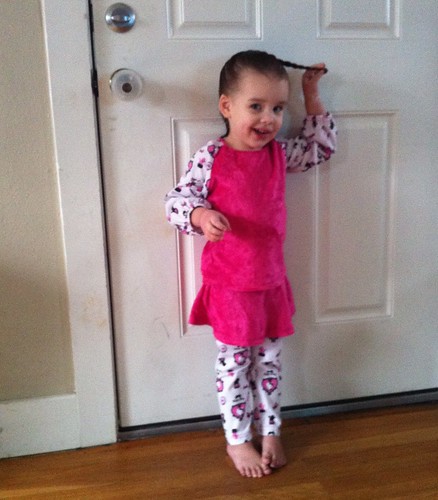
Myra has recently developed a bit of an obsession with Hello Kitty, so when I saw this knit print at Cottonwood Fabrics, I snatched it up. It is a little on the thin side, and I think it looks a bit PJ-like all by itself. Myra picked out this hot pink panne velvet at Joann recently and when I got it home, I realized they were a perfect match.
Both patterns are from Ottobre. The top is the "Sweet 'n' Cosy" tunic from the 06/2008 issue. I've used it before to make fleece PJs and I like the way it fits.
This time I actually did the elastic at the cuffs. I think it helps make this look less like PJs. I used my binder on the neckline. Both fabrics were very curly and hard to work with, so I am really glad I had the serger and coverstitch to help tame them.
The bottoms are super cute. This is the "Funky Stripes" skirted leggings from the 03/2011 issue of Ottobre. The design is for capri length leggings, but I lengthened them to full length for winter. I love the look of a skirt with leggings. This way you only have the one waistband. And they match, which is not always the case when Myra picks out her clothes...
This was a quick and easy outfit to put together. I'll definitely be using these patterns again. In the meantime, I've also been hard at work on a coat. After 3 muslins, I'm finally ready to cut the fabric. It's going to be awesome.
Myra has recently developed a bit of an obsession with Hello Kitty, so when I saw this knit print at Cottonwood Fabrics, I snatched it up. It is a little on the thin side, and I think it looks a bit PJ-like all by itself. Myra picked out this hot pink panne velvet at Joann recently and when I got it home, I realized they were a perfect match.
Both patterns are from Ottobre. The top is the "Sweet 'n' Cosy" tunic from the 06/2008 issue. I've used it before to make fleece PJs and I like the way it fits.
This time I actually did the elastic at the cuffs. I think it helps make this look less like PJs. I used my binder on the neckline. Both fabrics were very curly and hard to work with, so I am really glad I had the serger and coverstitch to help tame them.
The bottoms are super cute. This is the "Funky Stripes" skirted leggings from the 03/2011 issue of Ottobre. The design is for capri length leggings, but I lengthened them to full length for winter. I love the look of a skirt with leggings. This way you only have the one waistband. And they match, which is not always the case when Myra picks out her clothes...
This was a quick and easy outfit to put together. I'll definitely be using these patterns again. In the meantime, I've also been hard at work on a coat. After 3 muslins, I'm finally ready to cut the fabric. It's going to be awesome.
Monday, July 18, 2011
Ottobre 06/2008-13 & 01/2010-18
Tired of PJs yet? I promise I'll make something else next. I'm getting tired of them, too.
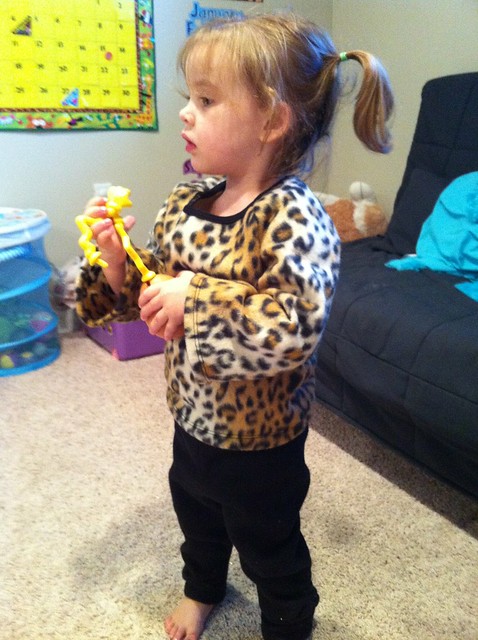
Here is Myra in her latest set of PJs. Both pieces are from Ottobre, and both are intended to be daywear, but I think the combo of fleece and leopard puts this ensemble squarely in the nighttime only category.
The top is from the 06/2008 issue of Ottobre. Since the print of the fleece has that white area, I wanted a raglan top so as not to break it up over the shoulder.
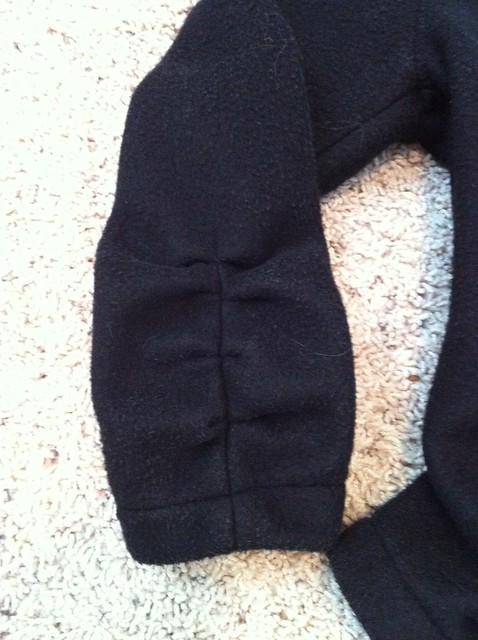
Here is the line drawing of the original. It's called the "Sweet 'n' Cosy" tunic. I really like the shirred sleeves, but the fleece was just too bulky to shirr well. I'll definitely have to make this again for her with that detail though. It's so cute. I also left off the elastic in the sleeve hems. I tried, but the narrow elastic and the bulky fleece just didn't want to play. Fortunately, the bell sleeves are pretty darn cute without the elastic. I also lengthened the top 1 inch. Those pattern pieces just looked short. I'm glad I did. It's the perfect length. I used my binder to attach the neckline binding, which is black rib knit.
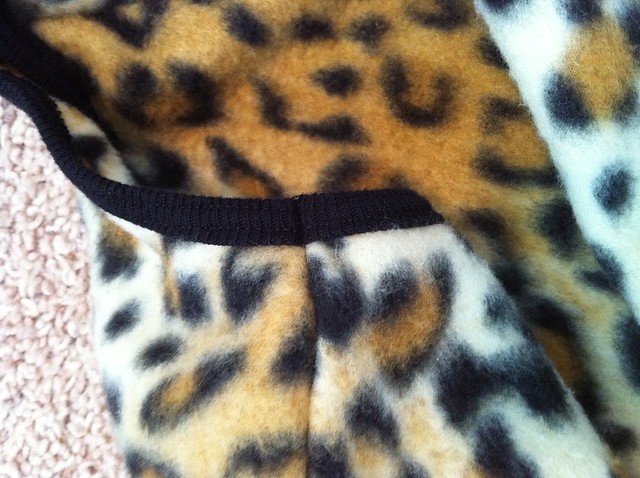
You can see it stretched out just a little bit. It isn't actually this bad - she's holding it up with her arms. The neckline is already a little more of a scoop neck than a crew, which I like. I am also so impressed with how perfectly the binding turned out otherwise. I am so in love with that binder!
I bound the neckline flat, and then seamed the left back raglan seam. Look at how perfectly the binding aligned! Even the stitching is perfectly matched up. I've never, ever managed to do that with binding applied by hand. Something is always slightly off.
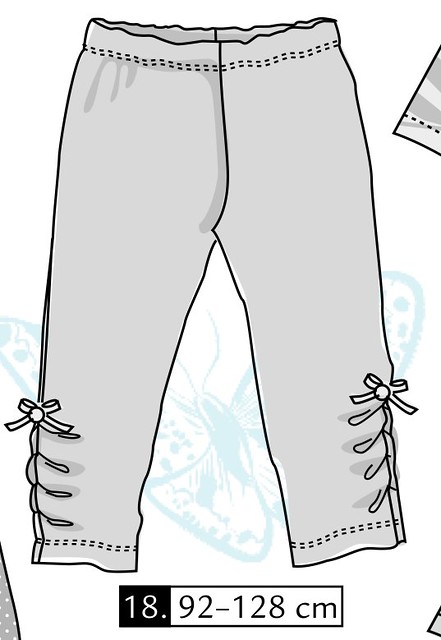
The pants are made from design 18 (the Ruusunnuppu leggings) from the 01/2010 issue that you've seen so much lately. I traced these and cut them out before the movers brought our stuff. I really like the cascading pleats on the legs, but fleece was not the ideal medium to showcase them.
Here is how they turned out. As you can see, the loft of the fleece made it difficult to pleat and sew accurately, so some of them don't line up. as PJ bottoms though, they're fine and the scrunch effect at the ankle keeps her nice and warm and keeps them from riding up as she sleeps.
She likes them! She called them "kitty jammies" and spent the evening meowing.
I may be off the radar now for just a little while. I've a few aprons to sew for a church service project and then a baby gift to make, which of course, I can't reveal until it has been gifted. You'll die of the cuteness though. I promise!
Here is Myra in her latest set of PJs. Both pieces are from Ottobre, and both are intended to be daywear, but I think the combo of fleece and leopard puts this ensemble squarely in the nighttime only category.
The top is from the 06/2008 issue of Ottobre. Since the print of the fleece has that white area, I wanted a raglan top so as not to break it up over the shoulder.
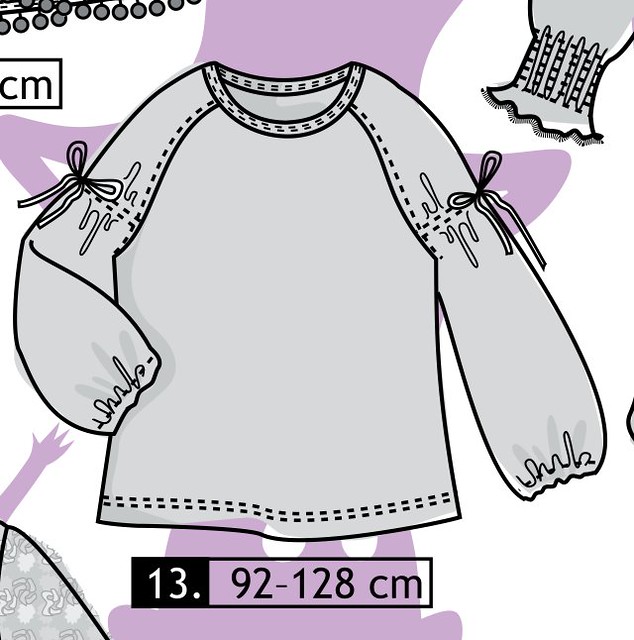
Here is the line drawing of the original. It's called the "Sweet 'n' Cosy" tunic. I really like the shirred sleeves, but the fleece was just too bulky to shirr well. I'll definitely have to make this again for her with that detail though. It's so cute. I also left off the elastic in the sleeve hems. I tried, but the narrow elastic and the bulky fleece just didn't want to play. Fortunately, the bell sleeves are pretty darn cute without the elastic. I also lengthened the top 1 inch. Those pattern pieces just looked short. I'm glad I did. It's the perfect length. I used my binder to attach the neckline binding, which is black rib knit.
You can see it stretched out just a little bit. It isn't actually this bad - she's holding it up with her arms. The neckline is already a little more of a scoop neck than a crew, which I like. I am also so impressed with how perfectly the binding turned out otherwise. I am so in love with that binder!
I bound the neckline flat, and then seamed the left back raglan seam. Look at how perfectly the binding aligned! Even the stitching is perfectly matched up. I've never, ever managed to do that with binding applied by hand. Something is always slightly off.
The pants are made from design 18 (the Ruusunnuppu leggings) from the 01/2010 issue that you've seen so much lately. I traced these and cut them out before the movers brought our stuff. I really like the cascading pleats on the legs, but fleece was not the ideal medium to showcase them.
Here is how they turned out. As you can see, the loft of the fleece made it difficult to pleat and sew accurately, so some of them don't line up. as PJ bottoms though, they're fine and the scrunch effect at the ankle keeps her nice and warm and keeps them from riding up as she sleeps.
She likes them! She called them "kitty jammies" and spent the evening meowing.
I may be off the radar now for just a little while. I've a few aprons to sew for a church service project and then a baby gift to make, which of course, I can't reveal until it has been gifted. You'll die of the cuteness though. I promise!
Saturday, June 25, 2011
Ottobre 01/2010-13 & 22
Thanks to everyone for the birthday wishes! I really had such a great day and I'm looking forward to sewing up some fun new things.
I took a little detour from the items that I had planned to sew while we waited for our belongings to follow us from Texas. They still aren't here, so I don't have my serger or coverstitcher, but Myra really needed some warm PJs. The kids sleep in the basement and it gets quite chilly at night. The problem was that all of my stash, both fabric and patterns are still on a truck in Texas.(Side note: North American Van Lines was our mover and I DO NOT recommend them. We have been getting the run around about when our stuff is coming for weeks.) Fortunately, I had brought one issue of Ottobre, and fabric shopping is great around here.
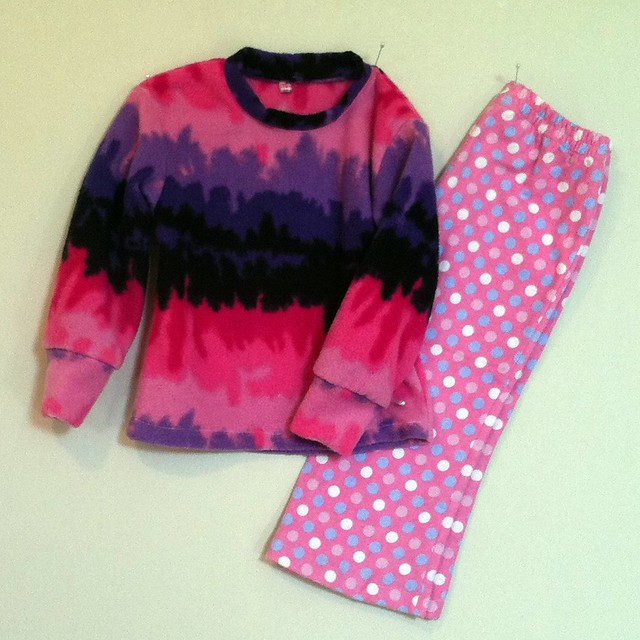
Yeah, they aren't a perfect match, but I was shopping the remnants bin and beggars can't be choosers. the patterns are both from the 01/2010 issue of Ottobre. The top is long sleeve tee #22 and the pants are #13, which I have made for her before, albeit in a much smaller size and not as jammies.
I don't have much to say about the patterns. The pants have a nice shape and fit well, although I did make Myra a larger size than she currently wears in hopes that she can wear these through the winter. I did raise the waistline a little on this version as she had some gapping the last time. The tee is your basic long sleeve tee with cuffs. I love the way that Ottobre's cuffs are shaped. Very cozy. I had plenty of fleece so I did go to the trouble of matching that dominant black area across the body and sleeves. That was probably overkill for PJs, but I knew it would drive me crazy if I didn't.
The verdict? She likes them and they keep her warm. That's pretty much all I ask of jammies. And, I have a new long sleeve tee pattern to use! Sweet.
I took a little detour from the items that I had planned to sew while we waited for our belongings to follow us from Texas. They still aren't here, so I don't have my serger or coverstitcher, but Myra really needed some warm PJs. The kids sleep in the basement and it gets quite chilly at night. The problem was that all of my stash, both fabric and patterns are still on a truck in Texas.(Side note: North American Van Lines was our mover and I DO NOT recommend them. We have been getting the run around about when our stuff is coming for weeks.) Fortunately, I had brought one issue of Ottobre, and fabric shopping is great around here.
Yeah, they aren't a perfect match, but I was shopping the remnants bin and beggars can't be choosers. the patterns are both from the 01/2010 issue of Ottobre. The top is long sleeve tee #22 and the pants are #13, which I have made for her before, albeit in a much smaller size and not as jammies.
I don't have much to say about the patterns. The pants have a nice shape and fit well, although I did make Myra a larger size than she currently wears in hopes that she can wear these through the winter. I did raise the waistline a little on this version as she had some gapping the last time. The tee is your basic long sleeve tee with cuffs. I love the way that Ottobre's cuffs are shaped. Very cozy. I had plenty of fleece so I did go to the trouble of matching that dominant black area across the body and sleeves. That was probably overkill for PJs, but I knew it would drive me crazy if I didn't.
The verdict? She likes them and they keep her warm. That's pretty much all I ask of jammies. And, I have a new long sleeve tee pattern to use! Sweet.
Wednesday, January 12, 2011
Stretch thread and another Ottobre 06/2010-13 jumpsuit
Since the first fleece jumpsuit/PJs have been so successful, I made Myra a second one, this time out of hot pink velour. She loves them!
This time I shortened the collar 1 inch so that it wasn't in her face and I skipped the topstitching. I also did a plain twin needle hem on the sleeves and leg openings. Last time I gathered them with clear elastic, which is cute, but tends to ride up when she's sleeping. I thought about adding some rhinestones (Happy Birthday, Elvis!), but she sleeps in it.
It's really hard to accurately photograph hot pink velour...
Mom reminded me, in my post asking about serger thread, about the importance of wooly nylon thread in your upper looper for serging stretch or particularly fray-prone fabrics. For those who may not be aware, wooly nylon is a thread composed of multiple, unplied threads of nylon. It is very strong and stretchy. As the name suggests, it has a wooly texture, as the unplied threads don't "stick together" the way that a plied thread does. Since it stretches, it is great for knitted and stretch fabrics and adds additional elasticity to your serged seam. I also love it for a twin needle hem. Wound loosely on the bobbin (by hand or slowly on your bobbin winder) it adds a significant amount of elasticity. It is also great for fabrics that are prone to fraying as the unplied filaments of thread sort of spread out.
You can see the difference here. (It's easier to see if you click on it to blow it up.) The seam to the right is the upper looper side with the stretch thread (this one is actually Maxi-Lock Stretch, stay tuned for more on that) and you can see that the coverage that the thread gives is very good. To the left is the lower looper, which is threaded with regular Maxi-Lock.
Wooly nylon has been around a long time. I can remember Mom talking about it when she taught me to sew, which was a few years ago. I recently heard, on ~E Made This, about Maxi-Lock Stretch thread. Since I like to match colors as exactly as possible, I thought I'd give it a try for this project. Since both threads are Maxi-Lock (color Swiss Beauty if you were wondering), the color match is exact. But is it as good as wooly nylon?? Inquiring minds want to know!
For me, one of the most important qualities of wooly nylon is the stretch, so that was what I was really interested in. To compare, I did this very non-scientific test. I took a 4 inch piece of Maxi-Lock stretch and one of wooly nylon, and stretched them to see which went farther.
And wow! No contest!! The wooly nylon (the bottom, blue thread) stretched a full inch farther! The Maxi-Lock (on top, pink) only managed to stretch 1/8 of an inch. So, for me I will definitely be sticking with wooly nylon for my stretch projects. The Maxi-Lock did provide excellent coverage in the serged seam, so it is still a good option if you are working with a fraying fabric and you can get an exact color match to your Maxi-Lock, so there are some benefits. If you are looking to purchase some wooly nylon, I have purchased mine at Thread Art. They have the lowest price I've found ($2.99 a spool!), and fairly quick shipping. You can also find it at Atlanta Thread and Supply and Sew True.
This time I shortened the collar 1 inch so that it wasn't in her face and I skipped the topstitching. I also did a plain twin needle hem on the sleeves and leg openings. Last time I gathered them with clear elastic, which is cute, but tends to ride up when she's sleeping. I thought about adding some rhinestones (Happy Birthday, Elvis!), but she sleeps in it.
It's really hard to accurately photograph hot pink velour...
Mom reminded me, in my post asking about serger thread, about the importance of wooly nylon thread in your upper looper for serging stretch or particularly fray-prone fabrics. For those who may not be aware, wooly nylon is a thread composed of multiple, unplied threads of nylon. It is very strong and stretchy. As the name suggests, it has a wooly texture, as the unplied threads don't "stick together" the way that a plied thread does. Since it stretches, it is great for knitted and stretch fabrics and adds additional elasticity to your serged seam. I also love it for a twin needle hem. Wound loosely on the bobbin (by hand or slowly on your bobbin winder) it adds a significant amount of elasticity. It is also great for fabrics that are prone to fraying as the unplied filaments of thread sort of spread out.
You can see the difference here. (It's easier to see if you click on it to blow it up.) The seam to the right is the upper looper side with the stretch thread (this one is actually Maxi-Lock Stretch, stay tuned for more on that) and you can see that the coverage that the thread gives is very good. To the left is the lower looper, which is threaded with regular Maxi-Lock.
Wooly nylon has been around a long time. I can remember Mom talking about it when she taught me to sew, which was a few years ago. I recently heard, on ~E Made This, about Maxi-Lock Stretch thread. Since I like to match colors as exactly as possible, I thought I'd give it a try for this project. Since both threads are Maxi-Lock (color Swiss Beauty if you were wondering), the color match is exact. But is it as good as wooly nylon?? Inquiring minds want to know!
For me, one of the most important qualities of wooly nylon is the stretch, so that was what I was really interested in. To compare, I did this very non-scientific test. I took a 4 inch piece of Maxi-Lock stretch and one of wooly nylon, and stretched them to see which went farther.
And wow! No contest!! The wooly nylon (the bottom, blue thread) stretched a full inch farther! The Maxi-Lock (on top, pink) only managed to stretch 1/8 of an inch. So, for me I will definitely be sticking with wooly nylon for my stretch projects. The Maxi-Lock did provide excellent coverage in the serged seam, so it is still a good option if you are working with a fraying fabric and you can get an exact color match to your Maxi-Lock, so there are some benefits. If you are looking to purchase some wooly nylon, I have purchased mine at Thread Art. They have the lowest price I've found ($2.99 a spool!), and fairly quick shipping. You can also find it at Atlanta Thread and Supply and Sew True.
Thursday, December 2, 2010
Ottobre 06/2010-13
Myra is not a peaceful sleeper. Now that it is starting to get really cold at night, her habit of kicking off her covers is problematic. She gets chilly and wakes up, which means the rest of us do as well. I thought I'd try making her a coverall that would keep her warm and that she couldn't kick off.
Doesn't she look cozy? I'm not sure that she is in love with that high collar. Perhaps for the next version we'll just use a ribbed band, or at least narrow that collar.
The pattern is Ottobre 06/2010-13, which is a jumpsuit that they style on a boy, made out of velour. Despite the piecing and zip, it actually sewed up very quickly and easily, and as is typical for Ottobre, the instructions were great! My only deviations were to add elastic ruffles at wrist and ankles. I was going for a slightly more girlie look, as well as hoping a little elastic would help keep the arms and legs from riding up. I also elected to stitch in the ditch for the collar, rather than handstitching the undercollar down.
I'm VERY happy with the zipper insertion! I managed to match all three seams and the topstitching across the zipper on the first try! Woo-hoo! The fabric is a fleece from Hancock that I got on Black Friday. At 1.99 a yard, I couldn't pass it up!! Myra chose the color, of course...
The only surprise I had while sewing this up was with the sizing. The last Otto item I made for her was a size 86, and fits her beautifully. I did want a little extra room in this, in case we wanted to layer it over her jammies, so I made a 92, which as you can see, fits her very well with nothing on underneath. I'm glad I didn't sew an 86!! I've noticed this trend with the more recent issues of the magazine. The 2004 issues that I have seem to run a little larger than the more recent issues. Something for me to remember...
ETA: It totally worked!! She not only slept completely through the night without a peep, she slept in an extra half hour this morning!!! We need more fleece.
Doesn't she look cozy? I'm not sure that she is in love with that high collar. Perhaps for the next version we'll just use a ribbed band, or at least narrow that collar.
The pattern is Ottobre 06/2010-13, which is a jumpsuit that they style on a boy, made out of velour. Despite the piecing and zip, it actually sewed up very quickly and easily, and as is typical for Ottobre, the instructions were great! My only deviations were to add elastic ruffles at wrist and ankles. I was going for a slightly more girlie look, as well as hoping a little elastic would help keep the arms and legs from riding up. I also elected to stitch in the ditch for the collar, rather than handstitching the undercollar down.
I'm VERY happy with the zipper insertion! I managed to match all three seams and the topstitching across the zipper on the first try! Woo-hoo! The fabric is a fleece from Hancock that I got on Black Friday. At 1.99 a yard, I couldn't pass it up!! Myra chose the color, of course...
The only surprise I had while sewing this up was with the sizing. The last Otto item I made for her was a size 86, and fits her beautifully. I did want a little extra room in this, in case we wanted to layer it over her jammies, so I made a 92, which as you can see, fits her very well with nothing on underneath. I'm glad I didn't sew an 86!! I've noticed this trend with the more recent issues of the magazine. The 2004 issues that I have seem to run a little larger than the more recent issues. Something for me to remember...
ETA: It totally worked!! She not only slept completely through the night without a peep, she slept in an extra half hour this morning!!! We need more fleece.
Saturday, April 24, 2010
Ottobre 01/2010-13
Myra needed some hippy chick jeans to go with her crazy neon shirt, so I hunted through my Ottobre's to find a flare leg pant pattern in her size.
Perfect! I LOVE the little pockets, which I think have a very 60s feel. They are on the back as well.
I skipped the trim on the hems. I wanted them to be a little more versatile.
But I did line the pocket flaps with the scraps of her shirt. You can also see that I added some jean-style topstitching, which is all that "fly" is - topstitching.
The fit isn't perfect. They are a little baggy up front,
but she has some serious gaposis in the back! She was sleeping when I was making them, so I couldn't measure her waist, and I guess she's slimmed down a little since the last time I measured her. I still think they are pretty darn cute, and will be a good addition to her wardrobe. The pattern went together really quickly, since it is just a very simple pair of elastic waist pants with four patch pockets. What's not to like?
Perfect! I LOVE the little pockets, which I think have a very 60s feel. They are on the back as well.
I skipped the trim on the hems. I wanted them to be a little more versatile.
But I did line the pocket flaps with the scraps of her shirt. You can also see that I added some jean-style topstitching, which is all that "fly" is - topstitching.
The fit isn't perfect. They are a little baggy up front,
but she has some serious gaposis in the back! She was sleeping when I was making them, so I couldn't measure her waist, and I guess she's slimmed down a little since the last time I measured her. I still think they are pretty darn cute, and will be a good addition to her wardrobe. The pattern went together really quickly, since it is just a very simple pair of elastic waist pants with four patch pockets. What's not to like?
Subscribe to:
Posts (Atom)