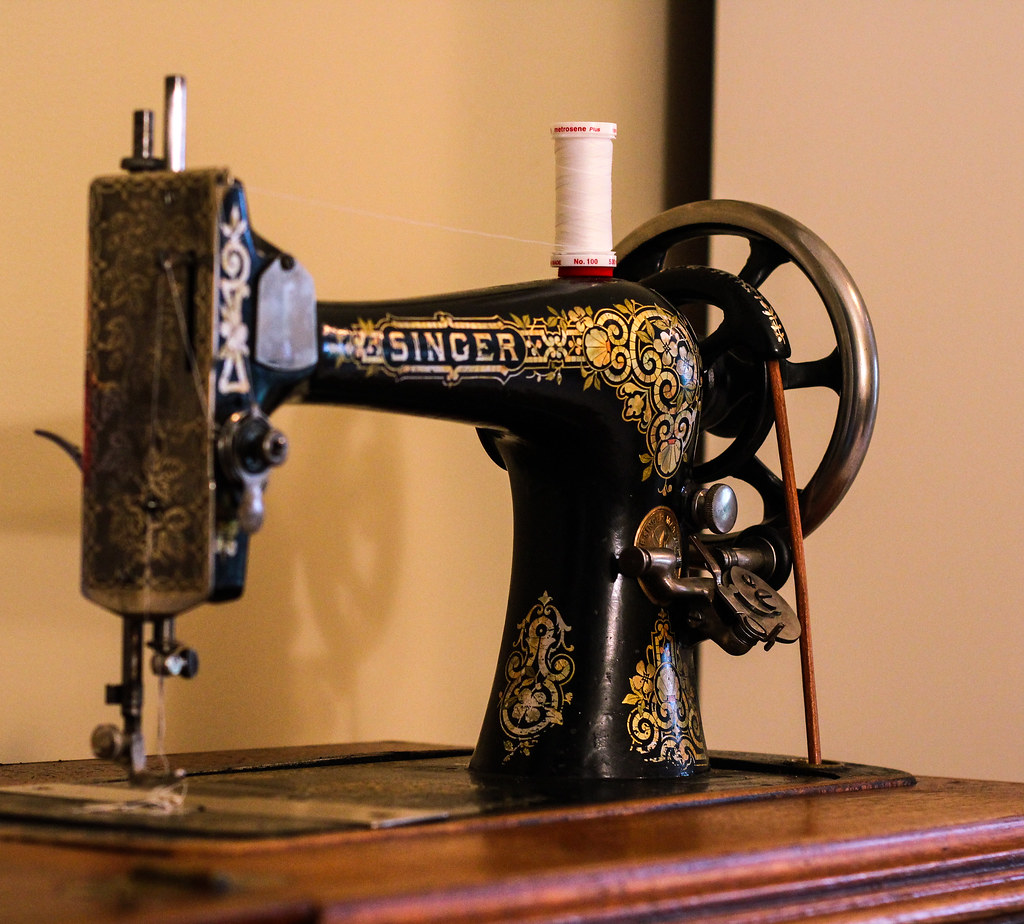
Last week my sweet hubby and I had an hour to kill between dropping off one kid and picking up the others, so we decided to check out the local Antique Mall.
We didn't have a whole lot of time, and I honestly wasn't looking particularly closely at anything. Mitch spotted this elaborate cabinet, and only upon closer inspection did he realize that there was a sewing machine in it. He called me over, and after I started breathing again, we took a peek at the price.
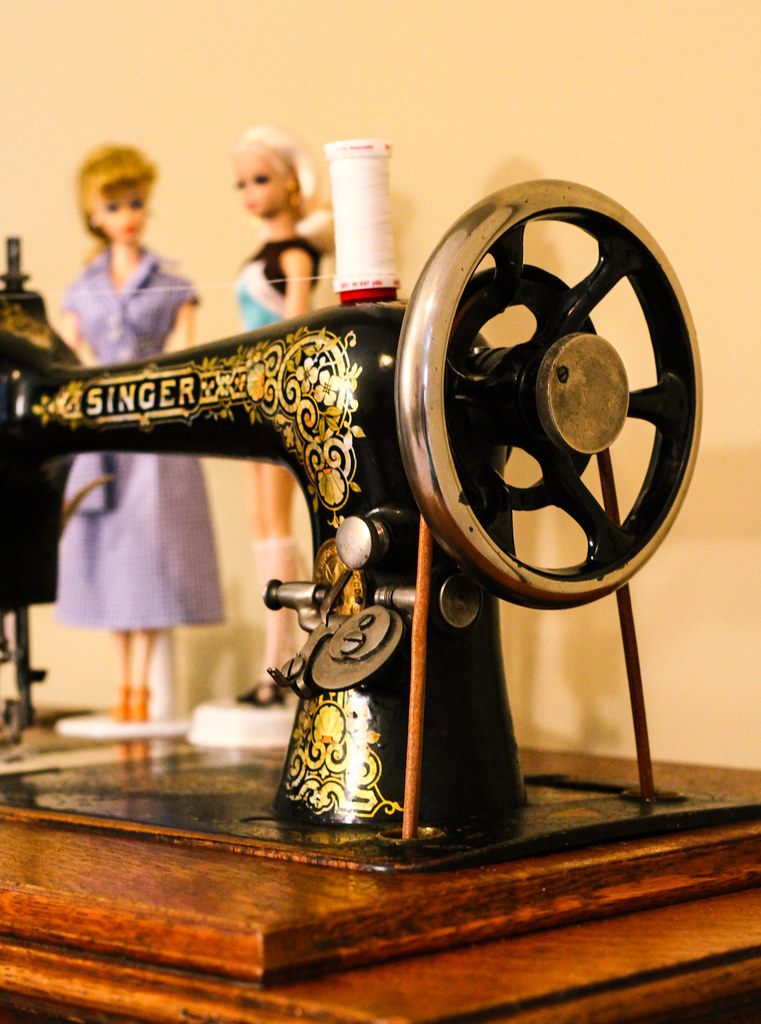
I should mention at this point that a treadle sewing machine has been a dream of mine for some time. And this one *gasp* she's so beautiful! And that cabinet! I have no words. But I know very little about machines this old, and even less about cabinets, and we HAD to go to get the other two kids, so I walked away, me heart breaking a little more with each step. I should mention at this point that Mitch thought we should buy it right off. I should listen to him more...
Obviously, this tale has a happy ending! While waiting for the kids to get out of school, I did a bit of homework and determined that the price the Antique shop was asking was a very reasonable one, and we went back to get her. I didn't breathe on the whole drive there. What if someone else had gotten her?? But there she was, waiting for me. It was meant to be.
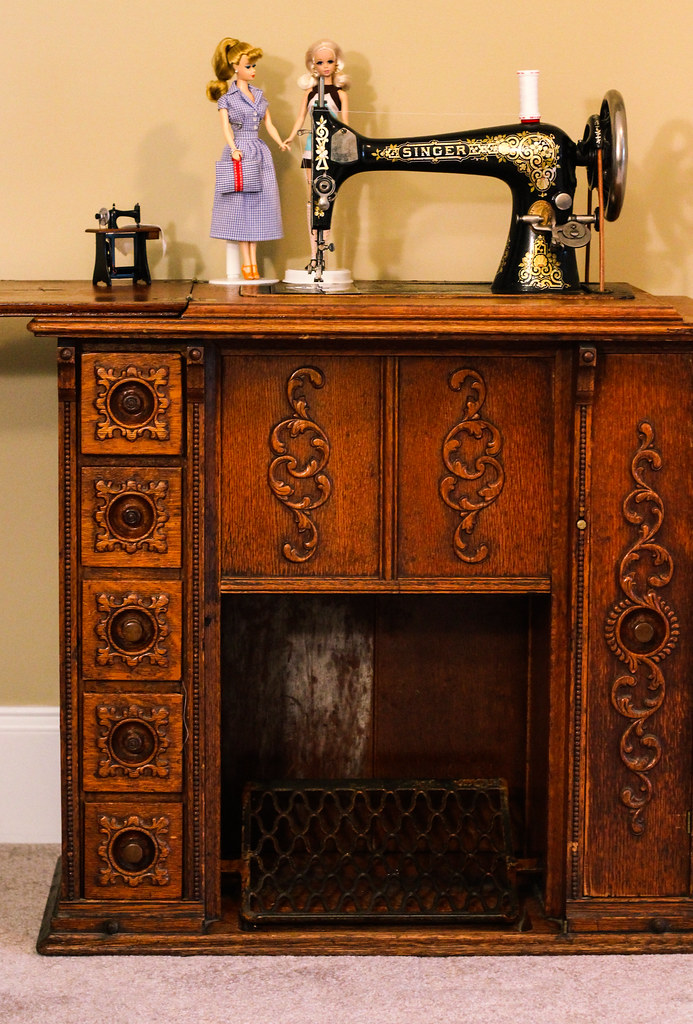
She wasn't in perfect condition. Not surprising, since she's 114 years old. I cleaned and oiled her, then replaced her belt and the rubber ring on her bobbin winder. But even before all that, she moved like a dream. So smooth! My modern machines are jealous.
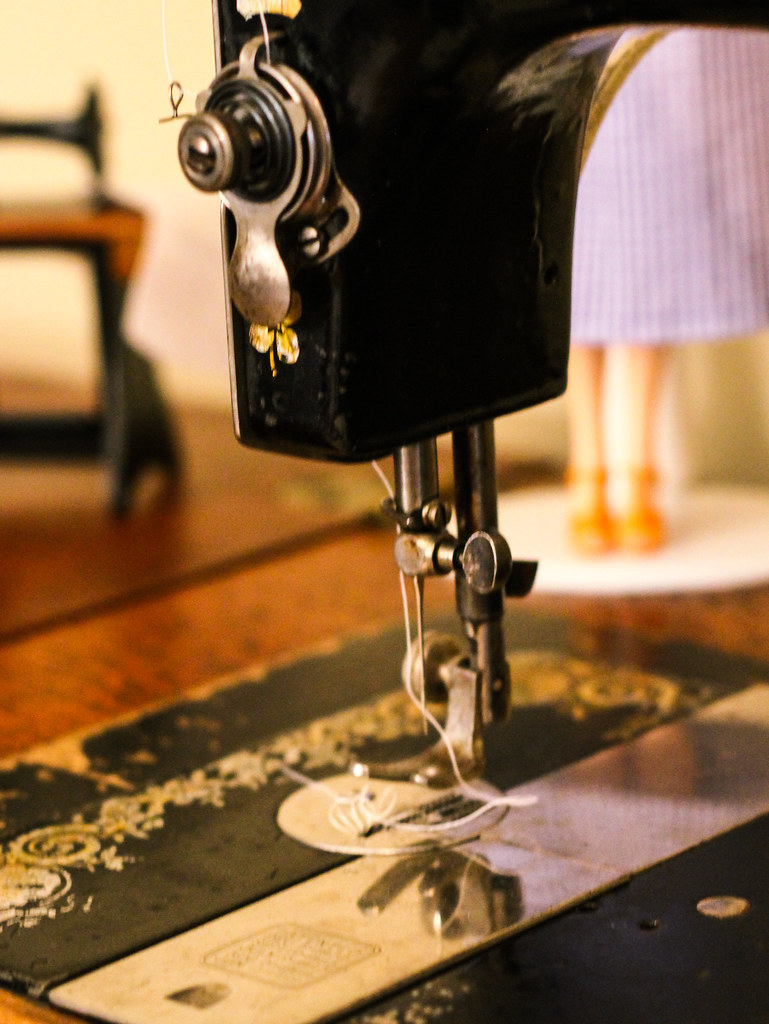
Even though I don't know a lot about machines this old, my clue to her age was the direction of the needle thread. You thread her left to right, instead of front to back. I looked her serial number up in the Singer database and discovered that she is a Model #27, built in 1900. She's in amazing shape for her age!
Her decals and paint are a bit worn, particularly on the machine bed where she'd have seen the most action. It is clear that she was used and cared for well. I wish I knew her history. Imagine the things she has sewn!
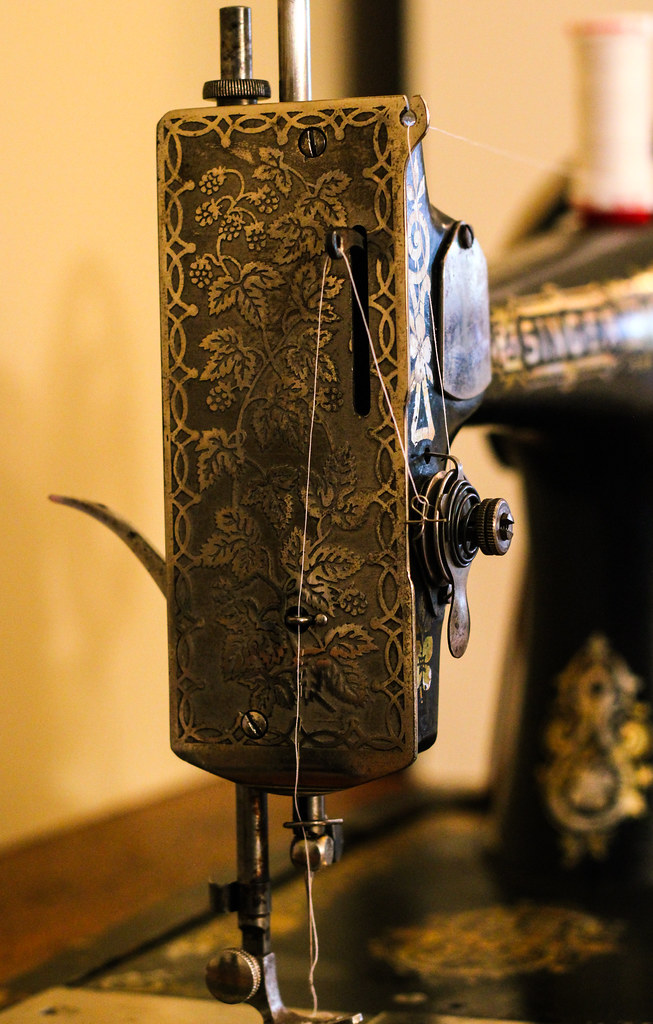
Her face plate is in excellent shape, although it could use a bit of a cleaning. I love the ivy design on it.
The treadle mechanism is in beautiful condition though. Even the paint is still shiny! Replacing the belt was easy peasy.
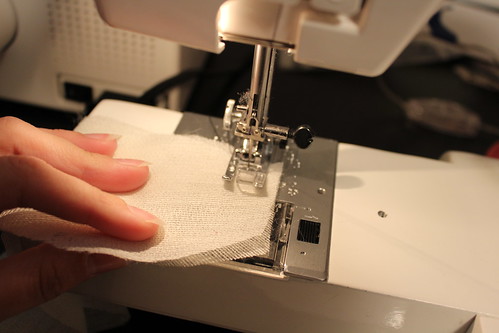
And just look at that perfect stitch. Nora and I are going to have a lot of fun together.
Showing posts with label vintage. Show all posts
Monday, September 29, 2014
Sunday, September 22, 2013
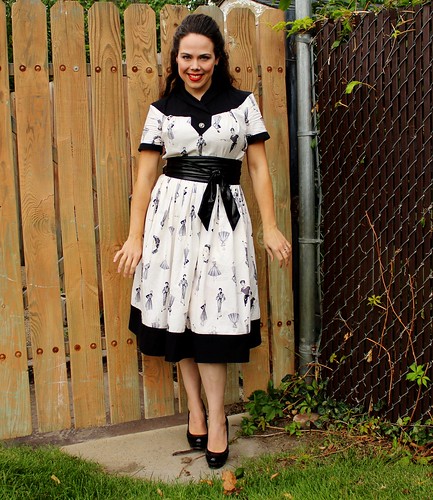
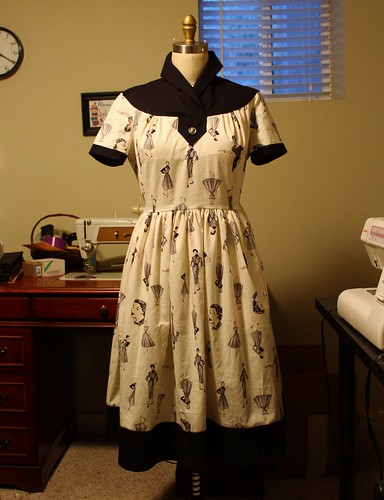
Fall for Cotton: Vintage Butterick 7238 dress
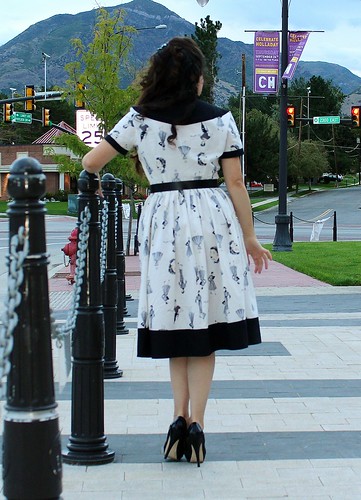
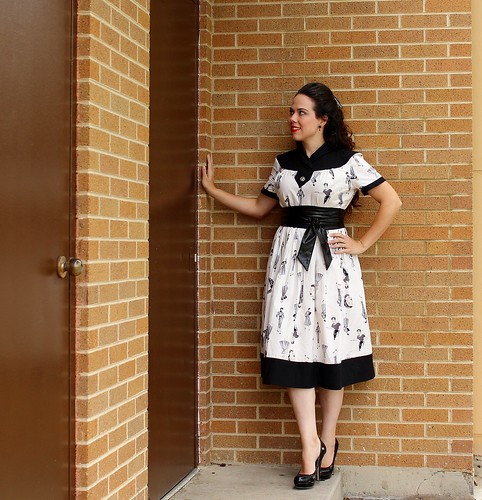
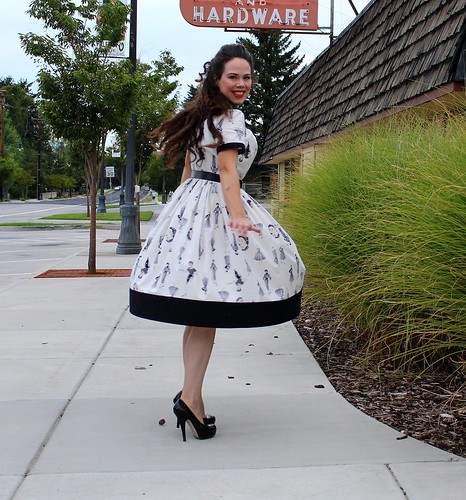
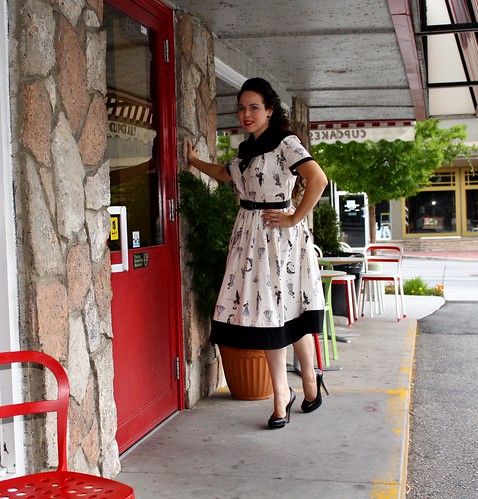
It feels like I've been working on this dress forever, but it was SO WORTH IT!
I'm warning you now, I took a stupid number of pictures of this dress, and I'm going to post them all because I can. Sorry, not sorry.
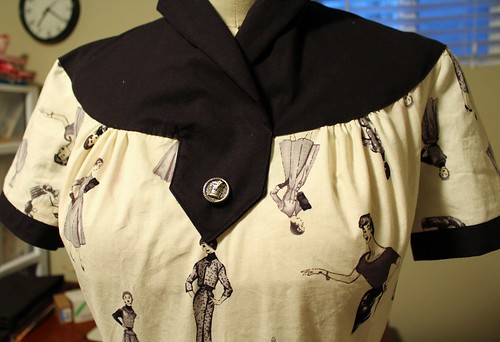
So, this dress began, as many of my makes do, with the fabric. My mother gave me this stinking adorable cotton print with vintage pattern illustrations all over it. Obviously, it had to become a 50s style dress! Then I saw that Lucky Lucille and By Gum, By Golly were hosting Fall for Cotton! It was a sign. I needed this dress!
It will not surprise you to know that I have a rather large number of pattern in my stash from that era, but when I came across Butterick 7238 at Vintage Martini, it was love at first sight. They were obviously made for each other.
The pattern is a fairly typical fit and flare 50s silhouette, but with a few unique details.
The most obvious is the shoulder yoke and collar. The yoke wraps around, shaping the shoulder and upper back area. The collar is cut onto the yoke and seamed at center back. It has a couple of darts, concealed under the collar, for shaping. The entire yoke is assembled, then attached to the dress with a lapped seam. The point of the yoke is actually supposed to be a functional button, but my muslin slipped over my head easily without it, so I just sewed it down.
There is a contrast band at the skirt hem, which is cut on the bias. I added bias cut sleeve bands as well.
In back, the bodice is shaped with darts and the shaping in the yoke. As a girl who has broad shoulders, the yoke is genius! It gives me the movement ease I need without any bunching. Love that!
The dress closes on the side with a zipper. Mine is lapped, and I did a shoddy job. Moving on.
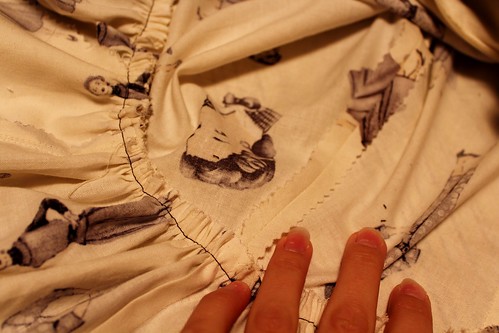
I decided to add a little vintage touch inside and pinked my seams instead of serging them.
For fit, I made a 1/2 inch FBA, then added another 1/2 inch of ease at the side seams. Thanks so much to everyone who weighed in on my muslin post! I do like the additional bust ease. I also shortened the left side of the bodice to accommodate my lower left shoulder, so that fits really well.
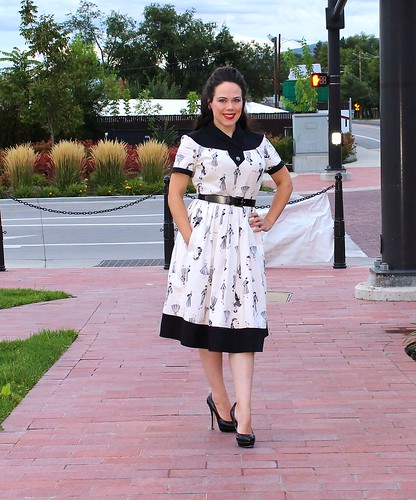
I added pockets and shortened the skirt about 5 inches. It was drafted to be closer to tea length and I wanted it to hit below the knee. The skirt is interesting. It's just a big ole rectangle, but the seams aren't at the side seam, rather they are slightly forward. You can see where I inserted the pocket into the seam. Not only does this make for a perfect pocket placement, it means the skirt has no side seams. Instead, there is a dart on the right, and on the left, a placket is inserted for the zipper. Pretty interesting construction!
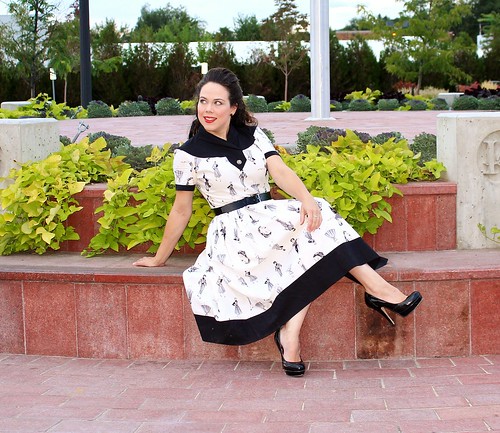
It's also nice and twirly.
When I got started making this dress, I was really unsure if I would wear it much. I mean, it's adorable, but does a twirly 50s dress fit into my modern mom lifestyle?
After wearing it today, I have to give it a resounding YES! It's comfortable and easy to wear, and I don't think it's ridiculously costumey if I'm careful with accessories. I can do all of the mom stuff, even playing on the floor! The full skirt keeps everything covered. I may not step out in gale force winds though. Don't want a Marilyn moment!
Labels:
Butterick 7238,
dress,
misses,
vintage
Saturday, June 15, 2013
Anne Adams 4799: 1940s dress
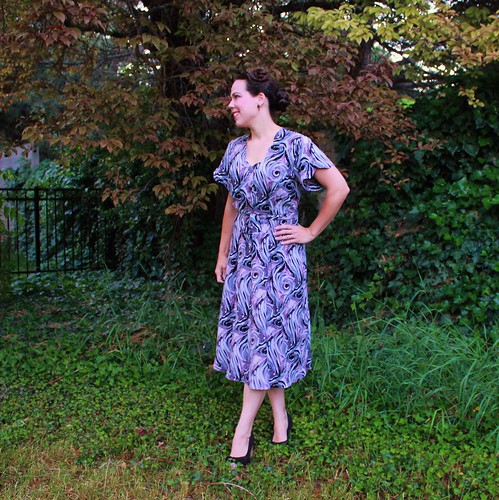
Once upon a time, there was a girl who spent far too much time looking at vintage patterns on Etsy. You see, there was this one, unobtainable pattern and she wanted it! It was perfect. A slim, 40s shirtwaister with a beautiful scalloped neckline and sleeves. From time to time, it would appear, always in the wrong size. Then one day, she heard about a pattern sale at Vintage Martini, and there it was. And only a size too large. Our intrepid heroine pounced.
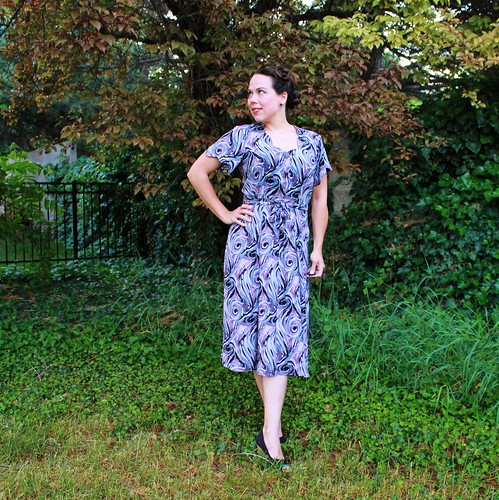
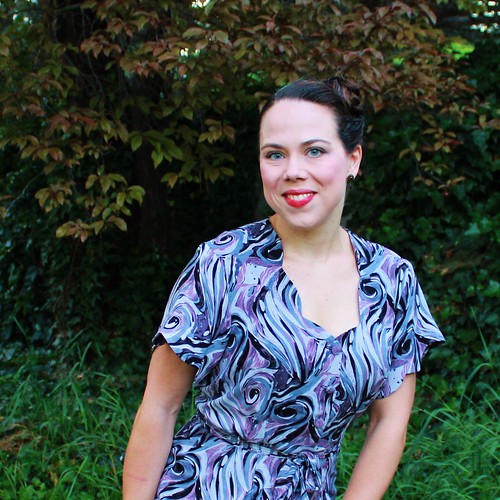
And so it was fate, that brought Anne Adams 4799 back to life. The fabric is a rayon challis (from FabricMart) that felt to me like it had a 40s vibe.
I wish I could tell you precisely her age, but alas her envelope has been lost through the ravages of time and couldn't find another just like her. A tiny pencilled notation "post-45" provides a little clue. Also the clearly 1940s style and the slim, economical skirt.
The pattern is unprinted - the first I've ever made. I'll not be afraid of them again though. It took a little puzzling to decipher the meaning of all the little holes, but it was no more challenging than reading a modern pattern, once you knew what they meant. The pattern provided a very clear key in the printed instructions.
What really drew me to this pattern was the gently scalloped neckline. It's so graceful and pretty. I think we can all use more pretty in our lives. The scalloped sleeves are lovely as well, although the drape of my fabric obscures them a little. You can also (barely) see the buttons I chose in this picture. I had the hardest time choosing buttons for this dress! Thanks so much to the collective wisdom of Instagram, Facebook and Twitter. I finally decided to go with fabric covered buttons like the pattern envelope, but I used bits of the fabric that were heavy on the mauve-y pink component of the print, so as to bring that out a little.
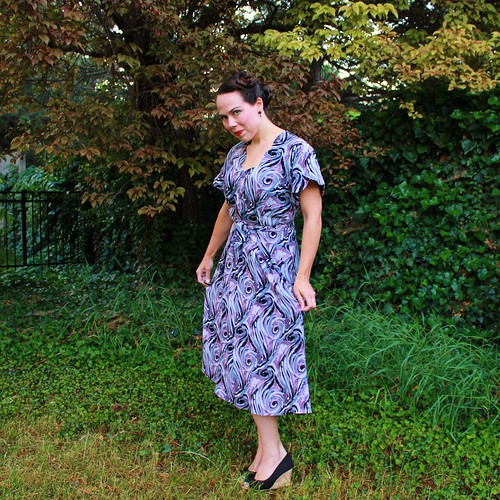
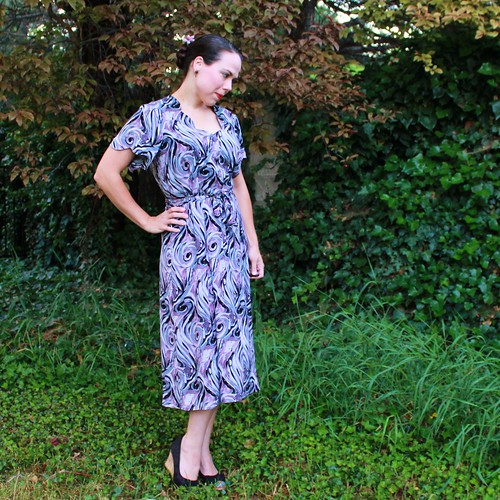
I mentioned the slim, economical skirt, and you can see, it is. If the pencilled note on the pattern envelope is to be believed, this is a post-war pattern, but it was still extremely sparing of fabric. The skirt is beautiful - gored in back and box pleated in front, but it is not at all full. I was frankly amazed at how little fabric this dress took, considering the fullness of the bodice and the length. The pattern pieces fit together quite exactly and there was very little waste.
The pattern is unlined, with facing finishing the neckline and sleeve hem. The dress closes with buttons in front as well as a "slide fastener" or snap placket at the side seam. I elected to insert an invisible zip. I finished the inside seams by serging them, but used the clean-finish facing technique to finish the facing edges.
I really love the length, although I think the pattern is intended to be a tiny bit shorter. When I tried it on to pin my hem, I loved how it looked unhemmed, so I just turned and stitched a narrow hem, but the pattern calls for a fairly generous hem allowance. Or maybe I'm taller than the average woman in the 40s? My only regret is that I got so caught up in stitching this up, that I forgot to add pockets! Hopefully that won't doom this dress to the back of the closet, because other than that, I really love it.
Today's Tip
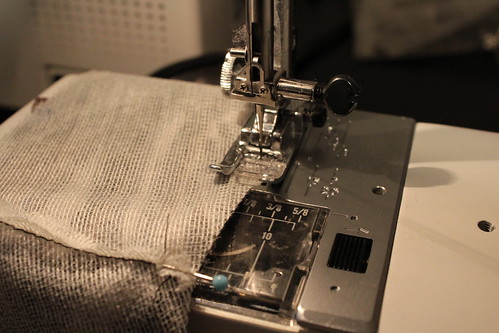
I mentioned the clean finish facing technique and I wanted to show those of you who may not be familiar with it (or haven't tried it yet) how easy and beautiful it is. I've seen this techniques on several other blogs (The Slapdash Sewist and Sunny Gal Studios come immediately to mind.), so I'm not inventing anything new here, but I did want to show you how I do it. I'm going to be applying the interfacing to the sleeve hem facing, which is in the round, just for reference.
First, stitch any seams on your facing itself and press the seams open. Don't finish the seam allowances at all. You want to minimize bulk. In this case, this is the underarm seam, but for a neckline facing, assemble the facing by stitching the shoulder seams.
Now sew the same seams in your interfacing. You'll sew with the non-adhesive (right) sides together. Just seam it like you would fabric. It seems odd, but it works just fine.
Trim the seam on the interfacing only to about 1/8 inch and finger press it open. Don't use the iron! You'll prematurely melt the adhesive and have a big mess.
Now pin your interfacing to the facing, right sides together (that is, the right side of the fabric to the non-adhesive side of the interfacing) and sew with a very small seam allowance (1/8-1/4) along the outer edge of the facing. This is the edge that you will NOT be attaching to the garment edge, that is, the edge that is hidden inside your garment.
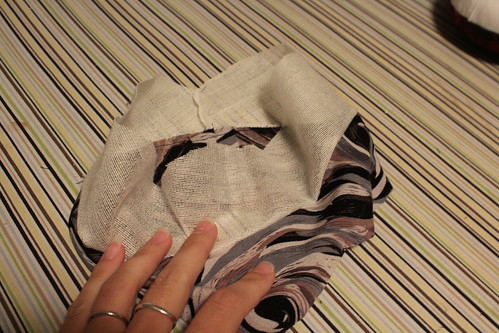
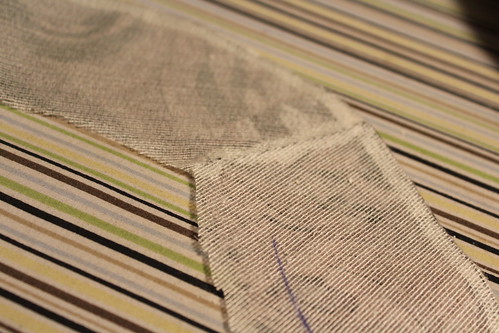
Here is my sleeve facing, immediately after sewing that seam. You can see the right side of the fabric and non-adhesive side of the interfacing are seamed together at the edge of the facing. Now we have to press it and make it pretty. This is the fussy part, since you have to be careful with the iron. Don't want to fuse interfacing to the wrong spot!
The first thing that I do is press just the seamline flat onto the interfacing. With the fabric/interfacing unit right side down on the pressing surface, gently glide just the tip of your iron along the seamline, lightly adhering the interfacing to the seam allowance. This is sort of a fusible understitching and helps your interfacing side roll to the inside and stay invisible.
Now fold your interfacing down onto the wrong side of the fabric right along the seamline. Favor the fabric side slightly so that the seam rolls to the interfacing side and is hidden in the final garment. I always like to press along the seam first all the way around, then fuse the body of the interfacing to the fashion fabric in sections. You may find that your interfacing hangs off the edge a little. Just trim it away when you are finished fusing.
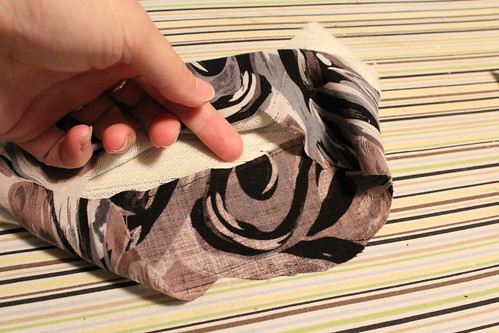
See how nicely the seams are enclosed? That's my favorite thing about this method! Since you seam the fabric and interfacing separately, the seams are sandwiched and fused between them in the final garment.
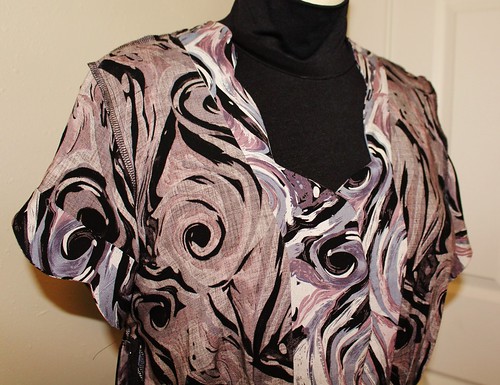
And here is how it looks in the finished garment! Smooth and clean, with no unsightly lumps from a turned under hem or a serged edge.
And so it was fate, that brought Anne Adams 4799 back to life. The fabric is a rayon challis (from FabricMart) that felt to me like it had a 40s vibe.
The pattern is unprinted - the first I've ever made. I'll not be afraid of them again though. It took a little puzzling to decipher the meaning of all the little holes, but it was no more challenging than reading a modern pattern, once you knew what they meant. The pattern provided a very clear key in the printed instructions.
What really drew me to this pattern was the gently scalloped neckline. It's so graceful and pretty. I think we can all use more pretty in our lives. The scalloped sleeves are lovely as well, although the drape of my fabric obscures them a little. You can also (barely) see the buttons I chose in this picture. I had the hardest time choosing buttons for this dress! Thanks so much to the collective wisdom of Instagram, Facebook and Twitter. I finally decided to go with fabric covered buttons like the pattern envelope, but I used bits of the fabric that were heavy on the mauve-y pink component of the print, so as to bring that out a little.
I mentioned the slim, economical skirt, and you can see, it is. If the pencilled note on the pattern envelope is to be believed, this is a post-war pattern, but it was still extremely sparing of fabric. The skirt is beautiful - gored in back and box pleated in front, but it is not at all full. I was frankly amazed at how little fabric this dress took, considering the fullness of the bodice and the length. The pattern pieces fit together quite exactly and there was very little waste.
The pattern is unlined, with facing finishing the neckline and sleeve hem. The dress closes with buttons in front as well as a "slide fastener" or snap placket at the side seam. I elected to insert an invisible zip. I finished the inside seams by serging them, but used the clean-finish facing technique to finish the facing edges.
I really love the length, although I think the pattern is intended to be a tiny bit shorter. When I tried it on to pin my hem, I loved how it looked unhemmed, so I just turned and stitched a narrow hem, but the pattern calls for a fairly generous hem allowance. Or maybe I'm taller than the average woman in the 40s? My only regret is that I got so caught up in stitching this up, that I forgot to add pockets! Hopefully that won't doom this dress to the back of the closet, because other than that, I really love it.
Today's Tip
I mentioned the clean finish facing technique and I wanted to show those of you who may not be familiar with it (or haven't tried it yet) how easy and beautiful it is. I've seen this techniques on several other blogs (The Slapdash Sewist and Sunny Gal Studios come immediately to mind.), so I'm not inventing anything new here, but I did want to show you how I do it. I'm going to be applying the interfacing to the sleeve hem facing, which is in the round, just for reference.
First, stitch any seams on your facing itself and press the seams open. Don't finish the seam allowances at all. You want to minimize bulk. In this case, this is the underarm seam, but for a neckline facing, assemble the facing by stitching the shoulder seams.
Now sew the same seams in your interfacing. You'll sew with the non-adhesive (right) sides together. Just seam it like you would fabric. It seems odd, but it works just fine.
Trim the seam on the interfacing only to about 1/8 inch and finger press it open. Don't use the iron! You'll prematurely melt the adhesive and have a big mess.
Now pin your interfacing to the facing, right sides together (that is, the right side of the fabric to the non-adhesive side of the interfacing) and sew with a very small seam allowance (1/8-1/4) along the outer edge of the facing. This is the edge that you will NOT be attaching to the garment edge, that is, the edge that is hidden inside your garment.
Here is my sleeve facing, immediately after sewing that seam. You can see the right side of the fabric and non-adhesive side of the interfacing are seamed together at the edge of the facing. Now we have to press it and make it pretty. This is the fussy part, since you have to be careful with the iron. Don't want to fuse interfacing to the wrong spot!
The first thing that I do is press just the seamline flat onto the interfacing. With the fabric/interfacing unit right side down on the pressing surface, gently glide just the tip of your iron along the seamline, lightly adhering the interfacing to the seam allowance. This is sort of a fusible understitching and helps your interfacing side roll to the inside and stay invisible.
Now fold your interfacing down onto the wrong side of the fabric right along the seamline. Favor the fabric side slightly so that the seam rolls to the interfacing side and is hidden in the final garment. I always like to press along the seam first all the way around, then fuse the body of the interfacing to the fashion fabric in sections. You may find that your interfacing hangs off the edge a little. Just trim it away when you are finished fusing.
See how nicely the seams are enclosed? That's my favorite thing about this method! Since you seam the fabric and interfacing separately, the seams are sandwiched and fused between them in the final garment.
And here is how it looks in the finished garment! Smooth and clean, with no unsightly lumps from a turned under hem or a serged edge.
Labels:
Anne Adams 4799,
dress,
misses,
vintage
Sunday, April 28, 2013
McCalls 6563: 1979 wrap skirt
After all the skater dresses it was time for some selfish sewing, and I wanted to wander back through the challis chalet once more.
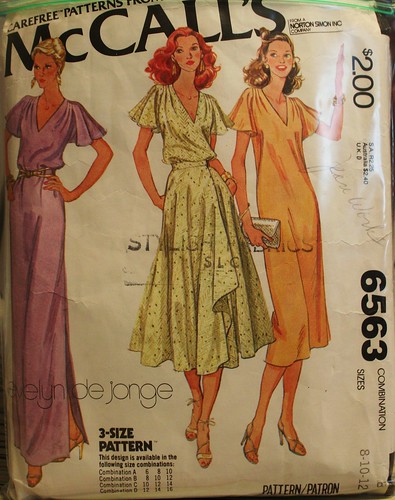
I know that there are some challis dresses in my future, but I've really wanted to make this skirt. The pattern is from 1979 and was a gift from a friend.
I just love how effortless and breezy these ladies look! And despite the fact that the top is a total box, I might give it a go. I love those shoulder pleats. But the skirt - I love everything about it. The midi length is my favorite for ease of wear and I love a wrap style. It even has pockets!! Really perfect.
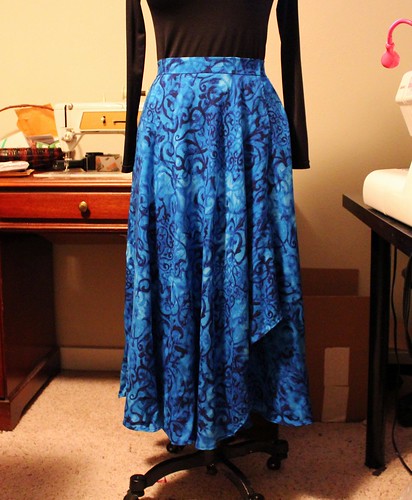
My favorite feature is the little flounce effect in front. The front wrap is shaped at the front edge, so that it drops gently in folds from the waistband. The effect is subtle, but very graceful. It's perfect for a softly draping fabric like challis.
And I had the perfect fabric picked out! Pressed it and got ready to cut, but it just kept telling me that it wanted to be a dress. I sat and stared at it, totally stymied. It was clearly a dress, but I really wanted to sew a challis skirt. I took my dilemma to twitter, and we settled on this blue swirl print.
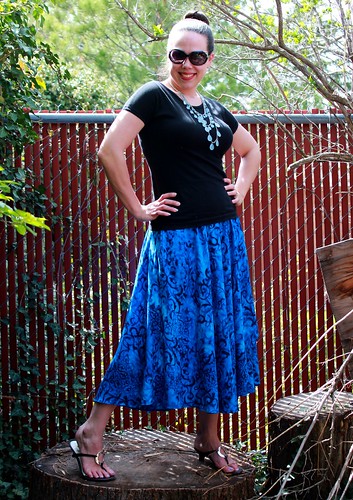
And I am so glad! I really love it. Pictures don't do justice to the intensity and gradations of color. It's so intense in fact, that it is really hard to style. I was afraid I had created an orphan, until I tried it with black. All of the blue tops in my wardrobe just look pale and washed out next to it. Black holds her own.
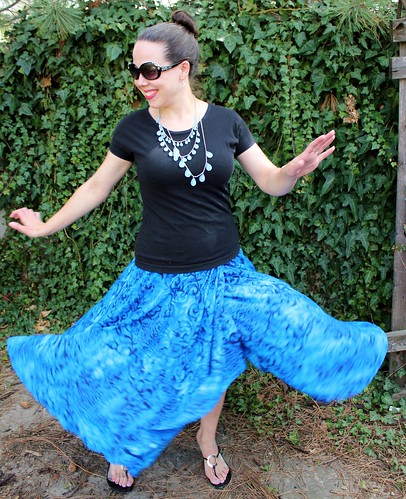
But the final test? Awesome twirl factor!
Today's tip
As I was working on this skirt, I came across a few bias seams and hems, and initially I thought I'd discuss working on the bias (and I will, as I love bias cut garments!), but today I was impressed with how important pressing and steam are to the finished quality of the garments we produce.
I know that most of us are already in the habit of pressing seams as we go, but it one of those things that is easy to overlook, but which is truly essential to a professional outcome for our work. But if you don't believe me, I refer you to the lovely and talented Ann of Gorgeous Fabrics. Her treatise on pressing, "And Now, a Word from the Pressinatrix" is a lovely summary of the importance of pressing at each phase of your work. Please read it, if you haven't already.
I know that there are some challis dresses in my future, but I've really wanted to make this skirt. The pattern is from 1979 and was a gift from a friend.
I just love how effortless and breezy these ladies look! And despite the fact that the top is a total box, I might give it a go. I love those shoulder pleats. But the skirt - I love everything about it. The midi length is my favorite for ease of wear and I love a wrap style. It even has pockets!! Really perfect.
My favorite feature is the little flounce effect in front. The front wrap is shaped at the front edge, so that it drops gently in folds from the waistband. The effect is subtle, but very graceful. It's perfect for a softly draping fabric like challis.
And I had the perfect fabric picked out! Pressed it and got ready to cut, but it just kept telling me that it wanted to be a dress. I sat and stared at it, totally stymied. It was clearly a dress, but I really wanted to sew a challis skirt. I took my dilemma to twitter, and we settled on this blue swirl print.
And I am so glad! I really love it. Pictures don't do justice to the intensity and gradations of color. It's so intense in fact, that it is really hard to style. I was afraid I had created an orphan, until I tried it with black. All of the blue tops in my wardrobe just look pale and washed out next to it. Black holds her own.
But the final test? Awesome twirl factor!
Today's tip
As I was working on this skirt, I came across a few bias seams and hems, and initially I thought I'd discuss working on the bias (and I will, as I love bias cut garments!), but today I was impressed with how important pressing and steam are to the finished quality of the garments we produce.
| By Monster4711 (Own work) [GFDL (http://www.gnu.org/copyleft/fdl.html) or CC-BY-SA-3.0-2.5-2.0-1.0 (http://creativecommons.org/licenses/by-sa/3.0)], via Wikimedia Commons |
Labels:
McCalls 6563,
misses,
skirt,
vintage
Monday, January 7, 2013
Simplicity 6276
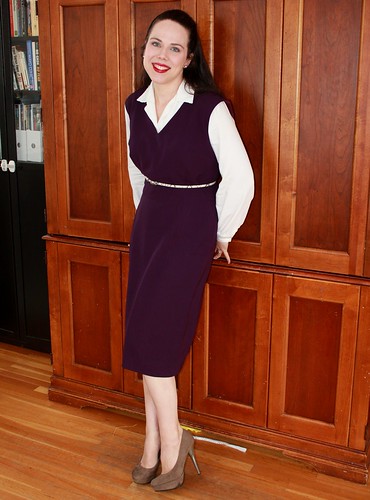
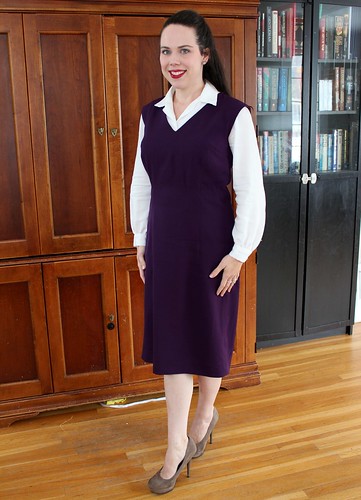
This dress has been a long time coming! I made my first muslin early in December, but I kept getting distracted by shiny things. I told myself I was not allowed to do any Jungle January garments until I finished this, so here it is...
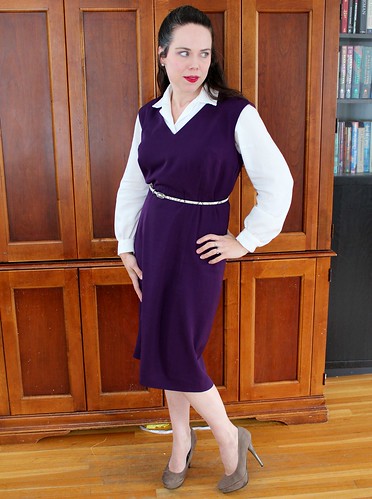
The pattern is Simplicity 6276, printed in 1965. The fabric is a lovely rayon/wool blend garbardine from FabricMart. I'm so glad I bought this in several colors. It was a dream to sew and wore beautifully.
My BSF, Carrie sent the pattern to me, along with a whole bunch of other fabulous finds. She's the best! The pattern is wonderful, and includes the jumper/dress, which I made, as well as four variations of a basic darted blouse. Since the jumper was the simplest sew, I decided to make it first, but I LOVE those blouses. There's something that I find irresistible about a vintage blouse pattern.
So, fit - the bane of every sewist, right? This pattern is a size larger than I generally sew, as well as being a relatively unfitted style, typical for the 60s. I knew I would need to make a lot of adjustments to be happy with it, so naturally I started with a muslin, but really I should have graded down a size first. You can see that the shoulders are a little wide in front and there is a bit of extra room in the bust area (!!!).
In back, there is a little extra room in the lower back, and again, the armhole has a dropped shoulder. The upper back fits well, thanks to the shoulder darts. I did have to make a square shoulder adjustment to this dress, which isn't typical for me. As drafted, the shoulders sloped pretty considerably.
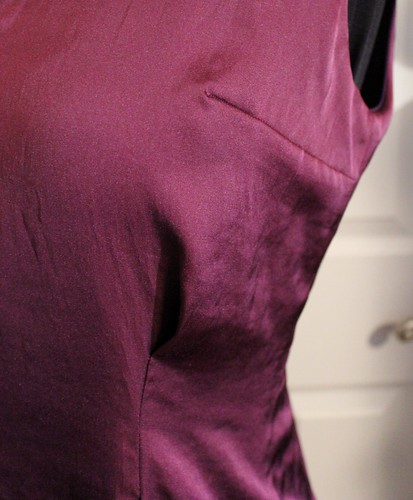
In my first muslin, the fit was quite shapeless through the waist, so I added vertical darts both front and back.
I draped them in on my first muslin, then refined them on the pattern tissue. It wasn't at all difficult to do, but it makes a great deal of difference to the fit.
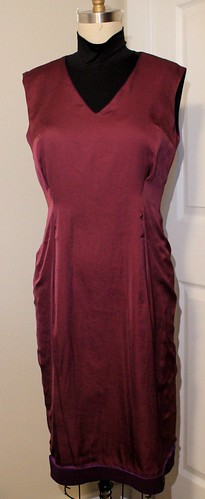
The pattern calls for facings to finish the neck and armholes, but I like a lined dress, particularly in the winter. I used Trena's tutorial for an all machine clean finish lining insertion. I love that tutorial. It works beautifully every time.
For the darts in the lining, I sewed release tucks in the vertical darts to leave some ease in the lining, as the charmeuse lining (also from FabricMart) had no give, while the gabardine did have a bit of stretch. I did fully sew the horizontal bust dart, as I wanted a smoother finish over the bust. Horizontal tucks tend to bunch a little, which isn't attractive at the bustline.
Despite the vertical darts, this is still a pretty unfitted jumper, so I belted it at my natural waist. Yes, my waist really is all the way up there. I wore it with my Ottobre Woman blouse, which I think fits with the style of the jumper. I think it will also look nice with a turtleneck, so I suspect it will get a good amount of wear, despite the fit imperfections.
The pattern is Simplicity 6276, printed in 1965. The fabric is a lovely rayon/wool blend garbardine from FabricMart. I'm so glad I bought this in several colors. It was a dream to sew and wore beautifully.
My BSF, Carrie sent the pattern to me, along with a whole bunch of other fabulous finds. She's the best! The pattern is wonderful, and includes the jumper/dress, which I made, as well as four variations of a basic darted blouse. Since the jumper was the simplest sew, I decided to make it first, but I LOVE those blouses. There's something that I find irresistible about a vintage blouse pattern.
So, fit - the bane of every sewist, right? This pattern is a size larger than I generally sew, as well as being a relatively unfitted style, typical for the 60s. I knew I would need to make a lot of adjustments to be happy with it, so naturally I started with a muslin, but really I should have graded down a size first. You can see that the shoulders are a little wide in front and there is a bit of extra room in the bust area (!!!).
In back, there is a little extra room in the lower back, and again, the armhole has a dropped shoulder. The upper back fits well, thanks to the shoulder darts. I did have to make a square shoulder adjustment to this dress, which isn't typical for me. As drafted, the shoulders sloped pretty considerably.
In my first muslin, the fit was quite shapeless through the waist, so I added vertical darts both front and back.
I draped them in on my first muslin, then refined them on the pattern tissue. It wasn't at all difficult to do, but it makes a great deal of difference to the fit.
The pattern calls for facings to finish the neck and armholes, but I like a lined dress, particularly in the winter. I used Trena's tutorial for an all machine clean finish lining insertion. I love that tutorial. It works beautifully every time.
For the darts in the lining, I sewed release tucks in the vertical darts to leave some ease in the lining, as the charmeuse lining (also from FabricMart) had no give, while the gabardine did have a bit of stretch. I did fully sew the horizontal bust dart, as I wanted a smoother finish over the bust. Horizontal tucks tend to bunch a little, which isn't attractive at the bustline.
Despite the vertical darts, this is still a pretty unfitted jumper, so I belted it at my natural waist. Yes, my waist really is all the way up there. I wore it with my Ottobre Woman blouse, which I think fits with the style of the jumper. I think it will also look nice with a turtleneck, so I suspect it will get a good amount of wear, despite the fit imperfections.
Labels:
dress,
misses,
Simplicity 6276,
vintage
Subscribe to:
Posts (Atom)


.jpg)