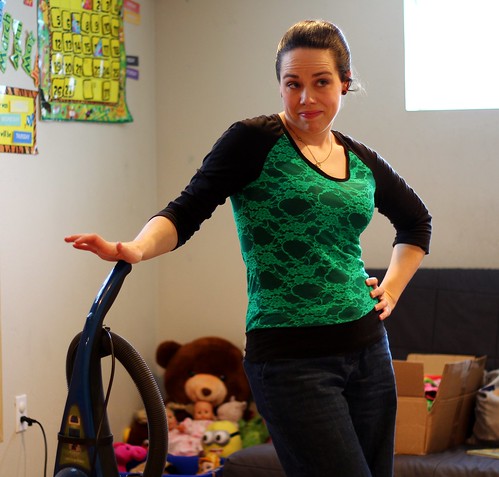
I feel like there a certain "big" sewing projects that are sort of sewing milestones. For me, successfully fitting and making pants for Mitch is one of those big milestone projects.
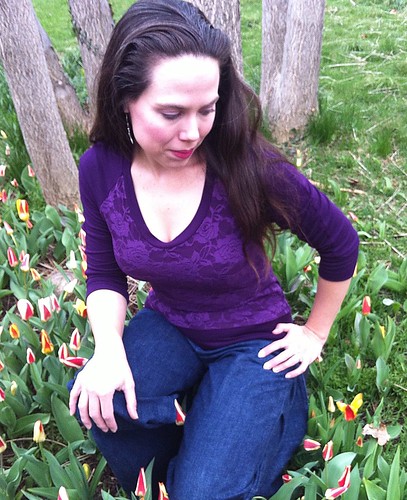
AND I DID IT!! Ahem. Sorry for the screaming, but I am so excited to have finished this project well. They are not perfect, but Mitch likes them and I intended them to be a wearable muslin of sorts anyway, so I wasn't going for perfect.
I already talked about the fitting journey we went on in
this post, so I'm not going to go there. I do want to tell you about this pattern though. It is from the 10/2005 issue of Burda magazine, so naturally it has some really interesting details. I chose it because it features a faced waist rather than a waistband. Mitch's favorite RTW pants have this feature, so I thought we'd start with something that we knew worked.
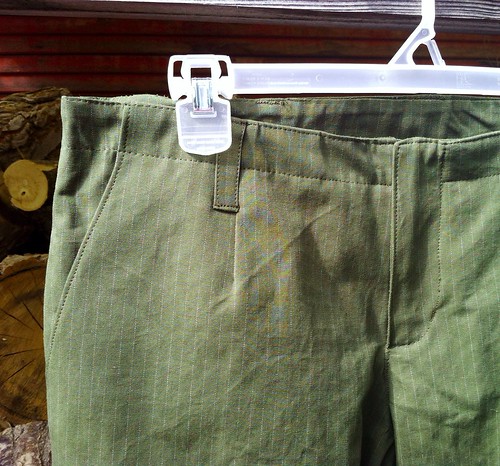
Here is the waistline up close. I did topstitch it to give a sort of waistband appearance, but you can see that the topstitching stops at the fly. Oh my goodness, that fly construction was wacky, and Burda was no help at all.
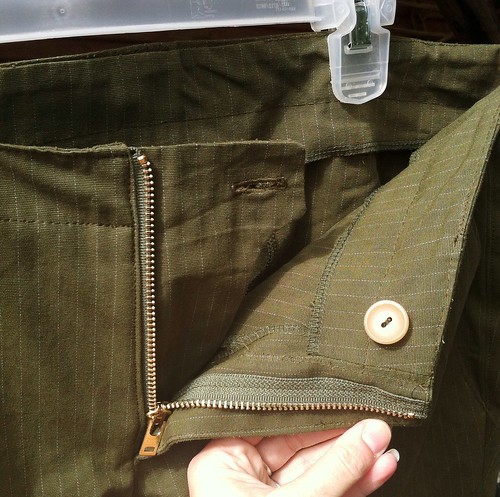
Here is how the fly looks on the inside. I truly have no idea how it all came together. The facing had to be attached to the fly and the waistline, but without covering the zip. I ended up just ripping and rearranging until it worked. Hopefully I can replicate it on the next pair... Anyway, after all the pain, I really like how clean this looks. The shaped underlap looks seriously professional and the finish is so neat. But yeah, man pants are hard.
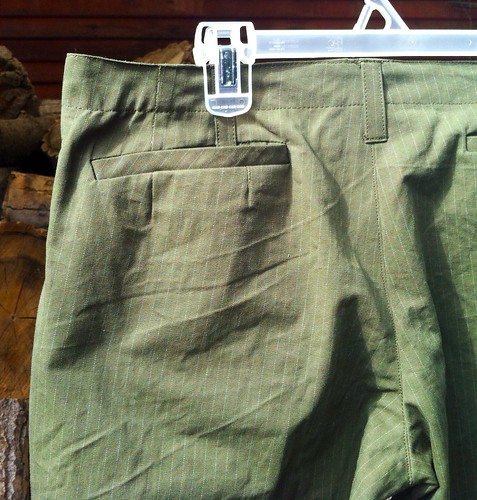
I wish I could have done the fly first, because after all that, these back welt pockets were laughably easy. I cut the welts on the bias
to avoid having to match the pinstripes because it looked snazzy. I always get nervous slashing through darts and these pants have two per pocket, but all was well.
You can see here how much fabric can affect fit. These pants are made from a heavy cotton canvas from FabricMart, and my muslins were all light cotton sheets. In the final product, we could use just a touch more room back there, and I think that all has to do with how relatively heavy and rigid this fabric is. Even without stretch, fabric makes a difference.
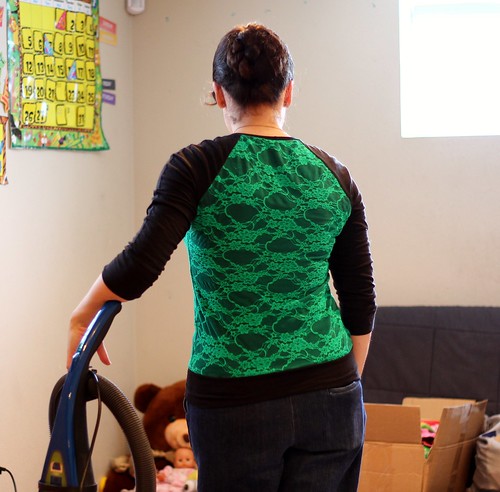
So while they have some imperfections that I'll tweak for the next pair, they are significantly better than the best RTW has to offer, and we are both very pleased with them. Yay for man pants!!
Todays tip:
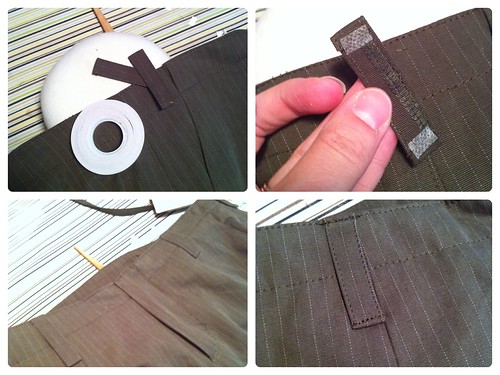
While sewing this stiff, heavy canvas it was really hard to pin anything, but particularly when attaching the belt loops, the pins wouldn't even penetrate all those layers (and I used heavy steel corsage pins!).
Enter one of my favorite notions,
Wonder Tape! Instead of pinning, I use Wonder Tape to stick on anything I need to sew down that I don't want slipping around. It's double sided, so you cut it to the length you need, stick on the sticky side and peel the backing away to reveal the second sticky side. You can see that in the top right pic. Then position your fabric, and sew! It is perfect for belt loops, pockets, zippers - pretty much anything you want to stay put as you sew it. I've even used it for small appliques. It won't gum up your machine and it washes away, so it doesn't permanently affect the drape or appearance of your fabric. If it doesn't stick well, a quick shot of steam from your iron will fuse it more securely.


.jpg)


.jpg)