I've had
Vogue 1378 in my stash pretty much since it came out. The top is cool, but these pants are amazing. For some reason I just didn't get around to sewing them.
And then Sara of
The Pretty Pickle DID sew them! And I had to have them. Immediately.
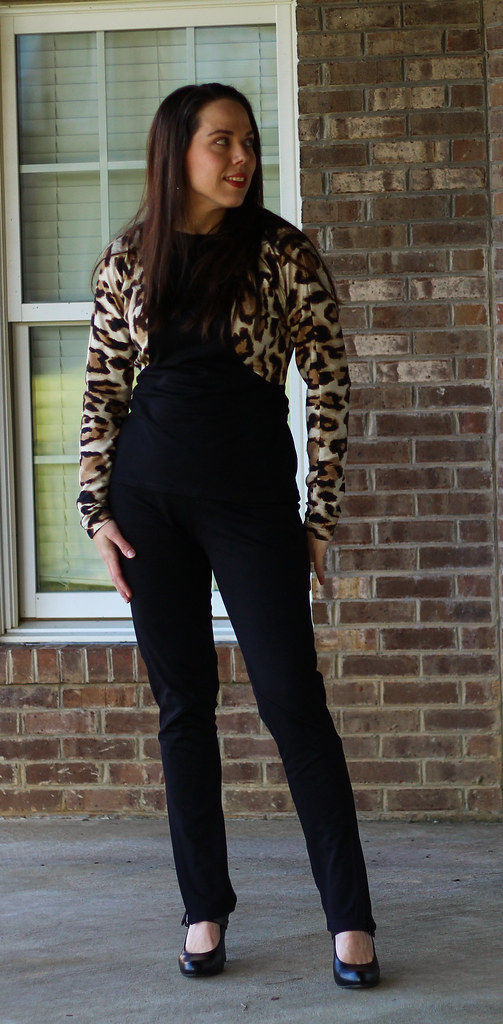
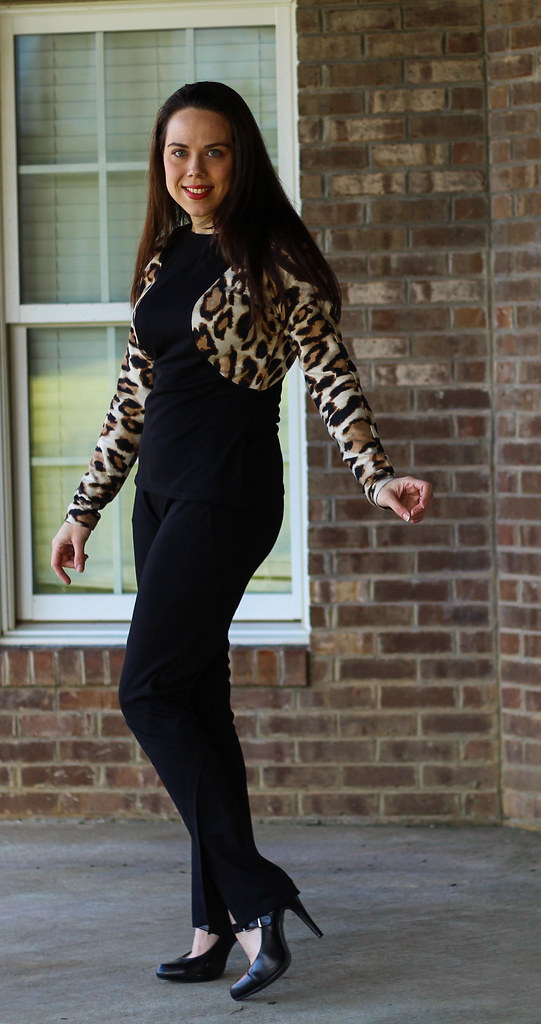
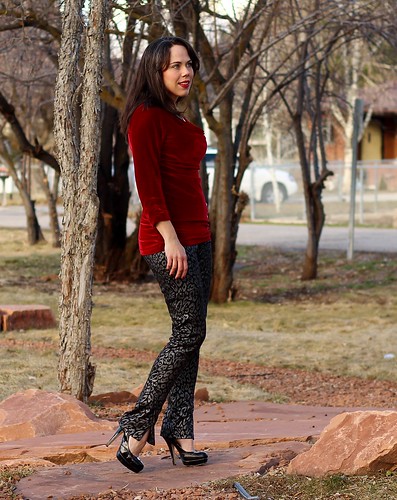
Of course, I used a printed black knit, so all the seam detail is lost. This fabric is awesome though, amirite? It's metallic printed
ponte from FabricMart.
Here's Vogue's line drawing. How freaking awesome are those pants?!! Donna Karan is brilliant.
I did make a few minor changes to the pattern. My typical changes for Vogue pants are to add an extra inch to the front and back rise and scoop out the rear crotch a bit. For these, I decided to use an exposed elastic finish that requires only about 1/4 inch of seam allowance, and the pant has a 1 inch allowance for the elastic casing, so Vogue pretty much did my alteration for me! Thanks! I do find that these are a bit lower in the back rise than I prefer. I'll raise them about 1/2 inch at CB next time.
Sometimes I have to add length, but Sara noted that they were drafted quite long, and my scientific method of holding the pattern pieces up to myself convinced me that the leg length was good. And it is.
The other rather major change I made was to cut my waistband elastic with negative ease (1 inch less than my actual waist measurement). Vogue wants you to add 3 inches to your waist measurement for your waistband elastic, but I'm pretty sure that's a recipe for failure. I like my pants to stay up, thankyouverymuch.
My favorite feature is the adorable front slit. It makes my legs look even longer, and my heels look even higher. Loves. So, what's keeping you from sewing this?? Worried about all those lapped seams, eh. Well, I took a few pics while I was putting these together, so hopefully that will help.
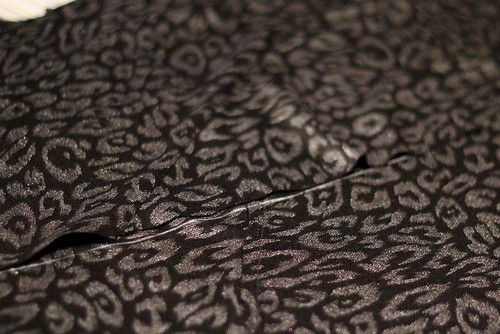
Today's Tip: Exposed edge construction lapped seams. This method is what I use when the fabric's raw edge will be exposed on the right side of the garment.
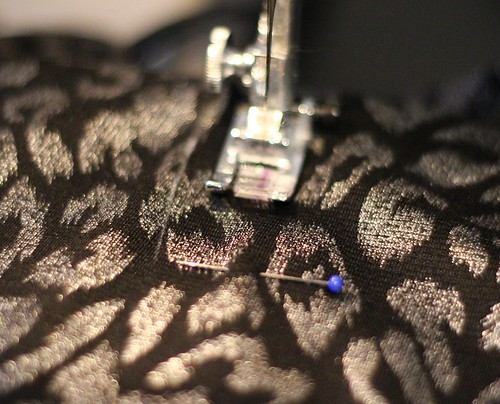
Start with the piece that will be on the bottom of the lapped seam. I used the pattern line drawing to keep track of what goes where. There are a lot of pieces to this pattern and many of them have a similar shape, so be sure to mark them well. On the bottom piece, I mark a placement line 2 seam allowances (in this case 5/8+5/8=1 1/4) from the cut edge.
Now lay the overlay pattern piece with the cut edge aligned with the marking you made. Pin it together with your pins perpendicular to the cut edges. Pin frequently so that the edges don't shift. Hand baste if it makes you more comfortable.
Stitch along the 5/8 seam line. It may help you to mark the stitching line 5/8 inch away from the cut edge on the upper layer. For this ponte knit, I used a triple stitch for this line of stitching.
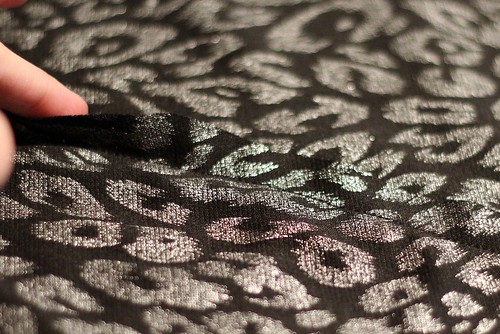
Here is how it looks once it has been stitched. There is a raw edge on the right side as well as one the wrong side (not pictured). If you want to add some decorative topstitching, this would be the time. I used my coverstitch machine to add another 2 rows of stitching, one line of stitching on either side of the first one.
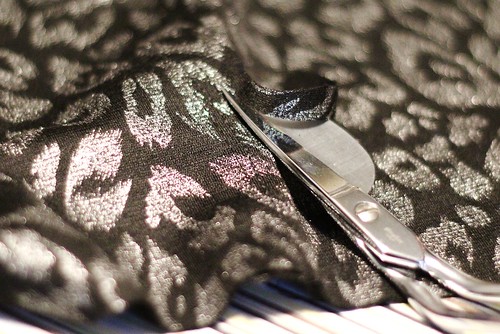
Once you are done with all the stitching, trim away any excess seam allowance close to the stitching. I like applique scissors for this step, as they protect the fabric underneath from an accidental cut. You can also trim away the excess seam allowance from the wrong side of the garment, if you choose.
When you finish, you should have a trendy, raw-edged seam!