Showing posts with label HTV. Show all posts

Monday, September 4, 2017

Ottobre 03/2014-16 sparkle tee!

My sassy girl recently outgrew her entire tee shirt drawer (conveniently timed for Top Month!), and there was much weeping and wailing as I "made" her get rid of many of her favorites. I told her to choose a few for me to recreate for her. One of those was a RTW Old Navy top that I had added HTV to. It was a beige shirt printed with gold stars all over it, and I really wasn't sure I would be able to recreate it. Where was I going to find the fabric?!
FabricMart came to my rescue with this grey/silver version that Myra just loves. Whew! I was afraid I was going to have to cut a zillion tiny foil stars. That would have been not so fun...
The original shirt had long sleeves and a gathered neckline. Myra requested short, puffed sleeves, since we live in the South and it's hot here. We found a perfect pattern in the 03/2014 issue of Ottobre. The original was designed for striped knits and to be cut on the bias for a diagonal stripe, but I didn't need that, so we cut it on the grain instead. Otherwise I didn't change the pattern at all. It's a really nice basic tee.
The neckline is a nice high scoop, gathered with clear elastic and bound with self fabric. Those stars gave my coverstitch binder a wee bit of trouble, but they sure look nice. The sleeves are puffed just at the cap and hemmed.
The top came in two lengths and I sewed the longer one, in the hopes that Myra will be able to wear it for more than 5 minutes. She's growing so fast these days!
At Myra's request, I replicated the decal on the original top, this time with silver glitter instead of gold. We do love to sparkle around here! I was so happy I was able to replicate a favorite top, and even to improve on it!

*************Tip for tops********************
Since it is Top Month for the stashbusters, I though I'd share a little tip for hemming in a tight spot, such as sleeves on a child's top like this one.
When I know I'm going to have limited space for pressing my hem (or and binding/bands - pretty much anything that is getting sewn in the round), I press the allowance up before sewing the piece into the garment. If it is a particularly small piece, like doll clothing, you can stitch the hem at this point as well, but I don't do that for human clothing, since it leaves a bump under the arm. Pressing the hem is at least 4000X easier on a flat piece than it is once the sleeve seam is sewn and you have a tube to deal with. Once the hem is pressed, it is much easier to fold up and stitch. As I mentioned, this also applies to binding and bands - press them in half before you sew them into a loop. It will be much quicker and easier! I hope that helps with your knit top sewing!

Saturday, April 1, 2017

Jalie 3670, the Loulouxe skort (and a bonus raglan tee)

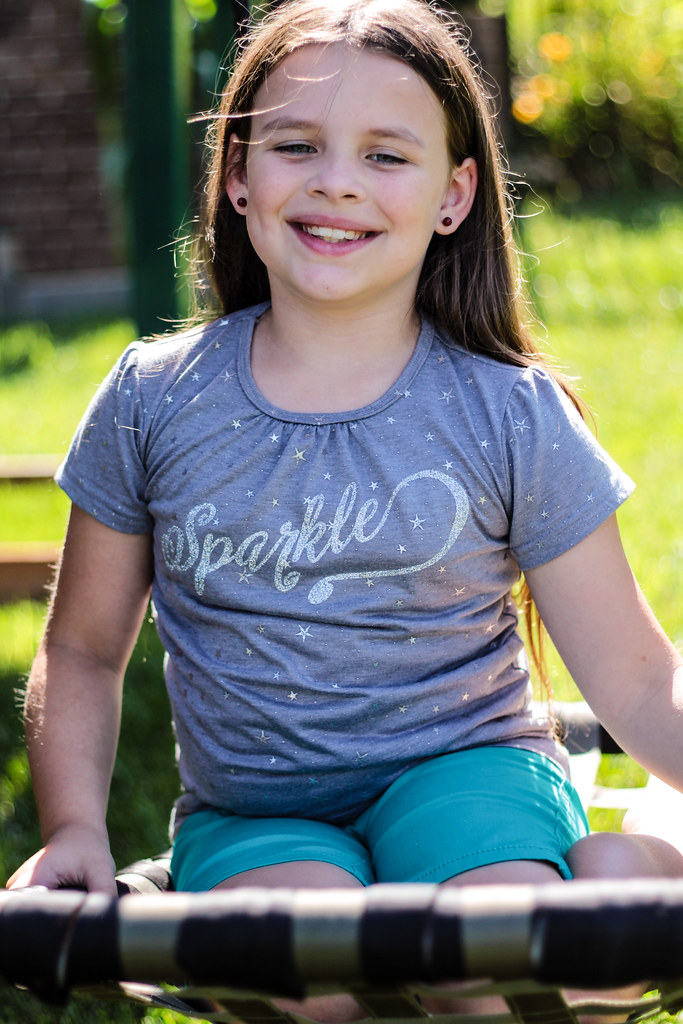
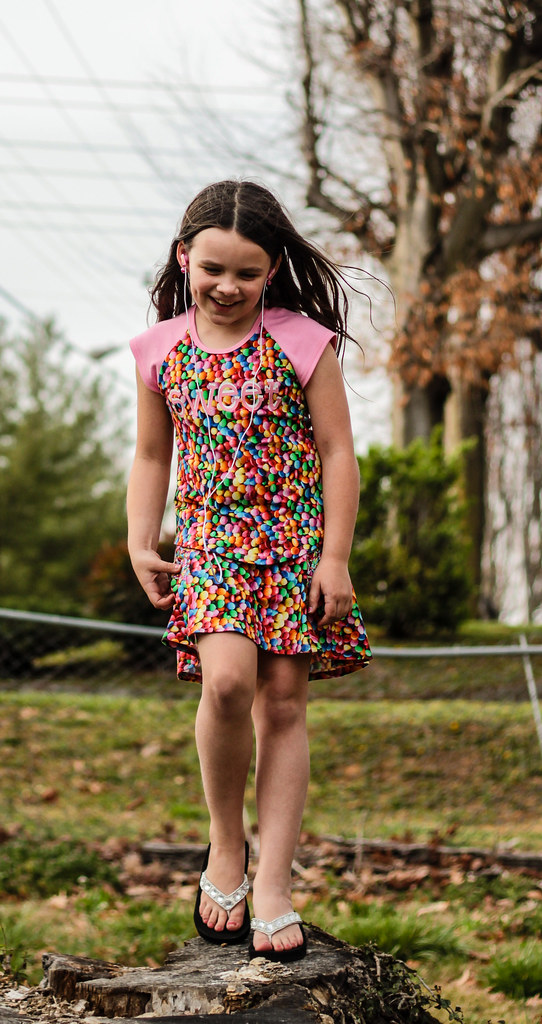
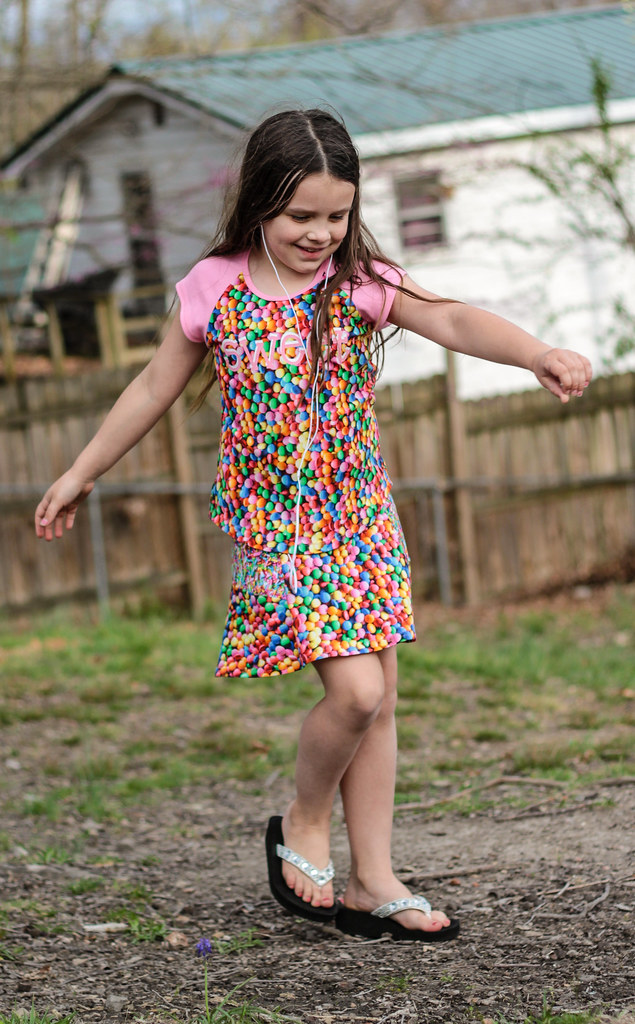
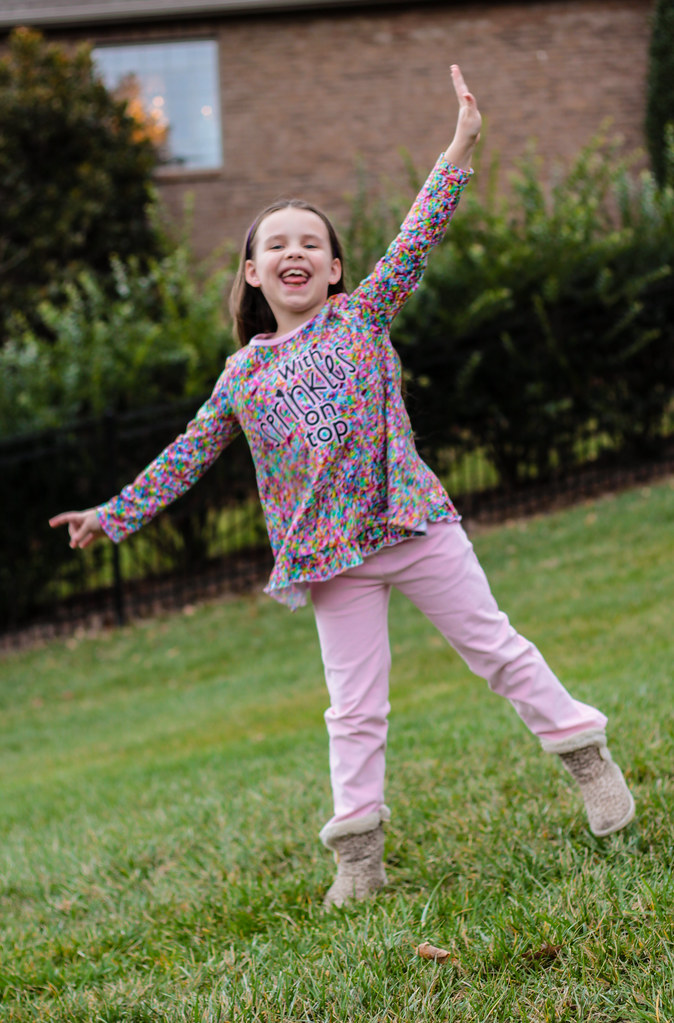
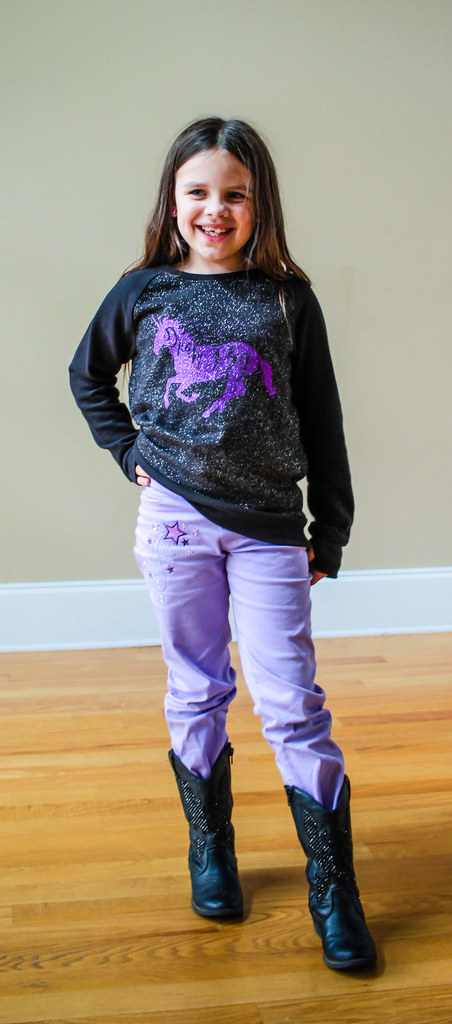
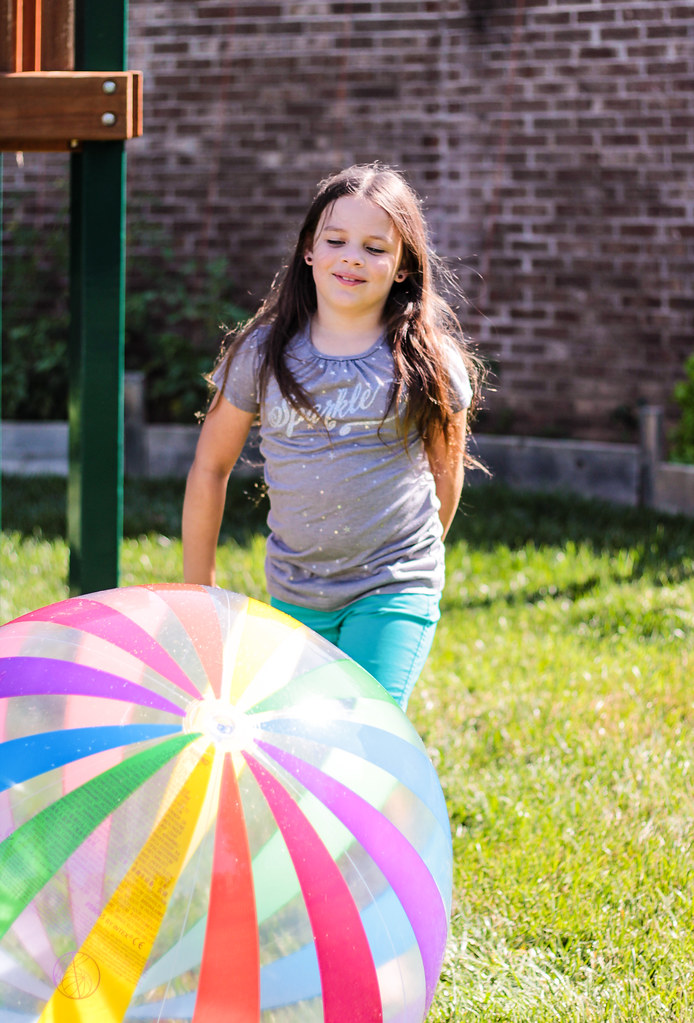
I took a lot of action shots of this cute little number. It is made for movement!
When Jalie announced this Spring's pattern release, this one actually didn't register on my radar. What was I thinking? It's adorable! But I'm not a sporty girl, so for some reason I just didn't see the cuteness potential until one of the ladies on the Jalie Facebook group posted one she had made for her daughter. I ran to the PR website and ordered the pattern (and a few others, ahem) immediately and sewed it up the next day.
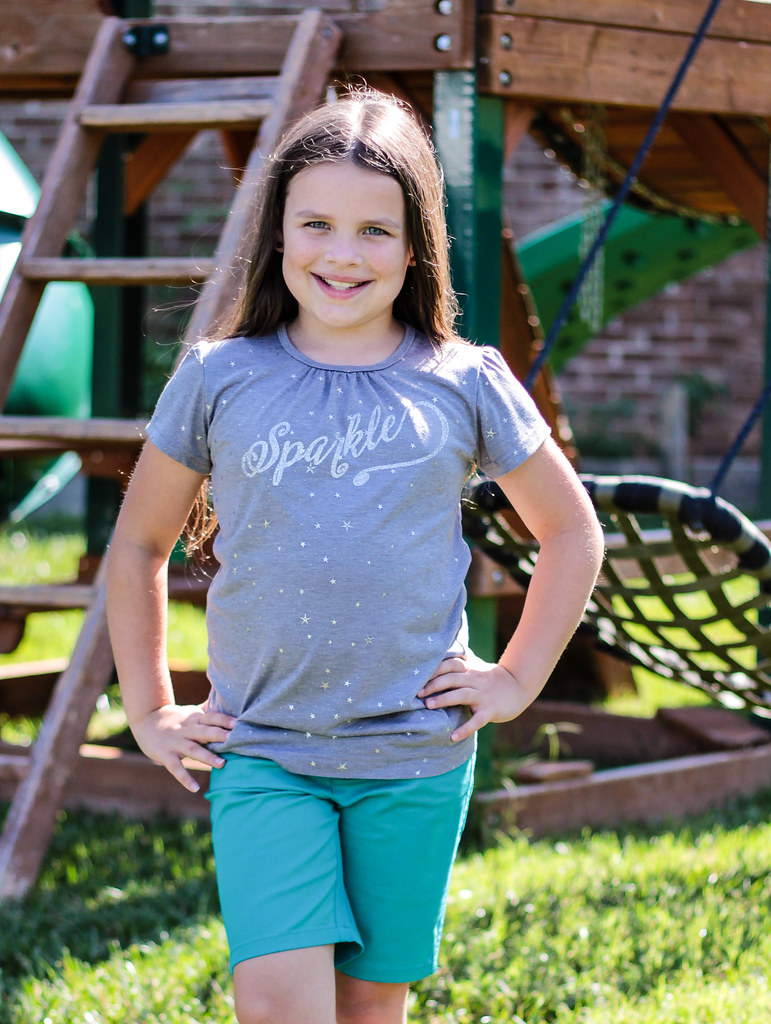
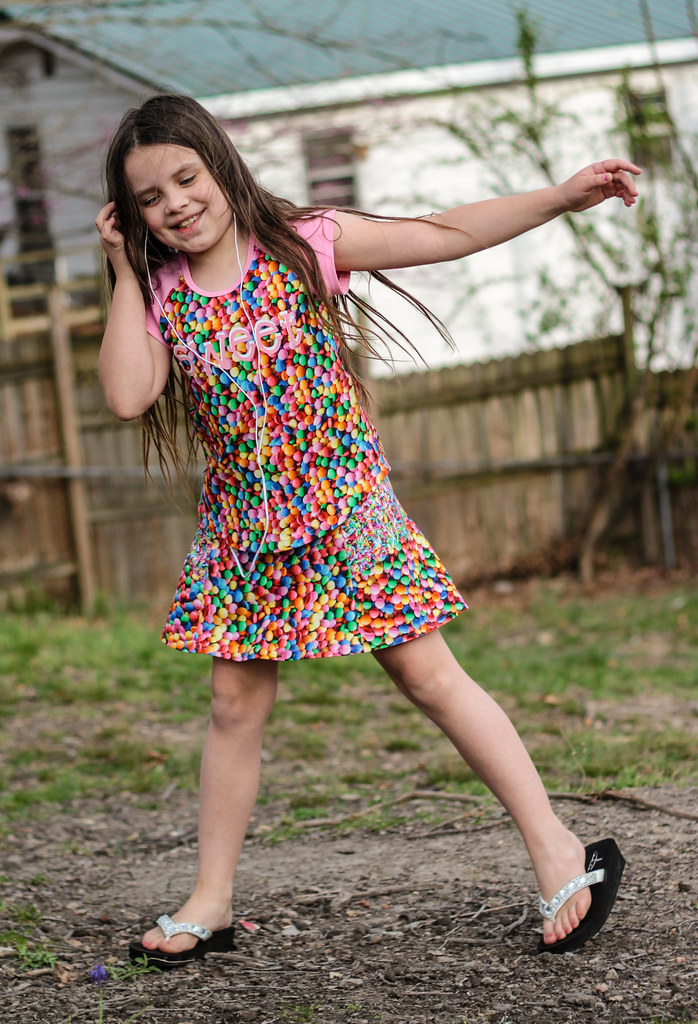
So, here we have the Loulouxe skort, Jalie 3670. It's designed for comfort and style when running and biking, but it is also totally perfect for the playground or your bestie's backyard.
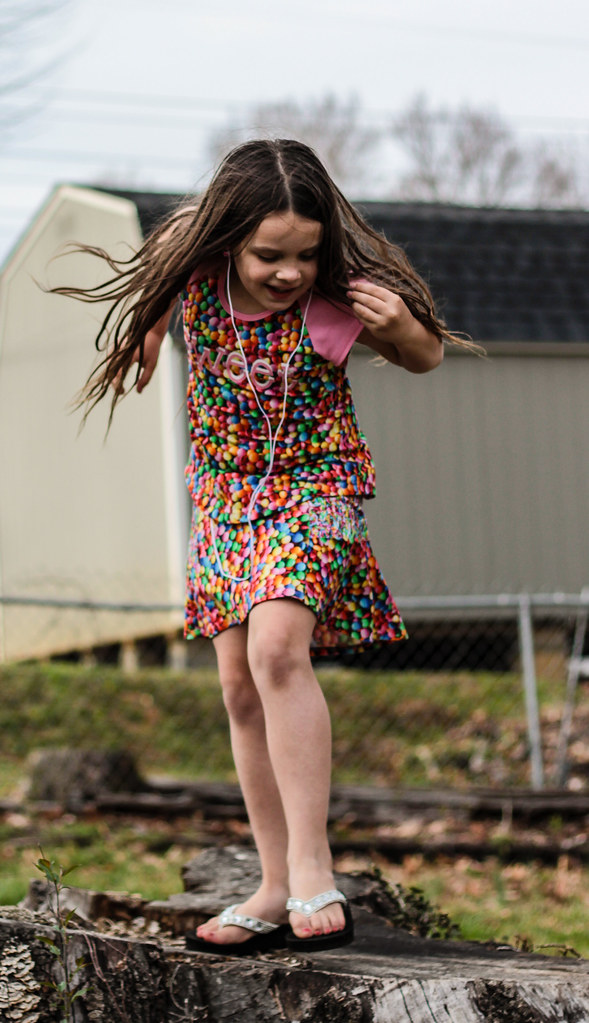
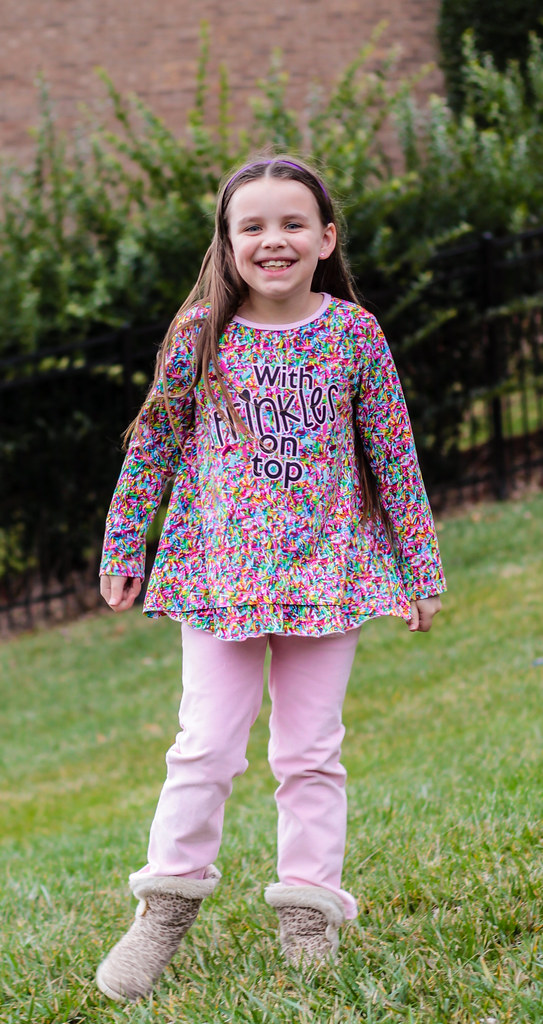
Myra's Loulouxe is made from a combination of digitally printed jersey (from Kitchy Coo) and solid pink interlock from Chez Ami. The pattern is designed for stretch knits with 60% stretch (like spandex and supplex knit), which these don't have, but it worked fine without size adjustments.
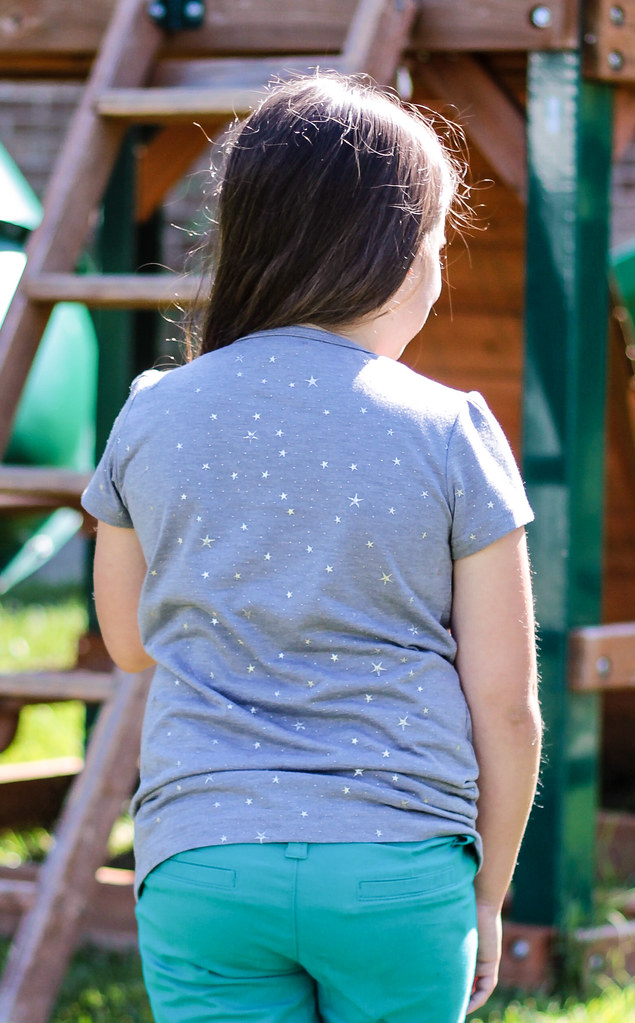
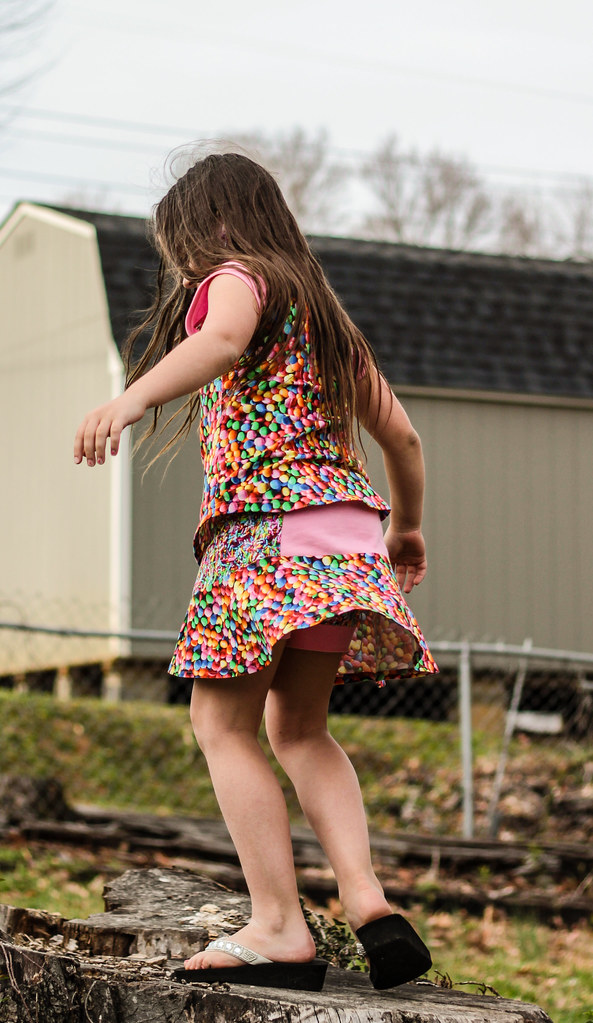
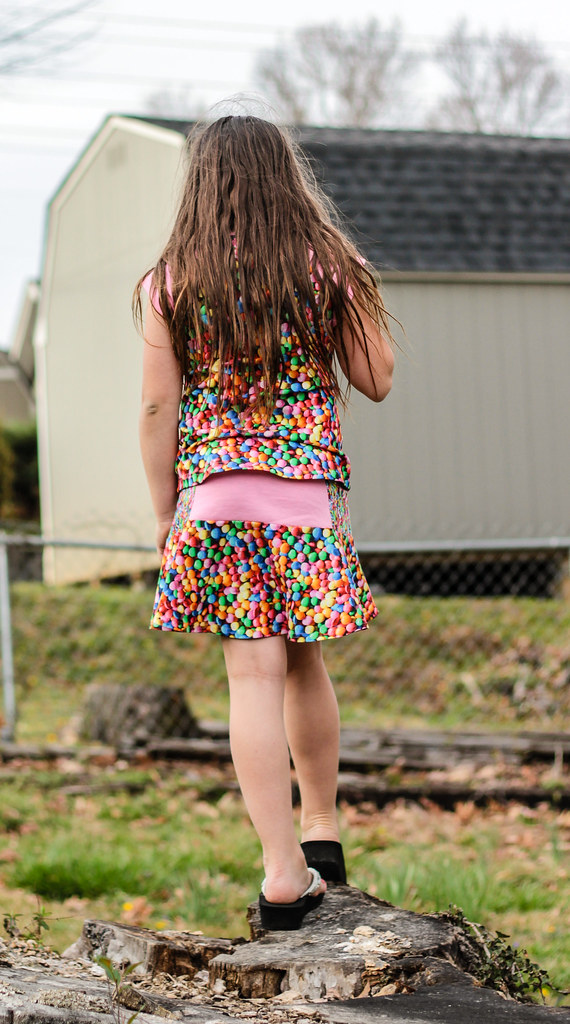
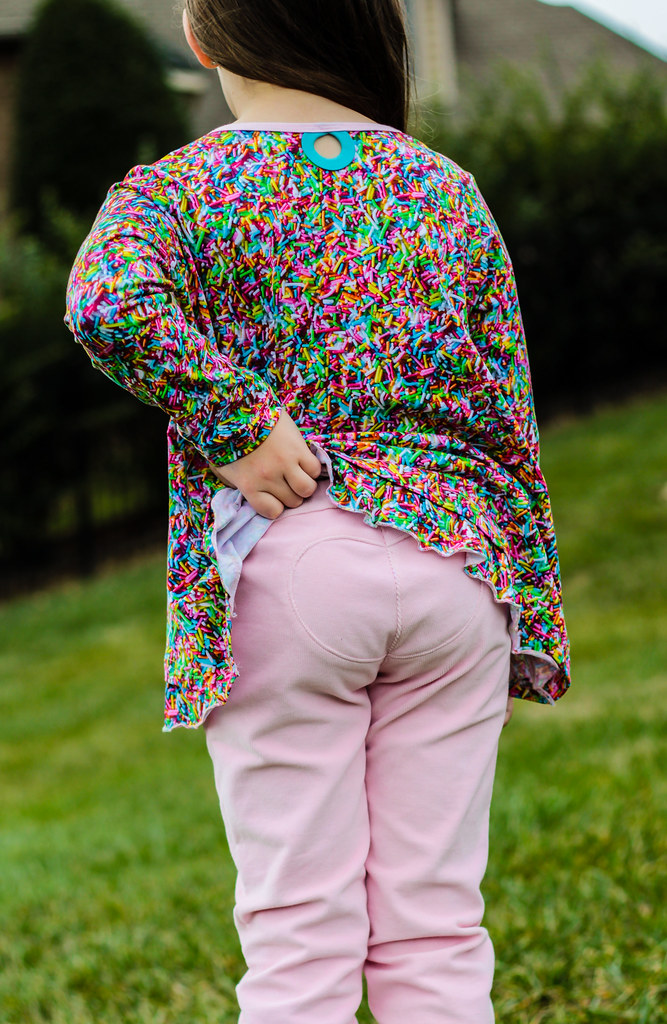
How cute is that flounce in the back?! The Loulouxe features a colorblocked skirt, with integrated shorts. The front skirt has a slight a-line for ease of movement, and the back is a full flounce, which is cute as well as functional, since it accommodates running, biking or playing equally well.
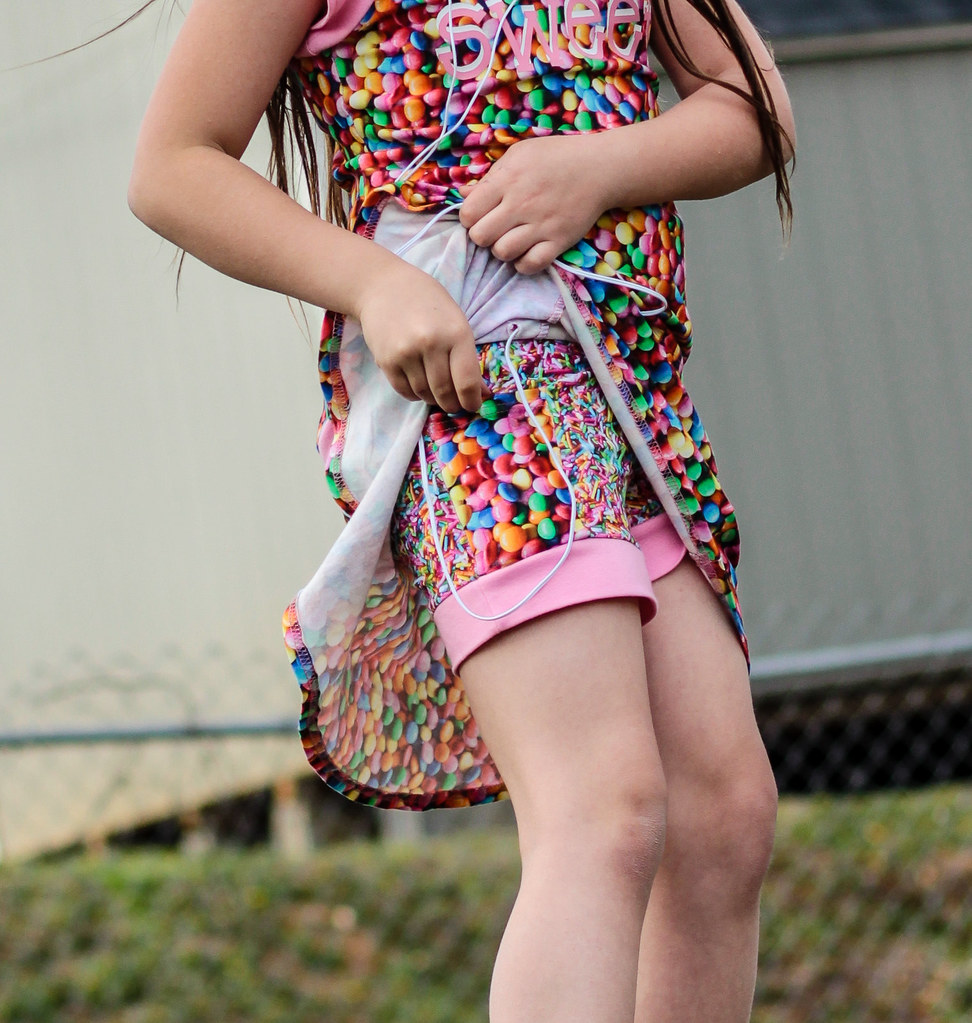
The shorts are nice and snug, with the option for a pocket or two. The size could easily be altered to fit a larger phone or device, but Myra's mp3 player fits just right as drafted.
I added a buttonhole to the top of the skirt to allow the headphone cord to pass through so Myra wouldn't have to put it under the skirt. If your devices uses bluetooth, or you're using the pocket for other things, you wouldn't need that, but Myra likes the functionality.
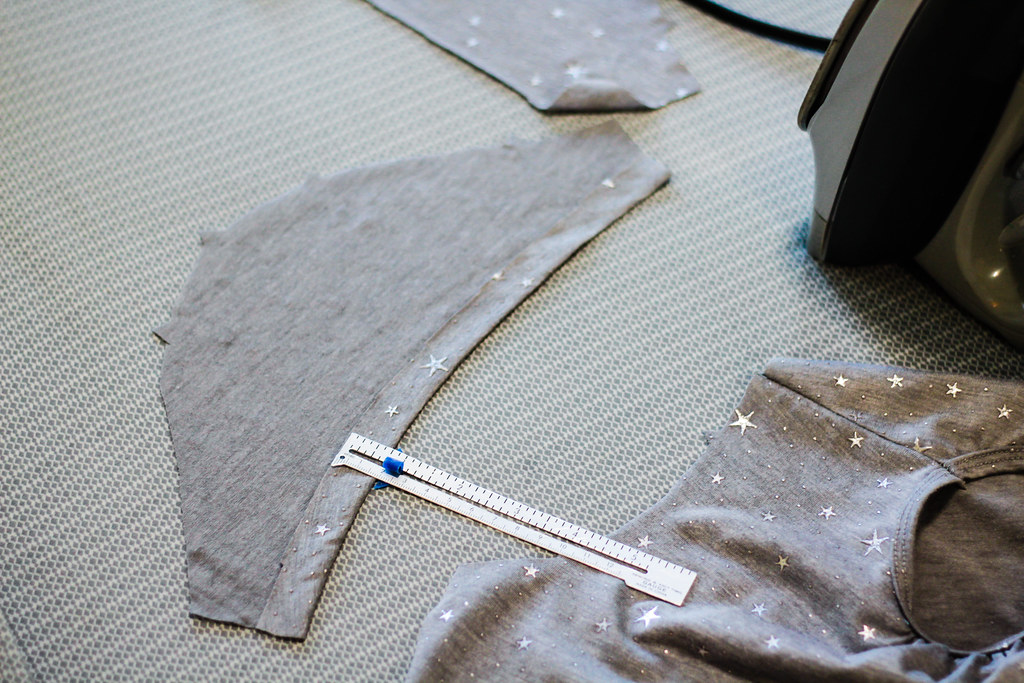
Other than adding the buttonhole, I made a few pattern changes for fit. Myra has a forward tilted waist, so I raised the back waist and lowered the front. That's a standard change for her. I also added 3/4 inches to the skirt length to make it school appropriate. Since it's designed as a sport skirt, it is quite short.
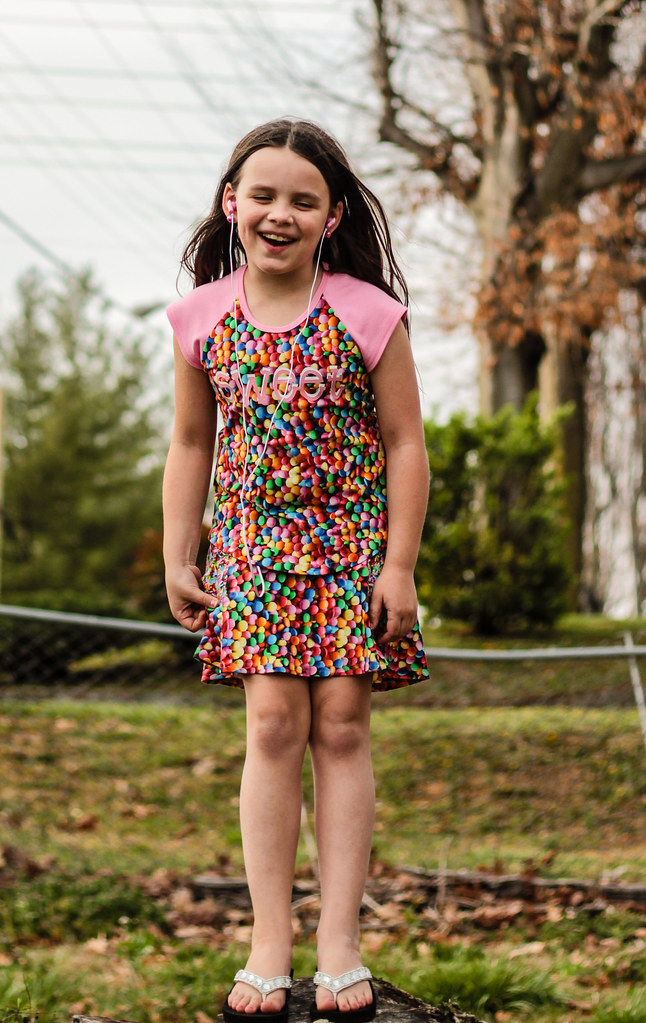
To complete the outfit, I also made Myra a raglan tee using Jalie 3245. I shortened the sleeve to a cap length (using the length of the cap sleeve on the Sweetheart top) to make it summer friendly. I also added a  vinyl decal to the front of the tee, just to break up all the candy print in front. And because I love my Cricut.
Myra and I are both pretty thrilled with the outfit. Cute and fun, but also functional. Jalie wins again!

Saturday, January 14, 2017

Ottobre, with Sprinkles on top

So many things I should be sewing, but I really wanted to make this cute outfit from the 06/2016 issue of Ottobre. So I put the practical on hold in favor of the cute.
Myra's a fan. I'm always happy when something I created makes her want to dance.
Both pieces are packed with adorable details. The top (06/2016, #29, the Shy Eyes tunic) has a triangular shape which comes to points at the side seams. The flattened hemline is filled in with an adorable ruffle. The fabric I used is a digital printed jersey from Kitschy Coo, although I got it a few years ago so this print is no longer in stock.
Just in case sprinkles and ruffles weren't enough cuteness, I added a graphic decal to the front. The black is glitter and the shadow layer is pink metallic. It's hard to see them in photos, but there are also large multicolored, flocked sprinkles surrounding the words.
The pants (#30, also from the 06/2016 issue) are a slim leg style with an elastic waistband. While they are similar in shape to the Jalie Elenore pant, there are a few critical differences that made me want to try these out. The fabric is pink stretch corduroy left over from these jeans. It was nice to get the last of that out of the stash, but it is a very soft corduroy, perfect for comfy, kid pants.
From the rear, the inset heart was the detail that made me want to sew these. So cute!! Also a huge pain, but worth it. I think it's adorable and so does Myra. You can also peep the cute little keyhole in the back neckline of the tunic. Ottobre doesn't miss a trick. I love all the great details.
Another nice feature of these is functional front pockets. I did some hearts as the pocket topstitching, just for fun, and because I feel like Vera's decorative stitching is sadly underutilized. Myra likes them. Hearts, ruffles, sprinkles and glitter can't lose! She's already worn it two days in a row, so It's a win for sure.

Friday, October 21, 2016

Jalie Eleonore, with sparkles

Well, the inevitable fall weather has finally hit us here in Eastern Tennessee, and fortunately I had an outfit all ready for Myra! She's been agitating for a pair of jeans "but fancy like yours, not from the store" for a while. And really, how can I refuse a request like that?!
Of course, the fancy part of her descriptor meant she wanted embroidery and sparkles. As you wish.
Myra prefers her jeans with a slim leg, so I went with the Jalie Eleonore pull on jeans. The pattern is great and given that the pants don't have zipper or buttons, they're a quick sew. Which is a good thing, as my sewing time has been pretty sporadic lately.
I made the same alteration for Myra that I did for myself. In the interest of booty coverage, I raised the back waist 3/4 of an inch (by increasing the height of the yoke at CB). I also shortened the elastic piece in the back waistband and stretched it as I basted it in. This pulls in the back waistband to cover Myra's backside.
For the embroidery on the front, I did a flourish with stars. I used a new-to-me applique technique that uses Glitter Flake heat transfer vinyl in the place of fabric. The big benefit of this method is that the HTV doesn't have to be cut away during the applique process - it rips away! Super fast and easy! And glitter-tastic, so Myra is definitely a fan!
The back pockets are embellished with purple unicorns, tiny glitter stars and swooshes. I used the rip-away applique method again here and it was amazing. I'd never have been able to applique those tiny stars with fabric. The trimming would have been too tedious.
As a finishing touch, I embellished a RTW sweatshirt with a dark purple glitter flake unicorn, to coordinate with her back pocket design. She was pretty thrilled with her new outfit, and declared that I am the best mom ever. So that was a win all around.

Friday, July 8, 2016

Avengers Assemble! Phase 1

A few months ago I came across some Marvel Avengers themed jersey at fabric.com. Although we are generally a DC family, we'll admit that the Avengers can be pretty awesome as well. Shirts were needed.
I started with Logan. His shirt is from the 03/2010 issue of Ottobre. It's a short sleeved raglan tee with a neckband and sleeve cuffs. I elected to do the sleeves only in the Avengers print. The remainder of the shirt is Laguna knit from fabric.com.
I could pretend I mixed the fabrics to make my Avengers print stretch farther, but the truth is, I wanted to add an HTV decal with my Cricut. I love that thing. Black makes a nice dramatic background for red!
When I was selecting patterns, I almost passed this one by. I wasn't sold on the sleeve cuffs. I'm really glad I went ahead and did them though. I like the ringer effect of the band.
The fit of the tee is long and slim, which has a nice modern look, despite the fact that the pattern was published 6 years ago. Ottobre is always ahead of the game! Duncan's tee is from the same 03/2010 issue, but his is number 18. It's the same style, but in a different size range.
The two fabrics are well matched in weight and both are nice quality, which means the boys are happy and comfortable in their new shirts.
In order to keep things extra comfortable for my sensitive guys, I made size tags out of scraps of HTV to iron onto the inside of the shirts. I had been using woven tags to keep track of sizes, but I like this so much better! No more itchy tags!
Duncan approves. And there's lots more Avengers fabric left to use! Stay tuned for more Super Sewing!

Wednesday, May 11, 2016

Jalie 2918 and heat transfer vinyl

In March I made Mitch a tee, and the pattern dissapointed me in several ways, so I decided to try the Jalie Men's tee pattern, with my trial run being in a somewhat smaller size...
And it also gave me a chance to try out Heat Transfer Vinyl in my Cricut! How fun is that?!
First let's chat about the pattern. Overall, it's good. I've generally found Jalie to have consistently good quality patterns and this was no exception. It went together well. The fit is slim and modern with a nice sleeve length and a comfortable neckline.
On Duncan (who had already gotten himself covered in mud before he even made it to school), you can see the nice fit. The neckband is slim without any bulkiness and fit into the neckline well. When I initially put the shirt on him, I thought it might  be a bit too long, but in wearing, I think it's just right. RTW shirts tend to be shorter, but I like this length better, It keeps his belly covered, which RTW doesn't always.
In this pic you can kind of see my one complaint about the drafting. The sleeve and armscye are symmetrical front to back. It's not an absolute dealbreaker in an unfitted tee, but the sleeve would hang more smoothly if it was shaped properly. I haven't yet found a men's tee pattern with a properly drafted sleeve, so maybe our guys are just used to their clothes not fitting...
The other fun part of this project was the decal! If you follow me on IG, then you know what a maniac Duncan can be, so when I saw this design on a Facebook page I follow, I knew Duncan had to have it. I used my Cricut to cut the decal from heat transfer vinyl(HTV) and ironed it onto the shirt front before assembling the shirt. It was super easy and I LOVE the way it turned out! Since I don't have a heat press, I used my regular iron. You do have to use a lot of pressure, so instead of pressing it on my ironing board, I used a cookie sheet, which in addition to being a hard surface, also reflects the heat back onto the shirt, strengthening the bond onto the fabric.
Despite the sleeve issue, I think this pattern overall is a win. And I will definitely be working more with HTV! So fun, so easy and such a professional looking result!