Friday, March 30, 2012

Ottobre 03/06-12 &14

So, right - trench coat. On Monday, when I posted that, I realized that Easter was 2 weeks away, and I hadn't even decided what I was going to make Duncan yet. Ooops. I looked over everyone's comments about the quandry, and it was a pretty even split. So, I left the decision to Mitch.
And we have a suit. And I can't even handle how cute it is.
Both pieces are from the 03/06 issue of Ottobre. The jacket is style #14 and the pants are #12. In the magazine, they are made of linen and styled with a tee shirt. I made mine from a pinstripe cotton/poly suiting weight fabric. The pinstripes are difficult to see in the pictures. They are a light silver color.
The jacket is a basic, unlined jacket with collar and lapels. It is constructed much like a casual shirt, in that the collar is attached in one piece, rather than as part of the facings, and the front facings are applied over the collar, with the seam allowances tucked into the collar itself. Basically, constructed using the second method I talked about here. The pattern called for three buttons, but I liked it with just two.
The pant pattern is seriously adorable and I know I will be using it again. It is a 3/4 length pant, which I just love the look of on a wee guy. I think it has a sort of rakish, Tom Sawyer sort of vibe. These pants have some great details as well. 
In front, there are hip pockets and a faux fly. The pattern also calls for cargo style bellows pockets on the side, but they didn't really go with the overall feel of the pinstriped suit so I left them off.
In back has a jeans-style yoke and patch pockets. I didn't match the stripe across the yoke, but the stripes match impeccably everywhere else, even across the shoulder seams and the front pocket facings.
And with that, I think we are ready for Easter. I'm thinking about making a pair of pants for Logan, but he doesn't really need them. I'm just feeling guilty that he got left out of the sewing. And then there is that trench coat... Hmm, I feel a little sewing ADD coming on.

Linked up...

Monday, March 26, 2012

Ottobre 04/2004-38A, sweat shop style

I realized the other day that Myra has managed to explosively grow out of all of her leggings. Since her daily uniform is leggings and a tee shirt, this is a bit of an urgent need, so I pulled a few pieces of jersey out of the stash and went to work.
And made 7 pairs of leggings in couple of mornings.
Her favorite pair is this animal print patchwork pair made of rayon jersey from Fabric Mart. She's wearing it with Jalie 2794, the Sweetheart tee. Since I pulled the fabrics all from the stash, they are a wide range of fabric and fiber, although I did mostly stick to lightweight jerseys, with the exception of the Hello Kitty pair, which is minky. 
It was originally a pair of adult sized PJ pants she spotted on the clearance rack at Target. I used the original hems and side seams, so these were super quick.
The pattern is Ottobre 04/2004-38A, which I used once before as a Halloween costume for Logan. They are your basic one piece pant pattern, and I love them. Conveniently, Myra fits into the size I had already traced, so I didn't even have to trace a pattern - win.
So, now that I am seriously tired of Myra sewing, I'm ready to jump back on my Wardrobe Basics wagon. I am almost finished with my Tie Waist sweater, although I ended up going shorter, so really it is just a cardi, but definitely a useful wardrobe basic. 
It just needs buttons and buttonholes and it will be ready to go. I didn't have any in the collection that suited, so I'm actually going to have to go get some. I'm not sure when that is going to happen, so I think I'll start tracing my trench coat. You know, now that it is Spring and I don't need it...

Saturday, March 24, 2012

Golden Twirler Refashion

A couple of months ago, I bought myself a metallic gold tank top at the thrift store. I've been toying with metallics in my wardrobe and I thought it would be a good layering piece, but the fit was so bad. I mean SO BAD. I would have basically had to completely remake it, which I wasn't willing to do for a tank top that cost me a buck. So it sat in my refashion pile until a scrap of the leopard print sweater knit I'm using for my Wardrobe Basics cardigan landed on it and I realized that it had to be a twirly skirt for Myra. And that it needed a leopard print waistband.
I know. I can't even handle how cute it is. Myra LOVES sparkles and leopard print. So you can imagine how she feels about this skirt.
Getting her to stand still for a picture was pretty much impossible. I think this might be some Myra-style cheerleader move.
I'm really pleased with how straight the hem turned out. Myra wears her skirts low on her hips in front, but high in back over her ghetto booty. If I make her a straight cut skirt, it hangs low in front and rides up in back. This time, although the waistband is straight, I curved the upper edge of the skirt portion, scooping out an inch in front and raising the center back waist about 1/2 inch. And it worked! It hangs perfectly straight!
I love the little flash of leopard waistband when she moves.

Friday, March 23, 2012

A Bound Sleeve: A Tutorial

I want to share my method for binding a woven sleeve. (In a knit, I do this totally differently.) For starters, let me say that this is the method that I use when I want a beautiful, sturdy and comfortable finish. It is not the easiest and quickest way, but I think it is the best. (Here, here and here are a few other prettily bound sleeves.)
For this method, you will bind your sleeve (or any cylindrical edge really - it doesn't have to be a sleeve) in the round, which will leave no bulky, scratchy seam allowances exposed. 
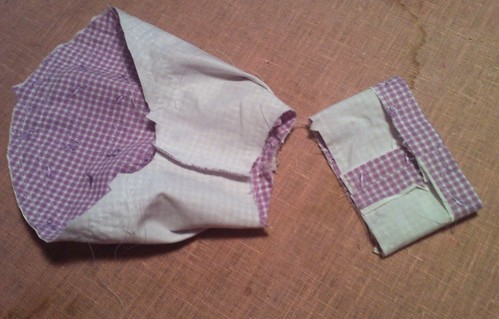
The pattern pieces you will need are the sleeve and sleeve binding strip. If your pattern doesn't include a binding strip - fear not! This is super easy to draft, as it is a simple rectangle. The long edge should be the finished circumference of the sleeve (after any pleating or gathering is done), and the short edge is the width that you would like your binding to be, times 2. Add seam allowances to all four sides and you are finished. Prepare your sleeve by putting the ease/gathering stitched in the sleeve cap, and by doing any pleating or gathering or tucking or whatever is to be done to the lower edge of the sleeve. Basting your pleats or gathers in place helps this go more smoothly. I also find it helpful to press up one seam allowance of the binding strip (Sorry no picture!). Just put the crease in place so that it is easier to fold under when you get ready to stitch the inside edge down. 
Next you'll sew the underarm seams of the sleeve and binding. Finish the sleeve seam in whatever manner you have been sewing the dress. French seams are nice. I simply serged mine. For the binding, you want this seam as flat as possible. Since it will be fully self-enclosed, there is no need to finish it. I sew a simple straight seam and press it open. Fold over your pressed edge and crease it again to even out any irregularity at the seamline.
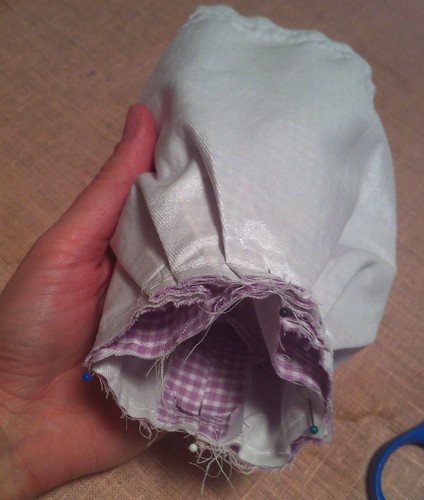
Now turn your binding right side out and tuck it into the inside out sleeve, with the raw edges together and the seams lined up. They should be right sides together at this point. I place a few pins around the circumference to keep the layers from slipping as I stitch.
Now you stitch the circle. This actually does fit over my free arm, but I feel like I have better control when I can see the entire circle as I stitch, so I keep the entire sleeve above the bed of the machine. You want the sleeve against the feed dogs, just in case there is any sleeve fullness that needs to ease in . Keep the fabrics relatively taught as you sew, and the feed dogs will do the work for you. Sew all the way around your sleeve with a simple straight stitch. This seam will be encased in the binding, so there is no need to finish it, although you can trim it down if you like, or if your binding is narrower than your seam allowance.
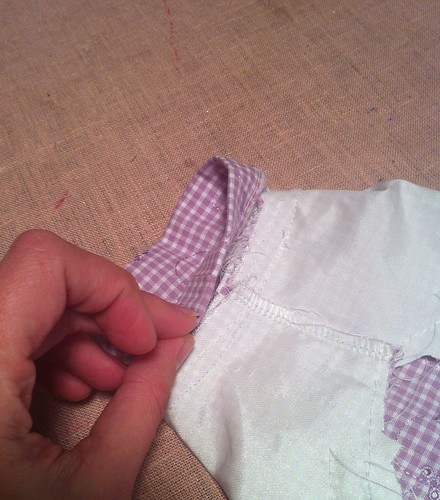
Now press the seam allowance down toward the binding.
Fold the binding in half over the seam allowance. You want the edge you pressed earlier to just barely cover the seamline.
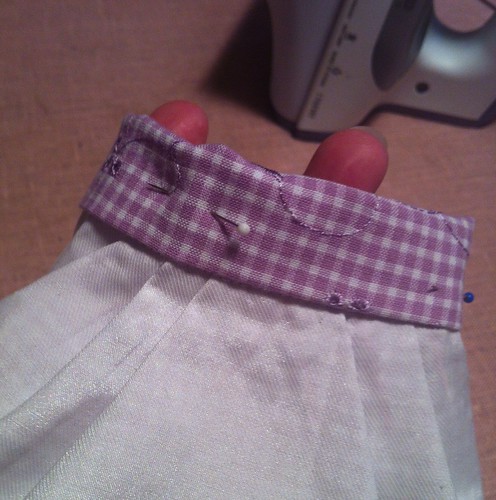
I stitch a few pins across the binding to keep it in place. Don't press the binding edge yet - wait until after it is sewn down. I used a slipstitch to invisibly hand sew the binding down on the inside, but if you would rather have a topstitched finish, I recommend glue basting down the inside edge and topstitching from the right side. (Sneaky tip: You can use regular glue sticks for this - you don't have to get the special fabric glue. Of course, test it on your fabric before you use it to be sure.)
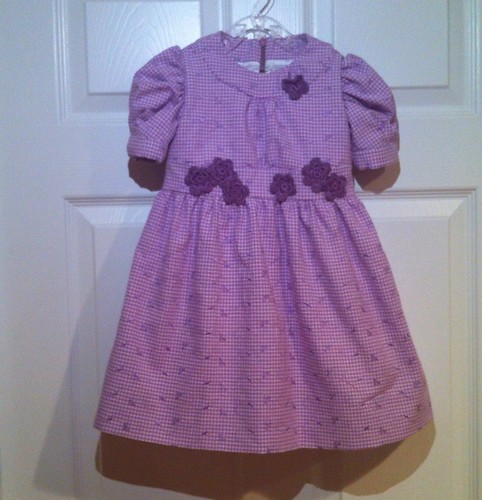
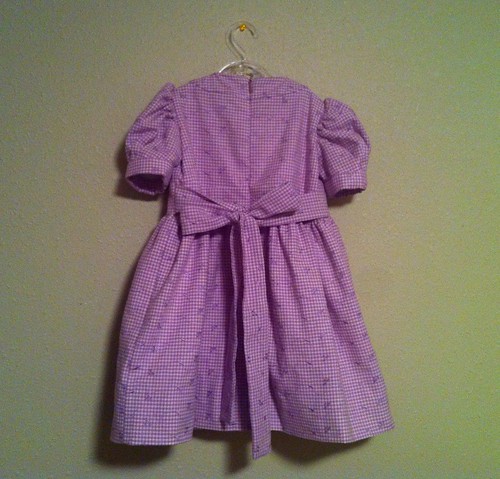
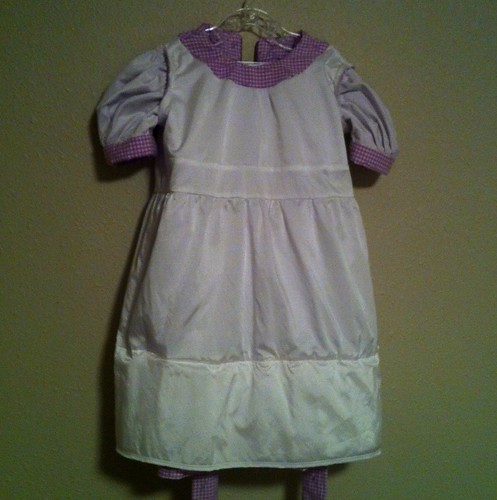
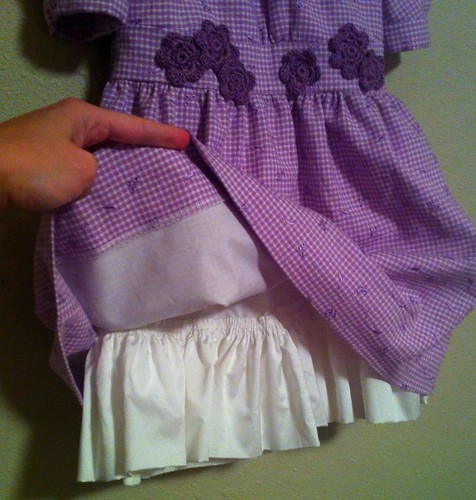
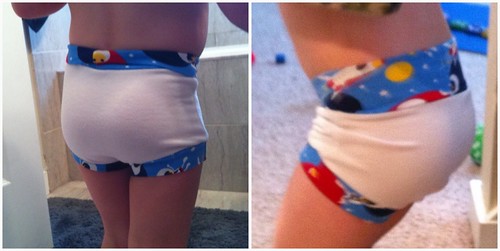
Now give the sewn down binding a press to crease the edge and you are done! Your sleeves are ready to set into your garment. Here you can see how they look, inside and out. Hard to tell the difference, eh?

I hope you all find this helpful, and if you have any tips or tricks that help you, please share them in the comments!!

Wednesday, March 21, 2012

Simplicity 2767

Whenever I want to sew something for the kids, I pretty much always start with my Ottobre magazines to choose a pattern. But for Myra's Easter dress, I hit my much neglected envelope patterns. I've got some really cute patterns in there! I chose one that she is just about to grow out of, but that I really wanted to sew, and which had a midriff band that I could decorate with some crocheted flowers.
This is Simplicity 2767. It is a seriously adorable Project Runway design. The basic dress has neck and midriff bands with gathers at center front. The skirt options are a basic dirndl or a bubble and there are three different sleeves as well as a sleeveless option. The pattern also includes several decorative additions, all of which are darn cute.
The pattern includes lining instructions and has a lapped zipper, which I didn't follow, although they were really quite good. I elected to go with an invisible zip (as I had one that matched in the stash), so I had to construct the dress differently than instructed. The outer fabric is an embroidered eyelet gingham from my stash. I think I bought it planning to make a summer blouse for myself, but it was just a perfect match for the crocheted flowers, so Myra got it.
Here is the back. I like the sash, although I wish I had gone with my gut and made it wider. I love a big fluffy bow and this one is a little anorexic. The zipper went in reasonably well, considering I have three seams and the check pattern to match. I ended up having to sacrifice pattern matching in order to get the seams to align perfectly. The check pattern is so fine, the jog there is less obvious than a seam mismatch would have been.
Inside, I built a lot of structure and swish into this dress. It is lined and underlined with a polyester twill that has a lot of body. It also happens to be a bit sparkly. Myra loves that, and you can see the slight sparkle through the eyelets in the gingham. It's a fun effect.
The pattern has an optional net ruffle that is attached to the lining between the lining and skirt. Instead of net, I went ahead and used the same twill as the lining/underlining. It is very crisp, so it makes a nice firm ruffle that gives the skirt a lot of twirliness. It also rustles beautifully when it moves. I love how luxurious it sounds and feels. And net is scratchy. This is nice and soft.
And the sleeve. Oh, this adorable sleeve! Can I tell you how much I love it??!? It just screams ultimate girliness. Pleated and puffed! And bound. I love a bound sleeve. I think they are so much nicer than a stitched on band or a plain hem, particularly on a puffy sleeve like this one. I took a few pictures while I was binding this sleeve. If there is an interest, I'd be happy to write up a little tutorial. Let me know.
Myra loves her new dress. She was quite put out when I made her take it off after our little photo session. I'm glad it is a winner. It was a fun sew!

Next up, another installment in my Wardrobe Basics - the tie waist sweater! I think I'm going to alternate a Wardrobe Basics project and an "other" project from here on out. I'm down to the more complicated Basics and I need a little break between them. I also have a bit more Easter sewing to do...

Monday, March 19, 2012

Vogue 2657

A friend of mine, who knows I sew, recently unearthed a big box of vintage patterns and asked if I would be interested in them, as she no longer sews. Um, yes! She and her mother had fabulous taste, and were even mostly my size! There was an impressive collection of Designer Vogue patterns, all in very good condition, although many of them had been cut. She must have had a fabulous wardrobe! Anyway, I decided to use Vogue 2657 as the vest for the Wardrobe Basics SAL.
The pattern is a Valentino design, and includes full, high waisted pants a la Katherine Hepburn, a tie waist collarless jacket and this cute waist length vest with princess seaming and a deep U shaped neckline. It is self-lined and topstitched.
I used the leftover ponte knit from my pants. There was only about 3/4 yard left, so there wasn't enough for a lining as well. I decided that I was OK with that, and just turned under the neckline and armholes and used my coverstitch machine to hem everything. For the button placket, I extended the front to form a foldover facing, which I interfaced to support the buttonholes.
I decided to use white to topstitch for contrast. I think it adds a little drama to an otherwise very simple garment.
The back has a center back seam, which adds some shape at the back waist and prevents any neckline gaposis. The ponte is very forgiving fit-wise, although I did add to the princess seam and side seam for a little FBA. I only added about 1 1/2 inches all around, since I wanted a close fit.
I wore my vest with my Vogue 8747 white shirt and my McCalls 5592 white jeans. For some color, I am wearing red patent pumps (my current favorite shoes). I also think this vest will be great with some brightly colored pants, or with jeans and a colored blouse. 

Saturday, March 17, 2012

Jalie 2787

After I finished my white blouse and the marathon of knit tops, I was ready to bite into a little more of a challenge and make a jacket. I started tracing Hot Patterns Deco Vibe Carrie-d Away Jacket (now OOP). Then I got sick, and didn't even go into my sewing room for the better part of a week. I came back and couldn't face the jacket, so I whipped up an old favorite that I have been meaning to remake for a couple of years.
The pattern is Jalie 2787, the Criss-Cross top. I made it once before when Myra was a wee one, and still wear it often.
The fabric I used this time is a cotton-lycra jersey from the remnant bin at Hancock's. It was a bit curly, but has really nice recovery, which is pretty essential for this top if you intend to use the nursing option. Which I do.
Here's how it works. This is absolutely hands down my favorite nursing top. In fact, after nursing all three of my babies for a collective 4 1/2 years (and still going!) this is the only nursing top that is still in my closet. I love it so much that I am willing to overlook the fitting issues that I (and many of the reviewers on PR) have had with the crossover panels. But I'm going to tell you all about them.
The major issue is the underbust area of the upper crisscross panel. Despite the fact that the top fits snugly with negative ease across the bust, the underbust area gapes open. My initial thought was to shorten the panel below the fullest part of the bust, in order to tighten up the area underneath.
You can see though, that the side seam already pulls forward significantly under the bust. This is mostly due to the elastic that holds the lower front panel up, but shortening the "legs" of the crisscross panels would only make it worse.
But to all that I say, I don't care. I love this top. It is comfortable, cute and convenient for nursing. Gape away. I will still be wearing it.

But before I made this top, I did finish tracing the HP jacket. I even stitched together the tracing for a tissue fit.
And well, I don't know. The style is cool and interesting. I thought the construction would be super complicated, but it really isn't (although the pattern does have 21 pieces, including lining and interlining - yikes!). I'm just not sure how well all those gathers will behave in the ponte knit I have in mind. Perhaps I need to seek out a sleeker pattern? Maybe I'll muslin it in an ugly sweater knit I have and see how it behaves.

Wednesday, March 14, 2012

Kitschy Coo Boy Short Briefs

After I cut out all of the pieces for my "Make it in a Metre" tees, I had quite a few largish pieces of astronaut knit left over. So, what to do with leftover knit?
Make underwear, of course! I've been meaning to try out the Boy Cut Briefs pattern by Kitschy Coo, and it seemed appropriate to use it on her fabulous jersey. And y'all - what was I waiting for!?! These are awesome!! They whip up in no time. These two pair, from prepping the pattern (taping together the PDF pattern and drafting the rectangular bands) to putting them on my kids was less than 45 minutes. And you can sew them completely on the serger, if you are so inclined. Since all the openings are banded, you don't have to hem anything.
My kids love them. They are comfortable and easy to move in. The sizing looks good for my munchkins - both fit in their age appropriate size. I love that they provide such good coverage. My kiddos inherited their ghetto booty from me, so I love that there is no cheek hanging out with these. So, I'm never buying underwear again.

Tuesday, March 13, 2012

McCalls 6203

My original plan for "Make it in a Metre" was to make tees for the kids, perhaps an applique or two with the scraps. Once I finished cutting out the kids' tees, and a couple of pair of underwear, I found myself with a rather big rectangle of unused fabric. Big enough to wrap around my hips, in fact. But not particularly long. Not being much of a minskirt girl, I decided that a dolman sleeve top with a hem band would be fun, and not too childish in the astronaut print.
I used McCalls 6203 for the top. It is a very simple pattern, but it was the basic shape I was looking for. The pattern calls for raw edged bands at the neckline and sleeve, which I actually did. It looks kind of cool, but the band sticks up a little at the neckline. Not my favorite look. I took in the side seams quite a bit to get some waist definition, as the pattern is a big rectangle with sleeves. That said, the end result is fun and I like the crazy waistband. The kids thought it was so cool that I matched them. I think it's awesome that they still think that is cool. Wonder how much longer that will last?

Monday, March 12, 2012

Ottobre 01/2009-5

For Duncan's "Make it in a Metre" tee, I wanted to go in a somewhat different direction. Instead of a raglan sleeve, I went with a set in sleeve. but an envelope neckline. I wanted to use the astronaut fabric as a decorative element as well.
I immediately thought of the "Muksis" tee from the 01/2009 issue of Ottobre. I've made it before for my nephew, and I even had the correct size traced. I just love how cute it is.
I used the astronaut jersey for the adorable pocket as well as the sleeves. There is a lot of binding happening on this tee. Last time I made it was pre-coverstitch machine, and it was a surprisingly quick sew, even then. Now, with the coverstitch binder is was crazy fast. I did all the binding and made the cuffs of rib knit. The white body is cotton-lycra jersey.
I used my coverstitch machine to attach the pocket as well. To keep the turned under edges nice and sharp, I stitched some fusible thread onto the fold line on the wrong side and fused the hem edges down. It gave me a nice crisp edge that didn't wiggle around. I used magic tape to position the pocket for stitching, which also eliminated any movement there so that it stayed where I wanted it to. The end result is darn adorable. Duncan is going to wear it a lot!