Saturday, March 2, 2013

Kitschy Coo Skater Dress!!

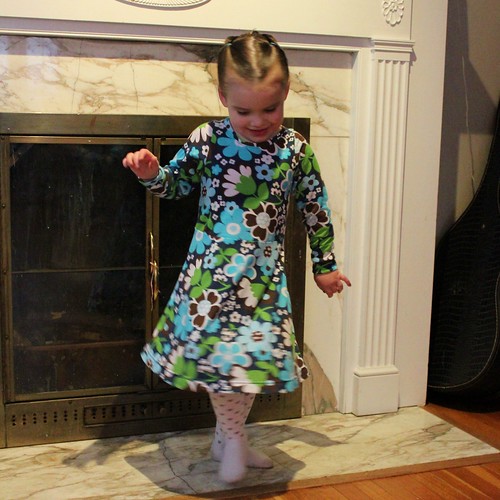
I've had such a hard time keeping these cuties to myself!!
Myra was really excited about them, too. But now that the pattern has been released, I present to you - The Skater Dress! The sewing internets have been abuzz about this pattern since Amanda of Kitschy Coo announced that she was going to make it available for us.
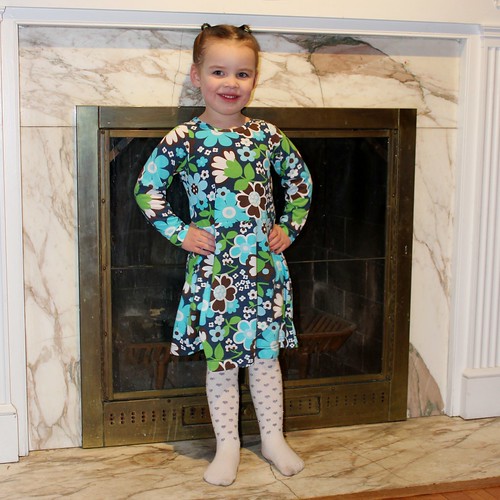
Myra and I were both so excited to be able to test the pattern, since it's pretty much the most perfect dress ever. The bodice is a basic tee style with bands at the neckline and armhole/sleeve hem. You can choose between long or short sleeves, or you can go sleeveless for a summer look or a jumper/pinafore.
The skirt is a nice a-line style with plenty of twirl. It's not so full that your princess has to worry about a wardrobe malfunction, and the length is just right for playtime.
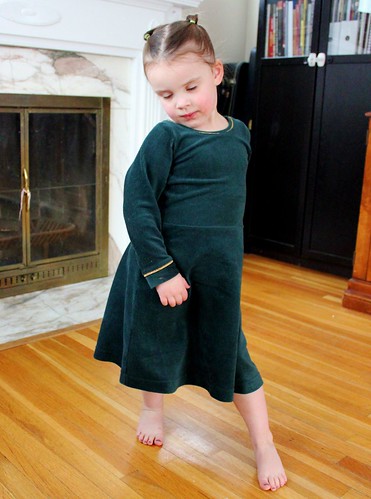
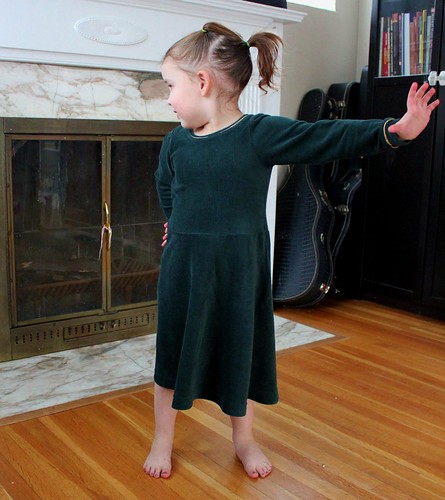
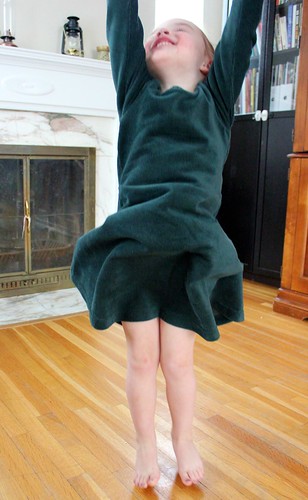
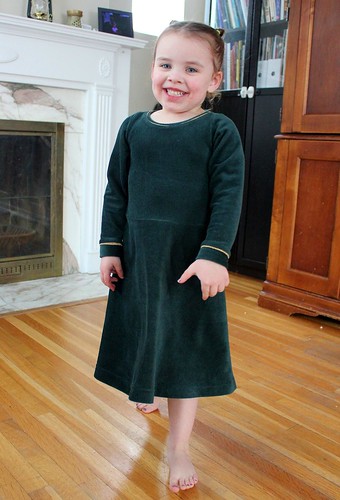
I've made 2, so far and Myra loves them both! This was the first I made, and I let her chose the fabric. She chose a corduroy-like knit from my stash, and while it is soft and snuggly, it was pretty unstable, and really wasn't the greatest to sew. She really loves this dress though.
I added some gold knit faux piping at the sleeve bands and neckband (using this tutorial) and I love the effect. Myra does too, and has decided that this is her Princess Fiona dress, since it sparkles.
The fabric for the floral print is a cotton jersey from Girl Charlee and it was really a much better choice. It's soft and comfortable, but still nice and girly. You can see how nicely the dress fits her in this shot. I made Myra the 3T/4T and it is perfect for her. For reference, she wears a size 104 in Ottobre.
So, what are you waiting for?? Stop what you're doing and go order your copy! Get it here. It's a PDF that is automatically delivered to your email when you purchase - instant gratification!! I generally am not a huge PDF pattern fan, but this one is really easy to tape together, as Amanda has each pattern piece tiled separately, so it's less of a jigsaw puzzle.
Hooray for the Skater Dress!!

Friday, March 1, 2013

Monthly Roundup: February 2013

February wasn't my  most productive month by the numbers, but given the plague that felled our entire household for a week, and the fact the I made a coat, I'm pretty pleased with my output.

I made:
1) Puppet show curtain for Myra's Preschool
2) Vogue 8831 tunic for me
3) Butterick 4910 nightgown for Myra
4) 12" doll peasant gown for Baby
5) McCalls 6069 dress for me
6) Zipper pouch for Myra
7) Burda magazine 01/2011-130 leggings (x2) for me
8) Burda magazine 04/2011-118 top for me
9) Burda magazine 08/2007-112B coat for me

I sewed up 11 projects and used 22.25 yards of fabric. 5 projects used stash fabrics and I used 3 burda magazine patterns, so that part of my Stashbusting goal went well. Unfortunately, I added 30.75 yards of fabric to the collection, when my goal was to only add 20, so since I went 10 yards over this month, my March goal will be to buy a max of 12 yards. Well, see how that goes...
My other February project got lost in the shuffle of coat making. I was really hoping to participate in Scruffy Badger's February Polka Dot Frock Fest! I have managed to get started, but I still have a few seams yet to sew before my dress is ready for the reveal. I was quite surprised at the difficulty I had finding good polka dot dress fabrics! I ended up using a stash fabric (yay!), so we'll see how it goes. I should have it finished soon to show you.

Once I finish my Polka Dot frock, I'm going to dive into the Pants Fitting class taught by Sandra Betzina on Craftsy. I enrolled in the class several months ago and have watched a few of the videos. So far it looks great and I've already learned a few key things. Next I just need to sew up a muslin of the pattern for the class. I actually really like this pattern, and if I can get a good fit, have some fabric in mind for a real pair as well.

The other big March event on the sewing front is Easter. I'm off the hook for Myra's dress, as my mother has offered to sew her up something to match her cousin. Sweet! I'd like to sew up something spring-y and sweet for myself as well, and the boys could probably do with some new pants at least. Myra has also put in a couple of requests for dress up dresses, including a mermaid tail... Stay tuned!

Tuesday, February 26, 2013

Burda Magazine 08/2007-112B leopard coat

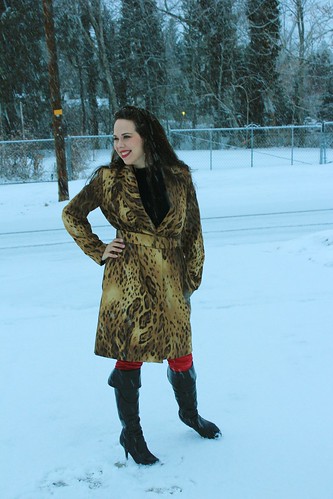
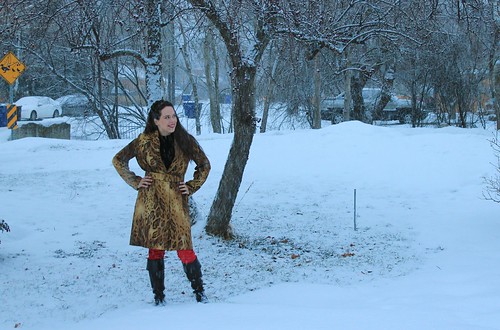
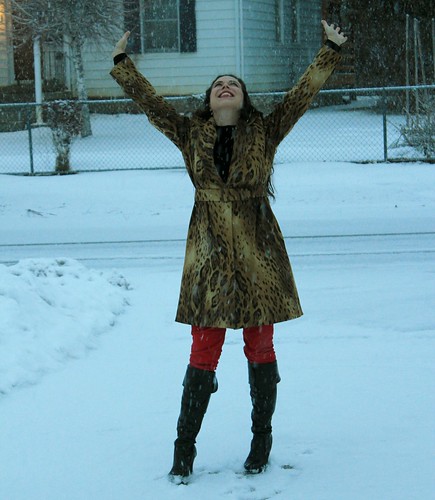
This morning I made the belt, stitched the belt loops and came upstairs to force Mitch to admire show Mitch my new creation, and he noted that it had just started to snow - perfect for pictures!!
And he was right. Not to mention he gave up his own man-cave time to take my blog pictures. He's the best, y'all.
But you want to hear about the coat, don't you? I apologize if I gush a bit, but I am very pleased with it. There may be an excessive number of pictures. You've been warned.
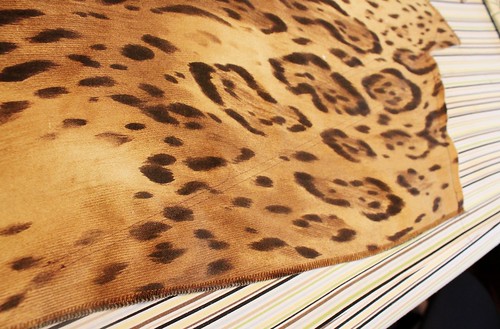
So, the coat began with this amazing fabric. It is a stretch poplin from Mood, which is still available as I type this. You can get yours here. I ordered it knowing that I wanted a leopard print coat, which it obviously became, but if you aren't really coat inclined, this fabric would also make great pants, a skirt or a lighter jacket. It has a nice amount of stretch and is fairly hefty in weight.

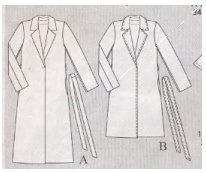
The pattern that I used is from the 08/2007 issue of Burda magazine. I made the shorter length. I chose this pattern for it's uncomplicated lines, as I really wanted my fabric to be the star. Despite it's simplicity, this is really a well thought out pattern. Some details...
The collar construction was really interesting, and built a ton of shaping into what would otherwise have been a big old sack. It's a bit difficult to see from this photo, but the undercollar is in two pieces, with a separate stand that adds shape to the back neckline. The collar back also extends into a dart that shapes the front of the coat and the lapel. The construction was a little tricky, and the Burda instructions were not particularly helpful. If you make this coat, the thing to remember is that the lapel to collar seam has to be sewn first, then the back neckline seam, which extends down into the dart in one pass. It was really fun to sew, once I figured it out. If you want to see details of the tailoring, click here.
The pattern called for a self fabric tie belt, but I decided I wanted a wide buckled belt. I went with a 2 inch wide buckle, as that was as wide as I could find, and I do like it. The belt was simple to make, as the buckle has no tongue, which meant no eyelets to set and made the buckle assembly easier. It works with this thick fabric.
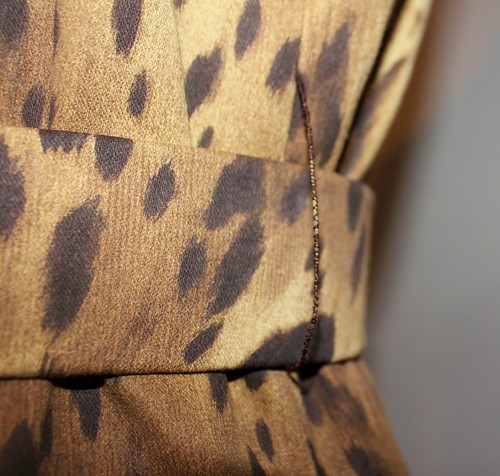
Thread loops hold the belt in place. I used this method, so the only handwork was actually attaching them.
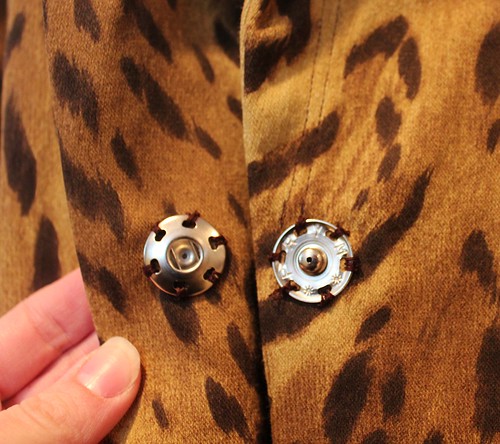
One of the things I really like about this style is the lack of visible closures. This snap is actually covered by the belt, so it looks like the belt is the only thing holding it closed. No buttons or zippers to distract from my fabulous fabric.
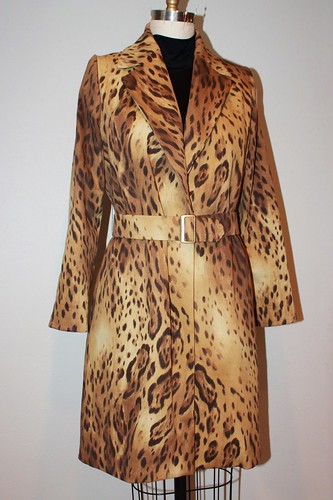
As far as fit goes, I did make a few alterations, primarily in the shoulders and back. The back was drafted with a totally straight seam, which on me, meant tons of extra fabric pooling at the waist, while it was still a bit snug in the back and backside. I basically just drew a curved back seam, shaping it in at the waist and giving myself more ease in the mid-back and down from my hips.
You can see on the dress form that it is fairly sleek in back, although I did leave more ease in the waist. The belt pulls that in, while the coat stays comfortable. I also narrowed the shoulders a little. The style is meant to have a slightly dropped shoulder, but that isn't what I was looking for. I added a small pad as well to firm up the shoulder line.
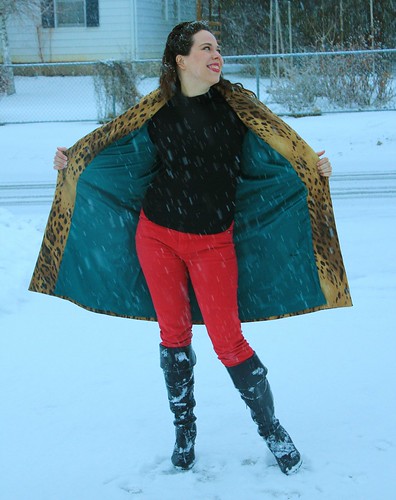
You wanna see the lining?
Teal!! Isn't it gorgeous!?! It's a stretch satin from Fashion Fabrics Club and it is really luscious. It's soft and silky, but also a little beefy - really perfect for a coat lining. The pattern actually only called for a half lining to the waist, but I went ahead and drafted a lining to the hem. If you're going to make a coat, you really ought to line the thing for real, right?
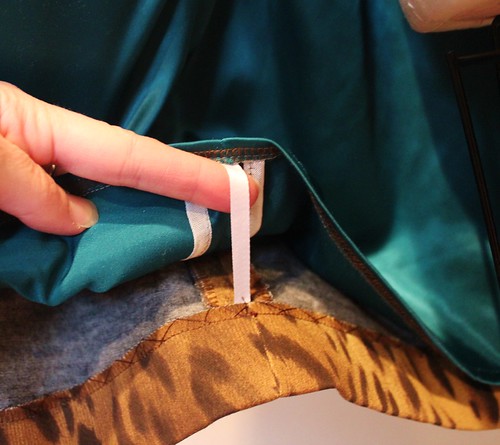
Coat linings are generally left free at the hem, and tacked in place at the side seams. I used a technique from Connie Long's Easy Guide to Sewing Linings that uses narrow ribbon, or in this case, twill tape in place of hand sewn French tacks. You simply stitch in the tape as you hem the lining, then tack it (I did this part by hand) into the coat hem.
I made a coat! And I love it!
Monday, February 25, 2013

Tailoring by machine

Hey all! Sorry I just dropped off the earth for a week there! It wasn't intentional, but I've been working on my coat, and making good progress, then the household was hit with the crud that's been going around, so the weekend was sort of shot. The coat should be done in a day or two, but before the big reveal, I wanted to talk a little about the tailoring I did on this one.
For this coat, I decided to try the machine method of tailoring. I've use the fusible method and the handsewn method, so this is my first attempt at tailoring by machine. I used my usual favorite tailoring resource, Tailoring: The Classic Guide to Sewing the Perfect Jacket. I have an older edition than the one in the link, but the material is the same. I really love this book, and if you are even remotely interested in tailored garments, you really should have it in your personal library.
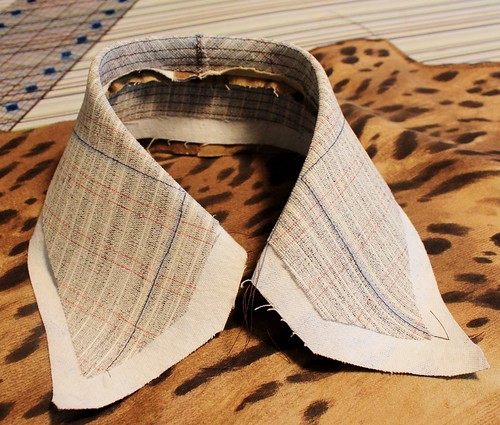
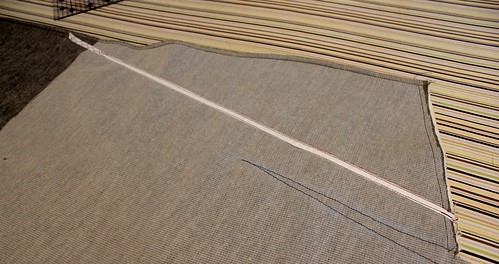
Anyway, here is my undercollar. All of the padstitching is done via curved lines of machine stitching. This particular pattern had a separate partial collar band which really helped shape the collar as well. I padstitched it separately and then sewed the two together.
Here you can see the major down side to machine tailoring - all of the stitching is visible from the right side of the undercollar. I did increase the contrast on this photo to make it really stand out, but IRL it does show. Since this fabric is a thin, smooth poplin, hand padstitches would have shown as well, so I decided that it wasn't a dealbreaker for me, particularly as I don't wear my collar up.
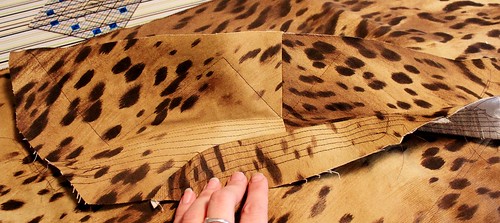
For the chestpiece, I sort of did my own thing. My outer fabric is a stretch poplin, and I really wanted to preserve the stretchiness in the body of the coat, so instead of tailoring with rigid canvas, I decided instead to underline the entire coat with a beefy wool jersey (for warmth, too) and use fusible tricot in the upper half of the coat, above the waist. I also taped the roll line. I really think that of all of the many things we do when we tailor a coat or jacket, taping the roll line makes the biggest difference, particularly when you consider how easy it is to do.
Again, this was done using the machine method, so the lines of stitching show, but are hidden under the lapel when the coat is worn.
Here's a little preview of how it all came together. The structure of the collar is really nice and crisp, and the body of the coat feels nice and substantial thanks to the wool jersey underlining. I can't wait to get it all finished and show it to you!!

Tuesday, February 19, 2013

Want to find your sewing buddies??

Here in the blogosphere, I think we've gone a long way toward ensuring that none of us sews in isolation. We have this amazing community of sewist/seamstress/sewcialist (s) that share and communicate with each other about projects, fabric, notions, sales, all the stuff! We even occasionally get a chance to meet up with each other in real life, which I think we all agree is about the most fun ever!
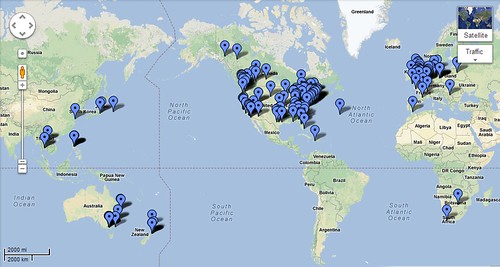
Well, in a brilliant move to help us find each other, Vicki at Another Sewing Scientist has compiled a map where we can all plot our approximate locations, so that we can find those who are nearby, and when visiting other places, link up with the local sewing crew.
So, since this is much more fun when we all play along, please head over to Vicki's post and get all the details about how to pin yourself.

As for my own sewing room, work on my coat is moving forward. I've decided to try the machine method of tailoring for this one, which I haven't done before.
Here is the undercollar, all stitched and ready for steaming into shape. So far, I like this method. It's definitely faster than by hand, and seems a little sturdier than the fusible method that I used on my equestrian jacket. While I'm fully tailoring the undercollar, I'm not going to do a complete chestpiece, as I am underlining the coat with a fairly beefy wool jersey, which will provide warmth as well as structure. I will tape the roll line, which is something I like to do by hand. That may be the only handwork this coat sees! Hopefully, I can get going on this, as I really still want to make a polka dot frock for Scruffy Badger's Polka Dot Frock Fest. I had a hard time finding a fabric that I really liked, and I'm still not sure that the one I've chosen is perfect. I'm waffling, so I guess it's a good thing I still have a coat to finish, so I can think over my fabric choice.

ETA: I took a picture.
These are the two fabrics under consideration for my Polka Dot Frock. I really like the dainty dots on the right, but the fabric is an ITY, and I fear those lovely crisp pleats would be an utter fail in an ITY. The larger, ring-type dots (Are they even polks dots??) are fun, and the fabric is a more suitable stretch moleskin, but I'm afraid they would look odd broken up in the pleat area. What do you think?