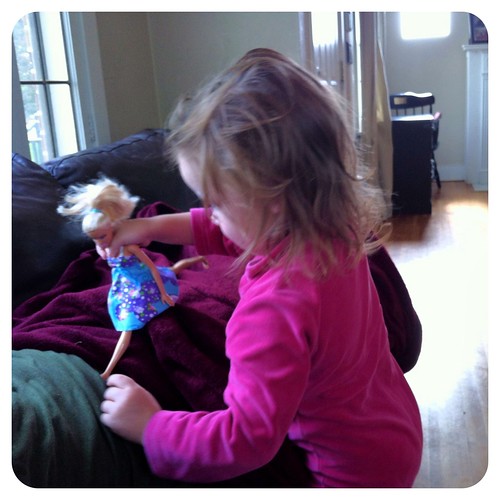
I let Myra flip through the pattern catalogs with me the other day, and she came across Simplicity 1955, and immediately wanted the Kate Middleton wedding dress for her Barbie. I haven't made Barbie clothes since I was a kid, so I thought it would be a good idea to start with something simpler.
This is view C, an empire waist sundress with a circular skirt. It was pretty simple to put together, although Myra's non-Mattel branded Barbie is apparently wider than your standard 11 1/2 inch doll. I had to add a placket down the back so that it would close. I also added about 3/4 inch to the length of the dress, but boy, Barbie likes to show some leg!! I think some leggings are going to be the next project.
On the inside, I used a velcro closure per the pattern, although I thought it would be easier for Myra to take it on and off herself if the closure ran the full length of the dress, rather than having a seam for the lower half of the skirt. All the seam allowances are 1/4 inch and there really isn't any room for seam finishing, so I just left them all raw.
Even though it isn't a Princess Bride dress (as Myra calls the Kate Middleton gown), Myra was still pretty happy with her new Barbie dress, especially since it matches one of her favorite dresses. And thanks to the full circular skirt, Barbie can still do the splits! Yep, definitely needs some leggings...
Saturday, May 26, 2012
Tuesday, May 22, 2012
Vogue 8330 in red
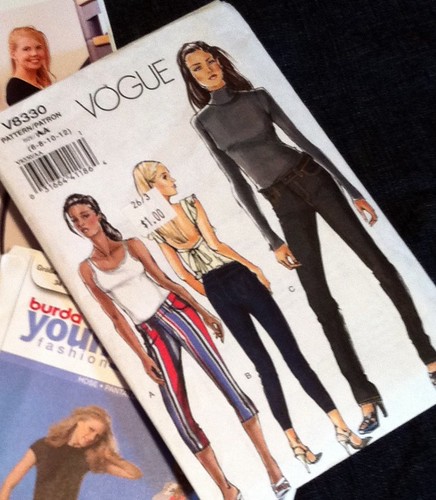
I just finished up my third pair of Vogue 8330 jeans, which is sort of amazing for me, since I generally am done with a pattern after one make. But these jeans have been a real workhorse.
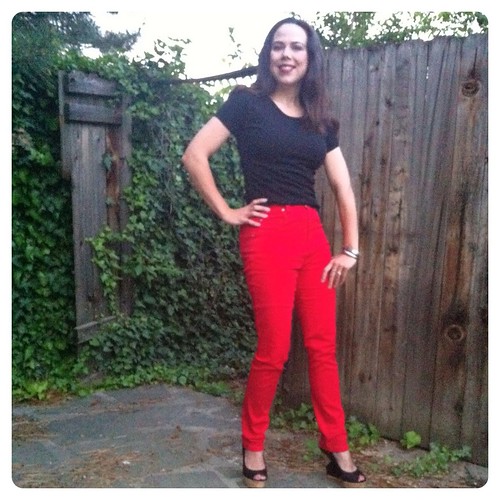
This time, I went for a bit less of a basic by sewing them in a bright red stretch twill (from Fashion Fabrics Club). Since the fabric has so much impact, I went very minimal with the stitching and embellishment. I just did a single line of topstitching, rather than a double, and used a matching topstitching thread.
I do think that hardware is one of the elements that can keep your home sewn jeans from having that "happy hands at home" look. Rivets are easy to apply and definitely give you a more professional appearance. These are the basic rivets produced by Dritz that are available at all of the big box craft stores, but you can get more fun rivets here and here. I am also a serious convert to the heavy duty snap, although a jeans tack button is also a great look. What I love about the snap is that I don't have to fight to sew a buttonhole through all of those layers in the waistband.
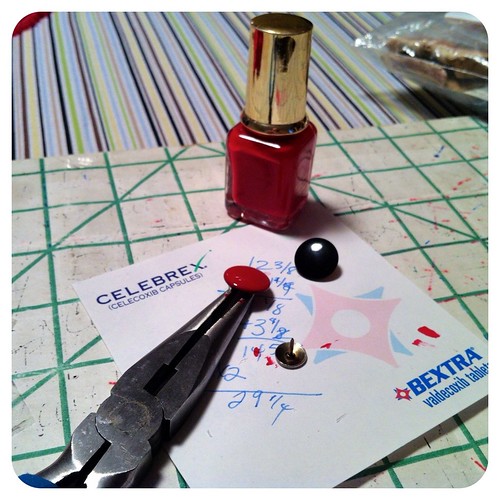
Since my heavy duty snap was black, I decided to paint it with nail polish so that it would match my jeans. Needle nose pliers held my snap in place while I painted it. You can also use model paints from the craft store, but nail enamel works great if you have the color you need. Don't forget to lightly sand your snap before you paint it. I just used an emery board. It helps the paint to adhere well so that it won't chip.
Elizabeth shared her amazing tip for staying organized while sewing jeans, so I thought I'd share mine with you as well. For me, keeping all my hardware and application tools in one place is critical, so I am not searching for the rivet applicator tool in one drawer and the actual rivets in another. I keep a large ziploc, into which goes all of the tools and hardware. Each type of hardware is stored in a smaller ziploc with the tool used to apply it. Tools that I use for multiple pieces of hardware are separate, but still stored in the larger ziploc. This way, when I'm ready to sew a pair of jeans, I just grab my "jeans" bag and all of the tools and hardware I need are right there when I need them.
Another thing that has helped me is having my own set of "man" tools, so I don't have to go hunting in the garage when I need a hammer or pliers. I have my own small tool box with a basic set of tools that I keep in the sewing room. I use it all the time and not just for sewing jeans!
Inside, I used a polka dot cotton for my waistband facing and pockets. I am a total convert to the pocket extension into the fly. It is no harder to sew, but it adds some support in the belly area and keeps the front pockets from gaping. I'm never sewing another pair of pants without adding this feature.
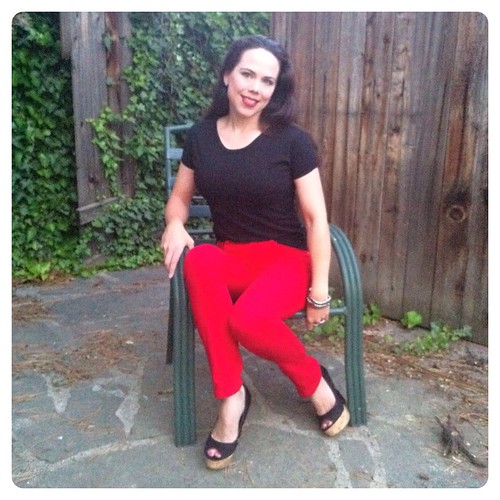
I wore my jeans to the grocery store and a random guy told me I looked like Betty Boop. I think it was the dark hair and red pants with sky high heels more than an actual resemblance, but if you want to tell me I look like a vintage pinup, that's OK with me! Even if she is a cartoon.
I'm wearing my new jeans with a top I copied from my favorite RTW layering tee. This is another "pattern" that I have used to death. I think I have actually made about 6 versions of this tee. It's so versatile. I think I'll make a red one now that I have red thread on the serger... Hmm, then I should probably get going on that wedding dress. 30 yards of ivory shantung/organza/lace/tulle is staring me in the face!
This time, I went for a bit less of a basic by sewing them in a bright red stretch twill (from Fashion Fabrics Club). Since the fabric has so much impact, I went very minimal with the stitching and embellishment. I just did a single line of topstitching, rather than a double, and used a matching topstitching thread.
I do think that hardware is one of the elements that can keep your home sewn jeans from having that "happy hands at home" look. Rivets are easy to apply and definitely give you a more professional appearance. These are the basic rivets produced by Dritz that are available at all of the big box craft stores, but you can get more fun rivets here and here. I am also a serious convert to the heavy duty snap, although a jeans tack button is also a great look. What I love about the snap is that I don't have to fight to sew a buttonhole through all of those layers in the waistband.
Since my heavy duty snap was black, I decided to paint it with nail polish so that it would match my jeans. Needle nose pliers held my snap in place while I painted it. You can also use model paints from the craft store, but nail enamel works great if you have the color you need. Don't forget to lightly sand your snap before you paint it. I just used an emery board. It helps the paint to adhere well so that it won't chip.
Elizabeth shared her amazing tip for staying organized while sewing jeans, so I thought I'd share mine with you as well. For me, keeping all my hardware and application tools in one place is critical, so I am not searching for the rivet applicator tool in one drawer and the actual rivets in another. I keep a large ziploc, into which goes all of the tools and hardware. Each type of hardware is stored in a smaller ziploc with the tool used to apply it. Tools that I use for multiple pieces of hardware are separate, but still stored in the larger ziploc. This way, when I'm ready to sew a pair of jeans, I just grab my "jeans" bag and all of the tools and hardware I need are right there when I need them.
Another thing that has helped me is having my own set of "man" tools, so I don't have to go hunting in the garage when I need a hammer or pliers. I have my own small tool box with a basic set of tools that I keep in the sewing room. I use it all the time and not just for sewing jeans!
Inside, I used a polka dot cotton for my waistband facing and pockets. I am a total convert to the pocket extension into the fly. It is no harder to sew, but it adds some support in the belly area and keeps the front pockets from gaping. I'm never sewing another pair of pants without adding this feature.
I wore my jeans to the grocery store and a random guy told me I looked like Betty Boop. I think it was the dark hair and red pants with sky high heels more than an actual resemblance, but if you want to tell me I look like a vintage pinup, that's OK with me! Even if she is a cartoon.
I'm wearing my new jeans with a top I copied from my favorite RTW layering tee. This is another "pattern" that I have used to death. I think I have actually made about 6 versions of this tee. It's so versatile. I think I'll make a red one now that I have red thread on the serger... Hmm, then I should probably get going on that wedding dress. 30 yards of ivory shantung/organza/lace/tulle is staring me in the face!
Labels:
jeans,
misses,
Vogue 8330
Friday, May 18, 2012
Stretch & Sew 200
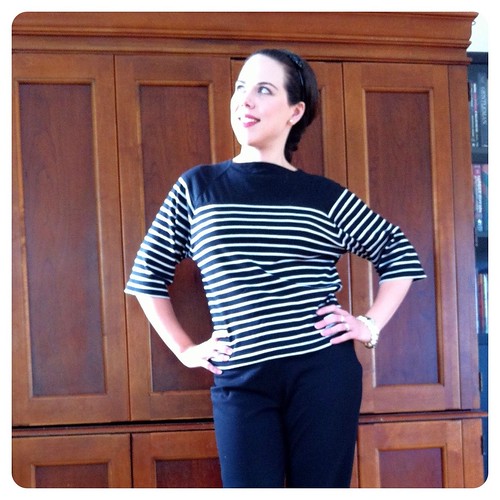
Apparently Pinterest is finally coming through for me. This is the second project in a row that I copied from a pin (or two). I've been sort of obsessed with striped tees with contrast yokes lately. I like the pink on this one. This one has a comfy, casual vibe. But this one is my favorite. I love the wider stripes and the way the black yoke blends seamlessly into the striped body.
Not bad, eh? I used Stretch & Sew 200 as the basis for this top, and it couldn't be more perfect. Thank you, Debbie for sending it my way!
I chose the view with the interesting square neckline. The great part about this was that the pattern pieces were drafted in parts that you taped together for the different necklines. The division line was the perfect place for the yoke, so all I had to do was add seam allowances. Sweet! The neckline is finished with a fold over facing, which I really think is great for a knit top when done well. I love that there is no circumferential seaming at the neckline to restrict the stretch. The facing is stitched down to the raglan seams, so it doesn't flip out.
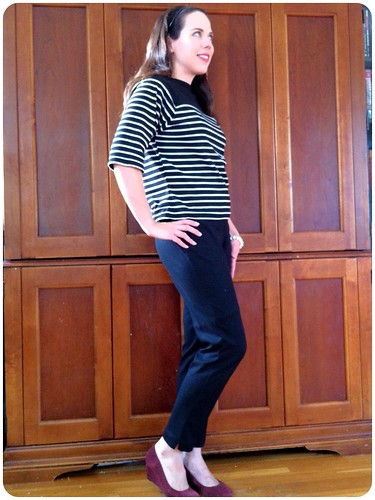
I was a little slapdash with my stripes during the layout, so I'm pleased with how well they matched up, particularly across the raglan seams. There is a little mismatch at the side seam where I eased in my cheater FBA, but otherwise, I was able to convince the stripes to match up nicely. The only other mods I made to the pattern were to shorten both the sleeve and the total length. As drafted, it is quite a long top, which I generally like, but I wanted this to be hip length.
I wore it with my New Look 6082 cropped pants. I really like these pants, but they look a little off balance with the longer tops I generally wear, so this length is perfect for them. This is such a comfortable outfit - I feel like I'm wearing PJs - but I think still pretty chic.
Not bad, eh? I used Stretch & Sew 200 as the basis for this top, and it couldn't be more perfect. Thank you, Debbie for sending it my way!
I chose the view with the interesting square neckline. The great part about this was that the pattern pieces were drafted in parts that you taped together for the different necklines. The division line was the perfect place for the yoke, so all I had to do was add seam allowances. Sweet! The neckline is finished with a fold over facing, which I really think is great for a knit top when done well. I love that there is no circumferential seaming at the neckline to restrict the stretch. The facing is stitched down to the raglan seams, so it doesn't flip out.
I was a little slapdash with my stripes during the layout, so I'm pleased with how well they matched up, particularly across the raglan seams. There is a little mismatch at the side seam where I eased in my cheater FBA, but otherwise, I was able to convince the stripes to match up nicely. The only other mods I made to the pattern were to shorten both the sleeve and the total length. As drafted, it is quite a long top, which I generally like, but I wanted this to be hip length.
I wore it with my New Look 6082 cropped pants. I really like these pants, but they look a little off balance with the longer tops I generally wear, so this length is perfect for them. This is such a comfortable outfit - I feel like I'm wearing PJs - but I think still pretty chic.
Tuesday, May 15, 2012
Mother's Day Maxi
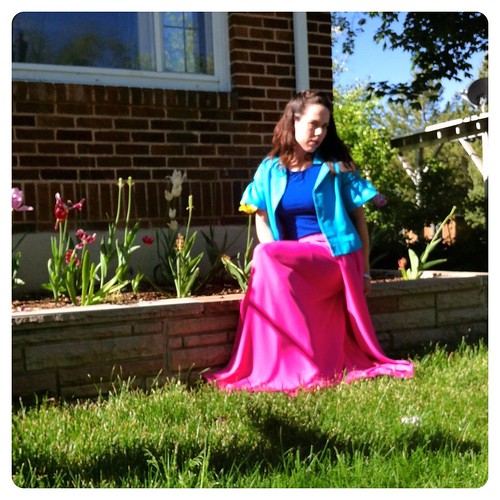
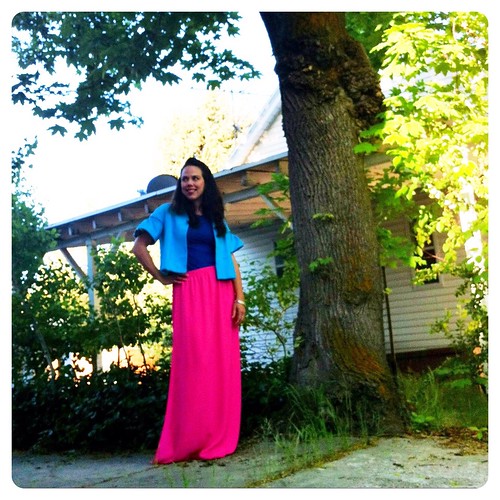
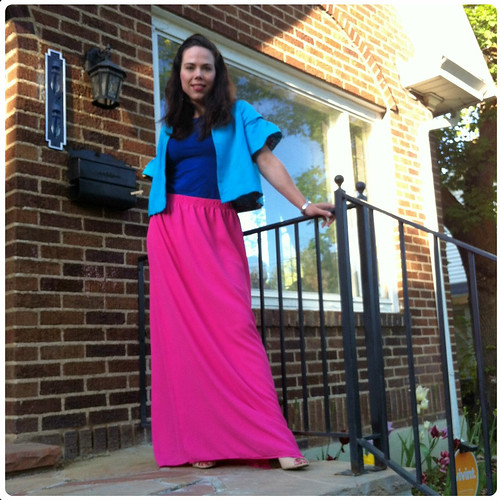
I've been seriously lusting after a bright pink Maxi skirt like this one and this one. And I really dig the high slit on this one.
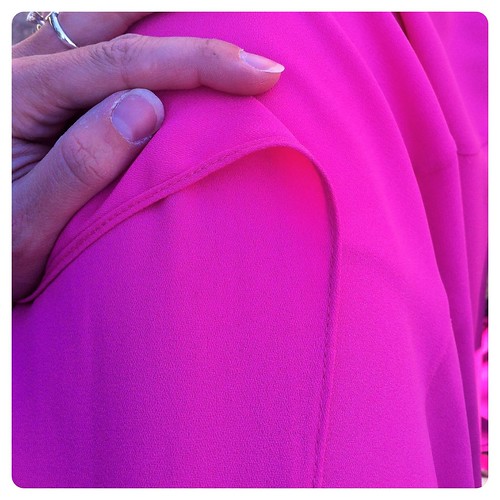
So I took elements that I loved from all of them and made my own. The fabric is a poly crepe from Vogue Fabrics. It isn't my favorite fiber to sew, but this design was simple enough that it wasn't too bad. Fusible thread tamed the beast.
I started by drafting a floor length column skirt (OK, a big rectangle with the width as my hip measurement and the length as the distance from my waist to the floor). I wanted some flow in the hem, so I slashed and spread at the hem to use the full width of my fabric at the hem only. I added an allowance for a 1/2 inch elastic casing at the top - more on that in a sec - then cut two full width panels.
I seamed the two panels together on one side only. I used a french seam, since this is the only seam in the entire skirt, I thought it ought to be nice. Now I have a giant semicircular panel that goes around me twice. I made a baby hem around the two side edges and the bottom hem.
Then I wrapped the skirt around itself, with the two hemmed edges up against the seam - one on the inside and one on the outside of the skirt.
This way, I had the look of a long side slit, but with a full layer of skirt underneath for modesty. The unseamed side also allows for a lot of flow at the hemline.
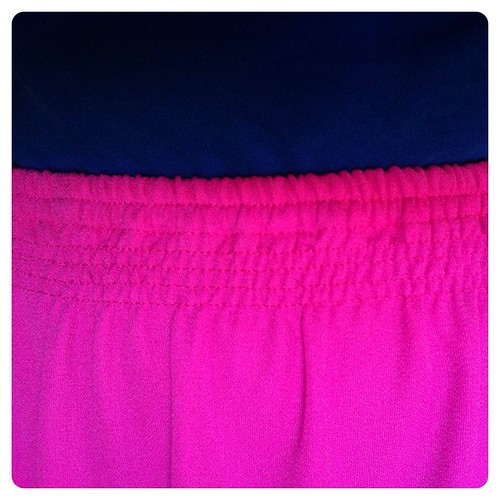
For the waistband, I wanted a bit of width to encourage it to lie flat and to look a bit more like pleats (but without having to pleat 80 inches of polyester crepe - no thank you!). I used this method, with 1/2 inch elastic in a casing at the top and shirring for 4 rows every 1/4 inch. When I finished, it looked strange with the 1/2 inch elastic next to the 1/4 inch shirring, so I added a row of topstitching through the center of the elastic casing. This gives the added benefit of preventing the elastic from rolling in the casing.
I wore my new maxi with a RTW tee shirt and my Vogue 1099 jacket. I've had a hard time styling this jacket, but I really like it with a long skirt. I think the volume at the hem of the skirt helps balance the volume at the hem of the jacket.
So I took elements that I loved from all of them and made my own. The fabric is a poly crepe from Vogue Fabrics. It isn't my favorite fiber to sew, but this design was simple enough that it wasn't too bad. Fusible thread tamed the beast.
I started by drafting a floor length column skirt (OK, a big rectangle with the width as my hip measurement and the length as the distance from my waist to the floor). I wanted some flow in the hem, so I slashed and spread at the hem to use the full width of my fabric at the hem only. I added an allowance for a 1/2 inch elastic casing at the top - more on that in a sec - then cut two full width panels.
I seamed the two panels together on one side only. I used a french seam, since this is the only seam in the entire skirt, I thought it ought to be nice. Now I have a giant semicircular panel that goes around me twice. I made a baby hem around the two side edges and the bottom hem.
Then I wrapped the skirt around itself, with the two hemmed edges up against the seam - one on the inside and one on the outside of the skirt.
This way, I had the look of a long side slit, but with a full layer of skirt underneath for modesty. The unseamed side also allows for a lot of flow at the hemline.
For the waistband, I wanted a bit of width to encourage it to lie flat and to look a bit more like pleats (but without having to pleat 80 inches of polyester crepe - no thank you!). I used this method, with 1/2 inch elastic in a casing at the top and shirring for 4 rows every 1/4 inch. When I finished, it looked strange with the 1/2 inch elastic next to the 1/4 inch shirring, so I added a row of topstitching through the center of the elastic casing. This gives the added benefit of preventing the elastic from rolling in the casing.
I wore my new maxi with a RTW tee shirt and my Vogue 1099 jacket. I've had a hard time styling this jacket, but I really like it with a long skirt. I think the volume at the hem of the skirt helps balance the volume at the hem of the jacket.
Labels:
misses,
self-drafted,
skirt
Saturday, May 12, 2012
Vogue 1050
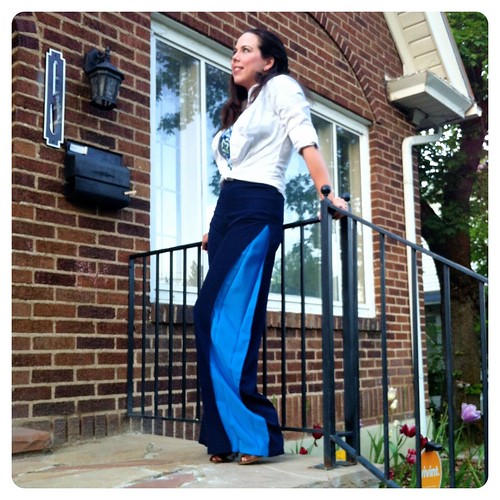
I've been planning to make these pants for literally years, but you know how it goes - Oooh, shiny! Mom and I bought our patterns together but she was more on the ball, and made her pair quite some time ago.
The pattern is Vogue 1050, and it is my first ever Sandra Betzina/Today's Fit pattern. For those who have not sewn a Today's Fit pattern, the sizing system is different. Theoretically, it represents an attempt to represent a more modern (ie, uncorseted) figure. The waist is relatively larger and the crotch curves are more L shaped. The other major difference is the Ms. Betzina writes the pattern instructions, so they don't suck. Actually, they were pretty amazing.
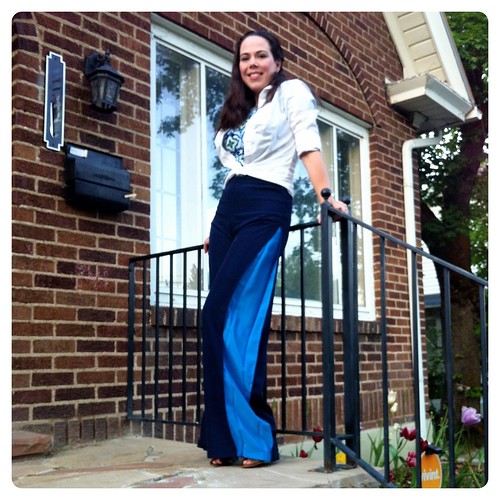
For me, I actually have a 10 inch difference between my waist and hip, so traditional pattern sizing works well for me there. I had to grade down a size at the waist for these to work. But the crotch curve is kind of awesome. From the back, you can see how well that area fits. The front wrinkles are showing you that I need a smidge more room in the hips. I suspect this is because I sewed together the upper part of the pleat through the hips, rather than using closures. I didn't want the hip area of the pleat to gape open and reveal the underlay. My hips are wide enough without a flash of turquoise reminding everyone of the fact. Because the hips a snug, the pants are riding a little high, and bunch up a bit below the waistband.
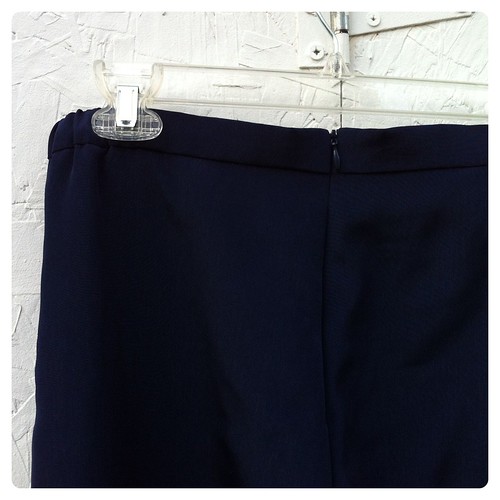
The other big star of this pattern is the waistband and zipper. The pattern calls for an invisible zipper inserted to the top of the waistband at center back. I don't have many pants with a CB zip, and now I know why. You have to be a contortionist to get into them. Particularly when the bulk of the waistband seam causes the zipper to hang up an inch from the top. The jumping and yanking that ensues is quite comical. Next time it goes to center front. Now, the waistband is awesome. It is constructed in fives sections, with only the front and back sections interfaced. The side sections are stabilized and shaped with short pieces of elastic that are secured in the seams. I think this is one of the most comfortable waistbands I have ever worn, but still flattering and shapely. Even if you don't like this style of pant, this pattern is worth having for the waistband alone.
The fabric I used is a polyester peachskin from Joann. This is the only thing I dislike about these pants. This stuff was painful to sew and press. I almost gave up on it, actually. In the end, between the slightly too snug hips and the crappy polyester, I don't think these will live in my wardrobe long, but they will be replaced. All the while I was sewing this pair, I was imagining a pair in a gorgeous soft linen. Wouldn't that be fabulous?!
Labels:
misses,
pants,
Vogue 1050
Subscribe to:
Posts (Atom)