Showing posts with label 04/2004. Show all posts

Saturday, January 25, 2014

Ottobre 04/2004-12 ruffle knit dress

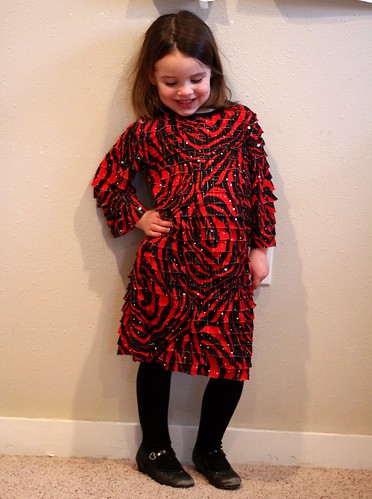
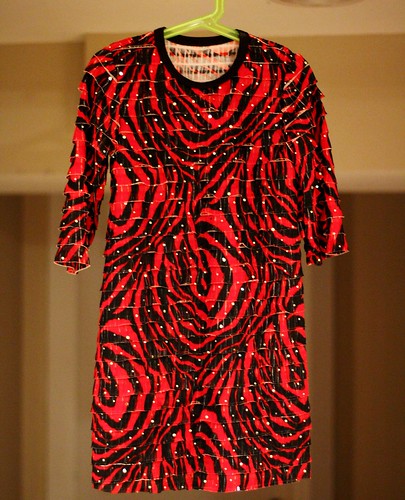
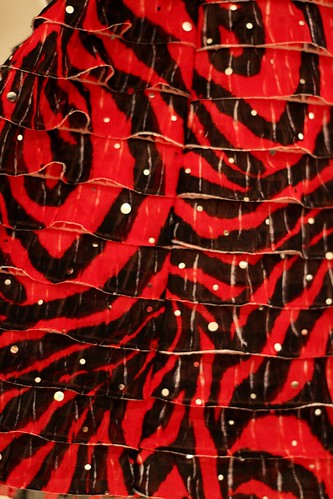
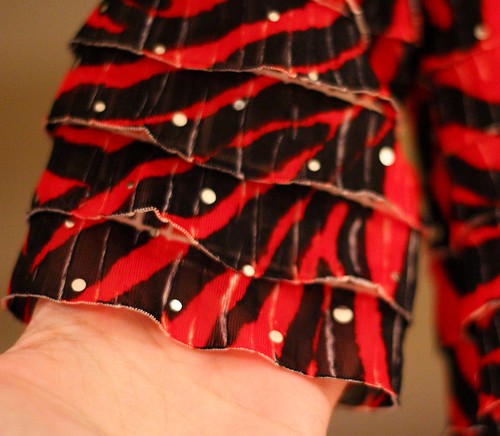
While the serger was still threaded with red after making my sweater, I decided to finally sew up this sequined zebra ruffle knit that I bought for Jungle January last year.
Fabric with this much going on called for an extremely simple design with minimal seaming. I chose a basic a line dress from the 04/2004 issue of Ottobre.
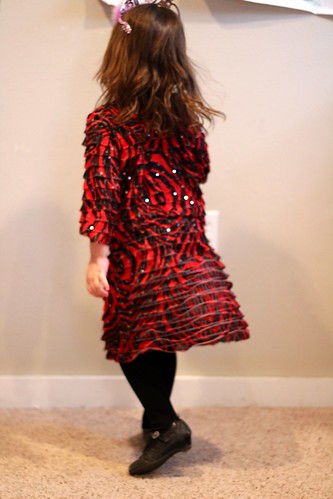
The dress is drafted for woven fabrics, so I went down a size from Myra's usual. I've also found that the older issues of Ottobre tend to incorporate more ease. As you can see, this is a loose fitting dress, despite being a size smaller than she typically wears.
This was my first time sewing with ruffle knit, and I wanted to share a few things that I've learned so far. As I mentioned, it's definitely to your advantage to choose a simple design with minimal seaming. A simple one piece dress like this one is great. A skirt with an elastic waist or a basic tee or tank would also work well.
When laying out your ruffle knit, remember that you must use a with nap layout, making sure that all your ruffles are falling in the correct direction. You will also need to treat the ruffles as stripes, and match them accordingly. I found that if I cut out my pieces on the fold, I ended up cutting into the ruffles accidentally, so I recommend using a single layer layout. It is also ESSENTIAL that you baste the ruffles down in the seam allowances prior to starting construction. You do not want to end up with a ruffle going the wrong direction in a seam! I like using a zigzag stitch to baste them down, as it preserves the stretch of the knit.
For the neckline and armholes if you are making a tank, you'll need to consider an edge finish. I used a rib knit binding, making sure that my ruffles were basted in place prior to applying the binding. Another option would be a facing or lining, but you'll want to use another fabric, as the ruffles would add bulk. A soft tricot knit or swimwear lining would be perfect.
One fun aspect of sewing ruffle knit is that the ruffles provide a perfect easy hem finish! Just trim away the mesh underneath the bottom ruffle. The mesh won't fray, in fact, mine curls up nicely out of the way. The ruffles themselves are already finished on the bottom edge.
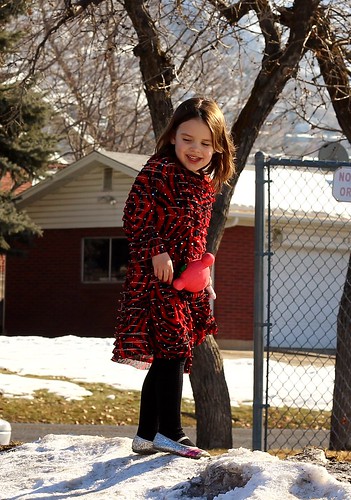
Despite the slim skirt on this dress, the ruffles give it plenty of movement, much like a flapper girl fringe. Myra loves twirling in it!
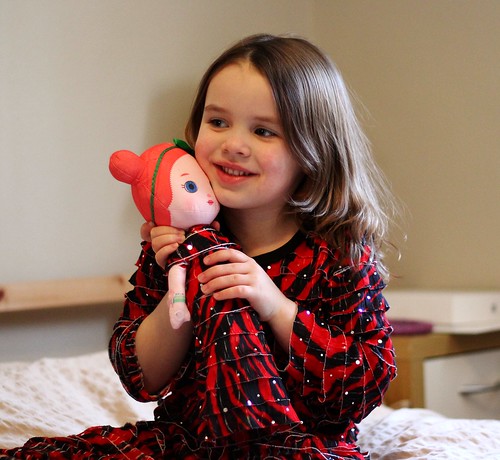
Since Myra's dress left a few largish scraps of knit left, I also made a dress for Myra's favorite doll. Myra insists that her dolls always wear floor length gowns. The ruffle knit drapes in a pretty little cape over her shoulders.
Myra and her Myra doll are both very happy with their new dresses. 
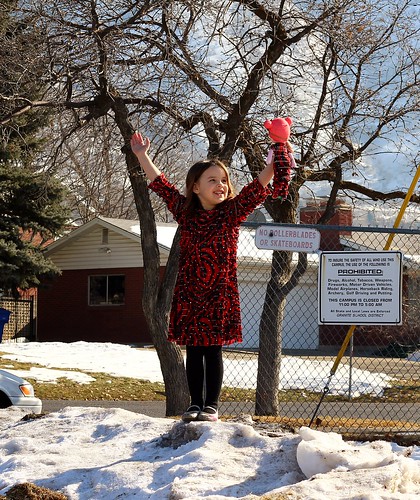
They are perfect for exploring.

Saturday, August 25, 2012

Ottobre 06/2011-21 & 04/2004-35

Myra starts preschool in 2 weeks, and despite the several dresses I made her last month (one of which she has already ruined), I suddenly freaked out and decided she needs a new school dress.
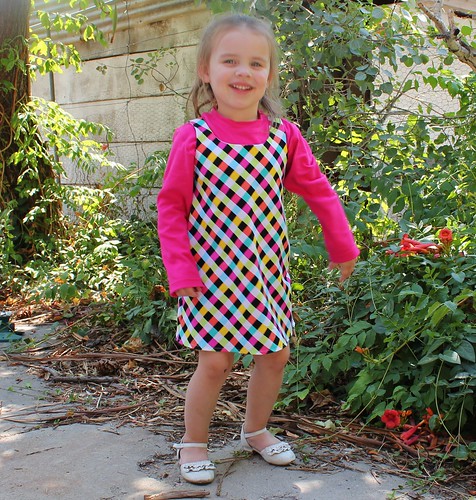
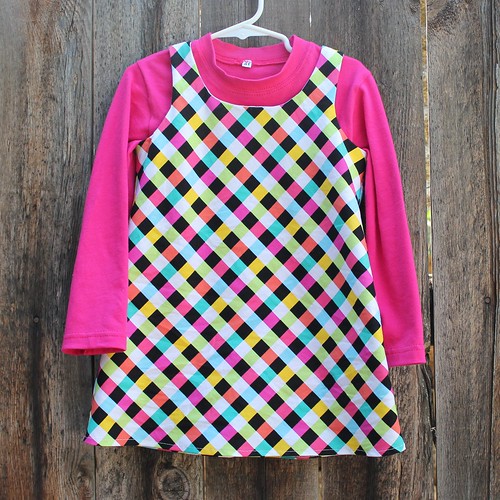
My mother sent me this adorable fabric and as soon as I saw it, I knew it had to be the jumper on the cover of the 06/2011 issue of Ottobre. It's even intended for bias cut plaids, so I thought I was in the clear with regards to pattern matching.
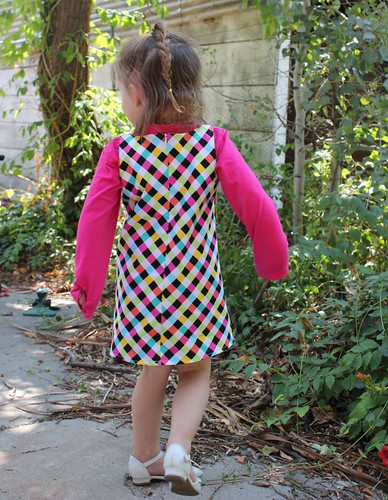
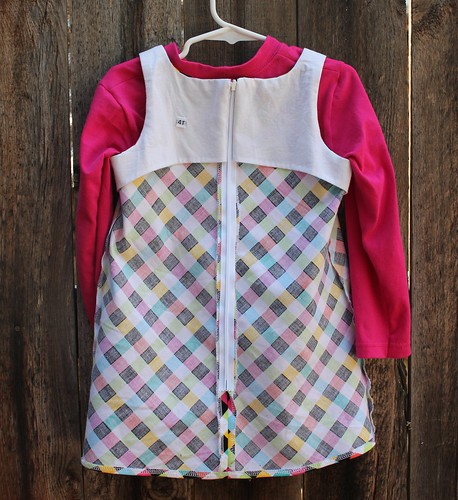
I did manage to chevron the dominant pink and orange stripes at the zipper, which was no mean feat and involved a lot of basting and wonder tape.
I also managed to chevron one side seam, again matching the pink and orange stripes. Unfortunately, since the dominant stripes are only in one direction, this works out like an uneven plaid, so there was no way to match all three seams. I decided the CB matching was more important, so I had to sacrifice the left side. I'm not even going to show you. It's too embarrassing. I almost decided to just cut this on the straight grain, but I just couldn't talk the fabric into it. It really wanted to be a bias cut jumper. Don't you hate it when your fabric gives you sass??
The pattern is designed for wool, and is lined, but for this fabric, I decided a facing was a better option, so I drafted an all in one facing from the main pattern pieces and used Trena's all machine, clean finish lining method. It was a little tricky getting the dress through those little straps, but it worked out. I also finished the facings with the interfacing, using the Sunny Gal method. I really need to take the time to finish more of my facings this way. It really looks fabulous. I made a narrow, serged and topstitched hem instead of the 1 inch hand sewn hem the pattern calls for. I'm glad I did, as it turned out a bit on the short side. I'll lengthen it an inch or so when I make it again.
I made a quick long sleeve tee to go under the jumper. Can you believe that child doesn't already have a long sleeve hot pink tee? I used Ottobre 04/2004-35, which I have used before for Logan. It is the same as the Creative Workshop 301 tee pattern, which is what the jumper is paired with in the Ottobre magazine. I keep thinking it needs an embellishment on the jumper, but I'm going to leave it be for now. Looking at that print for long is a little dizzying! Myra loves it. She's a bit dizzying at times herself.

Monday, March 26, 2012

Ottobre 04/2004-38A, sweat shop style

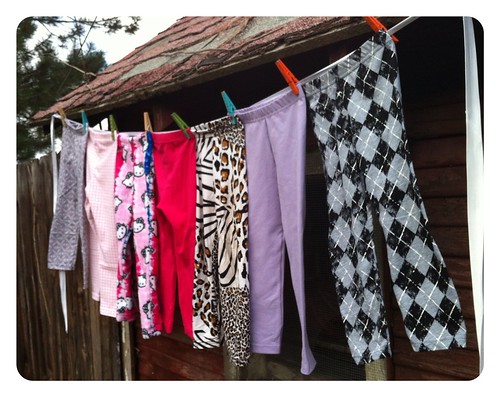
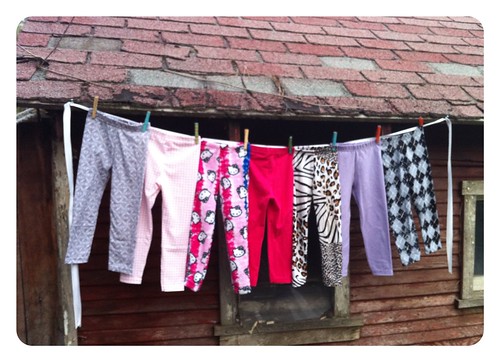
I realized the other day that Myra has managed to explosively grow out of all of her leggings. Since her daily uniform is leggings and a tee shirt, this is a bit of an urgent need, so I pulled a few pieces of jersey out of the stash and went to work.
And made 7 pairs of leggings in couple of mornings.
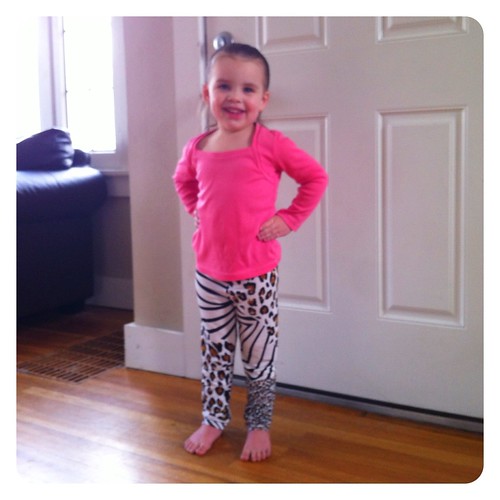
Her favorite pair is this animal print patchwork pair made of rayon jersey from Fabric Mart. She's wearing it with Jalie 2794, the Sweetheart tee. Since I pulled the fabrics all from the stash, they are a wide range of fabric and fiber, although I did mostly stick to lightweight jerseys, with the exception of the Hello Kitty pair, which is minky. 
It was originally a pair of adult sized PJ pants she spotted on the clearance rack at Target. I used the original hems and side seams, so these were super quick.
The pattern is Ottobre 04/2004-38A, which I used once before as a Halloween costume for Logan. They are your basic one piece pant pattern, and I love them. Conveniently, Myra fits into the size I had already traced, so I didn't even have to trace a pattern - win.
So, now that I am seriously tired of Myra sewing, I'm ready to jump back on my Wardrobe Basics wagon. I am almost finished with my Tie Waist sweater, although I ended up going shorter, so really it is just a cardi, but definitely a useful wardrobe basic. 
It just needs buttons and buttonholes and it will be ready to go. I didn't have any in the collection that suited, so I'm actually going to have to go get some. I'm not sure when that is going to happen, so I think I'll start tracing my trench coat. You know, now that it is Spring and I don't need it...

Tuesday, January 24, 2012

Ottobre 04/2004-14

Thanks to everyone for all the wonderful comments on my jacket. I really love it and enjoyed making it. I'm glad I got to share a bit with all of you.

**********************************

As predicted, Logan has been wearing his Woody costume shirt to church since Halloween. While I am glad it is getting worn, and also that he is leaving the vest at home (Whew!) it was quite fitted when I made it and now it is just too small. I have been trying out other patterns for dress shirts for Logan, but this time I came back to an old favorite from the 04/2004 issue of Ottobre.
This is #14, the "shirt for little boys". I made it for Logan in 2009 and I just love all of the wonderful details it has. It really is pretty much the perfect little man shirt.
It has cool darted pockets. I left off the flap, since I matched the pocket stripes perfectly and I was afraid to mess with a good thing. I do think it looks more grown up without the flaps, but the corner darts leave plenty of room for trains and cars.
I love the sleeve plackets. I just adore how much these make a little man shirt. And this issue of the magazine has detailed instructions with diagrams for putting in the sleeve placket. I forget all the fiddly details since I don't do this all the time, so it is really great to have the reminder of all the steps. Also - how about that stripe matching across the placket, eh? Mad skills. And magic tape.
The shoulder yoke comes forward of the shoulder seam and is curved into the front. Pam mentioned recently on Facebook how much she likes this feature in a man's shirt, and I have to agree. I think that it gives it a much more high end look. It's the little touches, you know?
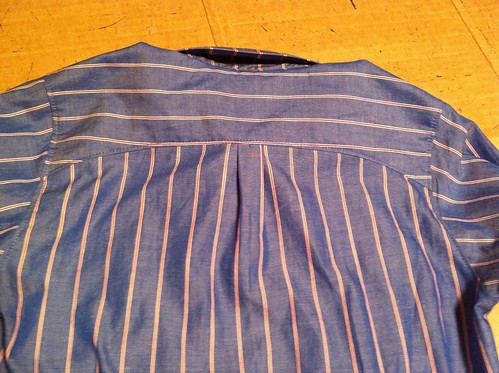
The back yoke also curves down, mirroring the front and there is a center back pleat, just like Daddy's shirts.  I'm really glad that Ottobre drafted this shirt all the way up to size 170. I just love it.

ETA: I just enabled threaded comments on the blog (Thanks Amanda, for showing us how it's done!). Please let me know (email - katiedeshazer (at) gmail (dot) com) if you can't comment or the blog is acting funny for you. I think it would be great to respond to each other's comments, but not if there are problems with blog functionality. Thanks!

Monday, December 14, 2009

Ottobre 04/2004-2 & 03/2004-8

With my last shreds of soil separator paper I managed to eke out a tee shirt pattern for Myra.  She really needs some long sleeved tees, and I wanted some leggings as well, for layering under summer dresses that she hasn't yet outgrown (but will by the time it is warm enough to wear them again!).

Here is her first tee.  I didn't want anything fancy, since she'll be wearing it under things, but I liked the little keyhole at the neckline.

And a pair of basic leggings.

I did the waistband slightly differently than the Ottobre directions and it looks exactly like her RTW leggings.  Basically I attached the elastic in the round to the wrong side of the pant top with a wide triple zigzag and my overcast foot so it finished the edge and sewed it in one step, then folded over the edge and topstitched it down with a twin needle.

For both pieces I used a "ponteroma" double knit from Hancock.  It is super soft and cozy.  I think it will be perfect as a warm winter layer.

"Why are you taking a picture of my in my long johns, Mommy?"  Yeah, not too stylish all by themselves!

But just right with a little dress over the top.

Friday, December 11, 2009

Ottobre 04/2004-35

Poor Logan hasn't had much representation in the sewing room of late, but he really needs some warm weather gear, so I started off with a couple of quick long sleeve tees to get his winter wardrobe going.

Pardon the yoghurt stains on the black tee.  He wore it before I could get a picture - before I even hemmed it,  in fact.

I think he likes it.  The applique design is based on an illustration from one of his favorite books, I Love Trucks.  I let him pick which truck to put on his shirt.  I think that this one will get a lot of wear.  I managed to stretch out the neckline while sewing it.  I've been having a lot of trouble with binding knits lately!  It recovered well during the day, though, so I think it will be fine.  I did think the neckline was a bit large, so I raised it on the green stripe shirt.

While I was working on these shirts, tragedy struck in my sewing room.  I hauled out all of my tracing materials to get this pattern ready.  As I unrolled my soil separator paper (which is what I use to trace patterns), I came to the end of the roll!  I knew it was coming soon, but I thought I had a few yards left.  Oh well - off to Lowe's to get some more - only to discover that Lowe's no longer carries it!!!  In fact, the isn't any available in this whole freaking town!!  Oh no!!  So, I'm going to have to order some off the internet, which means waiting for shipping during the Christmas season.  Which means I won't be able to trace off any patterns in the interim.  So, if there isn't much going on here, you know why...

Monday, December 7, 2009

Ottobre 04/2004-3

Now that the temperature has dropped for real around here, it is time for some serious winter sewing.  I love fleece.  It is fun and easy to sew and just so cuddly!

Here is the tunic to match Myra's red pants.  Overall this is a simple pattern.  The pockets were a bit tricky, but only because they are round and I was silly and decided to line them with silky fabric.  They're nice inside.  The worst part was that dang binding.  I think this was mostly my fault, too.  Sort of.  The pattern calls for ribbing, but I couldn't find any red ribbing anywhere!  I couldn't even find cotton interlock in the right shade of red.  So I ended up using a poly interlock that was slick and wouldn't stay put.  It made for a difficult binding to press and sew.  Despite hand basting, it slipped all over the place.  It took 4 attempts and it still isn't on right.  I just gave up on it!

I still think it is pretty darn adorable on Myra.  I love those little gathered sleeves!  The collar is really great.  Since it is two layers of fleece it is nice and puffy so it keeps her wee neck warm.

Here's a view where you can see the pants with the applique.  When she stands up, it just peeks out under the hemline.

Sunday, October 25, 2009

Renaissance Costumes

Yesterday we took our trip to the Texas Renaissance Festival, and the kiddos all wore their costumes! Here are Peter Pan and Wendy. His tunic is Butterick 4632 and his leggings are Ottobre 04/04-38. Her dress was made from Simplicity 5695 by my friend Laurie. It was her first time sewing clothing and I think she did a great job!!
Another shot of Peter Pan. It was a little tricky getting a good picture of him...
Here is my little pirate lass. Her costume is Simplicity 2561, except for her peasant blouse, which is Simplicity 5695. She wouldn't keep her hat on, of course.
Here is our entire little band. Whew, was it tough getting a decent picture of all four of them!

Friday, October 16, 2009

Ottobre 04/2004-14

Here is Logan's fancy new Soccer Ball shirt.I started on this shirt last week, but when I got the fabric for the pants for the wedding, I decided to put this aside, since the pants were a bit more urgent. All that was left was buttonholes and buttons, which doesn't sound like a lot, but there were nine of them in 2 different sizes! Long sleeved dress shirts are trouble...That said, I really love this one!! This is the first long sleeved dress shirt that I have ever made, and therefore, my first experience with cuff plackets. I've always been afraid of them. I read directions, but my mind just couldn't wrap around how they work. Now that I've done it, I think that it is one of those things that I just had to see and do to understand. Ottobre had wonderful illustrated instructions and I was reading David Page Coffin's Shirtmaking, so I used an amalgam of the two.
They turned out quite nicely, although I rather wish I had been a bit more careful with my layout, since this side says "Ick" across the buttonhole.
I love the way that the back yoke curves around to the front. This is also the first Logan-sized shirt that I have made with a full collar with stand. I like! I may not go back to the bad old one piece collar days...
And the little man pleat in the back - Love it!! And so does Logan!Whew! He's been refusing to wear things that I have made him lately, and I thought I was in trouble. Apparently I just needed to let him pick the fabric.
Myra likes it, too. Maybe I'll whip up a pint-sized version for her...

Parting shot: My big boy heading off to Pre-school. At least he is cradled in love. Mommy made his shirt and backpack and Oma made his shorts. We love you, little guy!

Thursday, October 15, 2009

Ottobre 04/2004-15 in black for the Ring Bearer

You saw the waistband to this guy yesterday, but after the final touches are all on, they are finished!
Why they look blue in this picture, I do not know. They are actually made of a black pique that I found in the clearance section at Hancock's. The fabric for these pants was a surprising challenge! Since I seem to be incapable of purchasing solid color fabrics, I had no solid black anything in my stash. On Monday when I hit the Hancock's sale, I thought I'd pick up some black suiting or twill, but there was none to be had!! What!! Fortunately, this pique was left over from the summer, and was 50% off, so I grabbed it. I think it turned out pretty well, although it ravelled like the devil.This picture is more true to the color, which means that you can't see any of the detail. The back yoke is pretty cool, but it's just like the last one. In terms of finishing, since this fabric was crazy ravelly I overcast all of the edges before I started construction, so there wasn't anything to finish once I got going. Nice, actually. The fly went together very well, so I don't have any pictures of wonkyness there this time. I remembered the interfacing and it was all good. the only real difference between these and the previous pair is that I refashioned the other pair, so I didn't have to construct the hip pockets. They were already there! The slash on these pockets is very much on the bias, and this pique is a pretty loose weave, so it stretched like crazy! Fortunately, I remembered a tip from Power Sewing for stabilizing a bias cut pocket with a piece of woven selvage.
So that is what I did! And it worked great!! The pockets are totally stable. No stretching at all. Of course, it also doesn't hurt that it is both understitched and topstitched per the pattern instructions. I thought that was a little overkill, but I did it and I admit - they look great.

I should have some fun pictures of all of this wedding gear to show you soon! The wedding is Friday and the reception Saturday!! I got these pants done just in time. Whew!