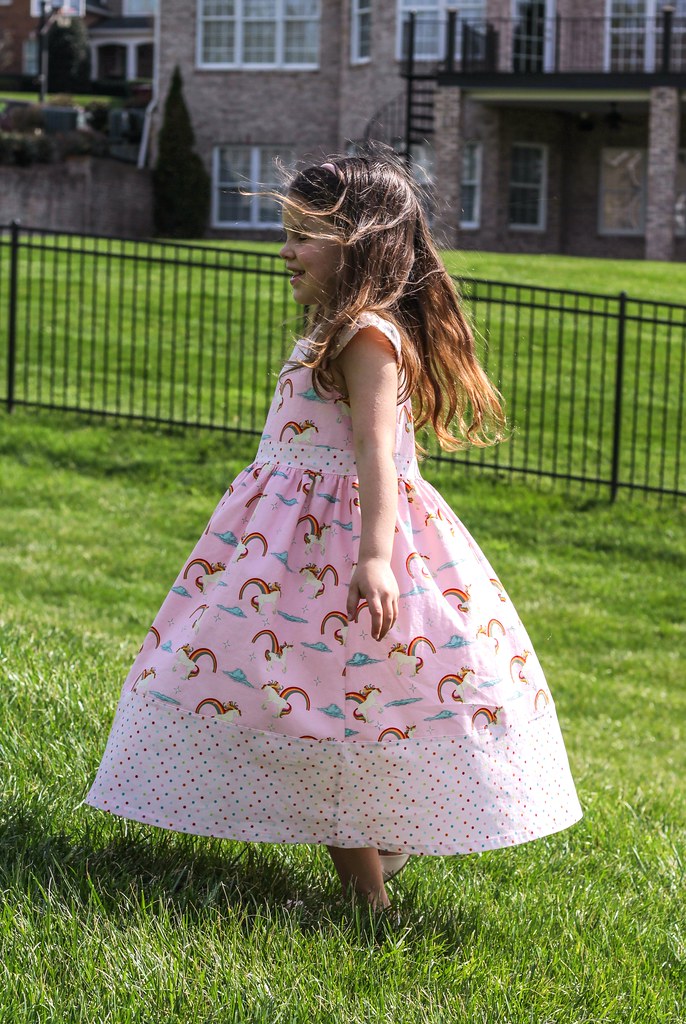
Myra personal style has experienced some evolution lately. She still loves pink, princesses, and all thing frou-frou, but she's expressing that love in a more understated way. Princess printed tops with skinny jeans or a high-low tunic with ruffle detail and bermuda shorts are much more likely to get worn than a fluffy dress.
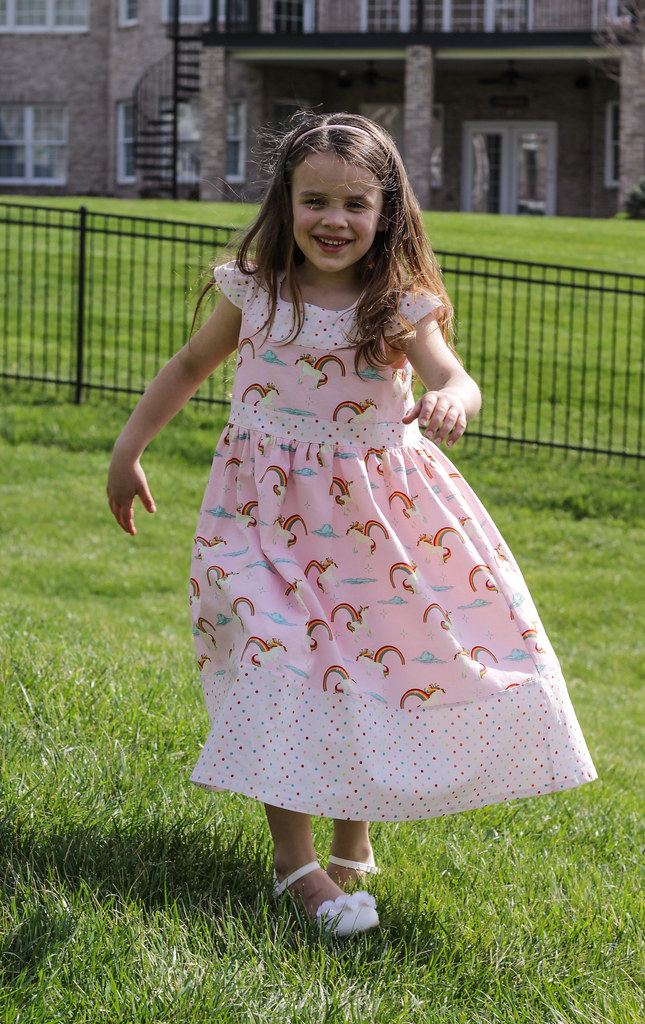
But it's Spring, and I always make Myra a fancy dress for Easter, and she's been crushing on unicorns lately, so I decided to try for this pretty but not too fluffy style, made up in unicorn themed coordinating prints by Riley Blake Designs. Which fortunately, she loves, Whew! The pattern is from the 03/2008 issue of Ottobre, style #19. It's a sweet dress that I've wanted to make her for some time.
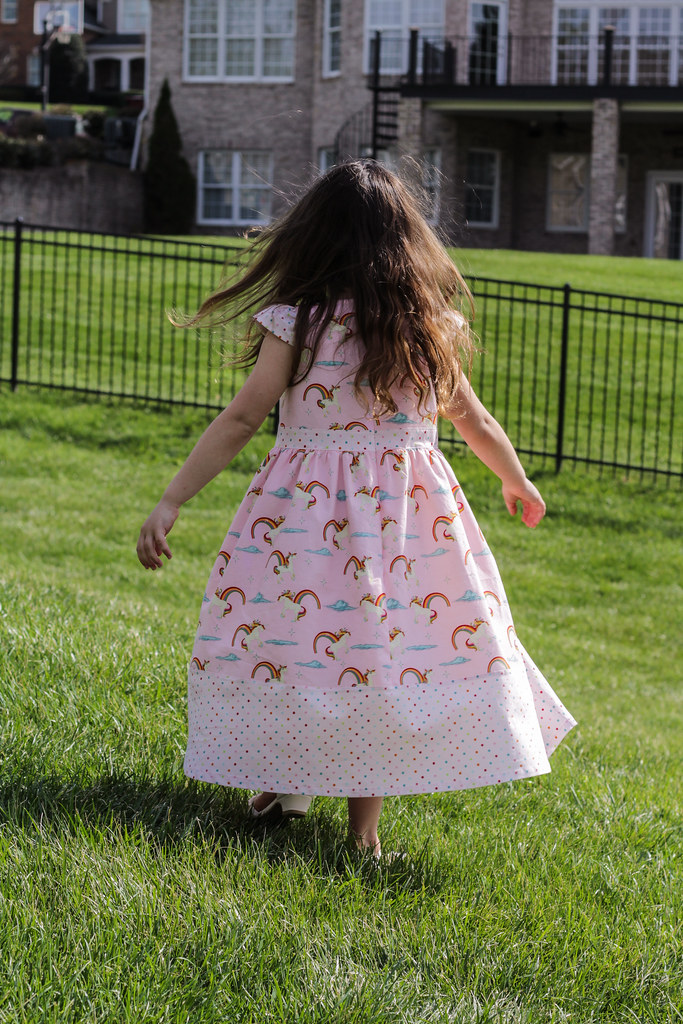
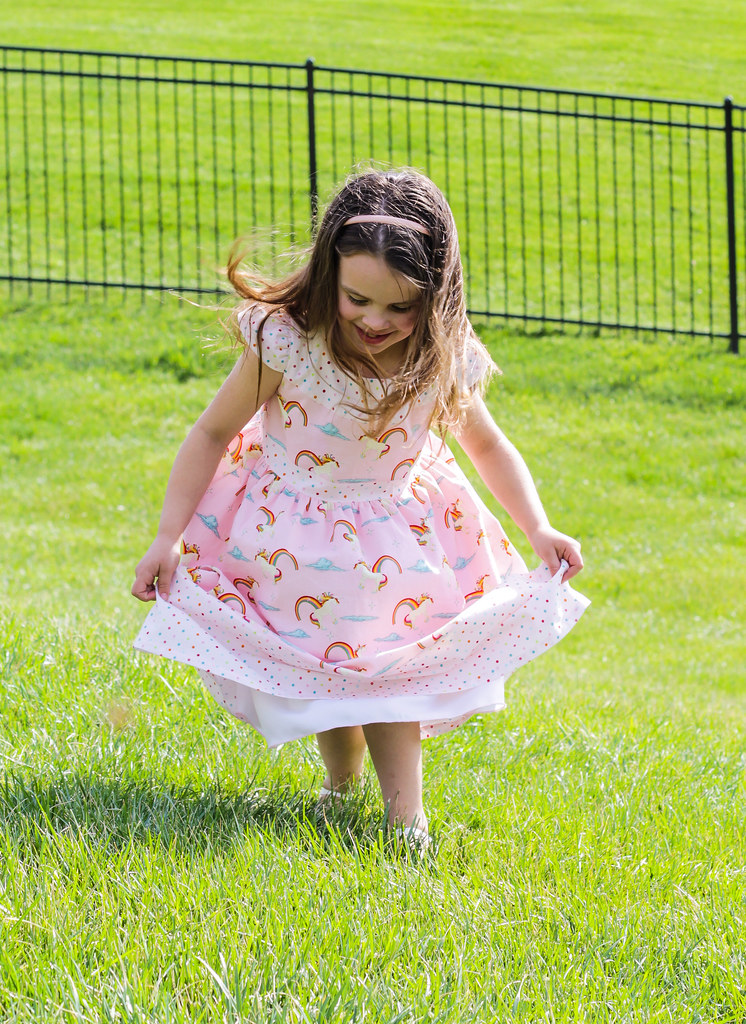
The skirt is a gathered half circle and the band at the bottom is nicely shaped for fullness. She might be growing up, but she still loves a dress with some twirl! She's been favoring longer skirts lately, so this length is about perfect. Functional when she wants to run and climb, but still long and girly.
The dress closes with a back invisible zipper. I love how the back band isn't broken up by the center back seam. It meant the construction was a bit less intuitive, but it still went together well with typical great Ottobre drafting.
Ottobre's instructions called for a lined bodice, but a separate petticoat in lieu of a skirt lining. I elected to line the entire dress with white satin. The bodice is lined with a lighter charmeuse weight satin and the skirt is lined with heavy bridal satin to give it more body. I finished the lining with a serger rolled hem in pink to tie it together.
I was really worried that this dress was going to be a flop, since she really hasn't been wearing dresses much, but she truly loves it and I've had to fight to get it off her since I finished it. What a relief!
Showing posts with label 03/2008. Show all posts
Friday, April 10, 2015
Monday, June 4, 2012
Ottobre 03/2008-11
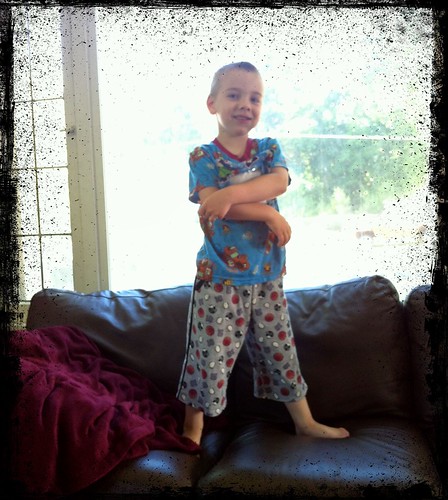
Logan has these shorts. He loves them so very much. But I made them nearly 3 years ago and they have been in heavy circulation since then. And boys are not known for being gentle on their clothing. They are raggedy. And not in a deconstructed, cool way. The hems are falling out, the knees are covered grass stains where they don't have holes and the pockets are falling apart.
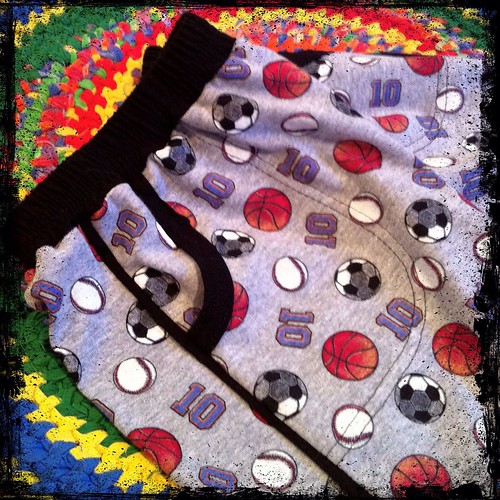
It was time for a new pair. Fortunately, I had enough of the printed rib knit left over to just squeeze these out.
The pattern is the same as the prior pair, Ottobre 03/2008-11, the "Summer" shorts. They really are a great combination of easy sewing and fun details.
The pockets are bound and there is a trim strip stitched to the side seam. This time, rather than topstitching the trim down, I folded it wrong sides together and treated it like flat piping. It was a little simpler to sew and I like the look of it. The last time I made these shorts, I was an Ottobre newbie and had neither serger nor coverstitch machine at my disposal. I have to say, this version not only is much nicer, it sewed together significantly more quickly. In fact, I went from tracing the pattern to handing them over to the boy in less than 2 hours.
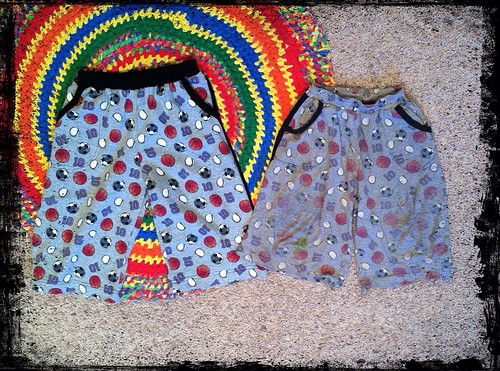
For the sake of the laughs, here they are next to the old pair. Not only do we still have the old pair, I had to pull it out of the laundry as he wore them a few days ago. The picture really doesn't do justice to just how competely worn out these are. They went straight in the trash after this picture was taken. I'm so glad he finally nagged me in to making their replacement!
It was time for a new pair. Fortunately, I had enough of the printed rib knit left over to just squeeze these out.
The pattern is the same as the prior pair, Ottobre 03/2008-11, the "Summer" shorts. They really are a great combination of easy sewing and fun details.
The pockets are bound and there is a trim strip stitched to the side seam. This time, rather than topstitching the trim down, I folded it wrong sides together and treated it like flat piping. It was a little simpler to sew and I like the look of it. The last time I made these shorts, I was an Ottobre newbie and had neither serger nor coverstitch machine at my disposal. I have to say, this version not only is much nicer, it sewed together significantly more quickly. In fact, I went from tracing the pattern to handing them over to the boy in less than 2 hours.
For the sake of the laughs, here they are next to the old pair. Not only do we still have the old pair, I had to pull it out of the laundry as he wore them a few days ago. The picture really doesn't do justice to just how competely worn out these are. They went straight in the trash after this picture was taken. I'm so glad he finally nagged me in to making their replacement!
Thursday, May 3, 2012
Ottobre 03/2008-7
Up until now, I haven't needed to do much Duncan sewing. Logan left a ton of hand me downs, and Duncan has been pretty well dressed. But, since their birthdays are offset by a season, we have no warm weather clothes in his current size. Even all of his pants are lined or fleece. The kid needs shorts.
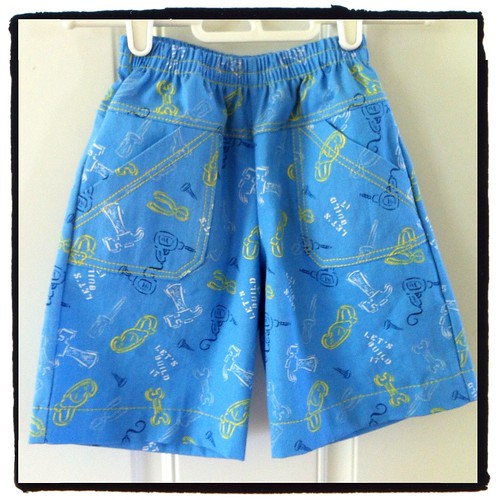
So I made him Ottobre 03/2008-7, the "Aqua" shorts. I made them a size too large, since I wanted them to last him a while.
The pattern is an elastic waist short with front and back patch pockets, and a yoke both front and back. Fun times with topstitching!
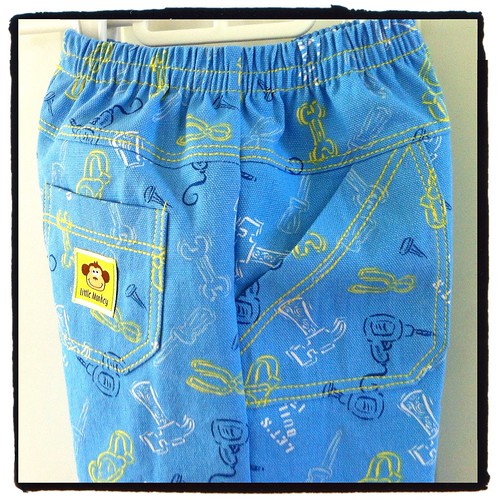
I added a little patch to one of the back pockets. Duncan is definitely a little monkey!
Here is a side detail shot so you can see the pockets, yokes and topstitching. I didn't have any yellow heavyweight thread on hand, so I used the triple stitch to give it some density and make it pop. I didn't use my twin needle this time - just sewed it freehand. Sometimes I'm crazy like that.
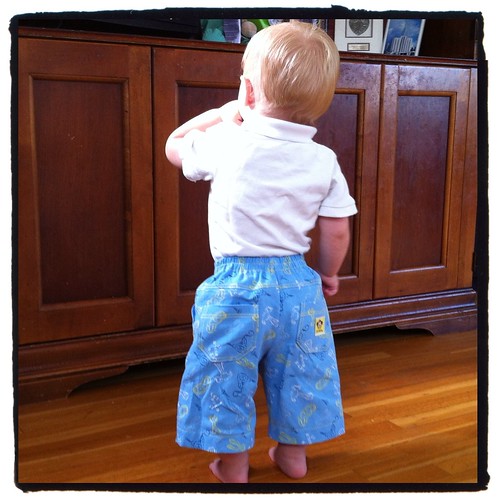
From the back, I actually really like the way they fit, despite being a size too big. There is plenty of diaper room. You have to love that cloth diaper friendly European drafting. The fabric is a printed canvas from Mom's stash. The selvage says that it comes from Joann, but I haven't seen anything this cute and boy friendly there lately!
One more cute baby picture, just for good measure. It's so nice to have such a cooperative model for a change!
So I made him Ottobre 03/2008-7, the "Aqua" shorts. I made them a size too large, since I wanted them to last him a while.
The pattern is an elastic waist short with front and back patch pockets, and a yoke both front and back. Fun times with topstitching!
I added a little patch to one of the back pockets. Duncan is definitely a little monkey!
Here is a side detail shot so you can see the pockets, yokes and topstitching. I didn't have any yellow heavyweight thread on hand, so I used the triple stitch to give it some density and make it pop. I didn't use my twin needle this time - just sewed it freehand. Sometimes I'm crazy like that.
From the back, I actually really like the way they fit, despite being a size too big. There is plenty of diaper room. You have to love that cloth diaper friendly European drafting. The fabric is a printed canvas from Mom's stash. The selvage says that it comes from Joann, but I haven't seen anything this cute and boy friendly there lately!
Thursday, April 26, 2012
Ottobre 03/2008-29 & 03/2011-6
Well, after a slow start, I'm getting some things done for KCWC. I started with the tee shirts for the boys, mostly because Logan has been really excited about the Mater fabric I found for him.
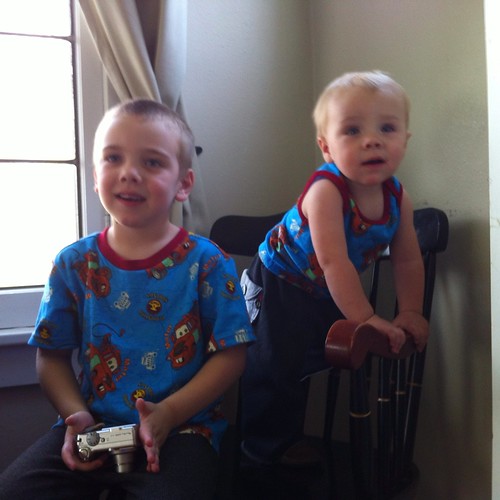
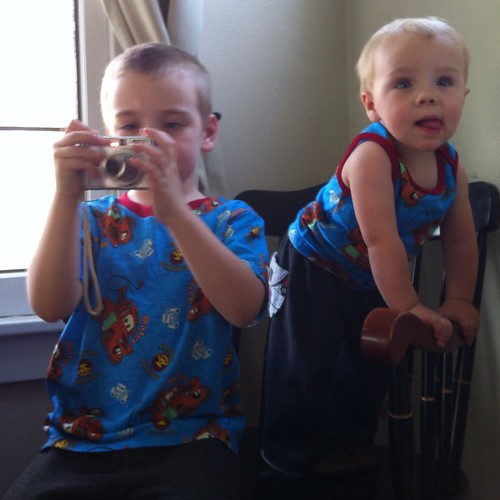
Here are my cuties in their coordinating shirts! The fabric is a cotton interlock from Print Knit Studio. It's a nice sturdy knit, but still soft. Perfect for kid's clothes. The ribbing is cotton rib knit from Fabric.com. I debated what color to use for the ribbing and binding. None of the blues I had seemed quite right, so I let Logan choose. He surprised me with the red! I really like it. So much so that I coverstitched all the hems with red as well.
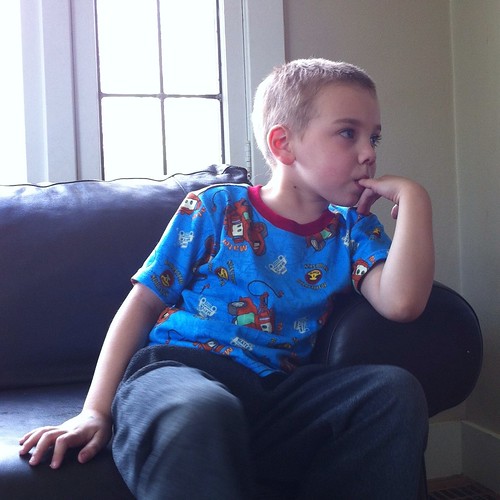
Logan's shirt is from the 03/2008 issue of Ottobre. This was my first issue ever and I have sewn a ton from it. This is the first time for this particular shirt though. It is a basic tee with slightly forward shoulder seams, a rib knit neck band and stitched hems. The neckline is a little larger on this one, which is actually good for Logan, as he has a pretty large head and small necklines freak him out. It has a relaxed fit, which Logan also prefers. I did add 3/4 inch to the length of the sleeve. They looked a little short to me, and I think they were. The finished length here is just about right.
For Duncan, I used #6 from the 03/2011 issue of Ottobre. It is photographed in pink on a baby girl, but it looked like a good boy shirt to me. It is a sleeveless tee with an envelope style neckline. It is a great fit on Duncan without alterations. Since all of the neckline and sleeve edges are finished with binding, this was a super fast sew on the serger and coverstitch machine. It only has the two side seams to sew! Everything else is bound. I'm definitely going to make Duncan a few more of these.
I did want to add just a little note about sizing in general. I've noticed that the newer issues of Ottobre (after about 2009) have a much closer fit, while the older issues are much more generously sized. You can really see that in play in these two tees. Both boys fall between sizes based on their chest and waist measurements. For both boys I used the larger size. Logan's tee (from a 2008 issue) is quite loose fitting with a slightly dropped shoulder line. Duncan's top (from 2011) has a very snug fit and the shoulder is right at his shoulder point. So, for those who sew with Ottobre, just be aware that the older back issues do tend to have a bit more ease built in to them. If you are looking for a closer fit, go with a style from a newer issue or size down
Linked up
Here are my cuties in their coordinating shirts! The fabric is a cotton interlock from Print Knit Studio. It's a nice sturdy knit, but still soft. Perfect for kid's clothes. The ribbing is cotton rib knit from Fabric.com. I debated what color to use for the ribbing and binding. None of the blues I had seemed quite right, so I let Logan choose. He surprised me with the red! I really like it. So much so that I coverstitched all the hems with red as well.
Logan's shirt is from the 03/2008 issue of Ottobre. This was my first issue ever and I have sewn a ton from it. This is the first time for this particular shirt though. It is a basic tee with slightly forward shoulder seams, a rib knit neck band and stitched hems. The neckline is a little larger on this one, which is actually good for Logan, as he has a pretty large head and small necklines freak him out. It has a relaxed fit, which Logan also prefers. I did add 3/4 inch to the length of the sleeve. They looked a little short to me, and I think they were. The finished length here is just about right.
For Duncan, I used #6 from the 03/2011 issue of Ottobre. It is photographed in pink on a baby girl, but it looked like a good boy shirt to me. It is a sleeveless tee with an envelope style neckline. It is a great fit on Duncan without alterations. Since all of the neckline and sleeve edges are finished with binding, this was a super fast sew on the serger and coverstitch machine. It only has the two side seams to sew! Everything else is bound. I'm definitely going to make Duncan a few more of these.
| Silly boys! |
Linked up
Tuesday, March 15, 2011
Ottobre 03/2008-8 - the "Peasant" shirt
I'm not sure why Otto calls this one the "Peasant" shirt. I think it's pretty classy!
Cute, eh? I hope it still fits him at Easter! It's a little big right now, so I think I got the size right. I guess we'll see how fast he grows.
The pattern is #8 from the 03/2008 issue of Ottobre. It isn't an exact match for Logan's shirt, and I thought about altering it to make them identical, but I decided that would be a little too matchy-matchy. I'd rather they just coordinated. There are a few things that I wish I had transferred though. This shirt was much simplified, which made it easy to sew, but I think it lacks a bit. There is no back yoke or button bands and the hem is straight rather than a more traditional shirt tail hem.
The details I did like were the cuff plackets and the bias cut pockets with flaps. I kinda wish I had cut the flaps on the bias, but they are still cute on grain. The cuff plackets were done a little differently in the pattern, and I have to say, I wasn't a fan. The pattern called for the underlap to just be narrow hemmed.
As you can see, I bound it in a more traditional way. In fact, I just used the directions from Logan's shirt. Overall, I am happy with the shirt, since it was quite easy, but if I make it again, I think I'll draft a yoke and front bands. I just prefer the look that way.
I got a lot of comments about the snap setter I used on the last shirt, so I thought I'd tell you about it.
Here it is! Crazy simple - just 3 pieces of plastic. For such a useful tool, I thought it was really inexpensive. At SewBaby, where I got mine, they are only 9 dollars, and adapters for other sizes are 3.50.
Here is how it works. You start by putting the prong side of the snap into a depression on the base of the tool. Put your fabric in place on the snap. I found it helped to push the prongs into the fabric a little, especially if there were multiple layers. Then you place the second piece of the tool which holds your fabric in place and aligns the snap to the base. You drop the appropriate snap into the hole, then put on the cover, and hammer the snap together. The cover has a circle that shows you where to hit. The instructions that came with the snap setter were great. The only thing that I found was that with my little girlie hammer (and girlie arms) I had to hit between 6-8 times to get the snap to really hold together. The instructions only say 2.
I do have a few words of caution.
The first is to be sure that you protect the surface that you are pounding your snaps on. This is my hubby's workbench, so I didn't bother, and you can see the little circles created by the press. Just putting a magazine or the yellow pages underneath is sufficient.
Second, if you are using pearl snaps, be sure to get the correct adapter. For the first shirt, it wasn't a problem, but after a while, I started cracking snaps. I'll be ordering the adapter before I put the snaps on Myra's dress.
Overall, I think this is an awesome too, and I know I'll be using it a ton!
Cute, eh? I hope it still fits him at Easter! It's a little big right now, so I think I got the size right. I guess we'll see how fast he grows.
The pattern is #8 from the 03/2008 issue of Ottobre. It isn't an exact match for Logan's shirt, and I thought about altering it to make them identical, but I decided that would be a little too matchy-matchy. I'd rather they just coordinated. There are a few things that I wish I had transferred though. This shirt was much simplified, which made it easy to sew, but I think it lacks a bit. There is no back yoke or button bands and the hem is straight rather than a more traditional shirt tail hem.
The details I did like were the cuff plackets and the bias cut pockets with flaps. I kinda wish I had cut the flaps on the bias, but they are still cute on grain. The cuff plackets were done a little differently in the pattern, and I have to say, I wasn't a fan. The pattern called for the underlap to just be narrow hemmed.
As you can see, I bound it in a more traditional way. In fact, I just used the directions from Logan's shirt. Overall, I am happy with the shirt, since it was quite easy, but if I make it again, I think I'll draft a yoke and front bands. I just prefer the look that way.
I got a lot of comments about the snap setter I used on the last shirt, so I thought I'd tell you about it.
Here it is! Crazy simple - just 3 pieces of plastic. For such a useful tool, I thought it was really inexpensive. At SewBaby, where I got mine, they are only 9 dollars, and adapters for other sizes are 3.50.
Here is how it works. You start by putting the prong side of the snap into a depression on the base of the tool. Put your fabric in place on the snap. I found it helped to push the prongs into the fabric a little, especially if there were multiple layers. Then you place the second piece of the tool which holds your fabric in place and aligns the snap to the base. You drop the appropriate snap into the hole, then put on the cover, and hammer the snap together. The cover has a circle that shows you where to hit. The instructions that came with the snap setter were great. The only thing that I found was that with my little girlie hammer (and girlie arms) I had to hit between 6-8 times to get the snap to really hold together. The instructions only say 2.
I do have a few words of caution.
The first is to be sure that you protect the surface that you are pounding your snaps on. This is my hubby's workbench, so I didn't bother, and you can see the little circles created by the press. Just putting a magazine or the yellow pages underneath is sufficient.
Second, if you are using pearl snaps, be sure to get the correct adapter. For the first shirt, it wasn't a problem, but after a while, I started cracking snaps. I'll be ordering the adapter before I put the snaps on Myra's dress.
Overall, I think this is an awesome too, and I know I'll be using it a ton!
Monday, April 26, 2010
Ottobre 03/2008-2 "Puffis"
Myra's summer wardrobe is coming along, but she needs a few knit tees. Doesn't every girl? I scoured my Ottobre's for a fun one, and came back to "Puffis", which is style #2 from the 03/2008 issue. It's such a perfect little tee shirt.
This one is made from cotton jersey from Hobby Lobby. I hate their knits, but I have a ton of them in my stash, as they are the cutest knit prints around. I need to use them up and buy better quality!
I love that this is a simple tee with beautiful details. Perfect for a sweet princess. It has a gathered neckline, keyhole back and puffed and gathered sleeve. How girly can you get? I love it! This was the first time I tried Ottobre's knit binding application method, and while it isn't perfect, I was quite happy with it.
The trickiest part was the little keyhole, and I think I probably should have stretched the binding a bit more so that it would lie flat. That teeny hole is a bit tricky...
Sorry for the fuzzy pic, but Myra wasn't in the mood for posing. The size it an 80, with the length an 86. For her last one, I made a straight 68, and it got too short before she outgrew the girth, so I thought I'd give her a little extra length this time so that she can wear it longer.
This one is made from cotton jersey from Hobby Lobby. I hate their knits, but I have a ton of them in my stash, as they are the cutest knit prints around. I need to use them up and buy better quality!
I love that this is a simple tee with beautiful details. Perfect for a sweet princess. It has a gathered neckline, keyhole back and puffed and gathered sleeve. How girly can you get? I love it! This was the first time I tried Ottobre's knit binding application method, and while it isn't perfect, I was quite happy with it.
The trickiest part was the little keyhole, and I think I probably should have stretched the binding a bit more so that it would lie flat. That teeny hole is a bit tricky...
Sorry for the fuzzy pic, but Myra wasn't in the mood for posing. The size it an 80, with the length an 86. For her last one, I made a straight 68, and it got too short before she outgrew the girth, so I thought I'd give her a little extra length this time so that she can wear it longer.
Friday, July 24, 2009
Awesome pants!
I finally got around to the last item on my sewing plan from earlier this month. Here are Logan's "awesome pants" from Ottobre.
I love all of the details! The pockets are really cool. It is hard to tell from the picture, but besides being bound on the edge - nice! - the pocket bag itself is actually topstitched to the wrong side of the pant front. It looked a little complicated, but wasn't and turned out really cool, especially since I used a print. It looks like I have mad pattern matching skills, when really it is all one piece. Sweet. I did have a little trouble with the waistband, but it was my own dinginess, and no fault of the pattern. Despite my issues, they turned out pretty well and Logan really likes them.
Here you can see the contrast strip up the side as well. Such great details in these simple knit comfy pants. I love Ottobre!
Logan loves the pockets. Every boy needs a place for "stuff".
Wednesday, July 15, 2009
Cutest outfit ever!!
The ensemble is complete now with the tee to match the freaking cute shorts. This pattern is also from the 03-08 issue of Ottobre. (Thanks for reminding me to mention it, Beth!!) It is called the "Puffis" tee.
I love this tee shirt pattern! So many cute little details. It isn't the easiest tee I've ever made, but not the most difficult either and the pattern is excellent. I love the little gathered detail at the neckline. I also really like how well the FOE worked for the binding. So fun and it looks great. I will definitely be doing that again!
So, here is a front view.
From the back. You can see the little keyhole in the tee that makes getting it over big baby heads easier. It closes with a teeny snap. This is really well designed!
And an extra picture, just for cuteness.
Friday, July 10, 2009
Holy freaking cute!
Seriously, the cutest thing I have ever made... They aren't wonky - I took the picture at an angle.
I was going to wait until I had finished the matching tee to show these to you, but they are so unbelievably cute, I couldn't wait.
Aaah! Adorable standing.
And crawling? Ridiculous.
The pattern was fun and easy to put together, the instructions were easy to understand and hello - CUTE! It does take some getting used to, since there are no seam allowances on the pattern pieces and we Americans are used to our 5/8 SAs, but I put in 3/8 and saved some serious yardage. You wouldn't think it would make that much of a difference, but on this particular layout it did.
Subscribe to:
Posts (Atom)