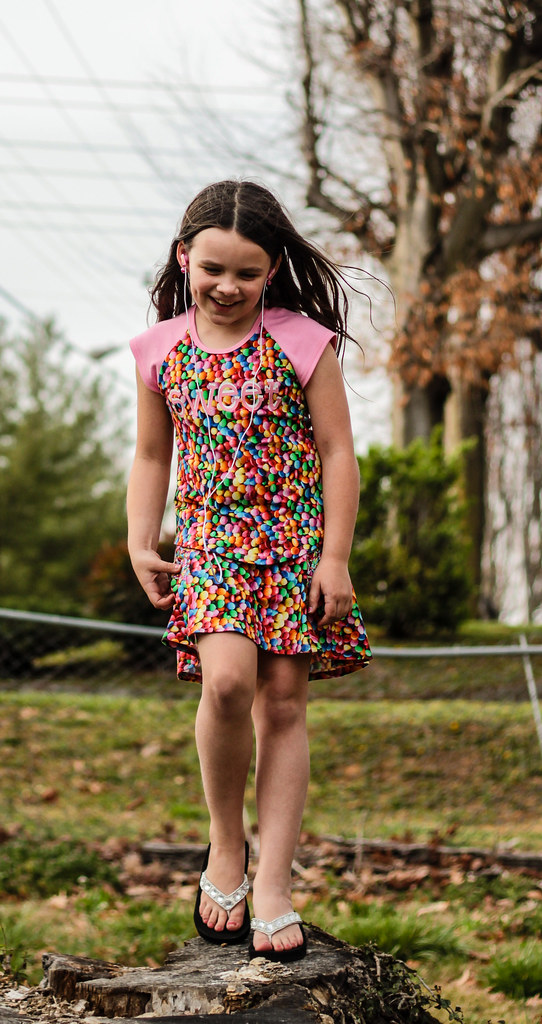
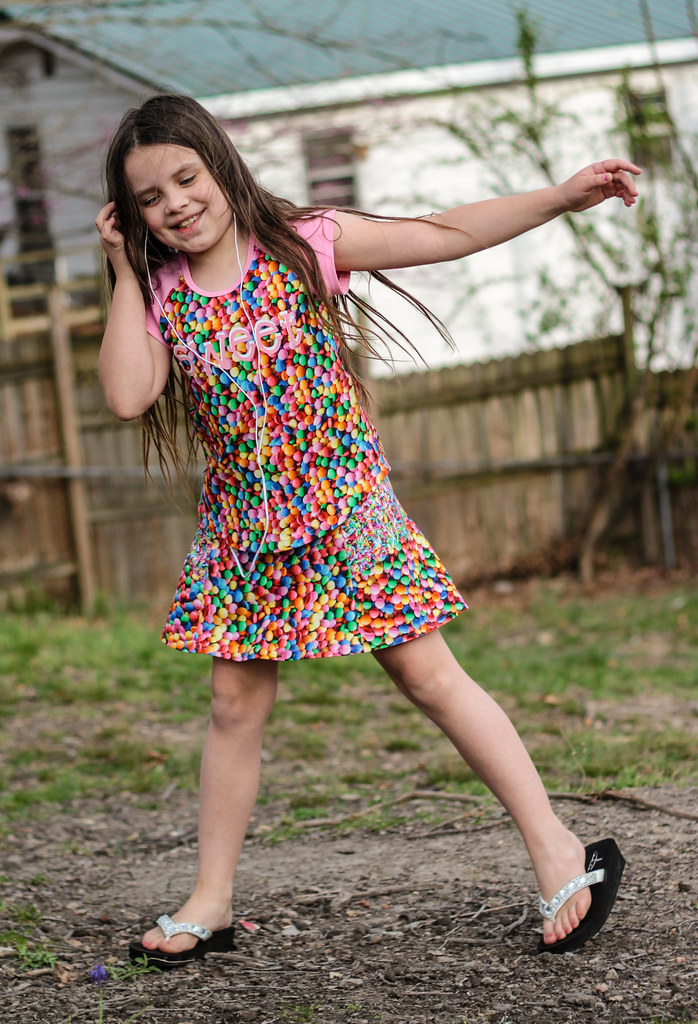
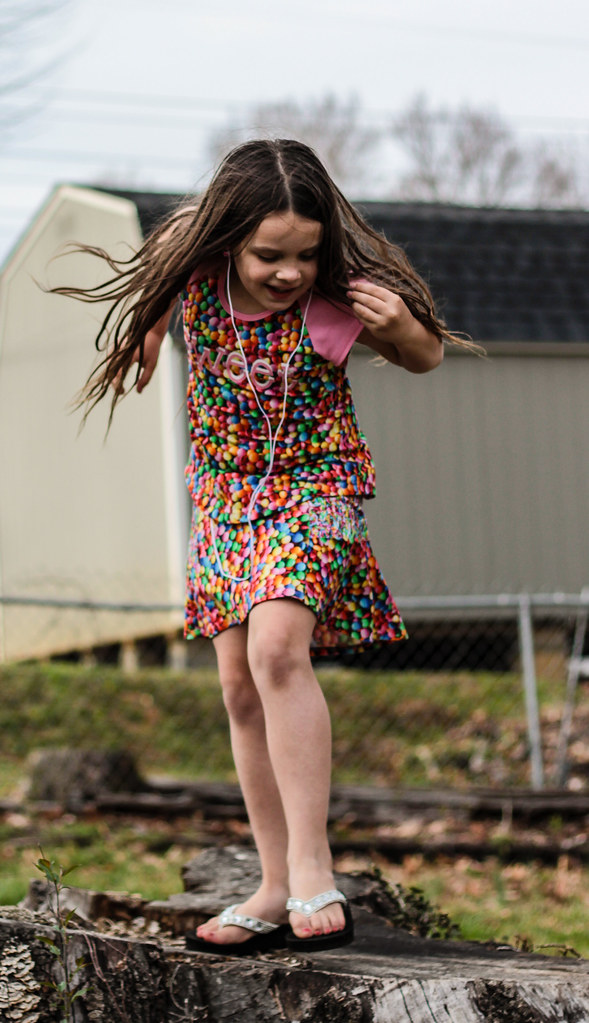
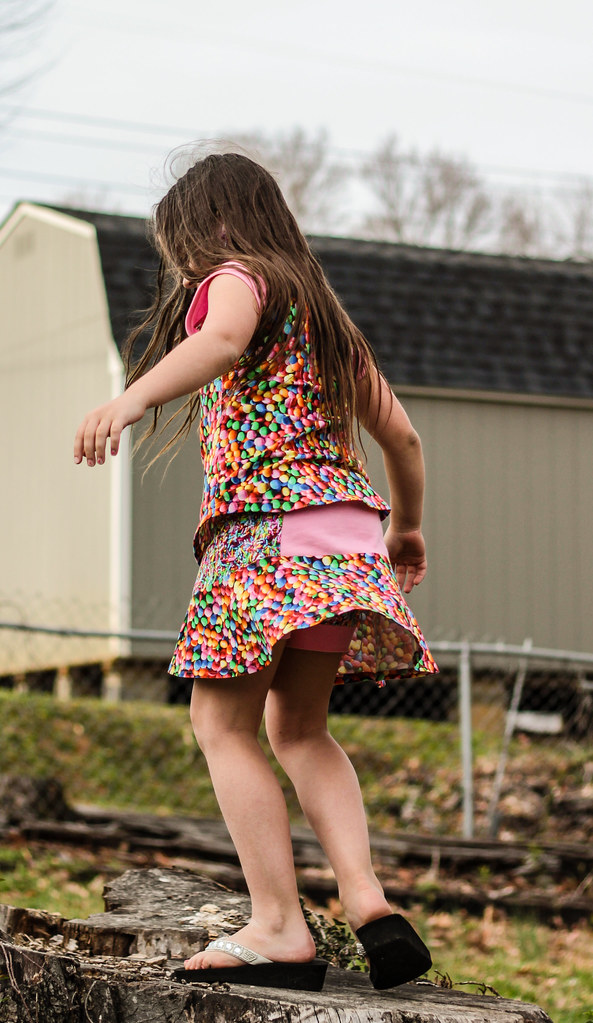
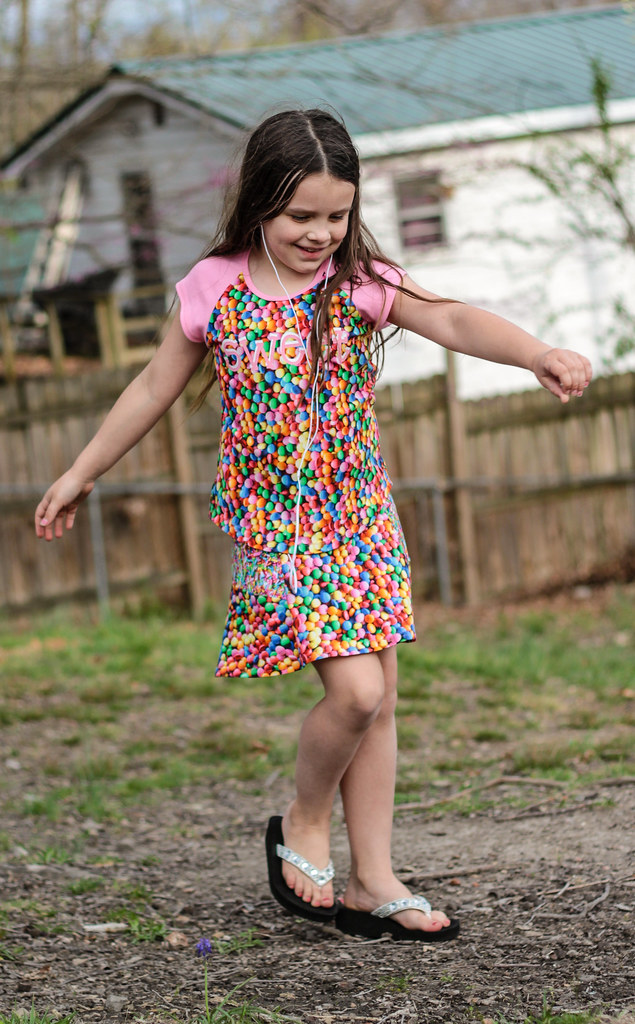
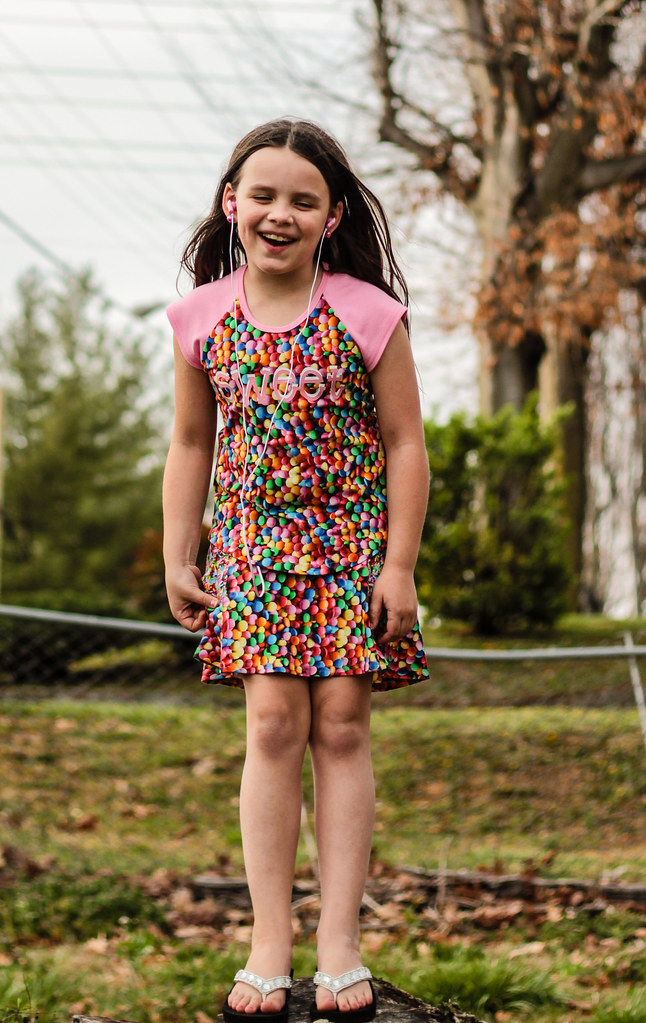
I took a lot of action shots of this cute little number. It is made for movement!
When Jalie announced this Spring's pattern release, this one actually didn't register on my radar. What was I thinking? It's adorable! But I'm not a sporty girl, so for some reason I just didn't see the cuteness potential until one of the ladies on the Jalie Facebook group posted one she had made for her daughter. I ran to the PR website and ordered the pattern (and a few others, ahem) immediately and sewed it up the next day.
So, here we have the Loulouxe skort, Jalie 3670. It's designed for comfort and style when running and biking, but it is also totally perfect for the playground or your bestie's backyard.
Myra's Loulouxe is made from a combination of digitally printed jersey (from Kitchy Coo) and solid pink interlock from Chez Ami. The pattern is designed for stretch knits with 60% stretch (like spandex and supplex knit), which these don't have, but it worked fine without size adjustments.
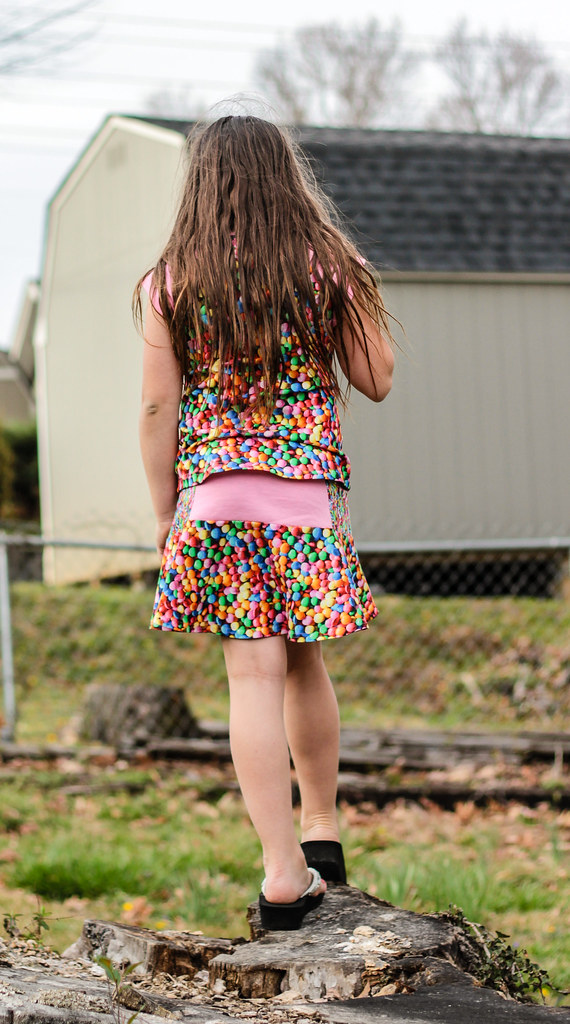
How cute is that flounce in the back?! The Loulouxe features a colorblocked skirt, with integrated shorts. The front skirt has a slight a-line for ease of movement, and the back is a full flounce, which is cute as well as functional, since it accommodates running, biking or playing equally well.
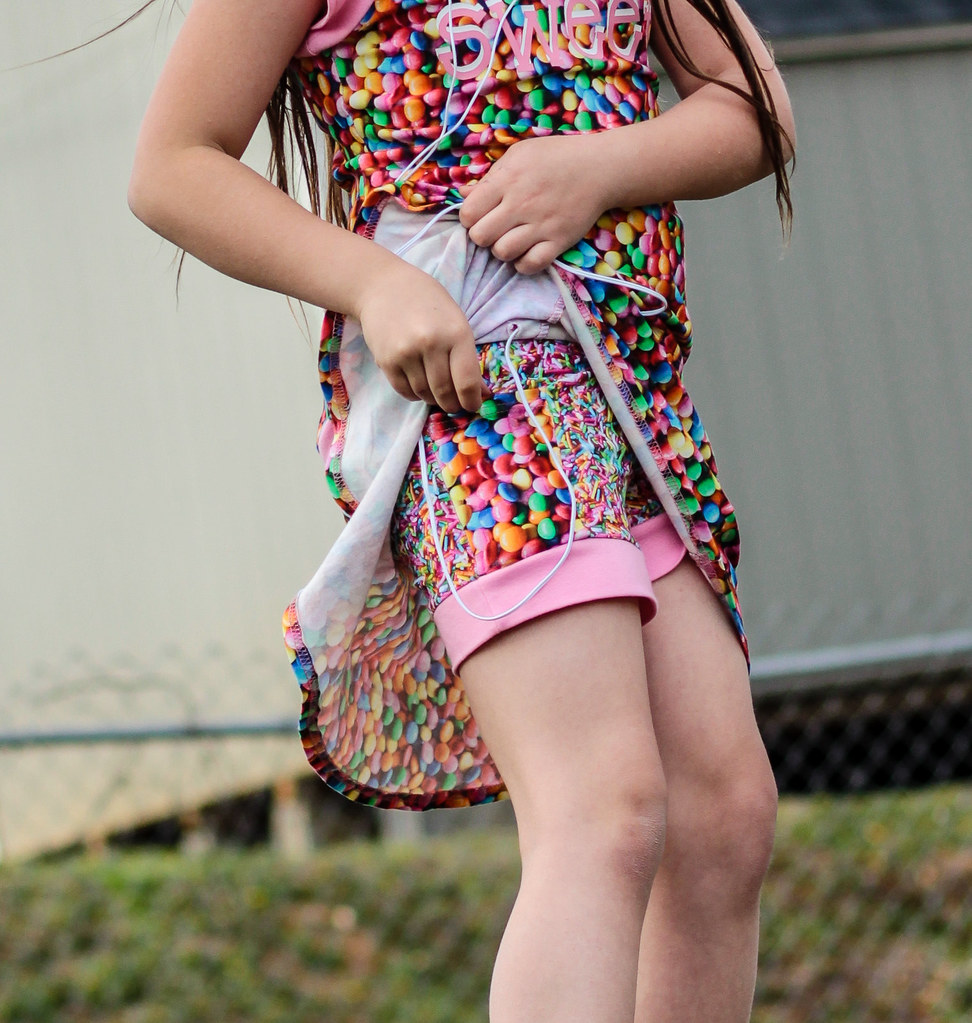
The shorts are nice and snug, with the option for a pocket or two. The size could easily be altered to fit a larger phone or device, but Myra's mp3 player fits just right as drafted.
I added a buttonhole to the top of the skirt to allow the headphone cord to pass through so Myra wouldn't have to put it under the skirt. If your devices uses bluetooth, or you're using the pocket for other things, you wouldn't need that, but Myra likes the functionality.
Other than adding the buttonhole, I made a few pattern changes for fit. Myra has a forward tilted waist, so I raised the back waist and lowered the front. That's a standard change for her. I also added 3/4 inches to the skirt length to make it school appropriate. Since it's designed as a sport skirt, it is quite short.
To complete the outfit, I also made Myra a raglan tee using Jalie 3245. I shortened the sleeve to a cap length (using the length of the cap sleeve on the Sweetheart top) to make it summer friendly. I also added a vinyl decal to the front of the tee, just to break up all the candy print in front. And because I love my Cricut.
Myra and I are both pretty thrilled with the outfit. Cute and fun, but also functional. Jalie wins again!
Showing posts with label skirt. Show all posts
Saturday, April 1, 2017
Thursday, February 5, 2015
Jungle January SWAP!
This year, as part of Jungle January, Anne was gracious enough to also host a SWAP for the participants. I was partnered with Ginny of Ginpins. I really enjoyed corresponding with her and getting a package of goodies together to send off. When my package arrived, I was literally speechless. Ginny is a mindreader!! She sent me the most fantastic poly-lycra jersey with a cobalt blue leopard print, as well as two patterns for BARBIE!! I know!!
The girls and I went right to work. I got a new Renfrew, and from the scraps I made a couple of fantastic dresses - one from each pattern. And I still have around a yard and a half left!!
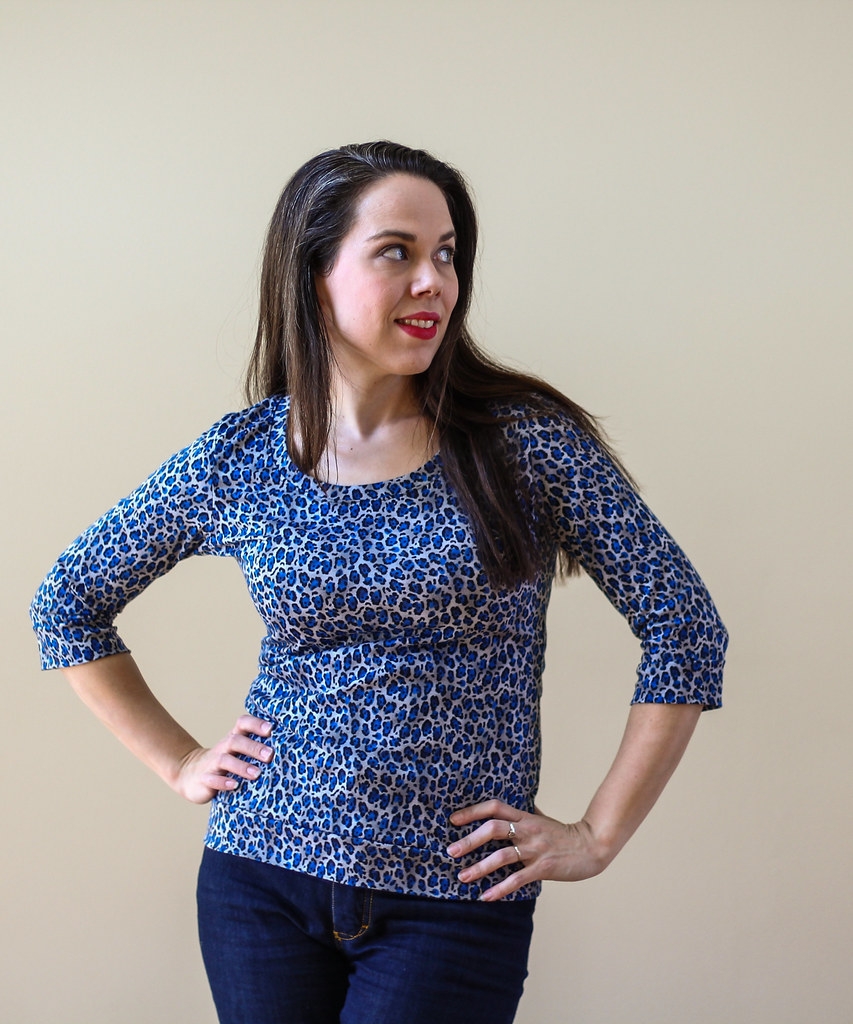
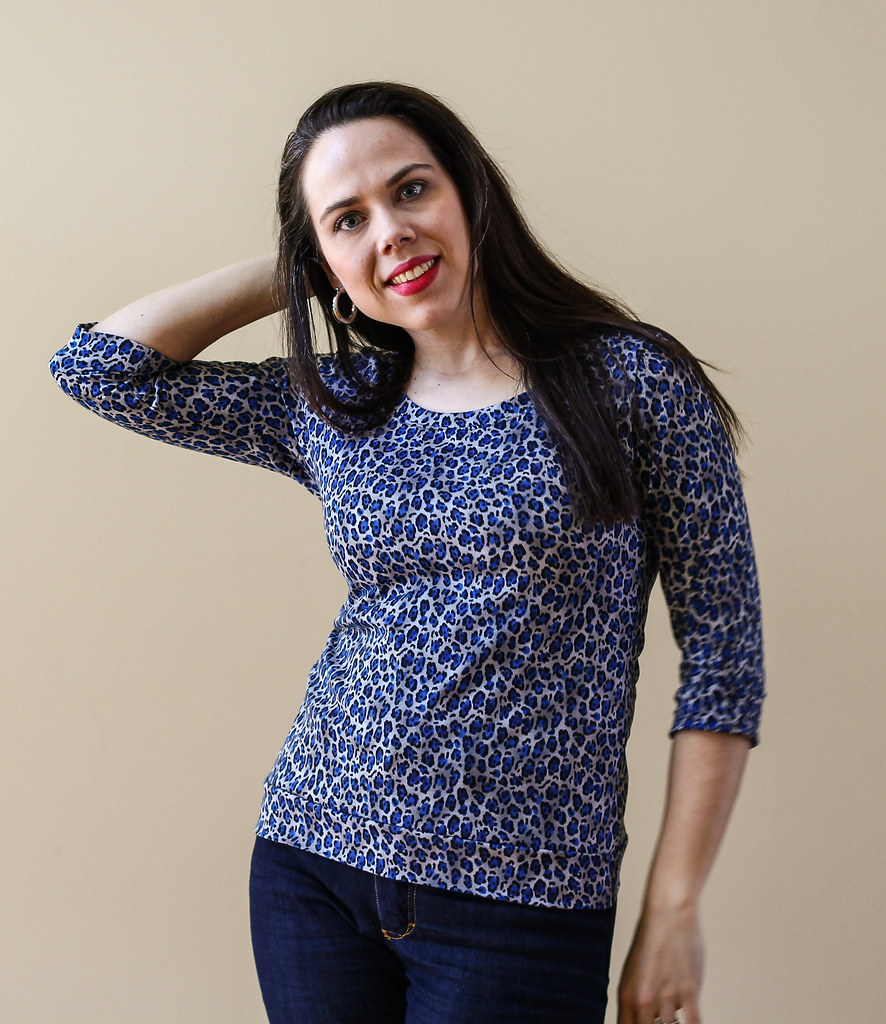
Me, first! This Sewaholic Renfrew is my 8th, I think. I haven't blogged them all. But I wear a Renfrew at least once a week. It's definitely a player in my wardrobe.
This time I went with the 3/4 sleeve round neckline with a simple band. Effortless dressing, right here. And the bright blue print looks great with my newest Jalie jeans. Love that. For this one, I did shorten the neckband about an inch. I notice on my other banded ones, that the neckband doesn't lie flat, but this one does!
After I cut out my Renfrew, I had a long skinny scrap, perfect for a couple of Barbie dresses, and since Ginny had sent me two fantastic vintage Barbie patterns, I went right to work.
I started with a maxi dress for Deanna. This is from Simplicity 7737, printed in 1976. I made up view 1, and the only change I made to the style was to eliminate the bottom ruffle and lengthen the skirt to make up for it. That's quite a sassy neckline, vintage Barbie!
For the bodice, I used a scrap of lightweight denim I had leftover from some jeans. I topstiched with gold to replicate the look of jeans as well. Since Deanna has a Pop Life body, she is quite slimmer than the doll this pattern was designed for. I ended up taking about 1/2 inch out of the back closure as well as 1/4 inch off the back of the neck. I like the fit, but I think I'll stitch that neckline a little higher next time!
Kyori's outfit is actually a two piece blouse and skirt. It is made with McCalls 3880, printed in 1988. I made the top from view A with the more straight skirt from view D. Kyori is a Fashion Royalty doll, and has proportions similar to the original Barbie who this pattern was designed for, so I was hoping she wouldn't need much in the way of alterations for fit. The skirt was great, but the blouse did need a bit of taking in at the waist. The fit through the shoulders was excellent though.
The major change I made here was to use cobalt blue FOE for the waistband, rather than turning and stitching as the pattern suggests. I like the pop of color and the belt-like appearance it has. And I'm thrilled I had that tiny piece of blue FOE! It was meant to be.
The girls and I are very happy with our new things, and I'm thrilled to have those great patterns to play with. Thank you so much, Ginny!!!
The girls and I went right to work. I got a new Renfrew, and from the scraps I made a couple of fantastic dresses - one from each pattern. And I still have around a yard and a half left!!
Me, first! This Sewaholic Renfrew is my 8th, I think. I haven't blogged them all. But I wear a Renfrew at least once a week. It's definitely a player in my wardrobe.
This time I went with the 3/4 sleeve round neckline with a simple band. Effortless dressing, right here. And the bright blue print looks great with my newest Jalie jeans. Love that. For this one, I did shorten the neckband about an inch. I notice on my other banded ones, that the neckband doesn't lie flat, but this one does!
After I cut out my Renfrew, I had a long skinny scrap, perfect for a couple of Barbie dresses, and since Ginny had sent me two fantastic vintage Barbie patterns, I went right to work.
I started with a maxi dress for Deanna. This is from Simplicity 7737, printed in 1976. I made up view 1, and the only change I made to the style was to eliminate the bottom ruffle and lengthen the skirt to make up for it. That's quite a sassy neckline, vintage Barbie!
For the bodice, I used a scrap of lightweight denim I had leftover from some jeans. I topstiched with gold to replicate the look of jeans as well. Since Deanna has a Pop Life body, she is quite slimmer than the doll this pattern was designed for. I ended up taking about 1/2 inch out of the back closure as well as 1/4 inch off the back of the neck. I like the fit, but I think I'll stitch that neckline a little higher next time!
Kyori's outfit is actually a two piece blouse and skirt. It is made with McCalls 3880, printed in 1988. I made the top from view A with the more straight skirt from view D. Kyori is a Fashion Royalty doll, and has proportions similar to the original Barbie who this pattern was designed for, so I was hoping she wouldn't need much in the way of alterations for fit. The skirt was great, but the blouse did need a bit of taking in at the waist. The fit through the shoulders was excellent though.
The major change I made here was to use cobalt blue FOE for the waistband, rather than turning and stitching as the pattern suggests. I like the pop of color and the belt-like appearance it has. And I'm thrilled I had that tiny piece of blue FOE! It was meant to be.
Labels:
Barbie,
dress,
McCalls 3880,
misses,
Renfrew,
Simplicity 7737,
skirt,
top
Thursday, October 30, 2014
Playscale Halloween
Halloween always seems to sneak up on me. I have no excuse. It's the same time every year...
Pris is a little pissed off that she didn't get the epic witch costume I had in mind for her, but this little top and skirt number will have to do. I think it's pretty wicked looking, at any rate.
This top though. I'm super pleased with it. The little waist cut out and peplum are so on trend. I started out with McCalls 7428, view C. Babs was pretty fashion forward in 1964! This view is a dress with a gathered skirt, but I was intrigued by the wrap bodice. It doesn't look like much on the pattern envelope, but it is really interesting. The skirt and bodice don't attach in front, leaving the keyhole opening you see here.
In back, the top has a pretty little v neckline, and is topstitched to the peplum waistband. The peplum is a simple 1/2 circle skirt that I nabbed from one of the other views and shortened to hip length. The only closures on the top are two snaps. One closes the skirt portion and the other the wrap top.
The skirt is Simplicity 4702, my go to pencil skirt pattern for Barbie. I was going to make it maxi length with a thigh high slit, but I think this mini works really well with the top, and my girls will definitely get a lot of use out of a basic black mini.
I hope those of you who celebrate it have a wonderful Halloween. But watch out for witches with shiny apples! Mwahahahahaha!!!
Pris is a little pissed off that she didn't get the epic witch costume I had in mind for her, but this little top and skirt number will have to do. I think it's pretty wicked looking, at any rate.
This top though. I'm super pleased with it. The little waist cut out and peplum are so on trend. I started out with McCalls 7428, view C. Babs was pretty fashion forward in 1964! This view is a dress with a gathered skirt, but I was intrigued by the wrap bodice. It doesn't look like much on the pattern envelope, but it is really interesting. The skirt and bodice don't attach in front, leaving the keyhole opening you see here.
In back, the top has a pretty little v neckline, and is topstitched to the peplum waistband. The peplum is a simple 1/2 circle skirt that I nabbed from one of the other views and shortened to hip length. The only closures on the top are two snaps. One closes the skirt portion and the other the wrap top.
The skirt is Simplicity 4702, my go to pencil skirt pattern for Barbie. I was going to make it maxi length with a thigh high slit, but I think this mini works really well with the top, and my girls will definitely get a lot of use out of a basic black mini.
I hope those of you who celebrate it have a wonderful Halloween. But watch out for witches with shiny apples! Mwahahahahaha!!!
Monday, June 30, 2014
More maxis, mini sized
I've been a bit obsessed with maxi length everything, so naturally my Barbies needed some maxi length goodies.
Nikki, Teresa and Raquelle were all still wearing sad Mattel style outfits, so they were my lucky models.
Nikki was first. She is a playline "Beach Nikki" doll that I rebodied onto a Liv body. Her dress is Simplicity 5755, which I have used before for Teresa. I added about 4 inches to the length to make it a maxi.
The fabric I used is viscose jersey left over from this top. I did have to take in the side seams considerably, as the pattern is drafted for woven fabrics, and the Liv body is slimmer than the Barbie body it was drafted for. I ended up just sewing all the seams at 5/8 instead of 1/4 inch. It worked out perfectly.
Teresa was up next. Instead of a maxi dress, I decided to make her a skirt and top combo.
The top is from Simplicity 4702, which is quickly becoming my favorite Big 4 Barbie pattern for basics. This top is a halter style with a tie at the neck and velcro to close the back.
The fabric I used was a thrifted baby shirt. The pointelle knit is pretty and perfectly scaled for Barbie. It also had a nice lettuce edged hem that I used as the bottom edge of Teresa's top.
The skirt started out as the straight skirt from Simplicity 4702, lengthened to maxi length. I skipped the darts of course, and used 3/8 elastic for the waistband, but it was way too bulky, so I hacked it off and added a yoga style waistband. The fabric is slinky knit left over from this top.
I left the side seams open below the knee as side slits. I simply hemmed the edges. I decided not to hem the bottom, as I had lost some length when I hacked off the elastic waistband. 1/4 inch is a lot when you are only a foot tall!
Raquelle got the last maxi dress. I really wanted something soft and floaty with a full, breezy skirt.
I started with Simplicity 8281, a vintage Barbie wardrobe pattern from 1977. View 4 is a cute empire waist sundress with a darted bodice and full skirt. The skirt is already midi length, so it only took a few inches to make it a maxi.
The fabric is a very lightweight rayon challis from fabric.com. It was left over from my BHL Anna maxi dress. Fabric is one of the trickiest parts of sewing for Barbie, as woven fabrics tend to have less drape that his scale, but I think the challis worked well here.
Once it was finished, the volume of the skirt and the placement of the seam had a bit of a maternity affect, which I definitely wasn't going for. I added a wide velveteen belt (borrowed from Army Barbie) which gave it exactly the look I wanted.
The straps were kind of painful to turn, but they definitely add to the look. In back, the dress closes with snaps, which I prefer over velcro for a snug bodice.
I love maxi dresses for relaxing in the summer. I think Barbie likes them too.
Nikki, Teresa and Raquelle were all still wearing sad Mattel style outfits, so they were my lucky models.
Nikki was first. She is a playline "Beach Nikki" doll that I rebodied onto a Liv body. Her dress is Simplicity 5755, which I have used before for Teresa. I added about 4 inches to the length to make it a maxi.
The fabric I used is viscose jersey left over from this top. I did have to take in the side seams considerably, as the pattern is drafted for woven fabrics, and the Liv body is slimmer than the Barbie body it was drafted for. I ended up just sewing all the seams at 5/8 instead of 1/4 inch. It worked out perfectly.
Teresa was up next. Instead of a maxi dress, I decided to make her a skirt and top combo.
The top is from Simplicity 4702, which is quickly becoming my favorite Big 4 Barbie pattern for basics. This top is a halter style with a tie at the neck and velcro to close the back.
The fabric I used was a thrifted baby shirt. The pointelle knit is pretty and perfectly scaled for Barbie. It also had a nice lettuce edged hem that I used as the bottom edge of Teresa's top.
The skirt started out as the straight skirt from Simplicity 4702, lengthened to maxi length. I skipped the darts of course, and used 3/8 elastic for the waistband, but it was way too bulky, so I hacked it off and added a yoga style waistband. The fabric is slinky knit left over from this top.
I left the side seams open below the knee as side slits. I simply hemmed the edges. I decided not to hem the bottom, as I had lost some length when I hacked off the elastic waistband. 1/4 inch is a lot when you are only a foot tall!
Raquelle got the last maxi dress. I really wanted something soft and floaty with a full, breezy skirt.
I started with Simplicity 8281, a vintage Barbie wardrobe pattern from 1977. View 4 is a cute empire waist sundress with a darted bodice and full skirt. The skirt is already midi length, so it only took a few inches to make it a maxi.
The fabric is a very lightweight rayon challis from fabric.com. It was left over from my BHL Anna maxi dress. Fabric is one of the trickiest parts of sewing for Barbie, as woven fabrics tend to have less drape that his scale, but I think the challis worked well here.
Once it was finished, the volume of the skirt and the placement of the seam had a bit of a maternity affect, which I definitely wasn't going for. I added a wide velveteen belt (borrowed from Army Barbie) which gave it exactly the look I wanted.
The straps were kind of painful to turn, but they definitely add to the look. In back, the dress closes with snaps, which I prefer over velcro for a snug bodice.
I love maxi dresses for relaxing in the summer. I think Barbie likes them too.
Thursday, June 26, 2014
Capital Chic? Yes, please!!
You guys. I have had the hardest time keeping this under wraps. I am so freaking excited about it!!
May I present Capital Chic Patterns? From the talented Sally of Charity Shop Chic comes a new line of beautifully crafted, fun to sew patterns with a London style vibe.
She's starting off with a bang, bringing us a full collection of patterns for a complete work to night life to weekend wardrobe that can easily mix and match to fit your lifestyle.
When Sally emailed me and asked if I could test I was thrilled. The styles are so beautiful, I had a very hard time choosing just one, and she was kind enough to let me do two! She did give me these patterns in exchange for my feedback, and I sewed the beta versions. The opinions are my own.
The patterns I chose to test are Bellini, a lovely cap sleeved blouse with two collar options, and Champagne, a sleek fitted skirt with options for two styles of flounce.
I started with Bellini. The pattern itself is very simple, but all the details for a beautiful finish are there. The sleeves are cut on, and the front opening is faced. It's a perfect wardrobe basic, but with lovely details that will make it a stand out.
The pattern has two collar options. One is a simple cutaway collar that is the perfect blank canvas for embellishment. I couldn't resist the cute scalloped collar though! It requires a little more precision to sew, but I think it's worth the trouble. Such a fun detail.
Here you can see how cute it is buttoned all the way up. I don't ever wear my tops this way, as it rather accentuates my large tracts of land up there, but the blouse is designed to be worn either way, so if this is a look you like, fear not! There will be no gaping or constricting neck to worry about.
The full busted among us will be pleased to hear that I sewed this right out of the packet, without an FBA. I know. That said, you may note a bit of pulling in the armhole. As soon as I'm settled in the new place I plan to make this again (and again and again), and I'll show you how to FBA it.
The fabric I chose was a lightweight poly-cotton pique. It has a pretty sheen and a nice drape. This blouse works for any number of blouse weight fabrics. The instructions call for an impeccable finish with french seams throughout and a machine sewn baby hem. Since there are only a few seams to sew, this really takes no time at all. You'll be amazed how quickly it goes together.
Now, for Champagne. I just love this skirt. The pattern has two options for the flounce. One, which you see here, is a circular flounce all around the hem. The other option (which I will be making soon) has a front band that ends in a cute little rear flounce that acts as a vent.
The body of the skirt has a basic pencil shape with a narrow waistband that sits at the natural waist. There are front and back darts for shaping and the skirt closes with an invisible zipper at the center back. There is a full lining included.
It's very sleek both front and back. You can spot the darts that shape the backside here. They were perfectly placed for me.
The flounce is the fun part though. It really swings! It makes the whole skirt feel light as air.
The fabric I used is a silk tweed that I have been hoarding for a few years. You can see the bias sections in the flounce are accentuated by the plaid. It's a fun affect. The lining is white polyester satin. I love satin linings and white was perfect to brighten the pink of the silk.
The size chart placed me in a 12 for the waist and 14 for the hip, so I blended between those two sizes. I also added a bit of length, as I have long legs and a high waist. With just those changes, I am totally thrilled with the fit. I love it when a pattern really fits the size it says it fits! Although, Sally includes the finished garment measurements in the pattern, so you can cut with confidence. Hey, I cut into my silk without a muslin! Confident!
Overall, I'm completely impressed with the quality and style of Capital Chic patterns! Please head over to the website and check out the full collection! Sally offers two dresses, two skirts, a blouse and a knit top, each pattern with variations to suit your style. The patterns are available as PDF, both in a print at home and print at copy shop version. So, which one will you make first?? I know, it's hard to choose!
May I present Capital Chic Patterns? From the talented Sally of Charity Shop Chic comes a new line of beautifully crafted, fun to sew patterns with a London style vibe.
She's starting off with a bang, bringing us a full collection of patterns for a complete work to night life to weekend wardrobe that can easily mix and match to fit your lifestyle.
The patterns I chose to test are Bellini, a lovely cap sleeved blouse with two collar options, and Champagne, a sleek fitted skirt with options for two styles of flounce.
I started with Bellini. The pattern itself is very simple, but all the details for a beautiful finish are there. The sleeves are cut on, and the front opening is faced. It's a perfect wardrobe basic, but with lovely details that will make it a stand out.
Here you can see how cute it is buttoned all the way up. I don't ever wear my tops this way, as it rather accentuates my large tracts of land up there, but the blouse is designed to be worn either way, so if this is a look you like, fear not! There will be no gaping or constricting neck to worry about.
The fabric I chose was a lightweight poly-cotton pique. It has a pretty sheen and a nice drape. This blouse works for any number of blouse weight fabrics. The instructions call for an impeccable finish with french seams throughout and a machine sewn baby hem. Since there are only a few seams to sew, this really takes no time at all. You'll be amazed how quickly it goes together.
Now, for Champagne. I just love this skirt. The pattern has two options for the flounce. One, which you see here, is a circular flounce all around the hem. The other option (which I will be making soon) has a front band that ends in a cute little rear flounce that acts as a vent.
The body of the skirt has a basic pencil shape with a narrow waistband that sits at the natural waist. There are front and back darts for shaping and the skirt closes with an invisible zipper at the center back. There is a full lining included.
It's very sleek both front and back. You can spot the darts that shape the backside here. They were perfectly placed for me.
The flounce is the fun part though. It really swings! It makes the whole skirt feel light as air.
The fabric I used is a silk tweed that I have been hoarding for a few years. You can see the bias sections in the flounce are accentuated by the plaid. It's a fun affect. The lining is white polyester satin. I love satin linings and white was perfect to brighten the pink of the silk.
The size chart placed me in a 12 for the waist and 14 for the hip, so I blended between those two sizes. I also added a bit of length, as I have long legs and a high waist. With just those changes, I am totally thrilled with the fit. I love it when a pattern really fits the size it says it fits! Although, Sally includes the finished garment measurements in the pattern, so you can cut with confidence. Hey, I cut into my silk without a muslin! Confident!
Subscribe to:
Posts (Atom)