Showing posts with label muslin. Show all posts

Sunday, September 15, 2013

Fall For Cotton: Butterick 7238 muslin

I finally got myself in gear and put together the muslin for my Fall For Cotton dress. As a reminder, this is the plan...
I'm making the view on the far right, with the vintage ladies print as the main fabric and a solid black cotton for the contrast. I traced and tissue fit the pattern, and made a 1/2 inch FBA, which I rotated into the gathered section, and shortened the back bodice about an inch. Then I made a bodice muslin. (Warning: unflattering muslin pictures ahead.)
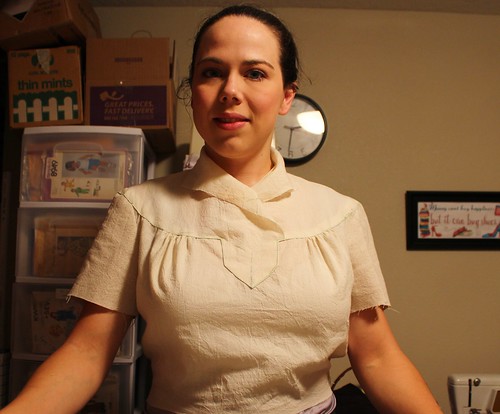
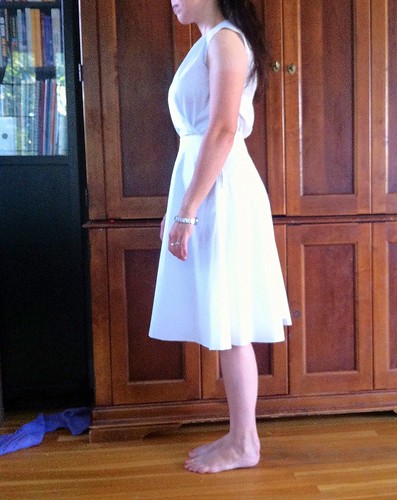
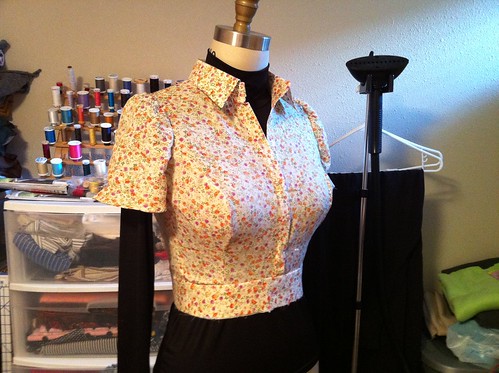
Here's how the bodice fits. There is basically zero ease at the bust, which I'm OK with, but the bodice is all bunchy and looks too long below the bust. It looks the same in back, so I was thinking I'd need to shorten the bodice all around. At this point, something told me I should attach the skirt and see what happens. Generally I don't bother checking the fit of a full, gathered skirt, but I'm glad I did this time.
The weight of the skirt pulls the bunchyness out of the bodice completely and I am really thrilled with the fit as it is! If I had shortened the bodice, I think I would have felt it was too short. I'm really glad I stuck that skirt on there! It made a big difference!
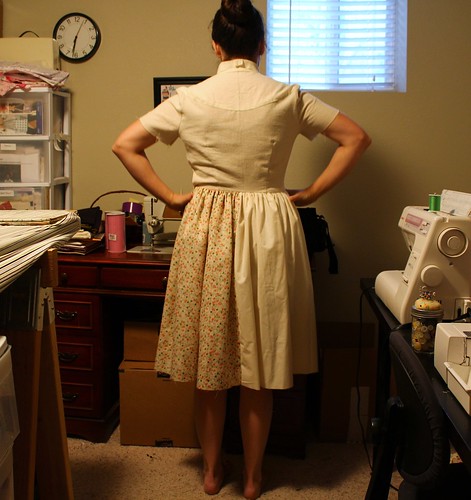
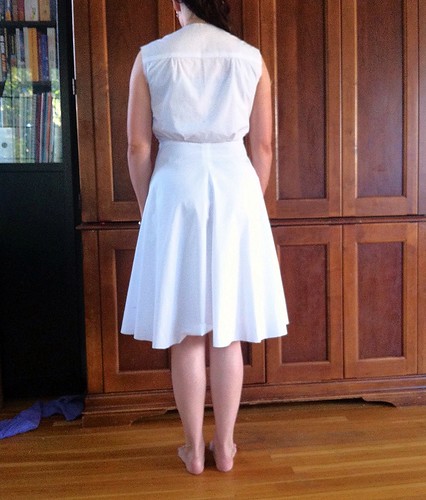
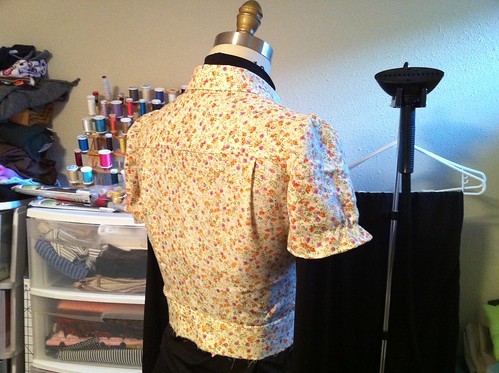
I think that wrinkle on my left is just me standing weird. I really like the fit in back as well. I can't believe how little altering this dress needed to be pretty nearly perfect. Woo-hoo!! On to the fashion fabric!

Tuesday, January 29, 2013

Burda 08/2007-112 coat muslin

I'll admit, I'm not the best at making muslins. I know, I'd probably have better final outcomes if I did, but it is easily my least favorite part of sewing. Still, when one making a coat, even I think a muslin (test garment) is in order.
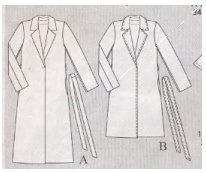
Here is the line drawing for Burda 08/2007-112.  As you can see, it is a fairly straight cut coat, shaped pretty much just with the belt, although there is a small dart that is hidden under the lapel that provides a small amount of shaping in the chest.

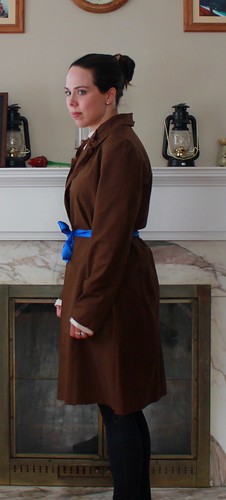
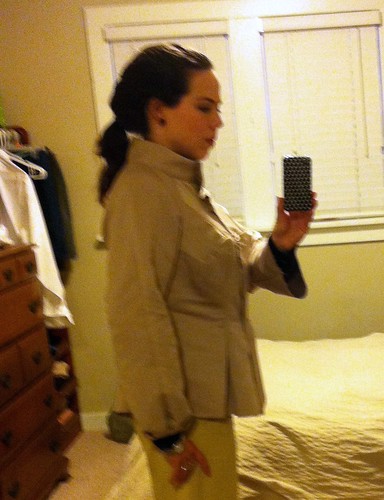
Here is an old sheet, cobbled loosely into the form of the coat, and tied with a random sash. Looks a bit like a bathrobe at the moment. My fit concerns here are all in the shoulder and sleeve. The shoulder seems to be slightly dropped, and I'm not sure if that is style or size. I do have narrow shoulders in front. The fold falling from the shoulder line is suggesting too much fabric there, so I need to consider that. The sleeves also seem to be twisting. I have no idea what that is about.
From the side, the sleeve looks great, and the hemline and side seams fall straight and even.I'm wondering if the collar is falling too far back, though.
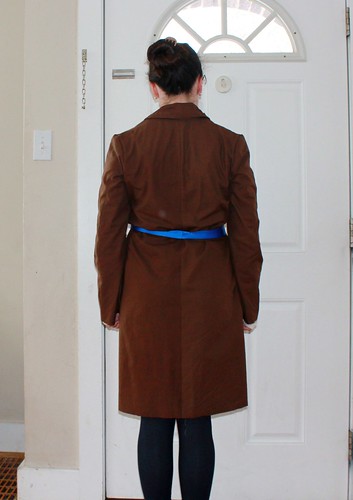
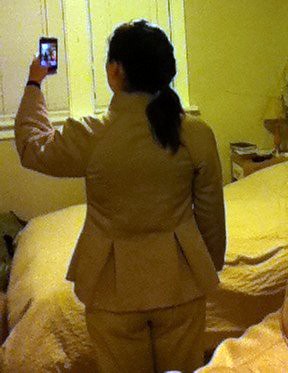
In back, it looks OK, although there are a few wrinkles in the armpit in this pic. I'm not sure if those are real or just posture related.
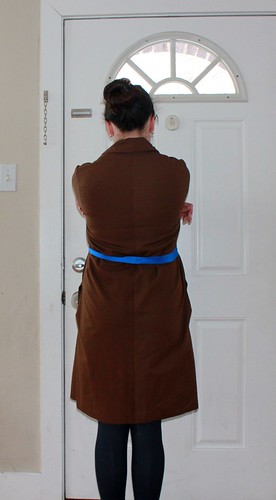
With my arms forward, it looks OK, but feels a little snug across my back and rear. I think I will release the center back seam from about mid back all the way down and add some width there for movement ease.

What do you think?

Friday, September 7, 2012

Vogue 8601 muslin

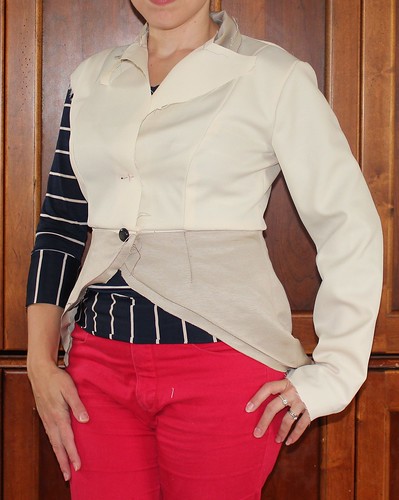
I've really been dragging my feet with regards to this jacket. I'm really excited about having the jacket in my wardrobe, but getting to the sewing process has been really frustrating. For some reason, I have had a really hard time getting the fit right on this jacket. After 4 (I think) muslins, I think I might be close.
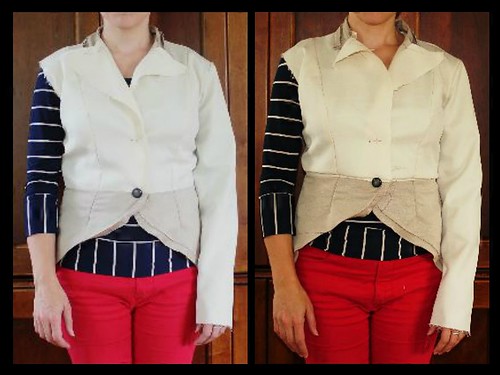
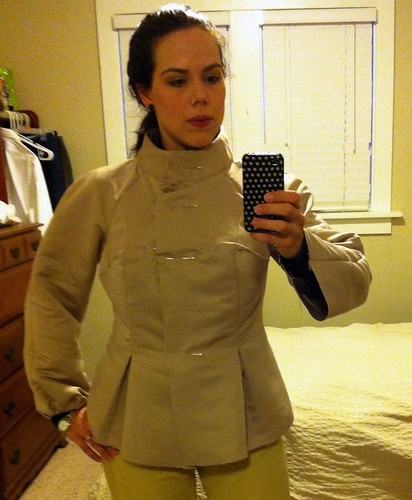
Here's my fashion-y hand on hip pose, where you can see what I like about this jacket. For this muslin, I actually totally trashed all of the changes I had previously made to the bodice fronts (which included a large FBA, shortening the bodice both above and below the bust as well as letting out the lower princess seam a little) and started back with the unaltered pattern. I added 1/2 inch to the side front panel at the level of the bust and below, blending into the original seamline at the upper princess seam notch (which is right at the top of the bust). I made no alterations to the front.
What I got was the picture on the left. Boxy, frumpy and just bad. After all the work I had put in, I almost tossed in the towel at this point. It looks dreadful! But I was thinking about Phyllis's post about proportion, and I wondered if it wasn't my short waist, fighting with the waistline of the jacket (and losing!). I took a 3/8 inch tuck all around the jacket at the waistline, and ended up with the shot you see on the right. And despite the slouchy, unflattering pose, I like it!
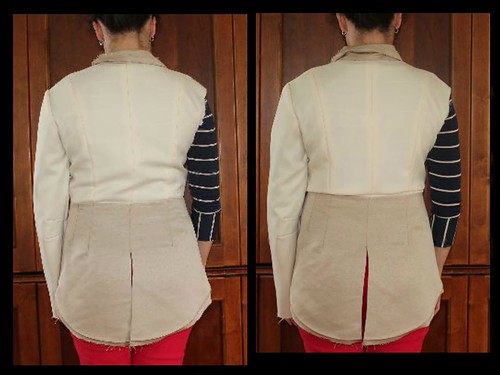
It made a big difference in back as well. I had already shortened the back about an inch, so I was surprised that I needed to lose even more length back there. I am seriously short waisted!
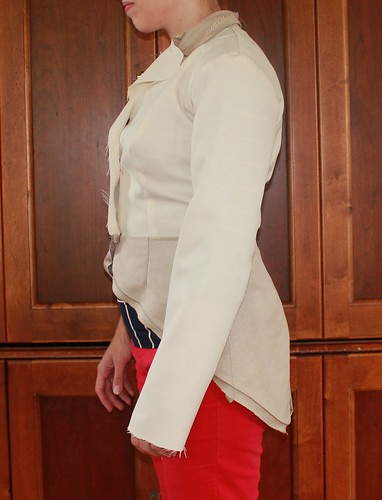
The sleeve still need a lot of help, and maybe the shoulder as well. Do you think that shoulder seam needs to come forward a little? The sleeve is definitely rotated forward. There was just too much ease in the back half of the sleeve to ease it in. I'll remove some of that ease in the back and try again with the shoulder point in the correct place.

Saturday, June 23, 2012

2-in-1 Sew-A-Long: Simplicity 1880 muslin

I had a little down time while making the wedding dress, while I was awaiting a sleeve fitting, so I knocked together a muslin of Simplicity 1880 for the 2-in-1 Sewalong over at A Fashionable Stitch. I'm really liking this pattern, although there are a few things I'm not so keen on.
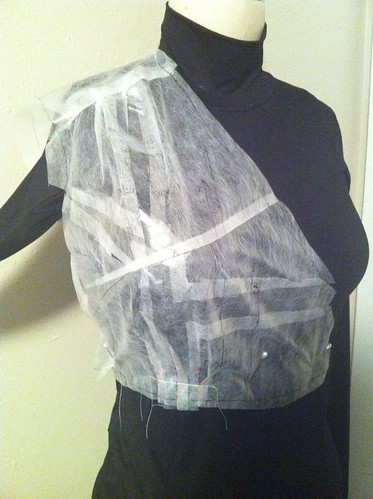
The first thing I did was a quick tissue fit on my dressform, which told me I'd need a 3/4 inch FBA. That's not a huge one for me, so we're already ahead as far as that goes. I always have to shorten the front bodice above the bust, but this pattern only needed a teeny wedge taken out, which was also nice. The picture is the altered pattern, pinned to my dressform. I wasn't sure how I liked the pleats/gathers, so I knew I'd need a real muslin.
Here is the front. I'm actually really pleased with how it fits. The neckline looks a little high, but I didn't remove the seam allowances, so it will be 5/8 inch lower in the final version. I moved the front waist pleats closer to center front, since my fullness in that area is forward and the pleats were nearly in my armpit. I also concentrated the shoulder gathers a bit more to the front as well. I'm happy with the way that the skirt fits.
From the side, it still isn't bad, although my waist seam is dipping a bit toward the back. Sorry that's hard to see between the bright white fabric and my arm in the way. You can also get an idea of how blousy the back is. The skirt hem is nice and level though, despite the back and front pattern pieces being the same. I added 1 inch to the length and I think I like it as it sits unhemmed, so I'll add a bit more as a hem allowance.
From the back - ick. I've already shortened the back 1/2 inch, but you can see it is still much too long and much too full. I'm really not digging the pleats at the waist back there. I understand the design element of balancing the front pleats, but I don't find them flattering at all. I think I'm going to totally eliminate the pleats at the bottom and remove a small amount of fullness at the top. I do need a bit of ease there, as my back is pretty broad.

Thanks to everyone who has weighed in so far about my fabric options! If you haven't yet posted an opinion, I'd love it if you'd pop over and let me know what you think. I'd also love any input you have about the fit. Anything you'd do differently than I mentioned?

Tuesday, November 8, 2011

Simplicity 2764 muslin

So, I slapped together a muslin for this jacket, after tissue fitting and adding a 2 inch FBA and and inch across the hips, and y'all, I'm kind of unexcited about this jacket now.
The initial FBA was a bit much, so I pinned some of the fullness out, so the fit isn't bad, but I'm not sure this shape is doing me any favors. My shoulders are already fairly broad, and the sleeves are definitely maximizing that feature. This is without shoulder pads...
From the side, (sorry so blurry!) it's even worse. I think part of the problem is that when I pinned out the fullness from the FBA, it lowered the bust point, but there is some weirdness at the waist I'm also not happy with. I like the pleats though.
I think the back is my best view. The shoulder width isn't as obvious and the fit through the back is good. 

My other concern is that this pattern won't play well with the large scale houndstooth wool I want to use. 
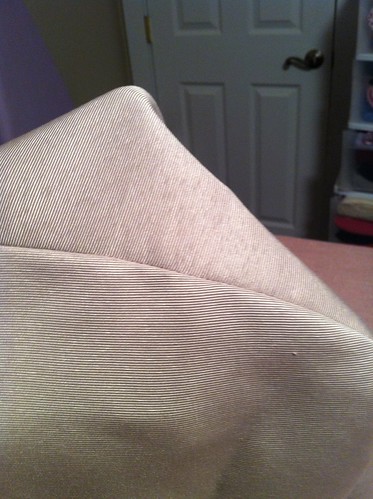
Here is the seam at the upper bust. I used a home dec weight faille as my muslin fabric so that I could easily see what the "stripe" of the fabric would be doing in the final jacket. Here the ribs are at right angles to each other, which does not bode well for matching the houndstooth. Like at all.

So, I'm not sure what I want to do next. Fix the FBA and try again? Table this and take a breather, see what a week or two in the Magic Closet does for it? Or is this pattern just not good for me? Friends, what do y'all think?

Saturday, September 24, 2011

Some knitting and more Simplicity 2403

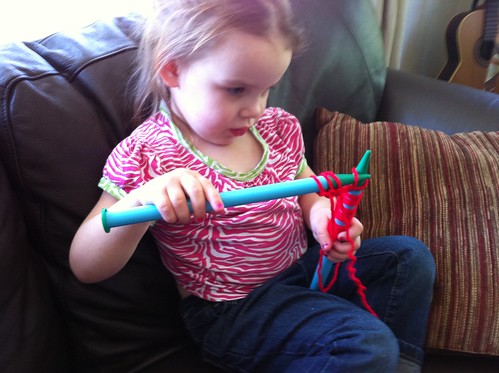
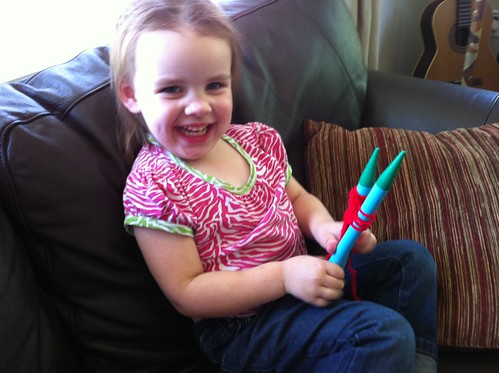
Now that Duncan is a little better at playing on his own, I've picked up my knitting needles again. I have a few projects in the works, and I was knitting away at a scarf for Myra the other night when she asked if she could help. I asked her if she knew how to knit, and she said, "Can you show me?" Yes, please!!
She's determined!! I think these needles are too big for her though, since she quickly gave up on actually making stitches and started just wrapping the yarn around the needles.
It's still fun though! We've started a little nightly tradition of knitting together. She picked some Barbie pink yarn and I got her some smaller needles. She sits in my lap and holds the needles while I maneuver them for her and she wraps the yarn. Not bad for a three year old!

I've also started work on the Simplicity 2403 dress from my last post. Thanks to everyone for the input!! I tried out a few things with the muslin, and found that I did need the wearing ease provided in the upper back. I loved the idea of moving the ease to the sides. Mitch has several RTW shirts that are pleated that way, so that was what I did.
Here is how it looks! Nice and flat without any pouf at all. I love it!!
Here is the front. I have some gold half ball buttons to put there, and the skirt (which is a tangerine sateen to match the flowers in the print) and lining to attach. I'm not 100% sure how I'm going to insert the side zip around the waistband and lining. I'm hoping for a flash of insight as I construct.

Monday, September 19, 2011

Simplicity 2403 muslin

I've been working on fitting Simplicity 2403.
I'm making the view on the model on the right, but with the shorter sleeves. This dress is very fitted in the bodice, with a back yoke and a menswear style collar with stand and front button placket. To fit the bodice, I started with a tissue fit on my dressform, which demonstrated a desperate need for an FBA. As you may know, the traditional method for doing an FBA also adds width to the waist, which I don't need, particularly in this fitted dress. In the book The Perfect Fit there is a princess FBA method that doesn't add width, so I decided to give it a try.
Click the picture if you'd like to see it larger
Here is my initial alteration. The purple pictures above describe it. I deviated from the instructions in that they only had a 1/4 inch addition for each cup size above a B, which for me would have only been a 1/2 inch addition. Laugh with me. I added 2 inches, then shaved off about 1/4 inch just at the bust point to correct a bit of a "bullet" look.
Here is the first muslin on Sandra Dee. As you can probably see, she's got a bit too much fabric around the bust, particularly at the bust point.
In back, I did a 1/4 inch broad back adjustment.
Here is how the back looked on me. I'm so not liking the wrinkles all over the waist, which were saying to me both "too tight" and "too long" at the same time. I'm also not a fan of the pouf created by the gathers at the upper back.
You can see the gathers a little better here, although they don't pouf quite as much on Sandra Dee. She's longer in the waist than I am. Lucky girl.
For muslin #2, I shortened the back waist by 1/2 inch, tapering to nothing at the side seams (basically a sway back alteration), and I added 1/2 inch of width at center back, both in the bodice, as well as the waistband and skirt. Then I added back the 1/2 inch I took out of the bodice to the top of the skirt. Instead of gathers at the upper bodice, I did an inverted pleat.
Here is how that looks on me. I didn't re-muslin the skirt, since the alterations were minor. I think the fit is better, but there is still a little pouf. So, gentle readers I put the question to you. Pleat? Gathers? Get rid of the whole bit? Do you think the fit needs more tweaking? Tell me what to do!

Wednesday, August 3, 2011

Colette Sorbetto muslin

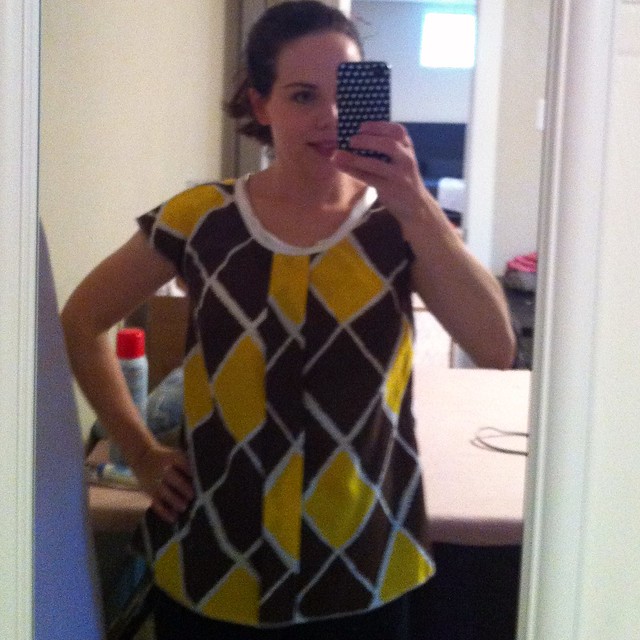
When Colette Patterns first released this pattern (You can download it for FREE here on their site.), I thought it was cute, but between the lack of sleeves and the  somewhat boxy shape, I really didn't think it would work for me. But then it started appearing on women of every size, shape and age all over blogland. I decided that I would give it a shot.
I'm so glad I didn't use nice fabric. It's a tent. Since it is designed to go over the head without closures, shaping at the waist is minimal, and it drapes straight down from my bust, which is not my most flattering look.
It isn't altogether horrible from the side. The bust dart does provide some nice shaping in that area, although mine is a little too high at the side seam and a lot too long.
The blue tape indicates the tip of the dart. It actually points in the right direction, but it ends right at the bust point. I prefer a dart at least an inch, but as much as 2 inches away, otherwise it just looks odd.

I actually think it might be cute belted or tucked in, so I'm not giving up on it forever, but I'm going to shelve it for a while and let it cook in my brain a bit before I try again. In the meantime, I thought I'd share with you all the alterations I made.
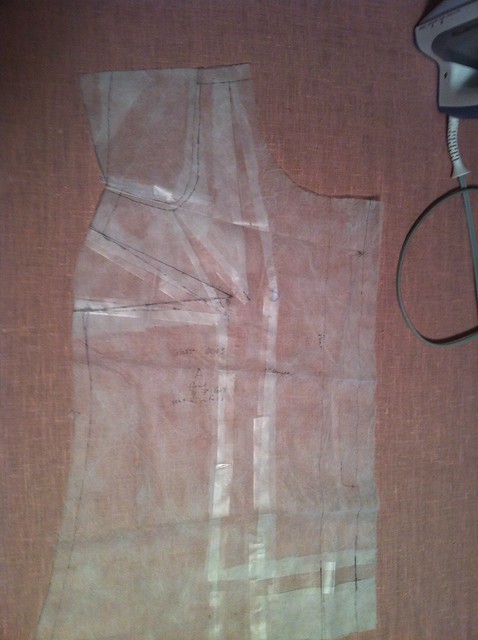
This is the front pattern piece. I started out with a size 8, which corresponds to my waist and hip, but is 2 inches smaller than I am in the bust. I did a 2 inch FBA using the Y-dart technique (found on page 146 of the second edition of FFRP) to minimize the width of the bust dart. As you can hopefully see in the picture, you split the upper leg of the alteration in half, so rather than adding all the extra to the armhole area, you add some into the shoulder as well. Since I have rather narrow shoulders in front, this method isn't always ideal for me, but it works when the sleeve is cut on. I also added 4 inches to the length, as I like my tops long and this one barely comes past the high hip as drafted.
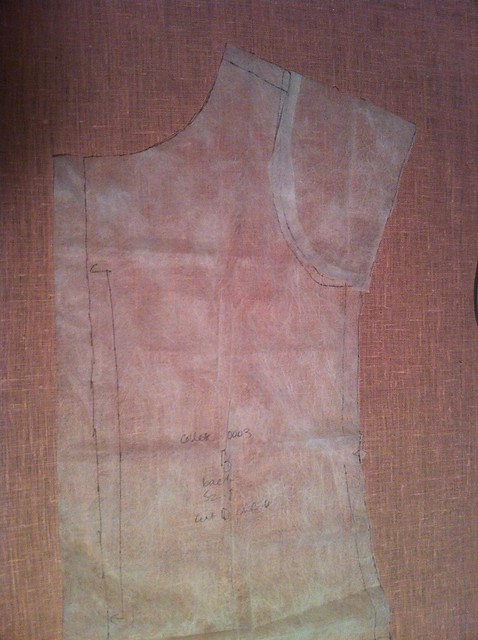
From the back it is a little easier to see how I added the sleeve. I just extended the shoulder line far enough to cover my shoulders, then added the 5/8 SA/HA and connected the end of the line with the underarm on the pattern. Easy peasy.

Monday, May 9, 2011

Simplicity 3503 top

My maxi dress dreams are slowly being realized, beginning with this first draft of the pattern. I had to make a lot of adjustments to the tissue to allow for a full bust as well as raise both front and back neckline. I decided to make up a "wearable muslin" out of some poly knit from the stash.
It turned out pretty cute, and I'm mostly pleased with the tweaks I made. It's also really comfortable and I can nurse easily in it. In fact, I like it enough to enter it in Made by Rae's Spring Top Sewalong. Today is the last day for entries, so get your top into the Flickr group by 8PM!
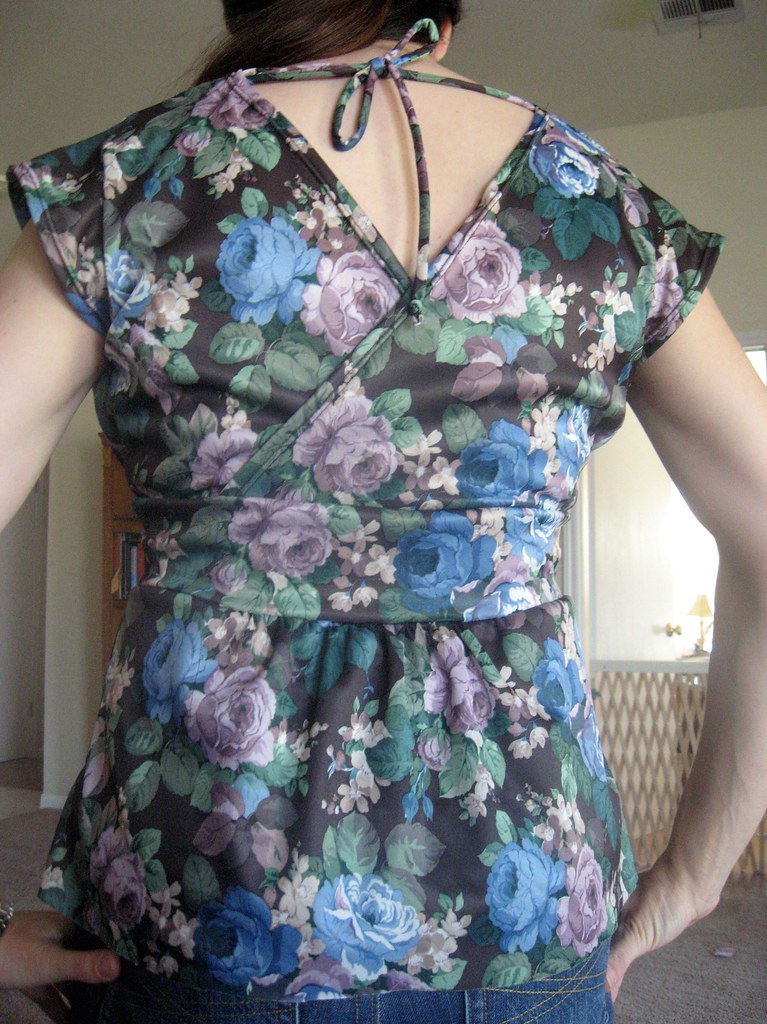
Here's the back. I raised the neckline about 2 inches. It was LOW! Although this is fine, I think for the final dress I will add another inch or so. I like the little tie at the beck neck, although I raised the back neckline enough that it really isn't necessary to keep the top on my shoulders.
I'm happy with the neckline in front, but I think for the dress I'll give myself a little more space over the bust, as the midriff band creeps up onto my bust just a tiny bit. I probably only need another 1/2 inch or so. I'll also tighten up the neckline just a tiny bit. With wear, it gapes open just a little. I also want to move the shoulder gathers more toward the front where most of my fullness is.
I think the underbust gathers are well positioned, but you can see here how the midriff band is creeping up onto my bustline. I'm also not a fan of the gathers concentrated around the middle of the skirt, but I can't decide if I want to eliminate them altogether or just distribute them more toward the sides.
So, did I miss anything that you would change? I'm a little scared of cutting into my irreplaceable 40+ year old Qiana. Even if Mom does think it's tacky.
Parting Shot:
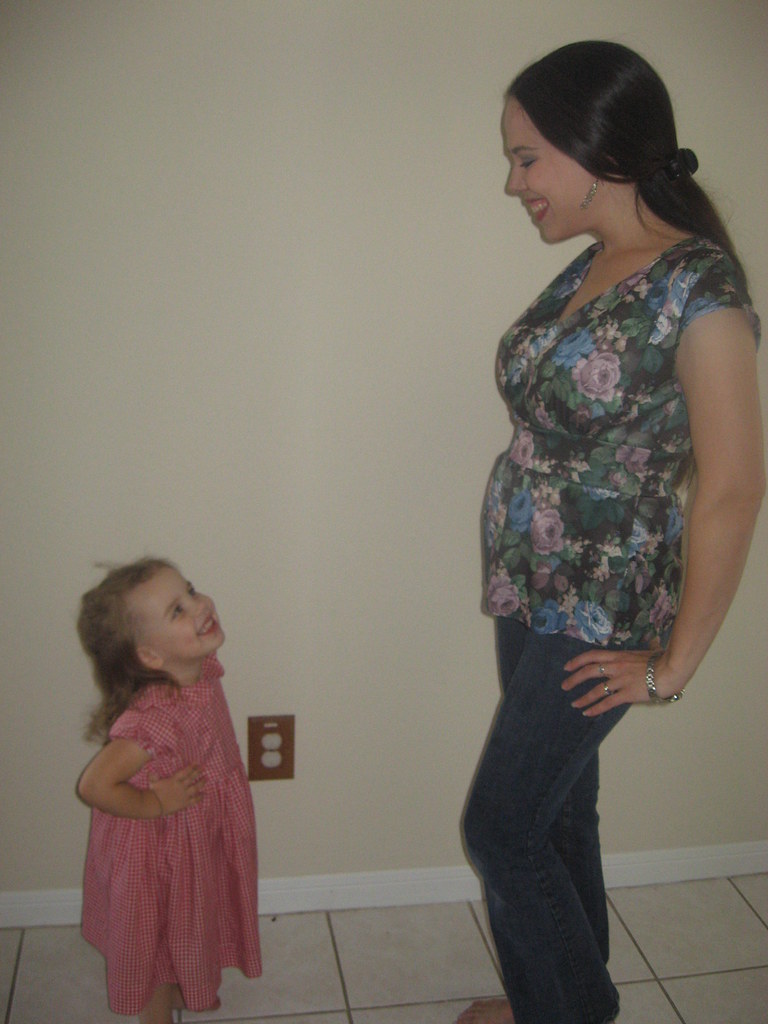
Myra wanted in on the photo shoot, too. She's learned to pose, just like Mommy!

Tuesday, March 16, 2010

Expo haul and burdastyle 02/2010-122 muslin

So, my mom and sister got to go to Expo this year.  Although I didn't get to go, mom was kind enough to do some serious shopping for me!
Clockwise from upper right - the modkids Kyoto top and dress pattern, cute owls and cupcakes flannel - soon to be more PJs for Myra, a couple of yards of a fun printed cotton - destined to be a full skirt for me, some Lightning McQueen twill tape - Logan's going to LOVE this!, and some cool jersey mesh printed with frogs and lizards.  I'll have to find a fun tee pattern for this one.
Mom also embroidered me a couple of tee towels.  Aren't they cute!?

Thank you!!
*****************************************
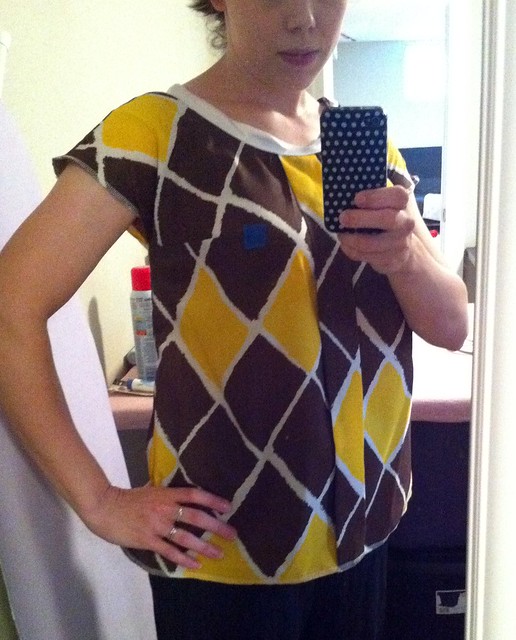
Today also starts the Mini Wardrobe contest, and so naturally I'm kvetching about my choices!  I'm going to start with the jeans, since I'm very happy with my fabric and the pattern is already traced and altered.  But do I really want to make the capris or do I want a skirt??  A skirt seems so much more spring-y.  Of course, I have about 42 skirts in my closet, so I really don't NEED another one.  (Stay tuned for the one I just finished and will post tomorrow - LOL.)  And the all solid tops palette is making me a little grumpy still.  I'm thinking about swapping out the burdastyle top for a simple kimono sleeve tee in a fab print that I got at Gorgeous Fabrics.  I think I'll just make both tees and see which I like better.  Aaah!  Since I didn't want to start a new project yesterday, I decided to trace, alter and even muslin the burdastyle 02/2010-122 top.  I knew that I would need to seriously raise the neckline as well as FBA the upper bodice, so although I don't generally muslin knit tops, I thought all these changes deserved it - and boy am I glad I did!!
OK, done laughing?  I think I may have been a bit exuberant with my FBA...  At least I got the neckline pretty much figured out.  I  threw out that bodice pattern piece  and started over.  Muslin #2 is much better!

Friday, March 12, 2010

Design it Yourself skirt: Pattern drafted and muslin

The Kitschy Coo Design-It-Yourself Clothes Sewalong is starting to heat up, and I was feeling behind the power curve!  So, I drafted my pattern and got going on my muslin.
Here are my pattern pieces.  I deviated only slightly from the instructions in that I didn't do a front dart.  I have a reasonably flat stomach, so I don't see any point in adding curves there.  I do have significant "back" so I deepened the dart in back to accommodate my posterior curves.

I cut it out of some scrap fabric and sewed up a muslin!  I know, me, a muslin?  I want to make the final version out of some silk twill and I didn't want it to end up yucky, since I can't get any more of this particular print.  Besides, I've never drafted anything fitted before, so I had no idea how this was going to go.
From the front.  I think I was holding the camera funny, since the picture is at a slight angle.  I'm not sure why my hips look uneven.  Probably the somewhat hasty and slapdash zipper installation...
From the side the fit looks good.  Excuse the pointy butt darts.  It's a muslin, after all!  I'm not sure about that side seam, though.  I think that it may be listing a bit to the front at the hemline.  What do you think?
I'm very happy with the fit from the rear.  Since I am a bit more curvy than the standard block that most pattern companies use, my rear view is seldom this good.  I am definitely a fan!

A few comments on the book itself.  Since I am a very novice pattern drafter, I think this is a perfect book for me.  Someone with more experience would probably find it a little simplistic.  The woven blouse, for example, doesn't even have bust darts.  This is also not a sewing text!  The assembly directions are quite brief, so if you haven't already sewn together a skirt or two, you may find yourself in trouble - or at the very least in need of another book to help you out!  With those caveats in mind, I heartily recommend this to someone who is just getting started in pattern drafting.  It is any easy and fun read and the drafting instructions are clear and well written.

Tuesday, January 19, 2010

Myrtlewood muslin

Well, I got the muslin for the Myrtlewood dress put together.   It took me quite a while, mostly because the kimono sleeves have underarm gussets, which I've never done before, so I took my time trying to learn how to insert them.  I'm definitely going to need more practice before I do the real dress!

I'm just doing the bodice, since the skirt is a simple straight skirt, and I'll just tissue fit that.  I am pleasantly surprised at how good the fit is out of the envelope.

According to the envelope measurements, I am an 8, but that is based on my upper bust.  Since the design has a bit of extra ease at the bustline, I don't think I'll need an FBA, but there are a few drag lines around the bust I'm not sure about.

Sorry about the blurry-ness, but you can see the lines that point to my bust point, right along the line where I might add a dart if I were to do an FBA.  What do y'all think?  Side darts and kimono sleeves don't seem like a good combo to me, but I'm not sure of another way to fix those lines.

I did let out the back darts just a smidge, based on my tissue fit on my dress form, who is slightly bigger than me.

I think it looks pretty good in the pictures, so I think I'll keep it this way, but I'll be trying it on a lot as I go.

I did manage to get all of the other things I need to make the dress at the MLK sale at Hancock.  I decided on a dark brown dull satin for the hip sash and coordinating dark brown lining and buttons.  I also got the shoulder pads, which I needed for the tissue fitting. They make me feel like a linebacker.

Here is how it looks without them.  Yeah, I'm thinking I'll get used to them.

Conveniently enough, the copy of Connie Long's Easy Guide to Sewing Linings that I ordered last week arrived yesterday.  I'm planning on using her "quick lining" method to line this dress.  My wool fashion fabric is beautiful, but it sure is itchy!

ETA (1/19 @8:10AM) So after staring at these pictures this morning, it occurred to me that maybe those drag lines weren't pointing to the bust, but actually were pointing to the shoulder!  I noticed that although I don't like the shape of the bodice without the shoulder pads, the fit is actually better.  So, I let out the shoulder seam a bit.

Look!  I think I fixed it!  Thoughts?