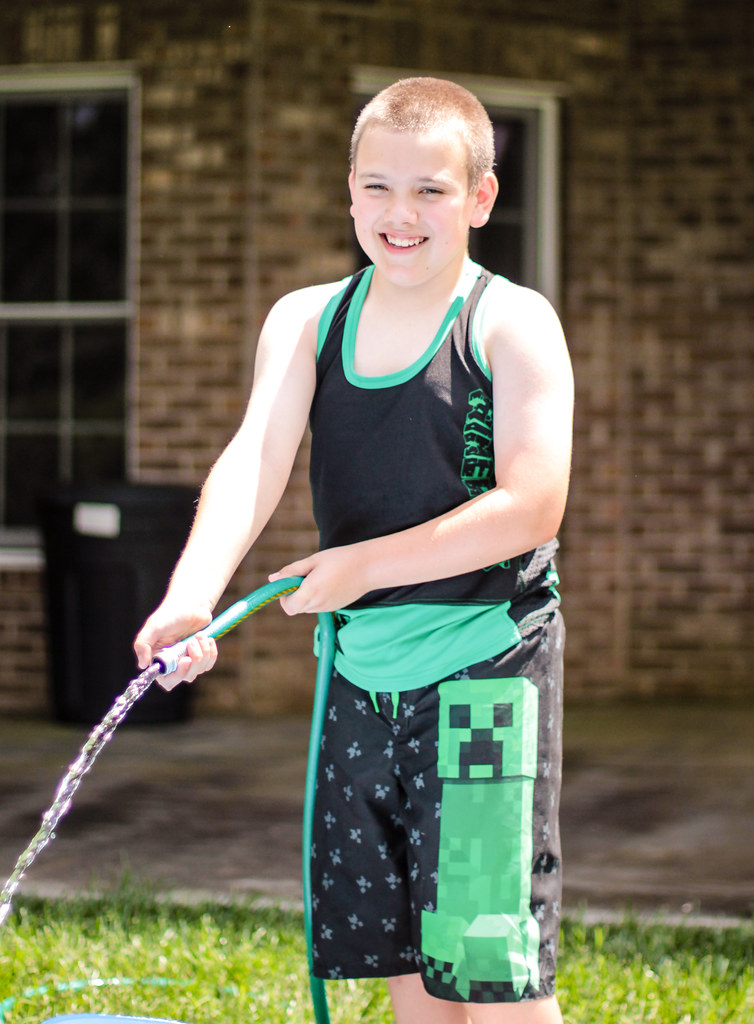
It's that time of year again! School is out in a few days and my kids are looking forward to lots of swim, sun and playing outside. Logan needed new swim togs this year, and while he found some cool Minecraft trunks he liked, we came up empty for a top.
Mom to the rescue. Logan specifically wanted a tank top, not a sleeveless shirt. And I wanted it to be wicking polyester so it would dry quickly and be comfortable in the heat. Neither requirement was an easy one...
The fabric turned out to be the least challenging. After searching at my usual favorite spots and coming up empty, I just did a Google search and found an impressive line of wicking jersey at Wazoodle. They had a range of colors and weights to pick and choose from. I went with the classic Minecraft color scheme of black and green. Shipping was fast and the quality is excellent, so I'll be shopping there again.
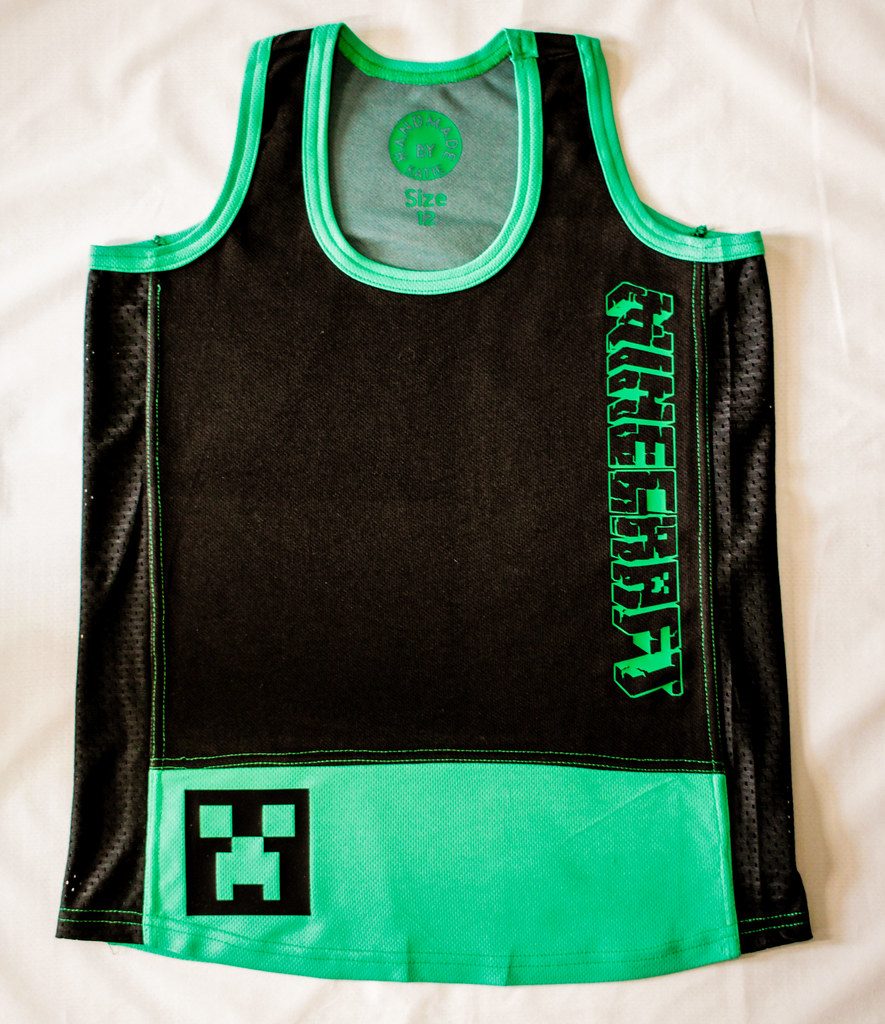
The larger challenge was the pattern. Boys tank top patterns fizzle out after the toddler sizes and Logan isn't quite big enough for mens sizing yet. Even Ottobre failed me! Logan was very specific about wanting a tank top and not just a sleeveless shirt. So, I had to get a little creative. I decided to start with the ladies racer back tank by Jalie (3245). But since it has decidedly feminine lines, I used the Jalie Nico raglan tee to get a more masculine shape, blending the two patterns together at the underarm. And since I was hacking up a couple of patterns anyway, I decided to do some color blocking and add mesh side panels for comfort. All in a day's work.
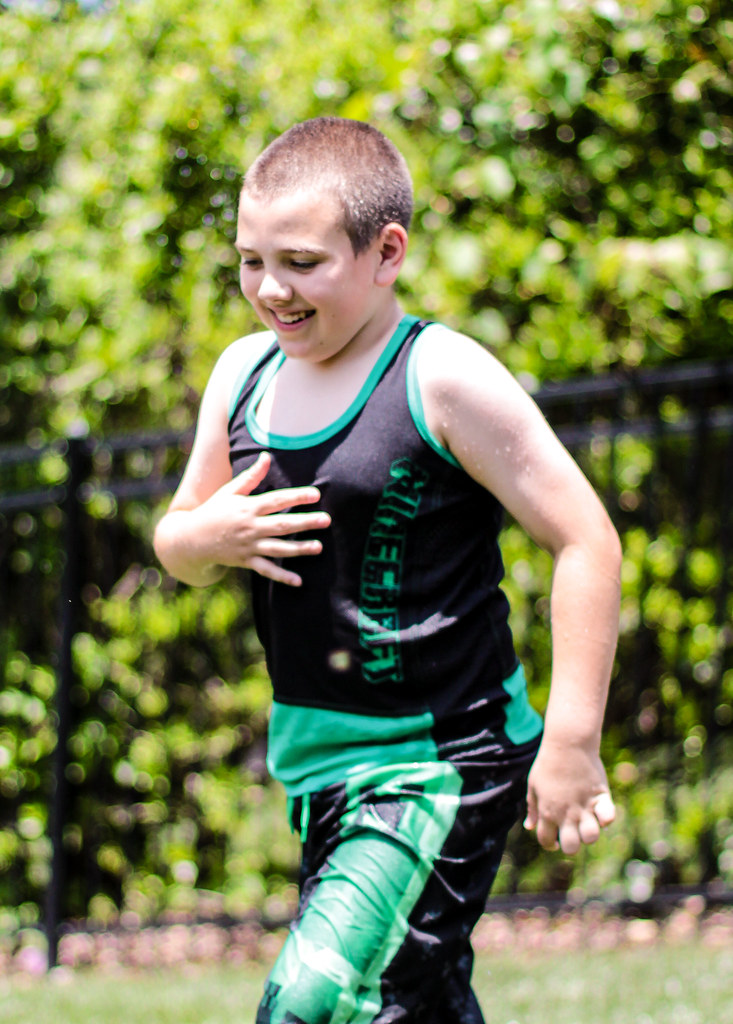
Logan is very happy with it. He loves the way it looks and fits and says it is very comfortable. I even got a hug from my not physically demonstrative boy. I think as I look at him that the armhole could be slightly lower, but really, it's a pretty good fit.
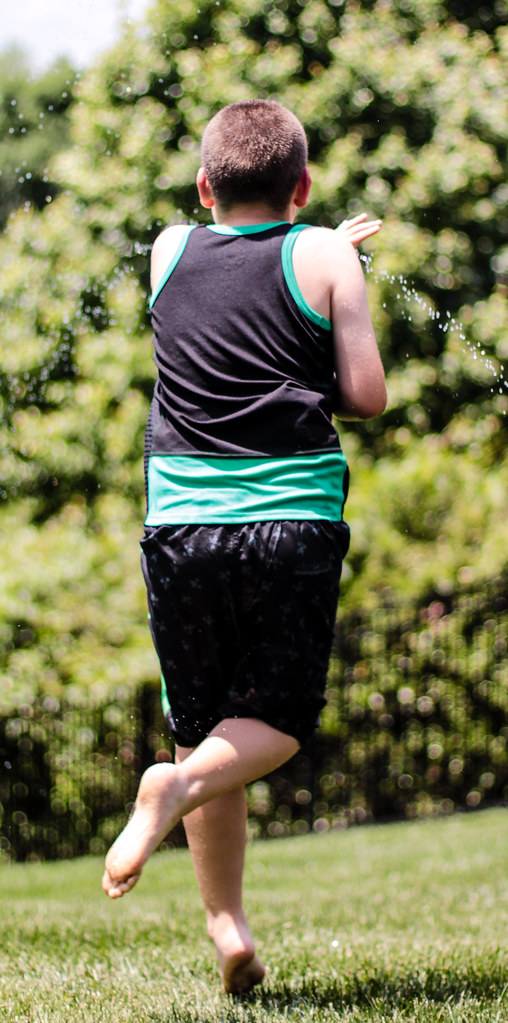
The fit through the back is pretty good though, and it looks well proportioned overall.
On the side, I added 4 inch wide panels of athletic mesh - the sort with large holes that jerseys are made of. It gives the tank some more breathability as well as a cool sporty look. I also color blocked the front and back with green on the lower 6 inches of the tank, and used the same green jersey for the neck and armhole bindings.
I got my Cricut in on the party for some finishing touches with a creeper face and Minecraft logo. I used a silicone HTV that has a slick feel. It's a cool texture that goes with water play well. I also coverstitched all the seams, both for a touch of contrast stitching, and to be sure the insides were nice and soft. No itchy seams!
It was a little more patternwork than I have been doing lately, and it was nice to use that part of my brain. Logan loves his tank, so that's the most important thing. I had fun making it, too.
Showing posts with label boys. Show all posts
Tuesday, May 22, 2018
Monday, September 25, 2017
Ottobre 03/2015-24
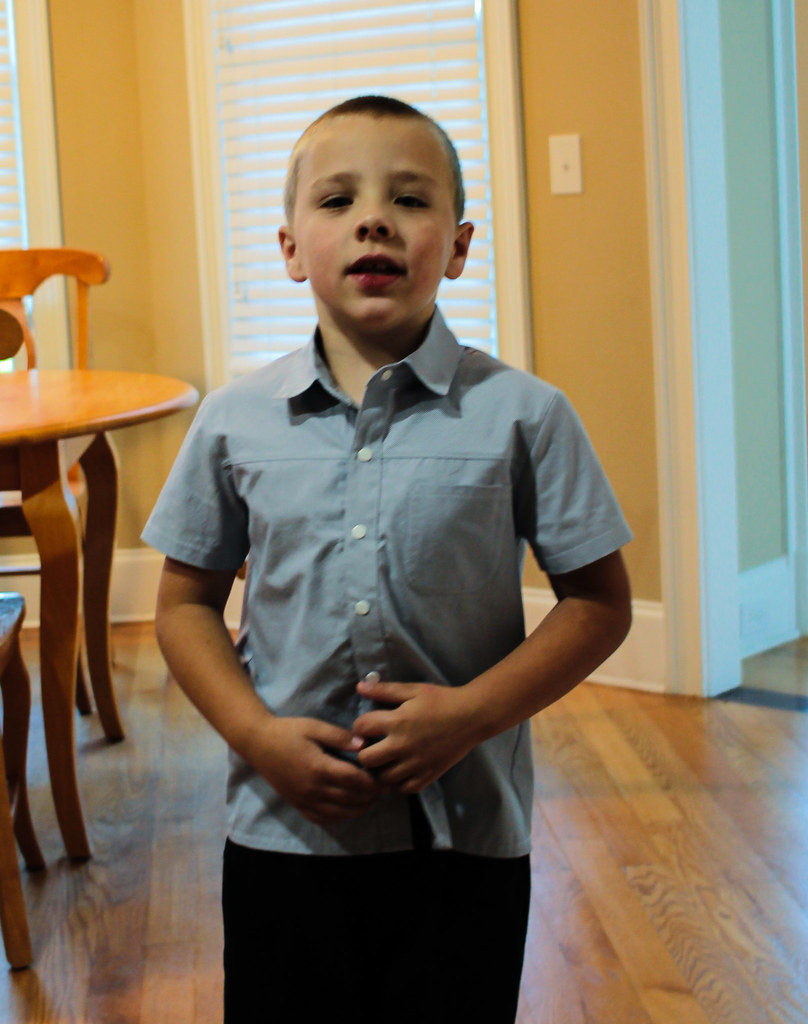
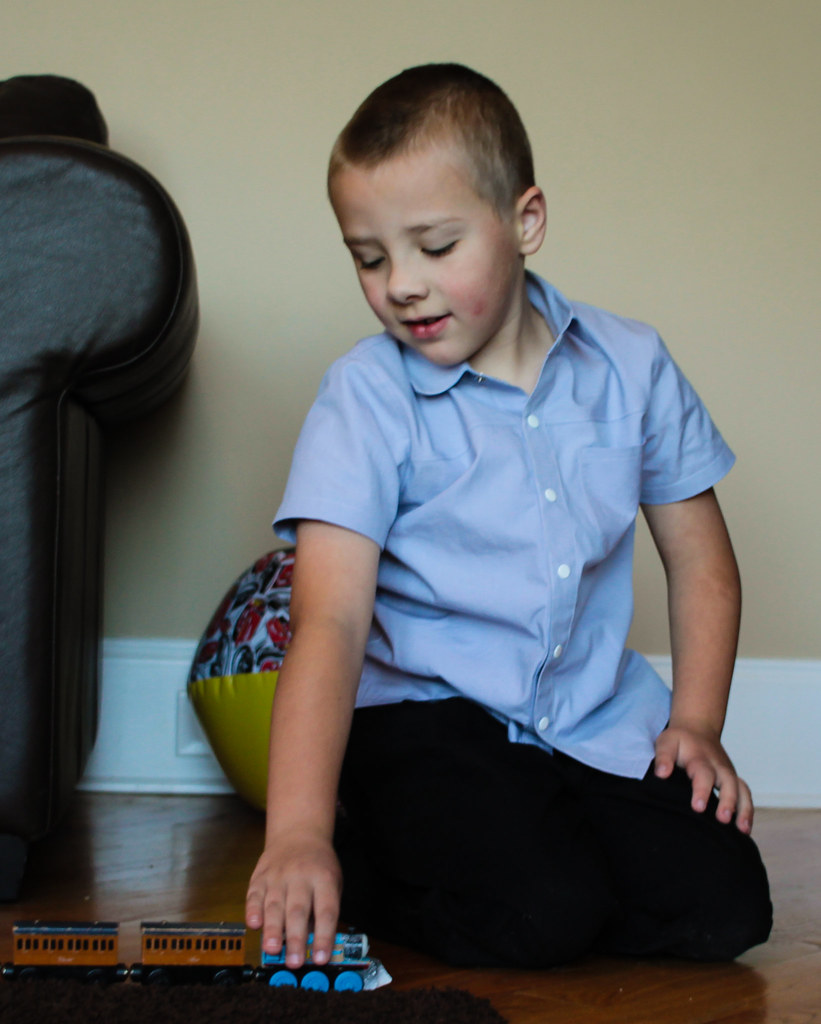
This sweet faced boy doesn't get much sewing time. He has a lot of handmade clothing passed down from Logan, so he really doesn't need much, and he lives in tee shirts and shorts anyway. He only has one dress shirt, and it was purchased for Logan, so it's in rough shape now. It was time for a nice new one of his own.
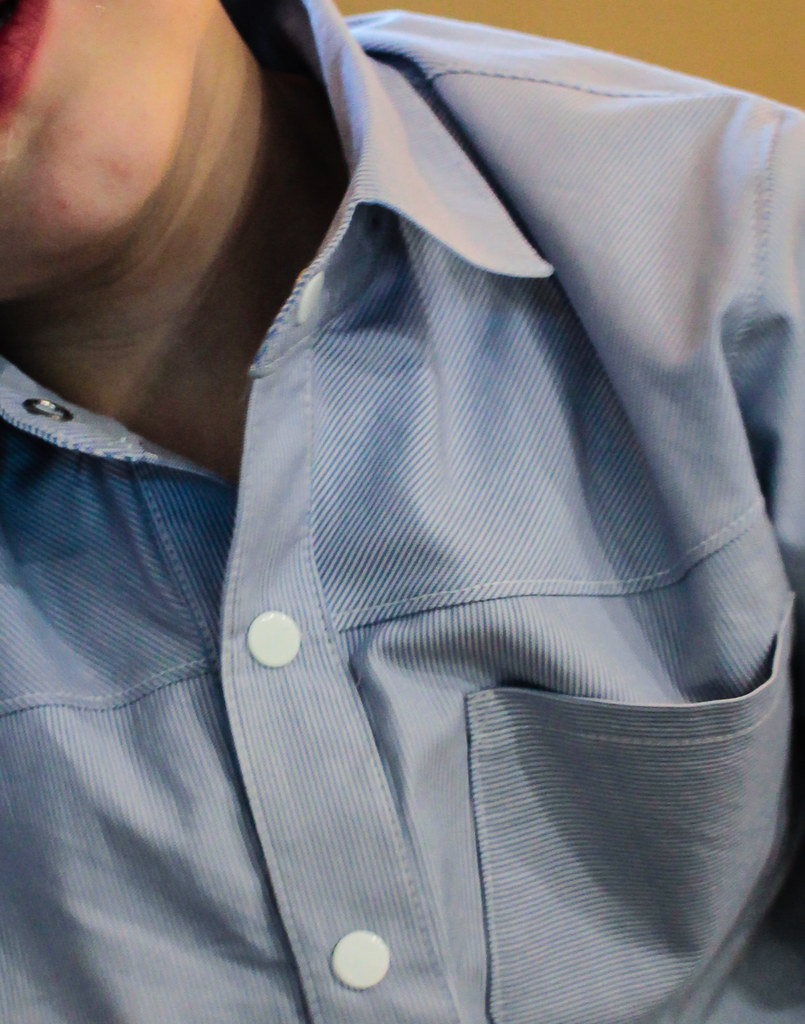
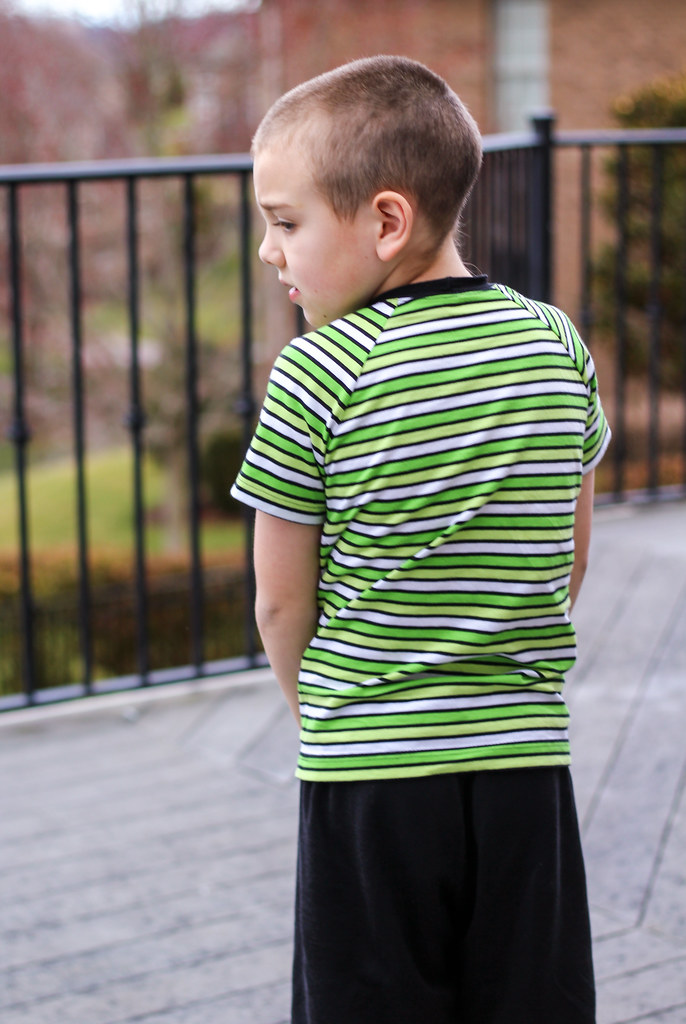
This is Ottobre 03/2015-24, which is a sport shirt with some nice details. The back yoke is echoed in front and there are several pocket options.
The fabric I used is a tiny stripe, so I had fun playing with directions along the yoke and pocket. I cut the main body of the shirt on grain, with the front yoke on the bias and pocket on the cross grain.
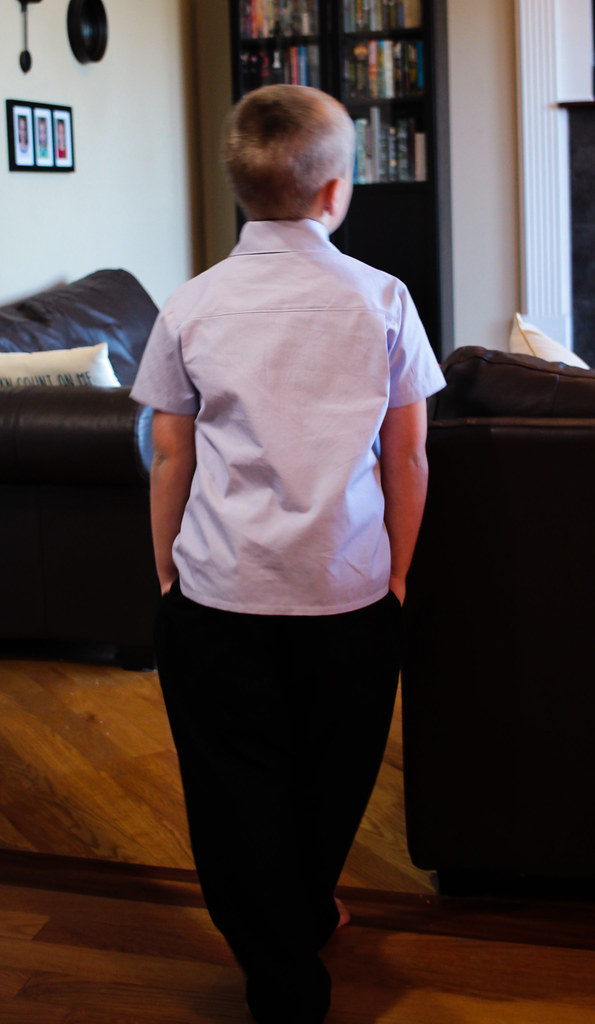
In the back, the yoke is on the cross grain. The shirt has a nice fit, with just a little shaping.
Back ease is incorporated into two pleats near the armhole area, rather than the traditional center back pleat. I like the sporty look it has. It suits Duncan's active personality.
The shirt has button bands and a one piece collar. The pattern calls for buttons, but since Duncan likes to Hulk out of his clothing, I went with snaps. I hadn't applied snaps in a while, so it took me a few tries to get them on properly, but I like the way they turned out.
I've missed sewing for my sweet boy. There never seems time enough for all the projects I'd like to do, but I definitely need to make more time for Duncan.
This is Ottobre 03/2015-24, which is a sport shirt with some nice details. The back yoke is echoed in front and there are several pocket options.
The fabric I used is a tiny stripe, so I had fun playing with directions along the yoke and pocket. I cut the main body of the shirt on grain, with the front yoke on the bias and pocket on the cross grain.
In the back, the yoke is on the cross grain. The shirt has a nice fit, with just a little shaping.
Back ease is incorporated into two pleats near the armhole area, rather than the traditional center back pleat. I like the sporty look it has. It suits Duncan's active personality.
The shirt has button bands and a one piece collar. The pattern calls for buttons, but since Duncan likes to Hulk out of his clothing, I went with snaps. I hadn't applied snaps in a while, so it took me a few tries to get them on properly, but I like the way they turned out.
I've missed sewing for my sweet boy. There never seems time enough for all the projects I'd like to do, but I definitely need to make more time for Duncan.
Wednesday, December 7, 2016
Train PJs
I'm afraid this post isn't going to be earth shattering, but I wanted to record the info for my own purposes. For some reason, I can never remember which patterns for PJs I like and what sizes I have used! It's a problem. Anyway, I finally got a chance to do some sewing, and the boys need PJs.
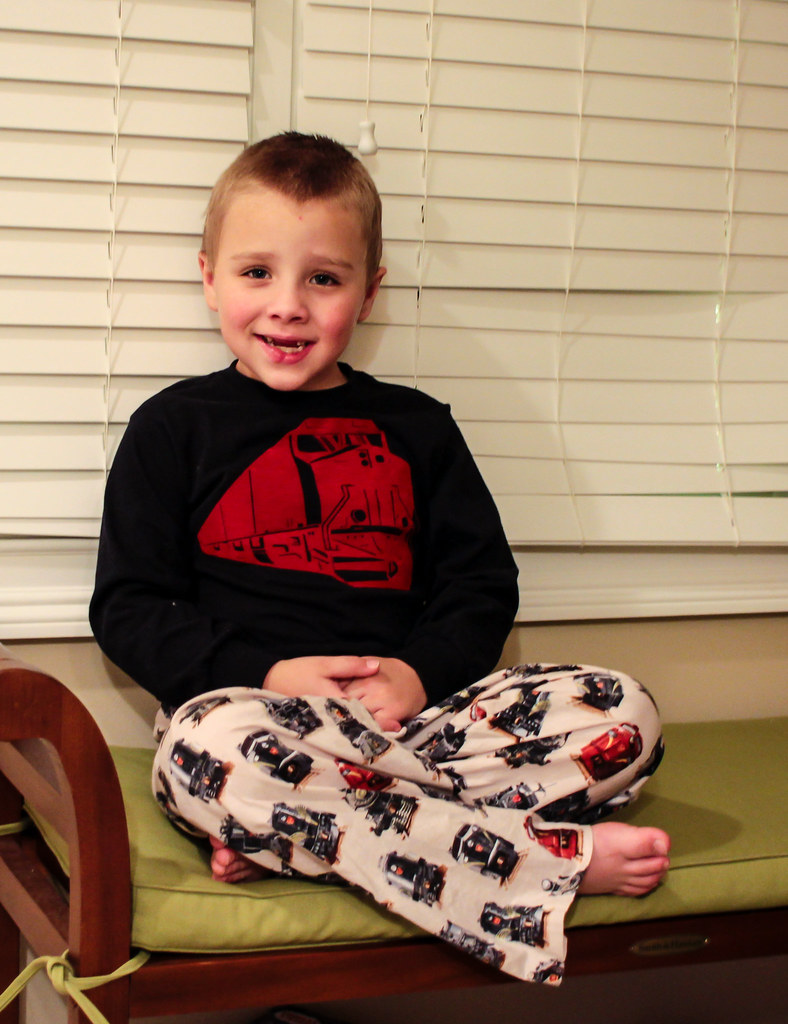
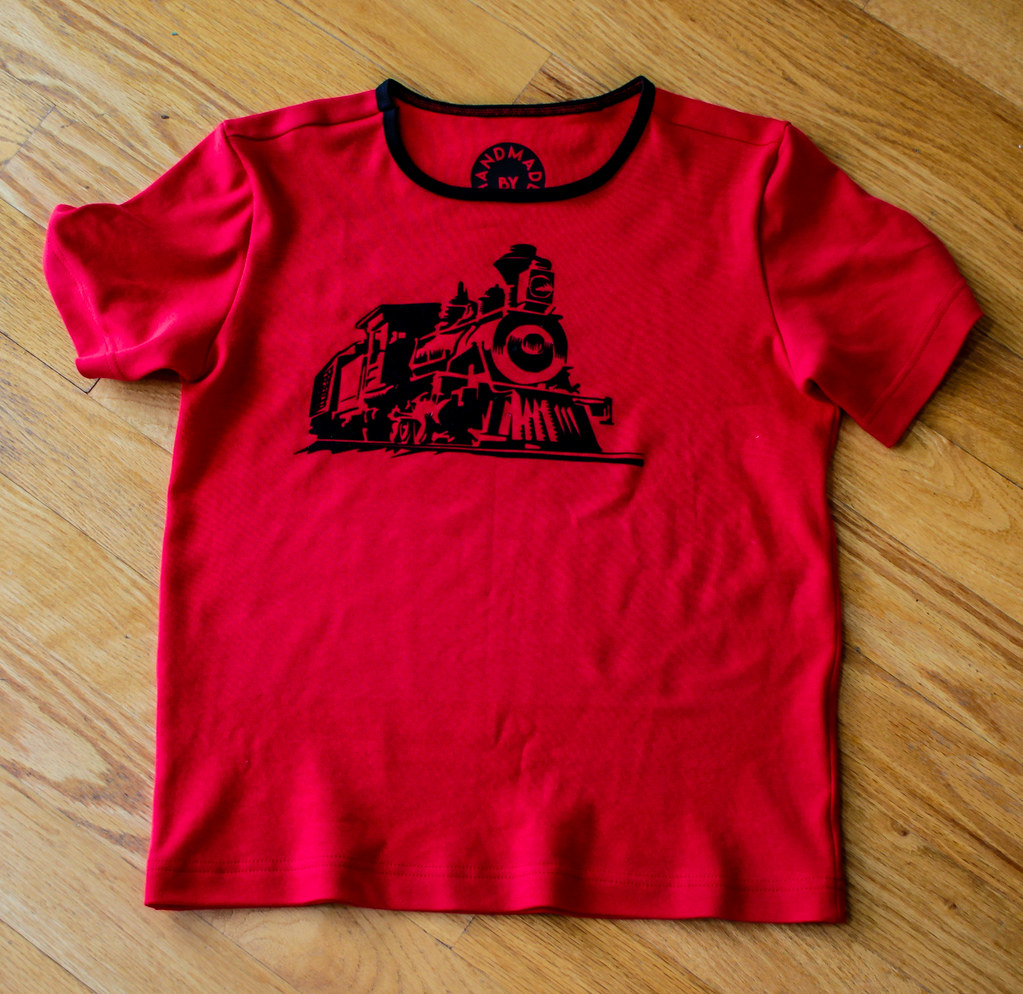
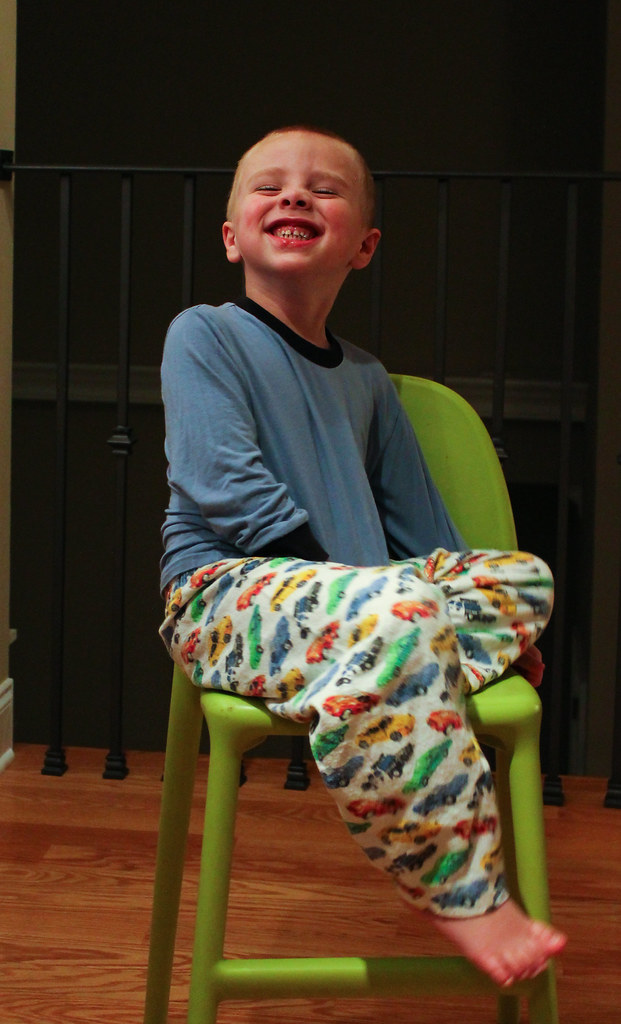
I started with Duncan, as his need was the greatest. The shirt is a blank from Walmart that I added the diesel engine to with flocked HTV, It's fun and fuzzy. For the pants, I used the Goodnight Sweetheart pants pattern from the Sewing for Boys book. I've been using it successfully for years, but Duncan is in the largest size now, so we'll be retiring it soon. Sad day. I did have to shorten it significantly. I took 3 inches off the length, and it's still got some grow length.
He likes them very much because TRAINS. The fabric is quilting cotton from Fabric.com. Not my favorite choice, but train printed fabric is difficult to find in anything else.
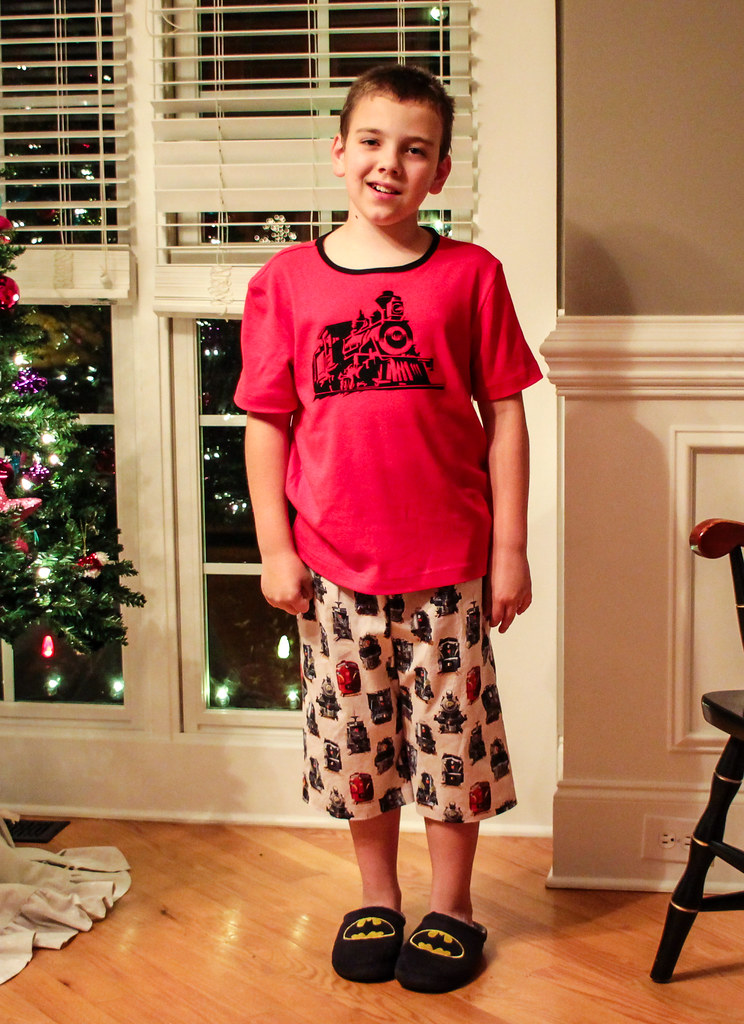
Logan was a wee bit trickier. He prefers shorts and short sleeved tees for his PJs. All the stores around here have switched over to winter stock, so long sleeves are all that are on the shelves. So, the shirt is mommy-made.
I was a little apprehensive about this, actually. I know, just a tee shirt, but sizing for Logan has been really challenging me lately. He's getting into pre-teen sizing, and I don't have the same intuitive feel for that as I do for children's sizing. The last tee I made him was on the small side, and I didn't want that to happen again. After some discussion with the ladies in my Ottobre sewing yahoo group (Thank you, ladies!!) I decided to go with the Dirt tee from the 01/2015 issue of the magazine, as the photo of the shirt looks on the looser fit side. He falls pretty squarely into the measurements for a 148, but after also comparing a few of his favorite tees with the pattern, I ended up sewing the next size up.
He loves the way it fits, so yay! I think the neckline is a bit wide, but since it's a PJ top, I'm not too fussed about it. If I were making it for him to wear to school, I would have made a band for the neckline, rather than the narrow binding, and probably brought in the neckline 1/2 inch or so. The fit through the body is just the way he likes it though, so win! He likes the shorts very much too, and declares he is happy with his PJs.
The shorts are from the 06/2011 - the Green Check boxers. I went with the same size in the boxers as the tee, but of course, cut the waist elastic to Logan's actual waist measurement, which was 25 inches. I skipped the fly as Logan will never use it, and added a tiny bit of topstiching to the side seams, While Logan was wearing them last night, he happened to need a pocket and I was informed that future PJs needed pockets. Ok, then. The boxers are long - coming to below his knee - but he says he prefers them that way, so that was a win.
I'm happy to have a PJs formula for the boys that will work for now, and I have plenty more train fabric to work with, so there will be more of these forthcoming.
I started with Duncan, as his need was the greatest. The shirt is a blank from Walmart that I added the diesel engine to with flocked HTV, It's fun and fuzzy. For the pants, I used the Goodnight Sweetheart pants pattern from the Sewing for Boys book. I've been using it successfully for years, but Duncan is in the largest size now, so we'll be retiring it soon. Sad day. I did have to shorten it significantly. I took 3 inches off the length, and it's still got some grow length.
He likes them very much because TRAINS. The fabric is quilting cotton from Fabric.com. Not my favorite choice, but train printed fabric is difficult to find in anything else.
Logan was a wee bit trickier. He prefers shorts and short sleeved tees for his PJs. All the stores around here have switched over to winter stock, so long sleeves are all that are on the shelves. So, the shirt is mommy-made.
I was a little apprehensive about this, actually. I know, just a tee shirt, but sizing for Logan has been really challenging me lately. He's getting into pre-teen sizing, and I don't have the same intuitive feel for that as I do for children's sizing. The last tee I made him was on the small side, and I didn't want that to happen again. After some discussion with the ladies in my Ottobre sewing yahoo group (Thank you, ladies!!) I decided to go with the Dirt tee from the 01/2015 issue of the magazine, as the photo of the shirt looks on the looser fit side. He falls pretty squarely into the measurements for a 148, but after also comparing a few of his favorite tees with the pattern, I ended up sewing the next size up.
He loves the way it fits, so yay! I think the neckline is a bit wide, but since it's a PJ top, I'm not too fussed about it. If I were making it for him to wear to school, I would have made a band for the neckline, rather than the narrow binding, and probably brought in the neckline 1/2 inch or so. The fit through the body is just the way he likes it though, so win! He likes the shorts very much too, and declares he is happy with his PJs.
The shorts are from the 06/2011 - the Green Check boxers. I went with the same size in the boxers as the tee, but of course, cut the waist elastic to Logan's actual waist measurement, which was 25 inches. I skipped the fly as Logan will never use it, and added a tiny bit of topstiching to the side seams, While Logan was wearing them last night, he happened to need a pocket and I was informed that future PJs needed pockets. Ok, then. The boxers are long - coming to below his knee - but he says he prefers them that way, so that was a win.
I'm happy to have a PJs formula for the boys that will work for now, and I have plenty more train fabric to work with, so there will be more of these forthcoming.
Friday, July 8, 2016
Avengers Assemble! Phase 1
A few months ago I came across some Marvel Avengers themed jersey at fabric.com. Although we are generally a DC family, we'll admit that the Avengers can be pretty awesome as well. Shirts were needed.
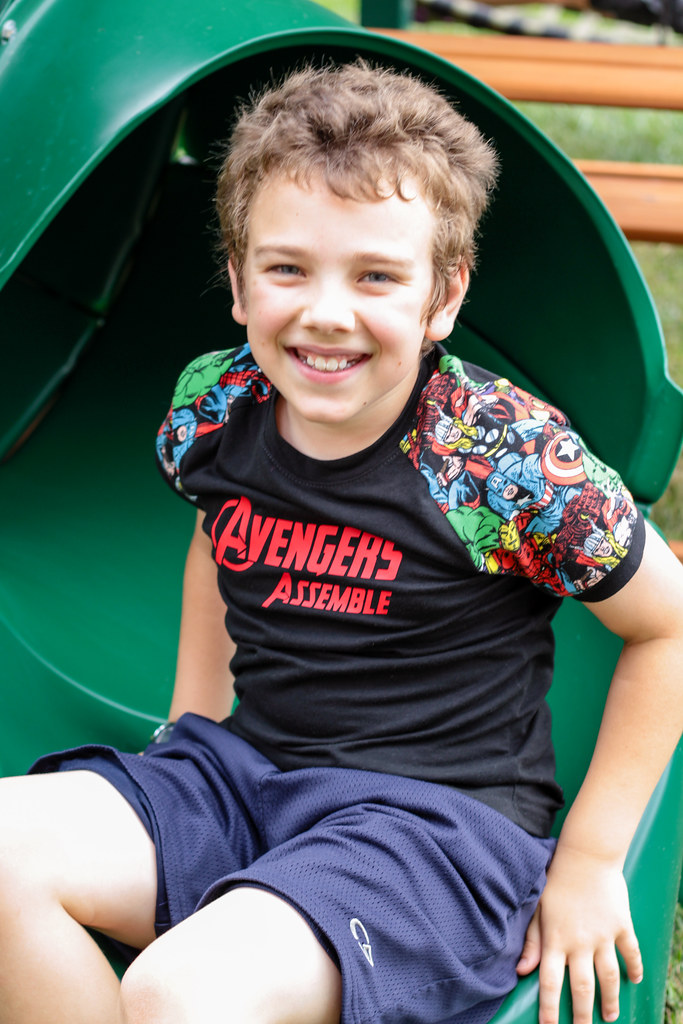
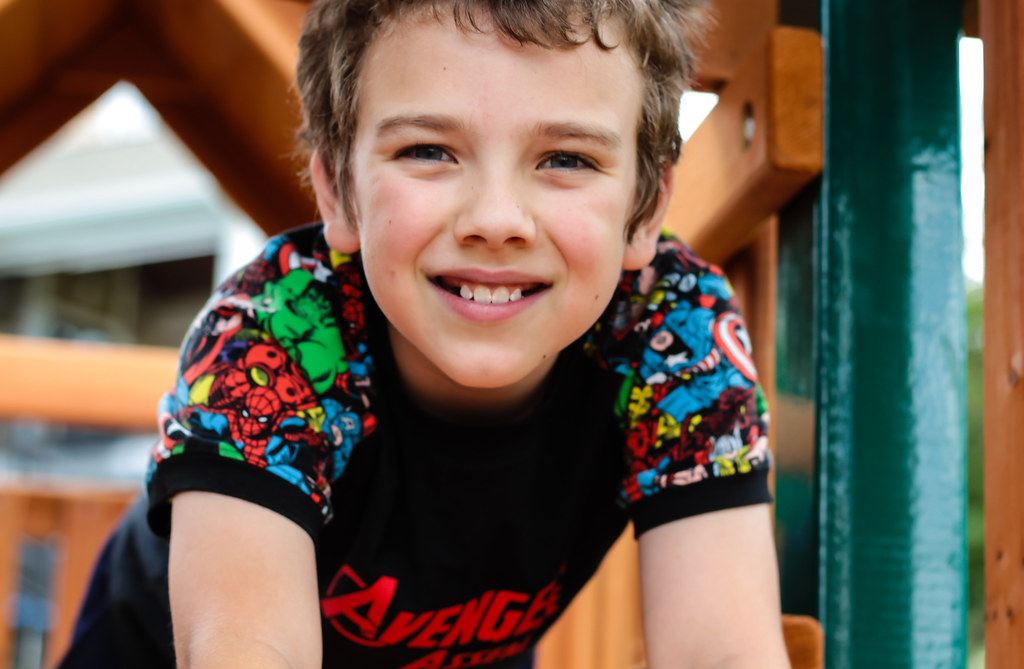
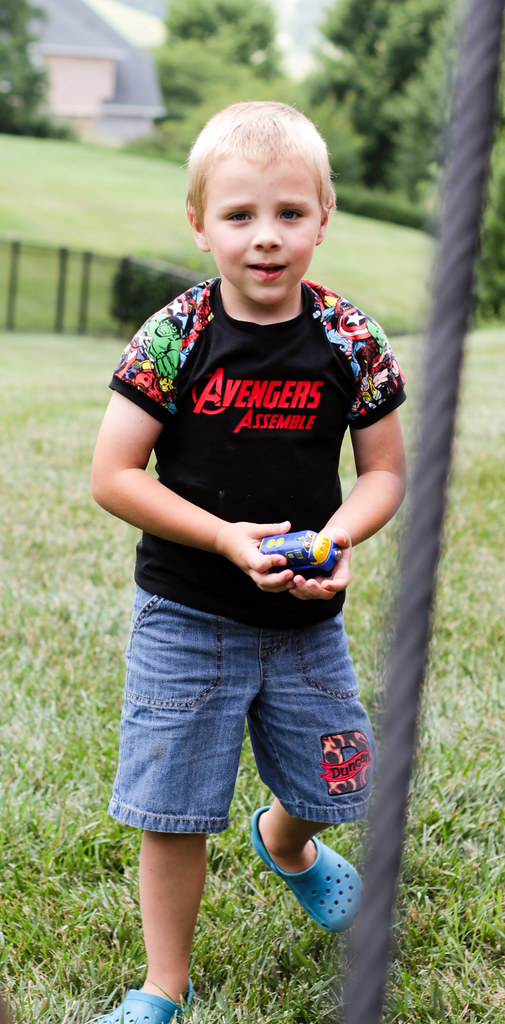
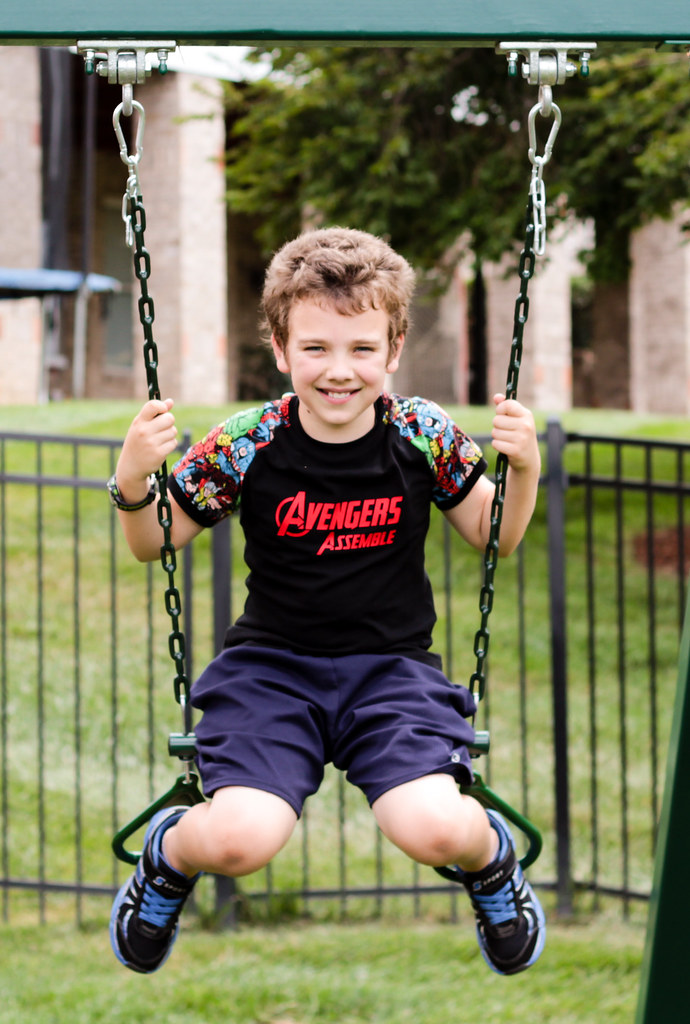
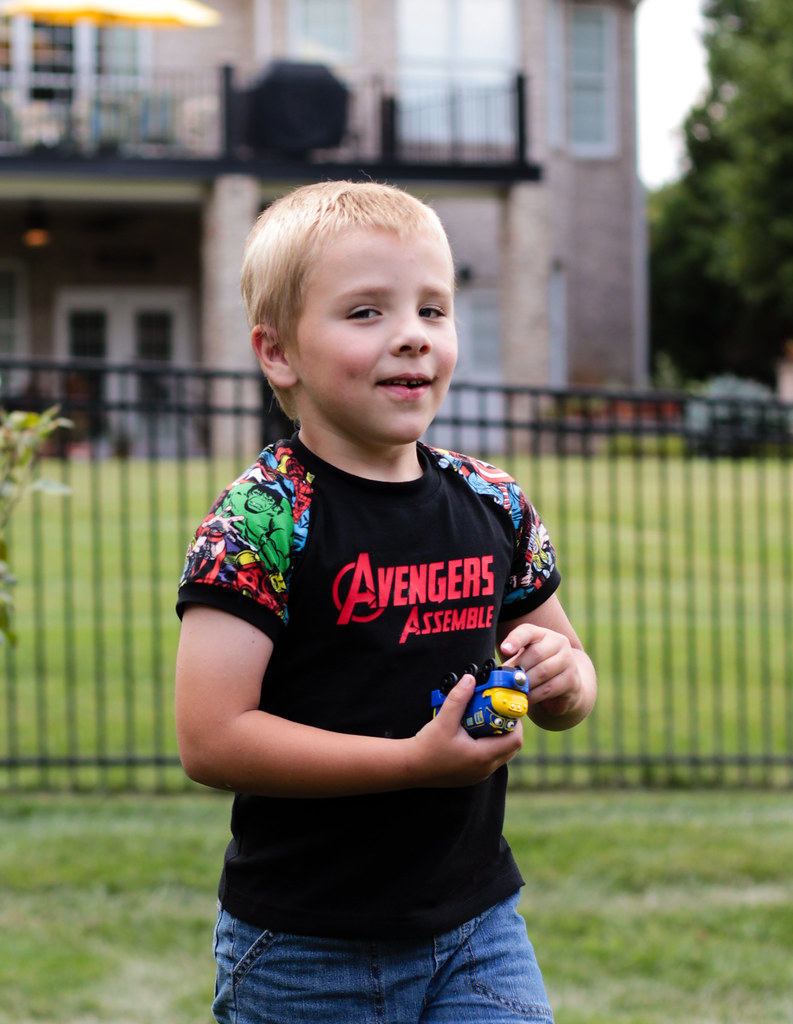
I started with Logan. His shirt is from the 03/2010 issue of Ottobre. It's a short sleeved raglan tee with a neckband and sleeve cuffs. I elected to do the sleeves only in the Avengers print. The remainder of the shirt is Laguna knit from fabric.com.
I could pretend I mixed the fabrics to make my Avengers print stretch farther, but the truth is, I wanted to add an HTV decal with my Cricut. I love that thing. Black makes a nice dramatic background for red!
When I was selecting patterns, I almost passed this one by. I wasn't sold on the sleeve cuffs. I'm really glad I went ahead and did them though. I like the ringer effect of the band.
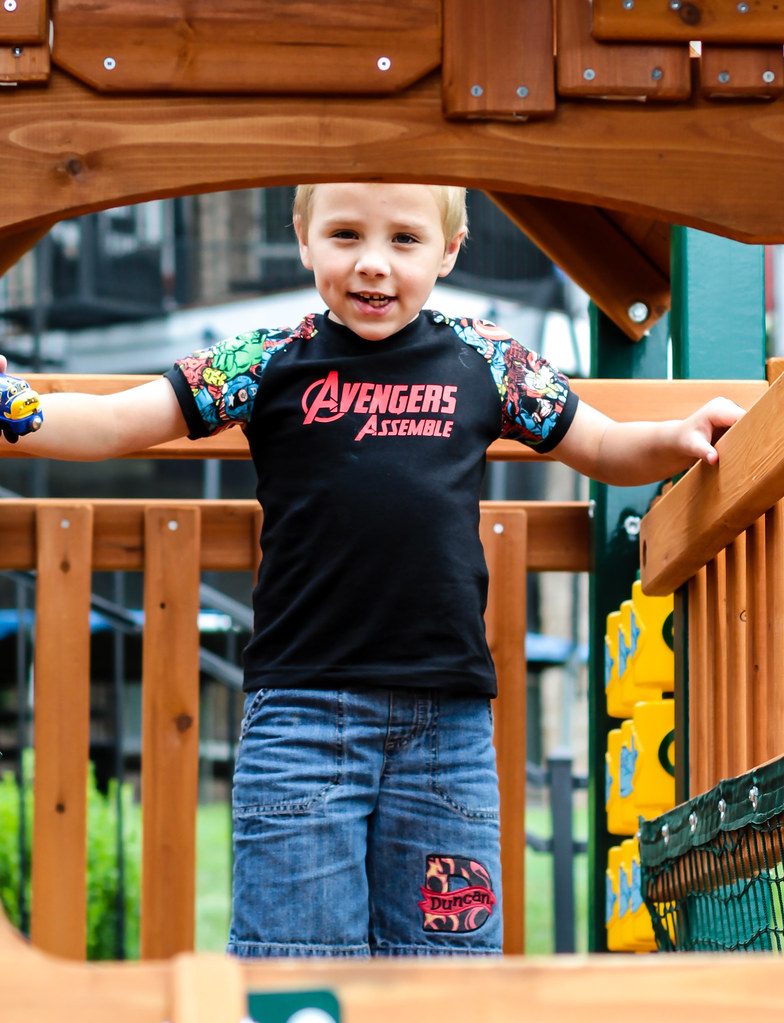
The fit of the tee is long and slim, which has a nice modern look, despite the fact that the pattern was published 6 years ago. Ottobre is always ahead of the game! Duncan's tee is from the same 03/2010 issue, but his is number 18. It's the same style, but in a different size range.
The two fabrics are well matched in weight and both are nice quality, which means the boys are happy and comfortable in their new shirts.
In order to keep things extra comfortable for my sensitive guys, I made size tags out of scraps of HTV to iron onto the inside of the shirts. I had been using woven tags to keep track of sizes, but I like this so much better! No more itchy tags!
Duncan approves. And there's lots more Avengers fabric left to use! Stay tuned for more Super Sewing!
I started with Logan. His shirt is from the 03/2010 issue of Ottobre. It's a short sleeved raglan tee with a neckband and sleeve cuffs. I elected to do the sleeves only in the Avengers print. The remainder of the shirt is Laguna knit from fabric.com.
I could pretend I mixed the fabrics to make my Avengers print stretch farther, but the truth is, I wanted to add an HTV decal with my Cricut. I love that thing. Black makes a nice dramatic background for red!
When I was selecting patterns, I almost passed this one by. I wasn't sold on the sleeve cuffs. I'm really glad I went ahead and did them though. I like the ringer effect of the band.
The fit of the tee is long and slim, which has a nice modern look, despite the fact that the pattern was published 6 years ago. Ottobre is always ahead of the game! Duncan's tee is from the same 03/2010 issue, but his is number 18. It's the same style, but in a different size range.
The two fabrics are well matched in weight and both are nice quality, which means the boys are happy and comfortable in their new shirts.
In order to keep things extra comfortable for my sensitive guys, I made size tags out of scraps of HTV to iron onto the inside of the shirts. I had been using woven tags to keep track of sizes, but I like this so much better! No more itchy tags!
Duncan approves. And there's lots more Avengers fabric left to use! Stay tuned for more Super Sewing!
Wednesday, May 11, 2016
Jalie 2918 and heat transfer vinyl
In March I made Mitch a tee, and the pattern dissapointed me in several ways, so I decided to try the Jalie Men's tee pattern, with my trial run being in a somewhat smaller size...
And it also gave me a chance to try out Heat Transfer Vinyl in my Cricut! How fun is that?!
First let's chat about the pattern. Overall, it's good. I've generally found Jalie to have consistently good quality patterns and this was no exception. It went together well. The fit is slim and modern with a nice sleeve length and a comfortable neckline.
On Duncan (who had already gotten himself covered in mud before he even made it to school), you can see the nice fit. The neckband is slim without any bulkiness and fit into the neckline well. When I initially put the shirt on him, I thought it might be a bit too long, but in wearing, I think it's just right. RTW shirts tend to be shorter, but I like this length better, It keeps his belly covered, which RTW doesn't always.
In this pic you can kind of see my one complaint about the drafting. The sleeve and armscye are symmetrical front to back. It's not an absolute dealbreaker in an unfitted tee, but the sleeve would hang more smoothly if it was shaped properly. I haven't yet found a men's tee pattern with a properly drafted sleeve, so maybe our guys are just used to their clothes not fitting...
The other fun part of this project was the decal! If you follow me on IG, then you know what a maniac Duncan can be, so when I saw this design on a Facebook page I follow, I knew Duncan had to have it. I used my Cricut to cut the decal from heat transfer vinyl(HTV) and ironed it onto the shirt front before assembling the shirt. It was super easy and I LOVE the way it turned out! Since I don't have a heat press, I used my regular iron. You do have to use a lot of pressure, so instead of pressing it on my ironing board, I used a cookie sheet, which in addition to being a hard surface, also reflects the heat back onto the shirt, strengthening the bond onto the fabric.
Despite the sleeve issue, I think this pattern overall is a win. And I will definitely be working more with HTV! So fun, so easy and such a professional looking result!
Labels:
boys,
HTV,
Jalie 2918,
shirt
Wednesday, March 18, 2015
Pajamapalooza 2015
I took over 100 pictures. And that was the best one...
It seems like every year my kids all need PJs at once. You'd think I could manage to plan for this better, but every year it seems like I am making 12 or so sets of PJs. At least this year it was just the boys.
Sort of. Myra has a collection of nightgowns that I made her several months ago. They all still fit and she loves them, but a friend of hers gave her these fleece pants, and she needed a top to go with them.
It turns out to be sort of fortuitous actually. I've been wanting to make this pattern (Ottobre 06/2010-18) for her since the magazine came out. In 2010. I even bought this fabric with this very pattern in mind. In 2010. I was so on the ball about it in fact, that this is the largest size the pattern is drafted in. And when I got the magazine she was too small for the smallest size. Seriously, how does that even happen?!
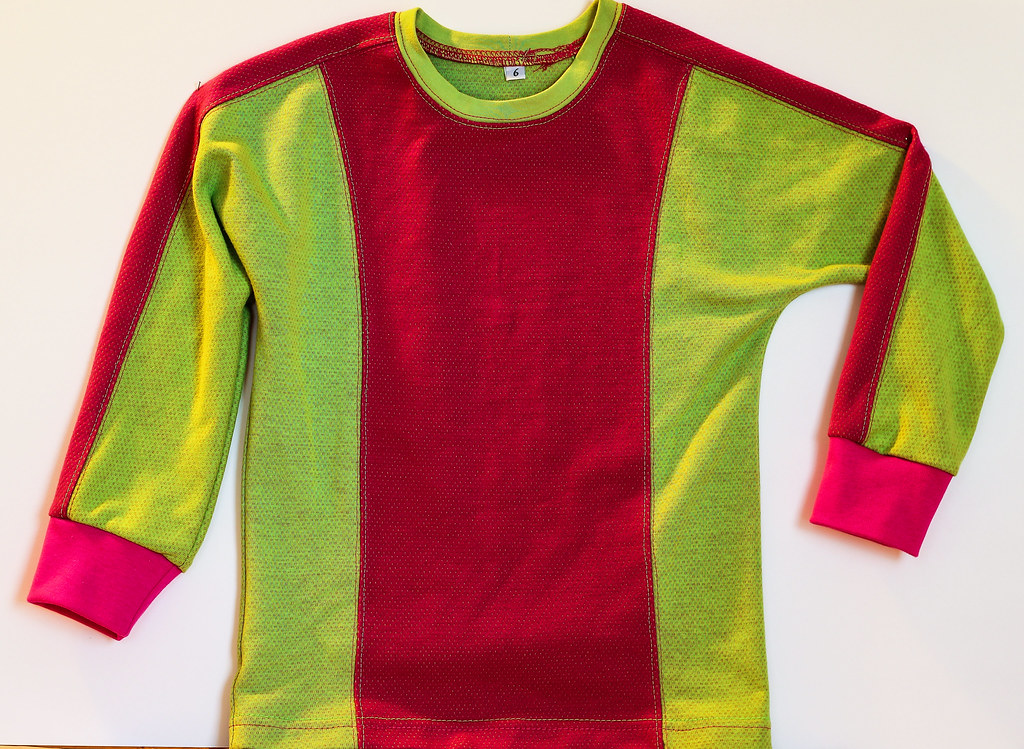
Since I had waited until the last possible moment to make this, I decided to go all out with the topstitching. I did a line of stitching on either side of each seam, with the thread color contrasting the fabric. Myra loves it. And it wasn't as hard to do as it looks. I just threaded my coverstitch with the two colors in either needle. This pic also show the cool fabric. It is a knit double cloth. The pink layer is an athletic mesh which is bonded to the green jersey layer. The green shows through the holes in the mesh, and the pink bonding stitches show on the green side. It's a very neat effect.
Duncan's PJs are extremely basic. The pants are one piece pants adapted from Sewing for Boys. The shirt is long sleeve, cuffed sleeve from Ottobre. I honestly can't remember which one it is, but there is one in nearly every issue.
He likes them, and I made 3 sets, so I busted a ton of stashed flannel and knit scraps on these. Total win.
It seems like every year my kids all need PJs at once. You'd think I could manage to plan for this better, but every year it seems like I am making 12 or so sets of PJs. At least this year it was just the boys.
Sort of. Myra has a collection of nightgowns that I made her several months ago. They all still fit and she loves them, but a friend of hers gave her these fleece pants, and she needed a top to go with them.
It turns out to be sort of fortuitous actually. I've been wanting to make this pattern (Ottobre 06/2010-18) for her since the magazine came out. In 2010. I even bought this fabric with this very pattern in mind. In 2010. I was so on the ball about it in fact, that this is the largest size the pattern is drafted in. And when I got the magazine she was too small for the smallest size. Seriously, how does that even happen?!
Since I had waited until the last possible moment to make this, I decided to go all out with the topstitching. I did a line of stitching on either side of each seam, with the thread color contrasting the fabric. Myra loves it. And it wasn't as hard to do as it looks. I just threaded my coverstitch with the two colors in either needle. This pic also show the cool fabric. It is a knit double cloth. The pink layer is an athletic mesh which is bonded to the green jersey layer. The green shows through the holes in the mesh, and the pink bonding stitches show on the green side. It's a very neat effect.
Duncan's PJs are extremely basic. The pants are one piece pants adapted from Sewing for Boys. The shirt is long sleeve, cuffed sleeve from Ottobre. I honestly can't remember which one it is, but there is one in nearly every issue.
He likes them, and I made 3 sets, so I busted a ton of stashed flannel and knit scraps on these. Total win.
And last but not least we have Logan. Logan decided recently that he wanted to change PJ styles. His past pajamas have been long sleeve and long pants, both made of flannel. He told me a few weeks ago that these were too hot (note: It was snowing at the time.) and that he wanted short sleeve tee shirts and shorts for sleeping. So, here we go. This is set #1, made with Ottobre 03/2013-23/39 and 06/2011-37.
I've made him two sets so far, and he's very happy with both. You can see the second set in the top picture. Those two sets were random stashbusted fabrics, but I find that the stash is very low on older boy friendly knits, so I ordered a few, and then I'll make more. You can never have too many comfy PJs.
Thursday, November 20, 2014
Sensory Time! A weighted blanket and a bit of navel gazing.
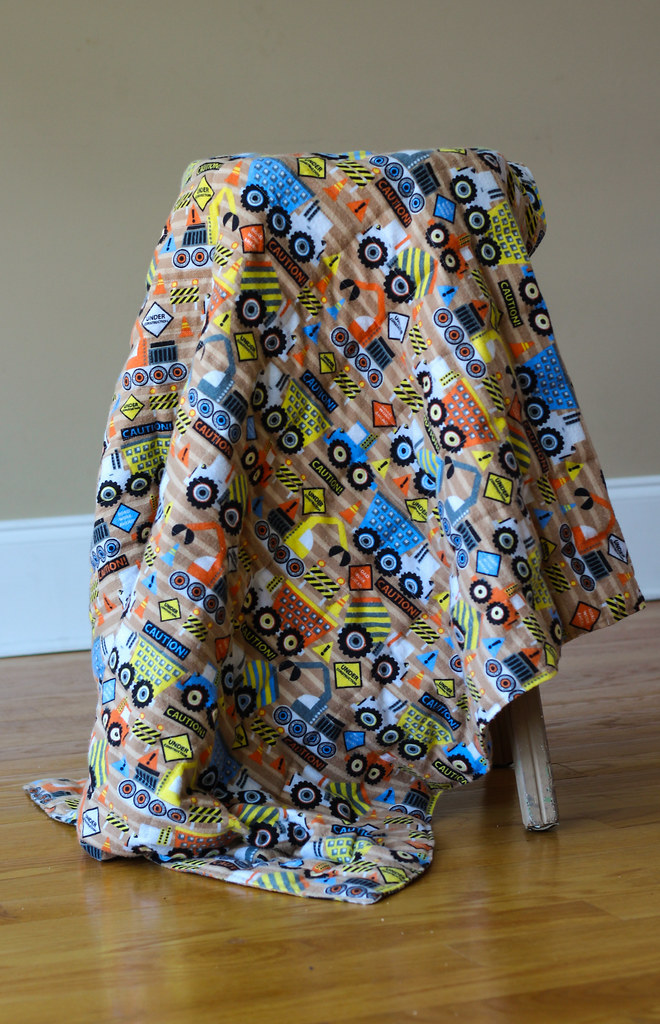
So, I know it's been a while since my last post. I'll get to that at the end, and for those not interested, you can skip it. Now for the sewing! I've mentioned in the past that my oldest son is on the autism spectrum and has some sensory issues. The same is true for my Duncan. Duncan has sensory seeking behaviors, which means he wants all the feels! It makes it very hard for him to focus on a task (even if that task is just eating breakfast) because he wants to feel all the things. His OT recommended a weighted blanket for him. They're sort of insanely expensive and since they're heavy, they're also costly to ship. So, I made him one.
And I'm so glad I did. We've only had it 12 hours and I can already see that it is helping him regulate. Why did I wait so long?!
And the answer is that I hate sewing straight lines and the process of filling 350 teeny pouches of flannel with itty bitty plastic beads filled me with dread. But it wasn't as bad as all that, and if you are considering making one for your little person, please let me encourage you to do it now! And I'll throw in a few tips I learned as I made this one.
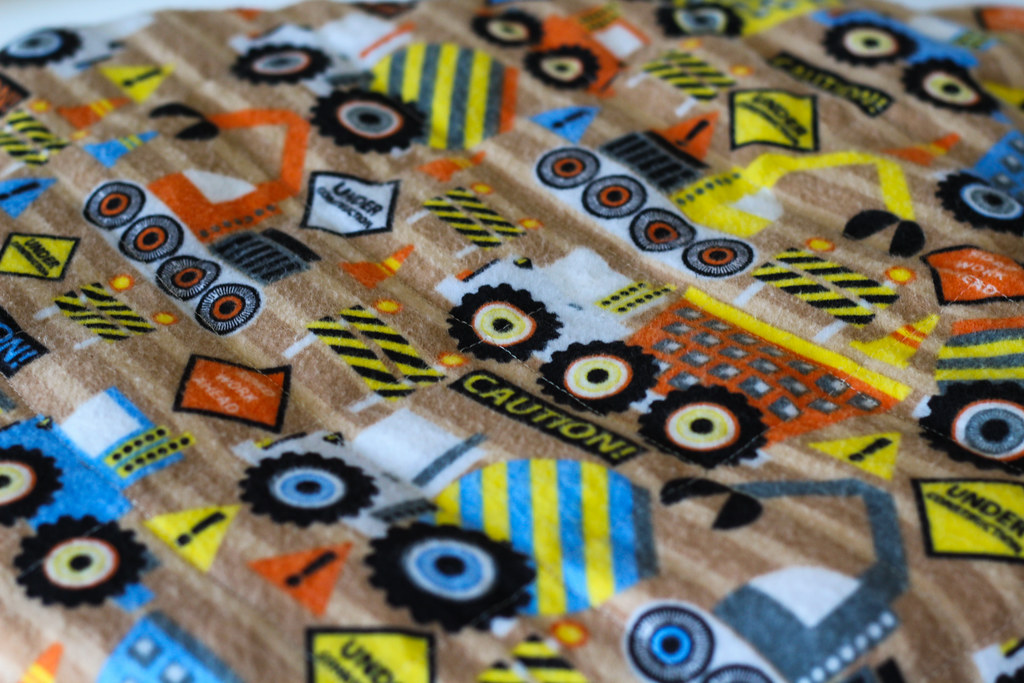
I started with this tutorial on the Dandelion Mama blog. I made some alterations to make this work for us. I made my blanket a little longer than hers, so I used 1 1/2 yard lengths of fabric. I also used flannel rather than quilting cotton. While this makes for a very snuggly and soft blanket, it was also extremely difficult to fill each pouch with the pellets, since the fabric sticks to itself. A smooth quilting cotton would have been much easier.
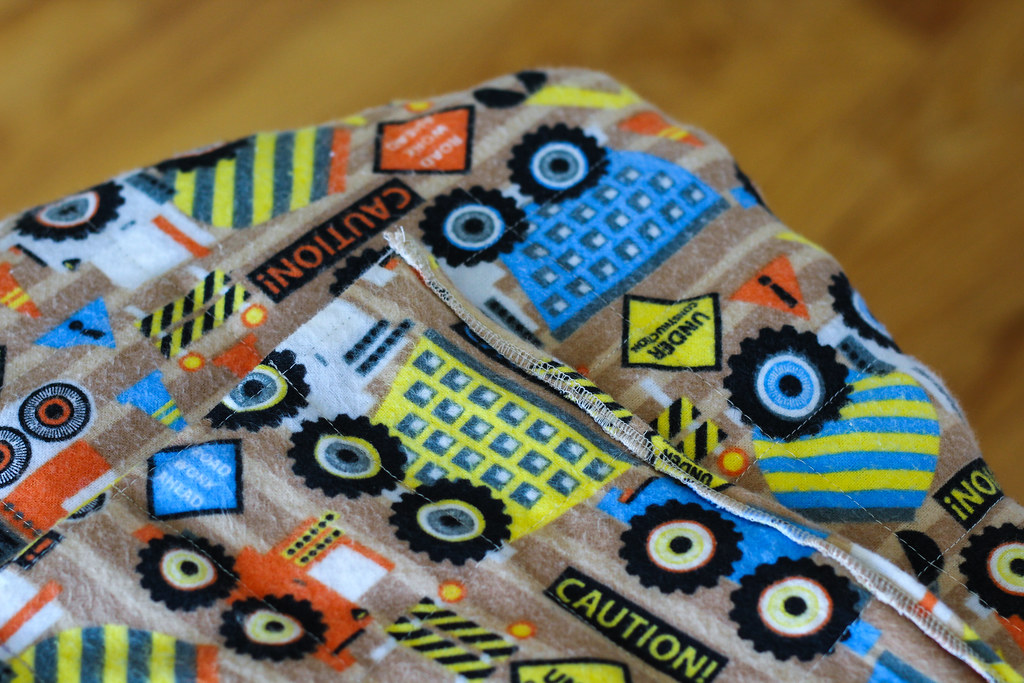
The individual pouches are a little difficult to see. For Duncan's blanket, I made 3 inch wide channels (which I marked with a Frixion pen) and then 2 inch "boxes" to capture the pellets. I marked my lines before I started sewing so that the grid was there before I began. The trickiest part is definitely sewing closed those little packets of pellets, but if you go slow and feel along your stitching as you go, it's not too bad. I actually managed to sew up this blanket without breaking any needles. I just went slowly.
I left myself a little extra room at the top, which turned out to be a good thing, because keeping the pellets under control gets a little tricky as you run out of space in the channels. After I closed the last line of pouches, sealing in the pellets, I serged off the extra length and turned it under and stitched it. I'm not sure it is the prettiest finish I could have managed, but it is secure! I don't want those pellets escaping.
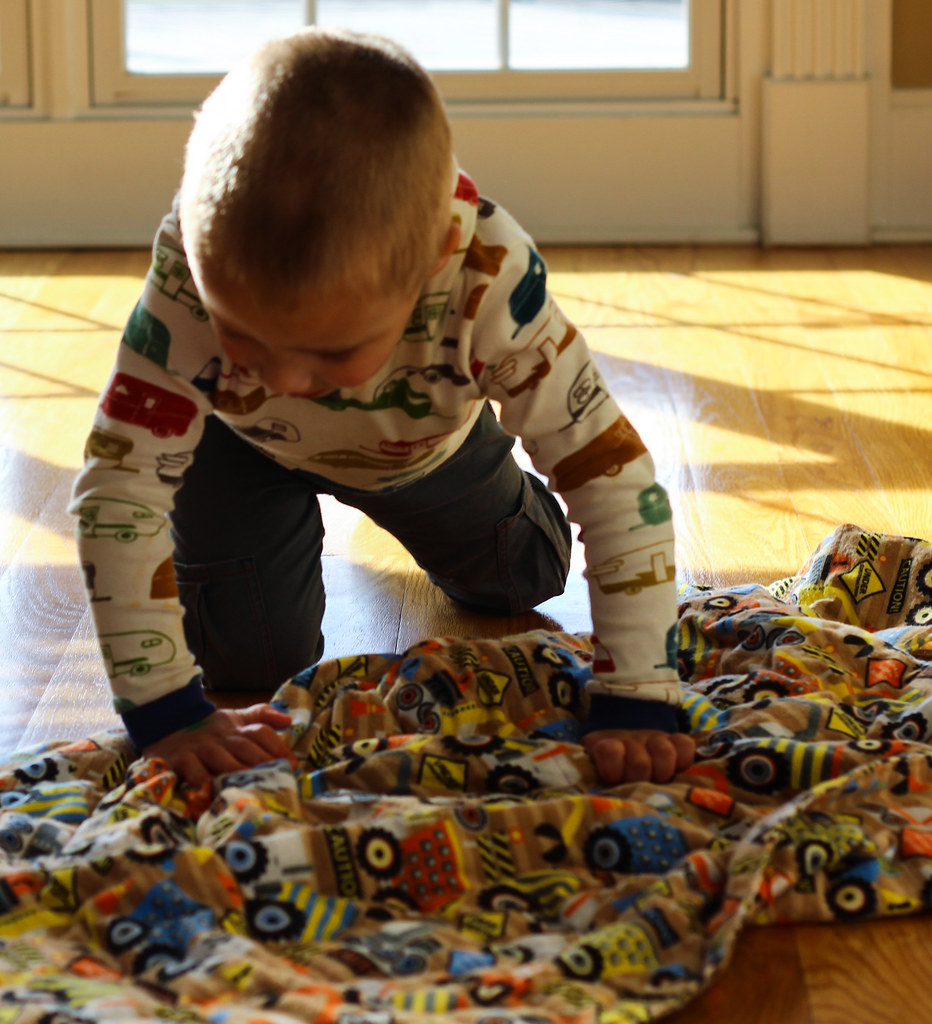
When I first gave it to him, he spent a lot of time exploring the feel of it. The pellets give it an interesting texture, and the flannel is very soft. He touched it with his hands, then explored it with his feet.
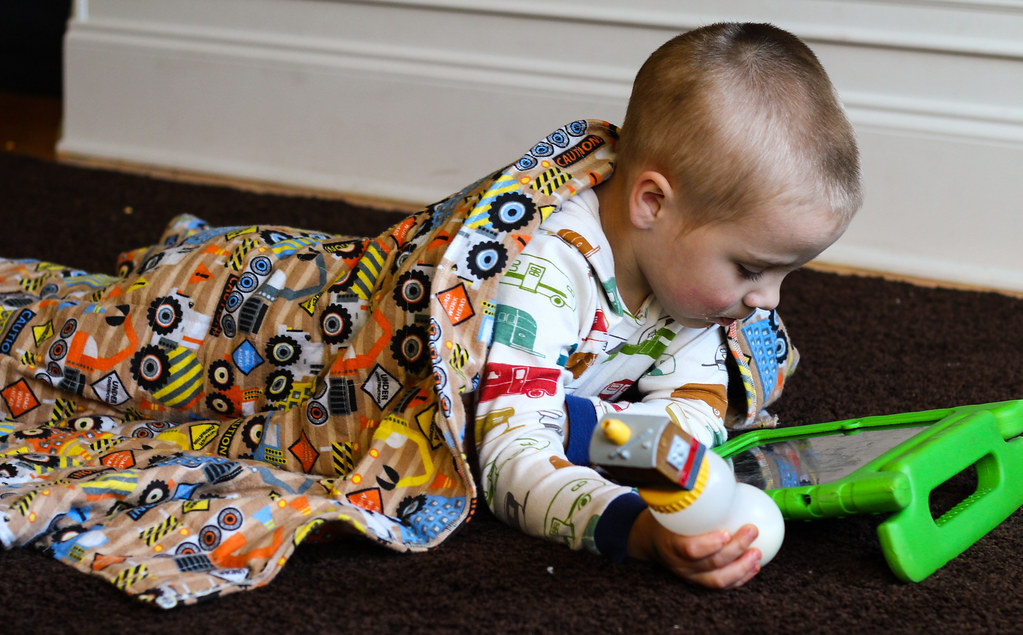
But it wasn't long before he figured out how good it felt to be enveloped in all that weight.
He carried it around everywhere yesterday. He even brought it with him in the car when we went to get the big kids from school, and he snuggled in it to go to sleep. I left it on him all night, and he slept an unprecedented 11 hours, and then woke up cheerful! Just for a restful night's sleep for all of us, I have to give this blanket a big win.
So, that's the sewing, You can skip the rest if you wish, but I wanted to put it out there. If you've been following me for long, you've probably noticed that my posting has really dropped off. I hate it when bloggers disappear without any explanation (I worry!) and I'm not planning to disappear altogether, but I just haven't been feeling the yen to blog lately. I've still been sewing. A lot. Because I have to sew like I have to breathe. I know you guys understand that. Blogging just hasn't been a priority. I'll still blog bigger projects (like this one) or new patterns, but really, do you want to read about my 400th Renfrew? Yeah, me either. So, that's it. I'm fine. I'm still here. Tweet at me and say Hi! I'll be around! But the blog might be a little quieter. That's all.
And I'm so glad I did. We've only had it 12 hours and I can already see that it is helping him regulate. Why did I wait so long?!
And the answer is that I hate sewing straight lines and the process of filling 350 teeny pouches of flannel with itty bitty plastic beads filled me with dread. But it wasn't as bad as all that, and if you are considering making one for your little person, please let me encourage you to do it now! And I'll throw in a few tips I learned as I made this one.
I started with this tutorial on the Dandelion Mama blog. I made some alterations to make this work for us. I made my blanket a little longer than hers, so I used 1 1/2 yard lengths of fabric. I also used flannel rather than quilting cotton. While this makes for a very snuggly and soft blanket, it was also extremely difficult to fill each pouch with the pellets, since the fabric sticks to itself. A smooth quilting cotton would have been much easier.
The individual pouches are a little difficult to see. For Duncan's blanket, I made 3 inch wide channels (which I marked with a Frixion pen) and then 2 inch "boxes" to capture the pellets. I marked my lines before I started sewing so that the grid was there before I began. The trickiest part is definitely sewing closed those little packets of pellets, but if you go slow and feel along your stitching as you go, it's not too bad. I actually managed to sew up this blanket without breaking any needles. I just went slowly.
I left myself a little extra room at the top, which turned out to be a good thing, because keeping the pellets under control gets a little tricky as you run out of space in the channels. After I closed the last line of pouches, sealing in the pellets, I serged off the extra length and turned it under and stitched it. I'm not sure it is the prettiest finish I could have managed, but it is secure! I don't want those pellets escaping.
When I first gave it to him, he spent a lot of time exploring the feel of it. The pellets give it an interesting texture, and the flannel is very soft. He touched it with his hands, then explored it with his feet.
But it wasn't long before he figured out how good it felt to be enveloped in all that weight.
He carried it around everywhere yesterday. He even brought it with him in the car when we went to get the big kids from school, and he snuggled in it to go to sleep. I left it on him all night, and he slept an unprecedented 11 hours, and then woke up cheerful! Just for a restful night's sleep for all of us, I have to give this blanket a big win.
So, that's the sewing, You can skip the rest if you wish, but I wanted to put it out there. If you've been following me for long, you've probably noticed that my posting has really dropped off. I hate it when bloggers disappear without any explanation (I worry!) and I'm not planning to disappear altogether, but I just haven't been feeling the yen to blog lately. I've still been sewing. A lot. Because I have to sew like I have to breathe. I know you guys understand that. Blogging just hasn't been a priority. I'll still blog bigger projects (like this one) or new patterns, but really, do you want to read about my 400th Renfrew? Yeah, me either. So, that's it. I'm fine. I'm still here. Tweet at me and say Hi! I'll be around! But the blog might be a little quieter. That's all.
Subscribe to:
Posts (Atom)