Showing posts with label costume. Show all posts

Sunday, November 3, 2019

It's a Jalie Halloween!

I don't think I have very many costume years left with this one, so I was pretty thrilled when she designed her own costume this year. Fortunately, it was doable within a pretty quick time frame, as time has been in short supply lately.
Here she is with her original design. She made a few tweaks to it before we got going, so the final result isn't exactly like her model, but it is exactly what she wanted! She asked me to make her silver leggings with a coral top that had gold sleeves. As you wish...
For the top, I made Jalie 2805, with the crew neckline and 3/4 sleeve. Other than cutting the sleeves out of a contrasting fabric, the pattern required no alterations to manage Myra's vision.
She requested her costume feature an amulet at the hip, so I added it with heat transfer vinyl as per her instruction.
The pants are made with Jalie 3887, the Clara leggings. I've been terribly remiss as a blogger, as I've made at least a dozen of these in various sizes and from various fabrics. Myra LOVES this pattern, and this is actually the second size I've traced for her. I do add some height in the back waist, which is a typical adjustment for Myra.
The Clara is an amazing basic leggings pattern and it was perfect for this crazy hologram lycra. For the record, it's also fantastic in DBP, cotton-lycra, rayon-lycra and denim knit. We really love this pattern.
Love the fit in back as well!!
And while it was made for Halloween, it also works as daily wear, if you are a sassy preteen!

Saturday, November 1, 2014

Jalie 2792 becomes Wonder Woman!

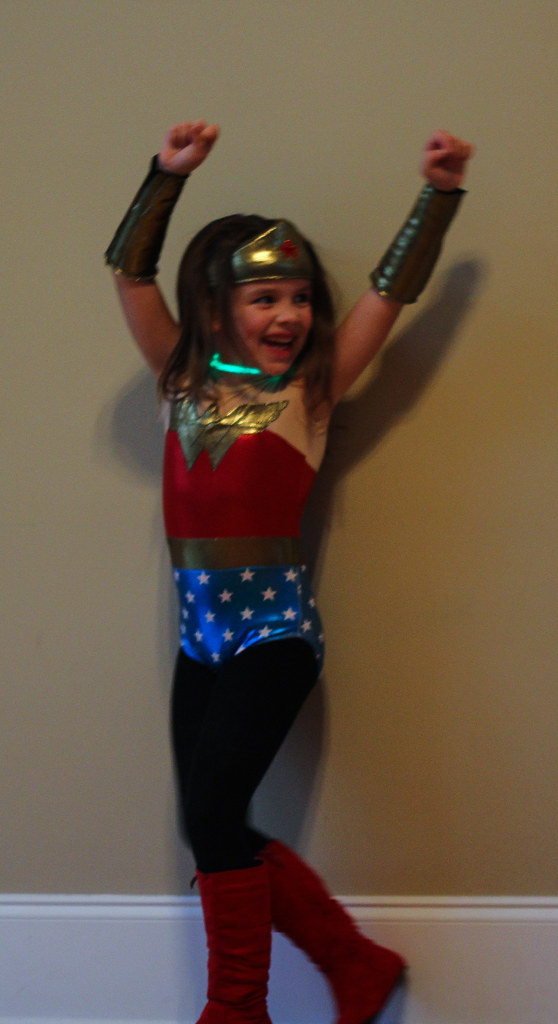
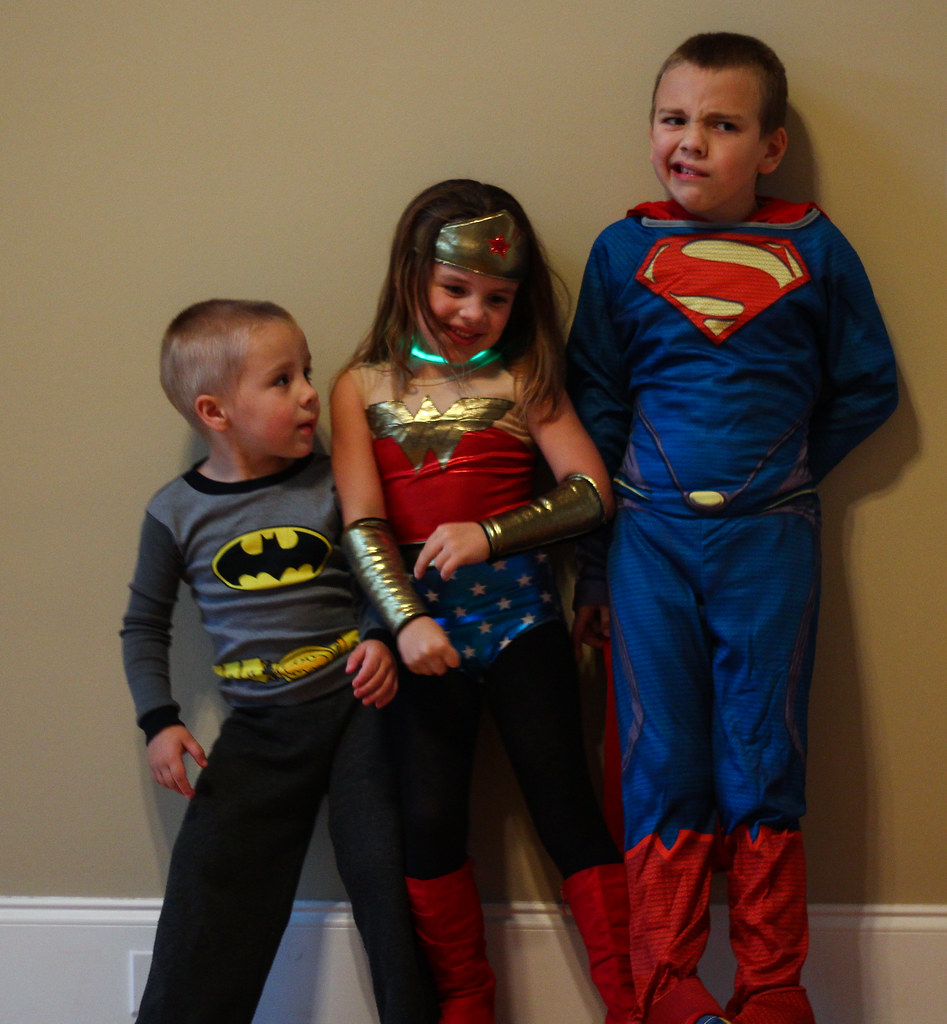
This Halloween I only did one costume. My boys went with storebought costumes, which was actually kind of a relief, but Myra really wanted me to make her a Wonder Woman costume.
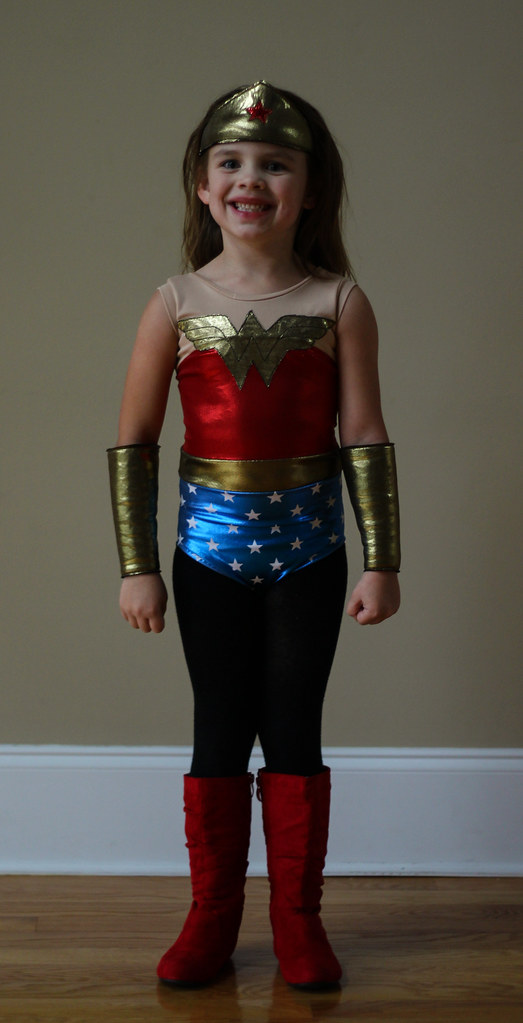
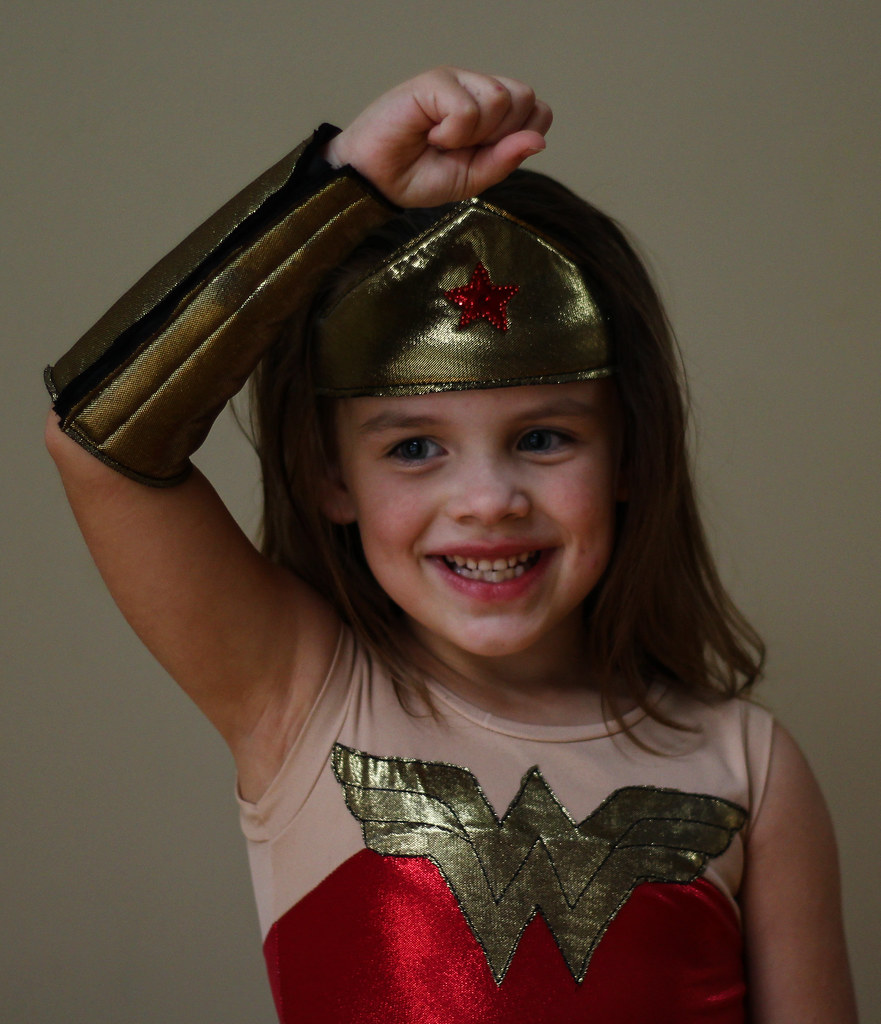
I'm so glad I did. I think her costume ended up much  nicer than the storebought Wonder Woman costumes we saw. She was very happy, All of the fabrics came from Cali Fabrics. I can't tell you how thrilled I was to find star printed metallic lycra!! And the service at Cali Fabrics is always excellent.
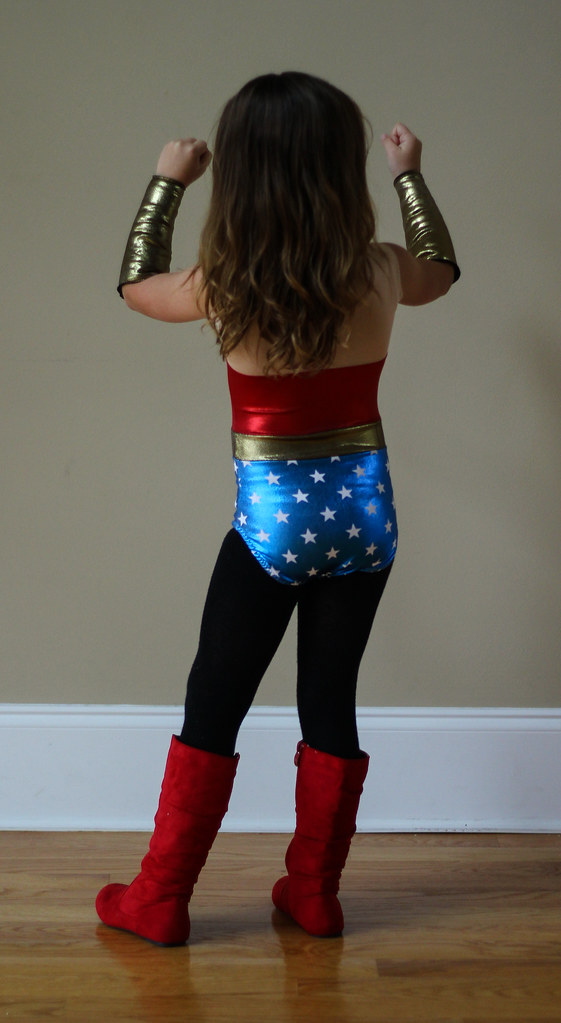
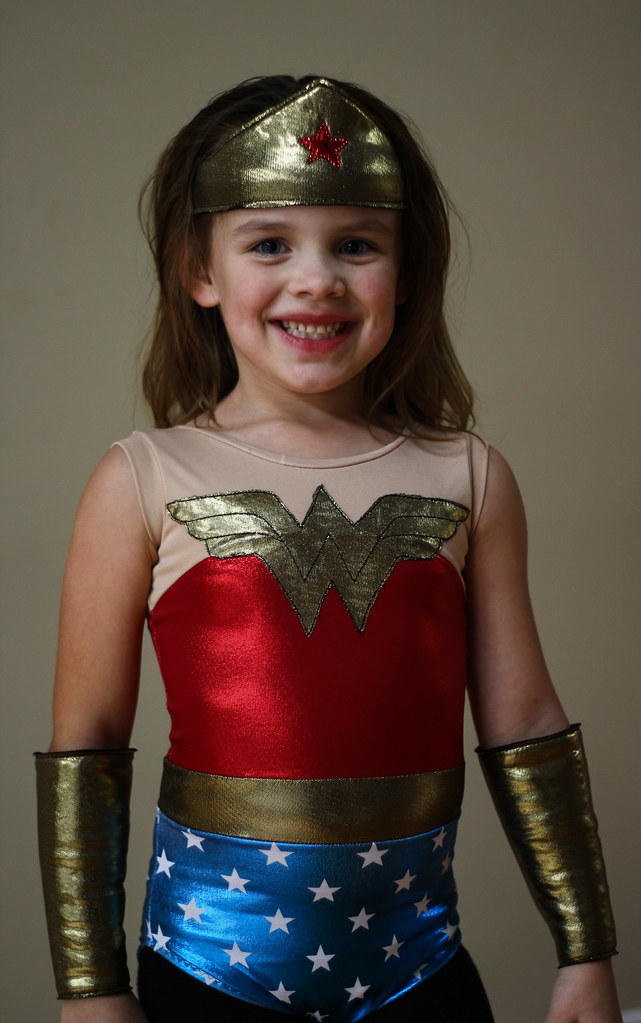
The base for the leotard is Jalie 2792. It's pretty much perfect for a Wonder Woman costume, since the bodice already has the yoke built in. Myra is long but lean, so she needed a 104 in width, but a 116 in length, Rather than tracing two sizes, I just added the gold band, since we needed a gold belt anyway.
The only other change I made to the pattern was to lower the leg opening for more coverage. Myra has a ghetto booty, and we were going for the Linda Evans Wonder Woman with a lower cut leg anyway.
The scariest part of the costume was the Wonder Woman insignia that I appliqued to the front. These fabrics are incredibly thin and stretchy, which made them tricky to stitch. I used my favorite knit applique trick and used a glue stick to adhere the gold applique to the leotard. Then I sandwiched the whole thing between two layers of wash away stabilizer. I used a triple stretch stitch to outline the W's and define the logo inside. This fabric doesn't fray, so I left the edges raw.
To complete the outfit, I made a set of gauntlets and a crown out of the metallic lycras. I backed the pieces with fleece for stability and comfort. The gauntlets close with velcro and the crown has wide elastic in the back under her hair. Myra loves the bling on the crown! I appliqued a small star with the red metallic lycra and decorated it with HotFix crystals and rhinestuds.
Myra loves her costume, and she was the perfect addition to our little Justice League.

Thursday, October 24, 2013

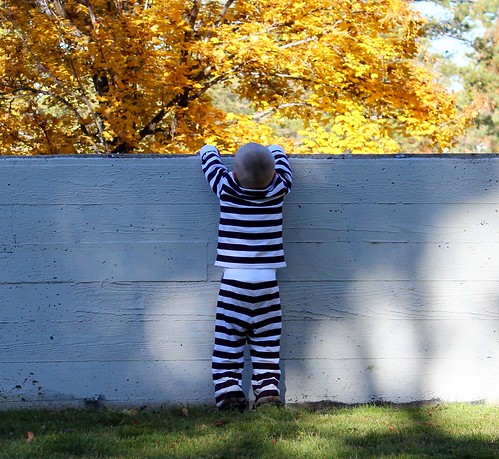
Ottobre + Ananda = One Smooth Criminal

This year is probably the last year that Duncan won't have an opinion about his Halloween costume, so I kind of struggled with what to make for him.
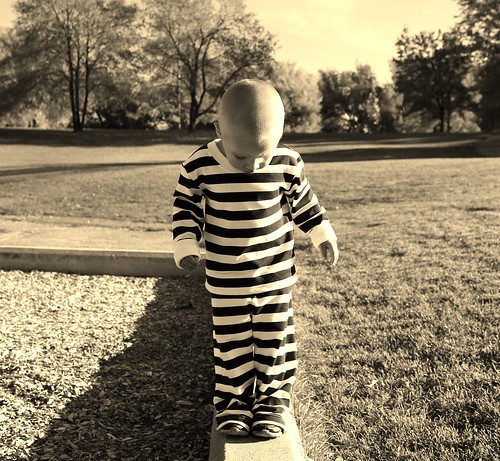
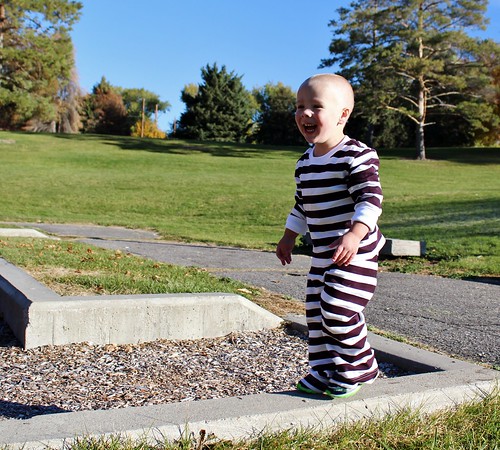
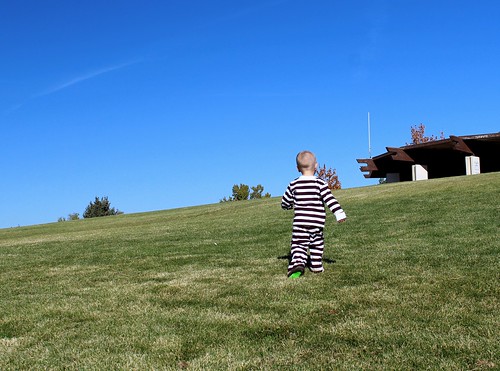
If you follow me on Instagram, you know that Duncan is something of an escape artist. We talked about several variations on that theme, but finally settled on classic jailbird stripes.
It's also a plus that this is basically a sweatsuit with stripes. Super comfy and cozy for trick or treating or just hanging around the cell block.
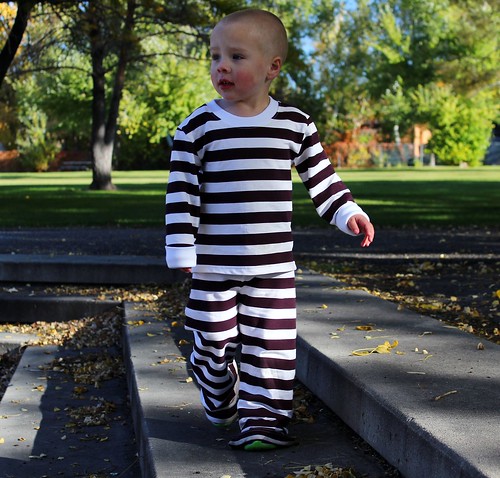
The shirt is from the 01/2010 issue of Ottobre. I made the size 98 because I already had it traced and his 92s are all too small. It looks like the sleeves are a little long, but I kinda like the ragamuffin look it gives.
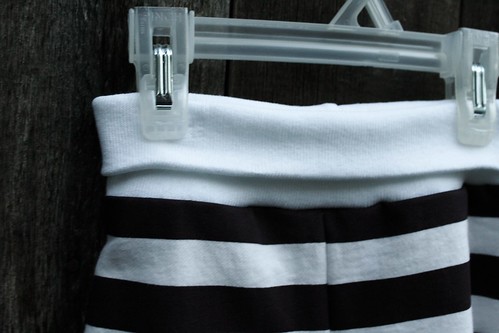
The pants are my new favorite comfy kids pant, the Ananda. They are so comfy and go together so quickly. And since they don't have side seams, I only had to match the stripes on the inseam and crotch. Bonus!
I made the waistband (and the cuffs and neckband of the shirt) from a white rib knit. I wish it had slightly better recovery, as the pants got a little saggy with wear, but I think that was also because I hemmed them a little too long so he was stepping on them.
Wasn't it nice of him to mark the new hemline with mud? Considerate kid, I tell ya.
Even though this is "just" a costume, I did go to the trouble of matching the stripes across the seams. I didn't have quite enough fabric to match the stripes across the sleeves, but he moves so much, I don't think anyone would be able to tell either way.
The fabric I used is a soft sweatshirt fleece from Nature's Fabrics. You may have noticed that it isn't the traditional black and white stripe. I could pretend that I did that on purpose so that he could get more wear out of the ensemble, but the honest truth is that I just wasn't paying attention. I still think it gets the point across and he actually will at least be able to wear the sweatshirt after Halloween, so whatever.
Better move fast, Copper! He's outta here! And as you all know, #childproofingisfutile .

Saturday, October 5, 2013

Bimaa Sweater + Ananda Pants = The Great and Powerful Trixie!

Myra spent a lot of time debating which My Little Pony she was going to be for Halloween. When she finally decided on The Great and Powerful Trixie, I was a little surprised, but thrilled that I wasn't going to have to sew Princess Celestia's wings and golden hooves. Once I pinned her down, it was time to choose patterns, and the SewFab bundle had just been released. The Bimaa hoodie and the Ananda pants seemed like the obvious choice! And they were.
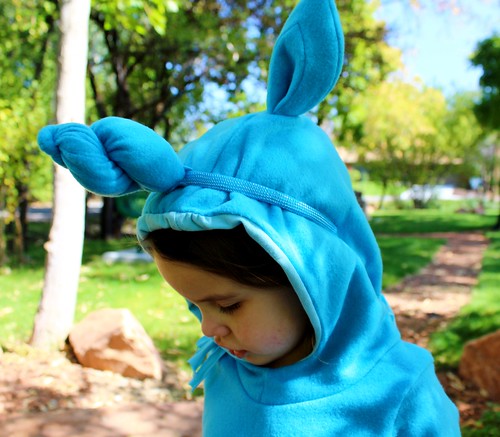
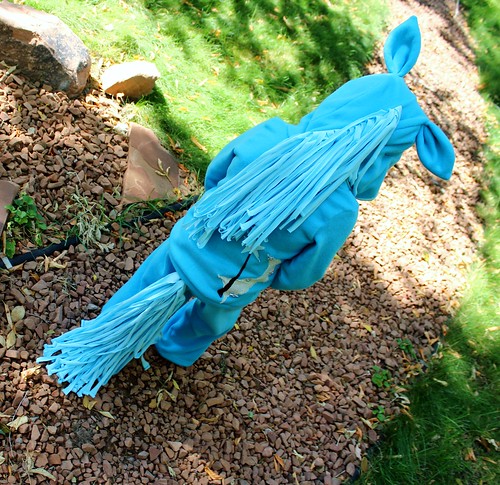
Myra LOVES her Trixie costume, and I'm pretty thrilled with how easily it came together. For the top, the Bimaa sweater pattern is absolutely perfect for adding ears. The hood has a center panel that is seamed right where a pair of ears would sit, so you don't have to manipulate the pattern at all.
For her horn, I elected to use a separate headband. The horn itself is just a piece of fleece that I twisted around itself and hand sewed to the headband. Super easy. For her mane, I did add a center seam to the center panel of the hood, and inserted the mane just below the ears. In retrospect, I sort of wish I had continued her "hairline" a little farther forward, and trimmed the from shorter to simulate a forelock.
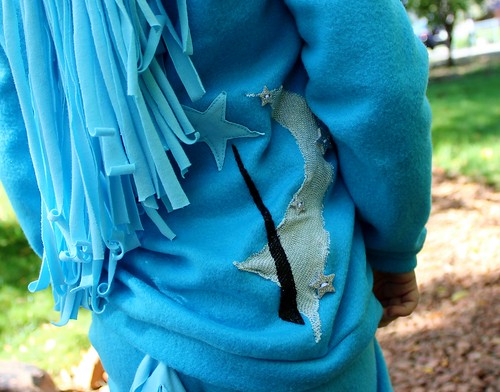
The main body of the costume is poly fleece to keep her cozy on Halloween night. For the mane, tail, hood lining and waistband of the pants, I used a cotton-lycra jersey from Chez Ami. The mane and tail are cut into thin strips to simulate hair. I love how it curls up on the ends, just like Trixie's hair.
Trixie's cutie mark is a magic wand with a "swoosh" of magic sparkles. For the wand, I used more of the same jersey and painted the stick part with fabric paint. The "swoosh" is a bit of silver sparkle knit, appliqued in place and decorated with some glitter star buttons.
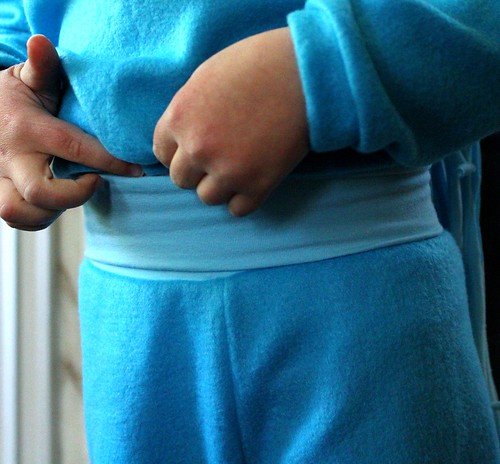
The Ananda Pants are so perfect for this costume! The pant has a nice easy fit, and the waist is finished with a knit waistband. Since Myra is carrying around that heavy tail, I did reinforce the waistband with some 1 3/4 inch wide elastic, which I just inserted into the knit waistband itself. It's still super comfy, but it holds up the extra weight well.
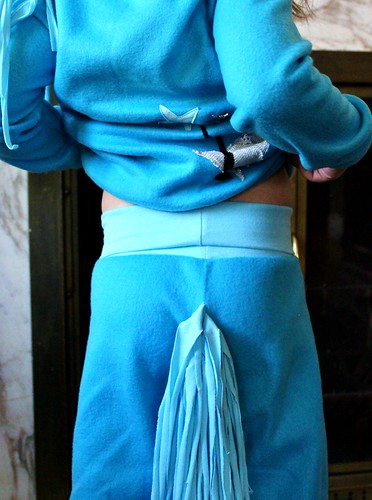
From the back, you can see I just inserted the tail into the center back seam of the pants. I seriously love how well that waistband covers Myra's lower back! She has a bit of a ghetto booty, but these pants are perfect. She asked me to make her another pair in pink to wear to school, so I know they are a winner.
Now we just have to wait for Halloween! Are you ready to rumble, Twilight Sparkle?! Trixie's coming for you!

Tuesday, March 5, 2013

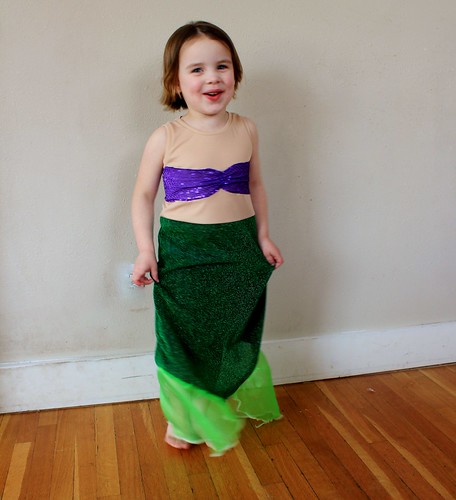
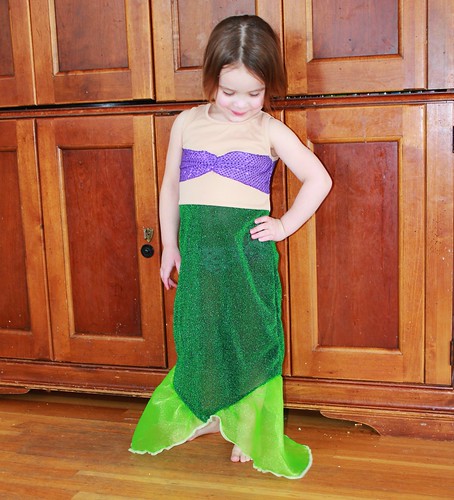
Kitschy Coo Skater Dress - Mermaid style

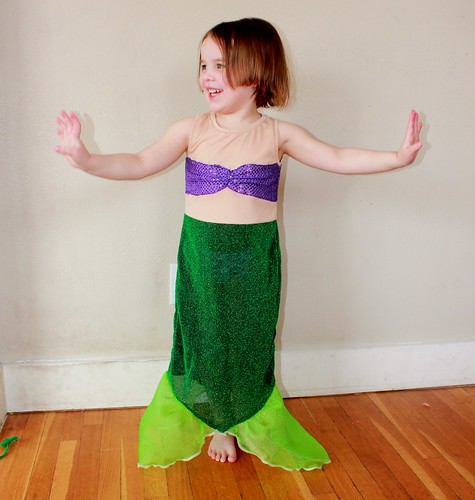
So, a couple of weeks ago, Myra mentioned that she wanted a mermaid costume. Since she asks me for a different princess costume on a daily basis, I sort of blew her off (also, I was in the middle of the coat, so I wasn't willing to be derailed). This time, the request stuck, and when she started asking on an hourly basis, we went fabric shopping for mermaid appropriate knits.
We did have a challenging time agreeing on a design. Myra really wanted a tail that was closed at the bottom. She's 4, so the reality of needing to walk just wasn't that important to her. Finally I convinced her (with the help of Google Images) that she really needed to be able to walk, and we agreed on a tail style. I used this tutorial for the fins.
The basic pattern is the sleeveless version of the Kitschy Coo Skater dress. It's such a great basic dress, obviously easily customizable. I think I'm going to use it for some further princess dresses. It's so nice when dress up dresses are comfortable and durable.
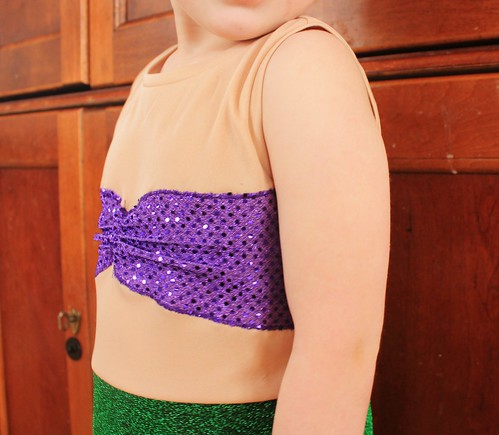
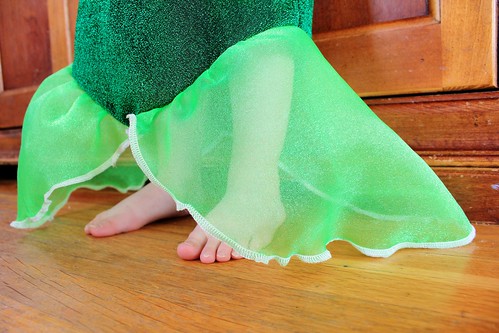
The fabrics we used were a hodgepodge of knits from Joann and Hancock. The nude knit on top is Joann's "Jet Set" poly knit. The sequin mesh for the shells and the green sparkle knit for the tail are both from Hancock's costume collection and the fins are poly organza from the BFF collection at Hancock.
To make Myra's "shells", I just cut a strip of the sequin knit and gathered it along the middle. I appliqued it to the bodice at around the bust level. I don't have a great back view, but I did extend the applique around the back, narrowing the band at center back to better approximate a bikini top.
The fins are just rough semicircles of organza (again, I based them on this 'tute.), pleated randomly along the front hemline for some volume. In the tutorial, the edges are finished with Fray Chek, which looks really nice, but Myra was breathing over my shoulder to wear this, so I serged the edges to finish them. Would have been nice if I had green thread, huh?
For the skirt, I used the Skater dress skirt, but slimmed it by taking several small wedges out of the pattern piece. I lengthened it to ankle length at center front and pegged it just slightly to give it more of a tail shape, but not enough to restrict movement.
My little princess is very pleased with her new mermaid costume. I'm happy with how quickly it worked up (about 3 hours, including pattern alterations) and how much she likes it. I think we'll be hanging out "Under the Sea" quite a bit in the near future.

Saturday, December 29, 2012

My Little Princess

Hey all! I hope that everyone had a wonderful holiday! We had a lovely time in Texas and really enjoyed the time with family. Since I was away from my machines, I didn't do any sewing, but I did get a ton of knitting and crocheting done on the drive. That's a long stinking drive.
Here are a couple of pair of slippers I crocheted at Myra's request. One pair was for her, and one for her favorite cuddly toy, Baby Dragon. I also wanted to share some pictures of the Princess Merida ensemble, now that Myra has opened her gifts.
She is one happy little girl! The dress is my version of Burda 9648, which I blogged about here. The wig and sword are purchased. My sister gave Myra the bow, and it is seriously awesome.
It's actually a Marshmallow shooter, that Varina detailed and painted bronze.
Here is a closeup of the "scrollwork" which Rina did with hot glue. Amazing, right?! Myra adores it beyond all things.
Altogether, between the dress, the bow and the sword, Myra had a pretty great Christmas. Mine was pretty awesome, too - full of sewing and knitting goodies. Once we've unpacked from the trip and sorted through the rubble, I'll snap some pics and share. I'm having fun seeing what everyone else has been doing for their holiday!

Thursday, December 13, 2012

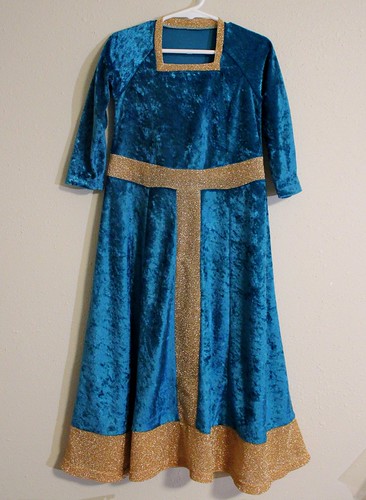
Princess Merida's dress: Burda 9648

Whew! Just a few days before we leave for Texas, I managed to get Myra's Princess Merida dress finished.
I'll post proper modeled photos after she's opened it for Christmas, but for the moment, hanger shots will have to do. As a reminder,
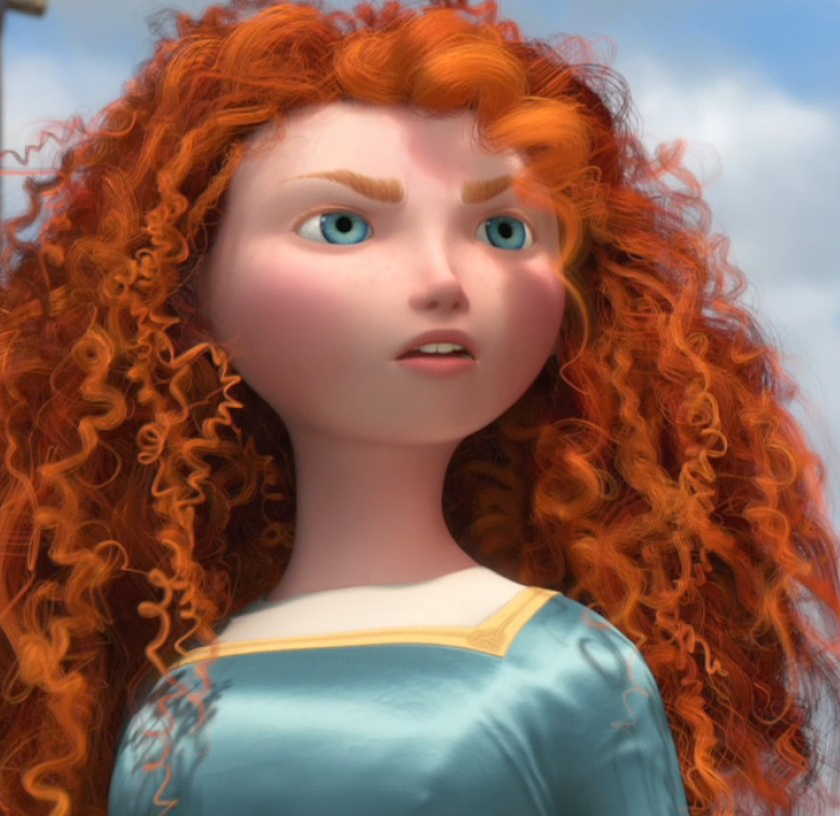
This is the dress I was attempting to copy. I think this comes pretty close, while still being playtime friendly. The pattern I used was Burda 9648. The most critical design change I made was to use a knit fabric - panne velvet and metallic jersey from Hancock Fabrics. Since I used a knit, I omitted the back zipper and used a band at the neckline rather than facing or lining.
I changed the neckline to a square shape just like Merida's. Her's is trimmed in gold, but I just used the metallic knit as the band fabric. The band is mitered at the corners, and the finished width is 1/2 inch.

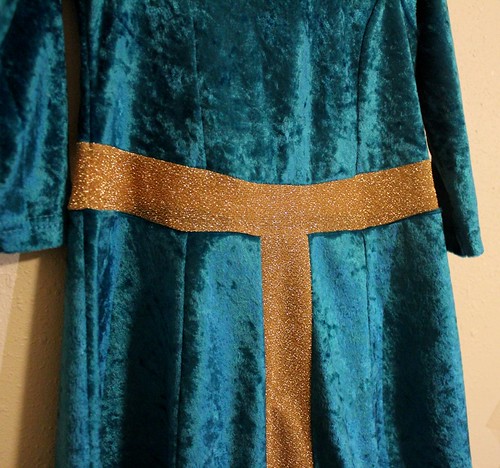
For Merida's belt, I was loath to make a separate piece that Myra would likely just lose, so instead I pieced a waistband and strip down center front of the skirt. These are all 1 1/2 inches wide. I initially thought it would be easiest to applique the gold knit onto the skirt, but this knit is quite thin and unruly, so piecing was a better way to go.
The bottom of Merida's dress is decorated with a wide, beaded and embroidered band. Beading and embroidery seemed a bit much to me for a dress up dress, but my metallic knit is pretty bling-tastic on it's own. I used a 4 inch wide band with a coverstitched hem. Since the skirt is gored, the band is shaped rather than just a plain rectangle.
A better view of Merida's square neckline
I'm pretty pleased with how it came out, and I hope my wee lassie likes it, too. I'll let you know.