Most of the blogs I follow are sewing and crafting blogs, but a few style blogs have managed to stay in my reader. One of them is Pink Avenue. I know Corinne in real life, which makes it even more fun to follow her blog, but I also really love her style, and I get a lot of inspiration from her. When I saw this post, I knew I needed a leopard print blouse and red sweater. Stat.
Even better that it's still Jungle January! Perfect!
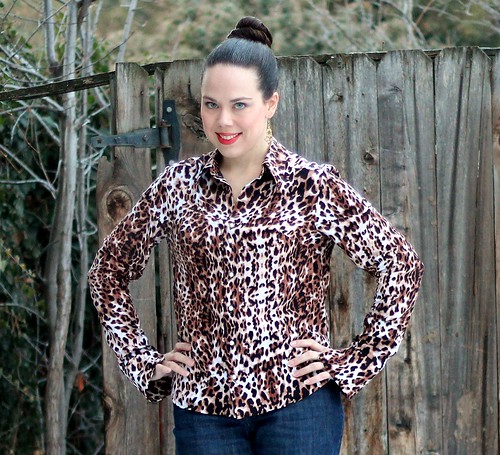
For the blouse, I wanted something with minimal shaping, but still not bulky so I could wear it layered. Initially I thought about the Grainline Archer. It looks great on everyone! But as I was perusing some back issues of Burdastyle magazine, blouse 105 from the 04/2011 issue caught my eye.
It has very sleek lines - just a bust dart for shaping, lined shoulder yokes that wrap to the front and a nice shaped hemline.
The collar has a stand, which is a nice feature. The cuffs are interesting. There is no placket and the cuff is left open, giving it a slit effect. You may notice that I chose pearl buttons for this. Thanks to my social media buddies for weighing in!
The cuff opens over the thumb, and the sleeves are quite long, so the cuff comes down to cover the hand. When I first put this on, I thought that would annoy me and get in the way, but the slit is in a very functional location and keeps the cuff out of the way as I work.
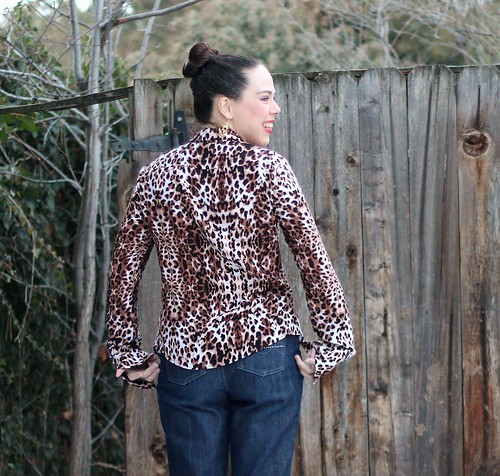
The back yoke is fairly high, and the back is cut without an ease pleat. The fit is comfortable though, even without the pleat and I really like the sleek look.
From the side, you can see that there is very little waist shaping. The shaping in back is all in the yoke seam, although between the bust dart and the yoke shaping, the fit through the shoulders and upper chest is very nice, which allows the rest of the blouse to drape attractively.
The fabric I used is a rayon challis from FabricMart. I don't know why I haven't made more blouses out of challis! This is so soft and comfortable to wear and the drape is really lovely, especially in this unfitted style.
The sweater is another Sewaholic Renfrew. I've made so many of these, I didn't think it deserved a separate post. This is the long sleeve version with a v neck. I used a very thin Hatchi knit from fabric.com. It's actually sheer enough that you can see the leopard print right through it, but it is rather soft and cozy.
The knit was so unstable that I used red rib knit for the bands. I was pleased to find I had a rib knit that coordinated exactly in my stash! I'm trilled that I got this outfit out of my head and into my closet so quickly, and even more pleased that my stash provided all the materials I needed.
Showing posts with label 04/2011. Show all posts
Thursday, January 23, 2014
Thursday, October 3, 2013
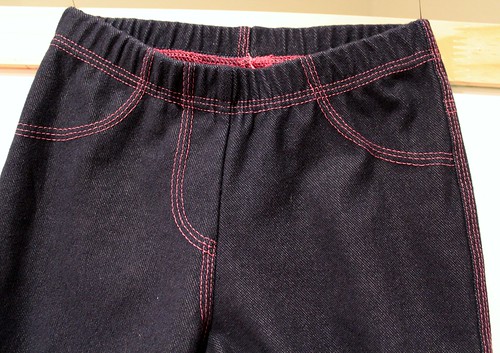
Ottobre 04/2011-20 jeggings
This is one of those projects that should have been done years ago! When I got this issue of Ottobre, I immediately went out and got some jeggings knit to make these up.
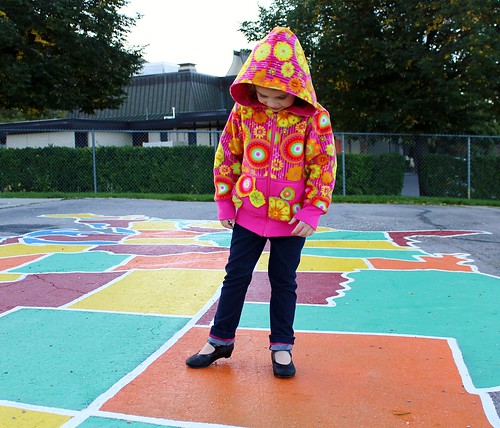
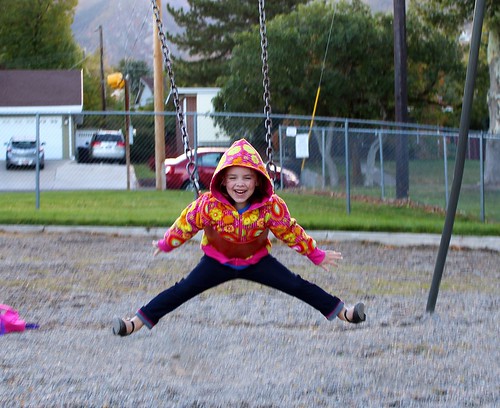
Why did it take me 2 years!? They went together in a flash and are super cute. Bonus that they are comfy and Myra loves them.
They are from the 04/2011 issue of Ottobre, and come in both the kids and teens size ranges. I made Myra a 116, which is a little big, but she measures to a 110, so that's to be expected.
They feature a ton of jeans style topstitching as well as back pockets. Attaching pockets in a knit this unstable takes a little work. I use wonder tape to stick them in place, then spray starch or water soluble stabilizer to keep them from stretching out when sewing. I attached them with a triple stitch on my regular sewing machine. It's sturdier than the coverstitching, so Myra can shove her hands in her pockets without fear.
All the topstitching is purely decorative though. The pattern is a front, back and pocket - super simple! I did the topstitching on my coverstitch machine, but a twin or triple needle would work as well.
The fabric is from Joann. It is a denim colored jersey intended for jeggings. It's a bit thicker than your typical jersey, so it works as a bottom weight.
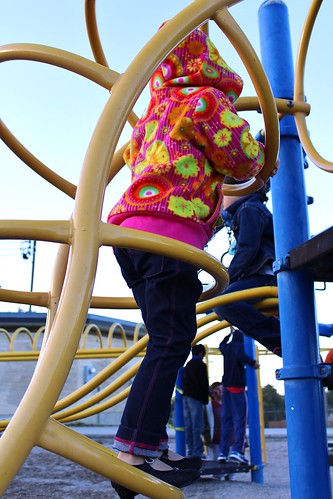
Myra likes to wear them cuffed, which I think is a fun way to show off the back side of the coverstitching, which has a sporty look. The back pockets are a nice touch as well.
I definitely think Myra is going to wear the heck out of these. They are comfortable and stretchy for play, but still appeal to her sense of style.
Why did it take me 2 years!? They went together in a flash and are super cute. Bonus that they are comfy and Myra loves them.
They are from the 04/2011 issue of Ottobre, and come in both the kids and teens size ranges. I made Myra a 116, which is a little big, but she measures to a 110, so that's to be expected.
They feature a ton of jeans style topstitching as well as back pockets. Attaching pockets in a knit this unstable takes a little work. I use wonder tape to stick them in place, then spray starch or water soluble stabilizer to keep them from stretching out when sewing. I attached them with a triple stitch on my regular sewing machine. It's sturdier than the coverstitching, so Myra can shove her hands in her pockets without fear.
All the topstitching is purely decorative though. The pattern is a front, back and pocket - super simple! I did the topstitching on my coverstitch machine, but a twin or triple needle would work as well.
The fabric is from Joann. It is a denim colored jersey intended for jeggings. It's a bit thicker than your typical jersey, so it works as a bottom weight.
Myra likes to wear them cuffed, which I think is a fun way to show off the back side of the coverstitching, which has a sporty look. The back pockets are a nice touch as well.
I definitely think Myra is going to wear the heck out of these. They are comfortable and stretchy for play, but still appeal to her sense of style.
Tuesday, February 12, 2013
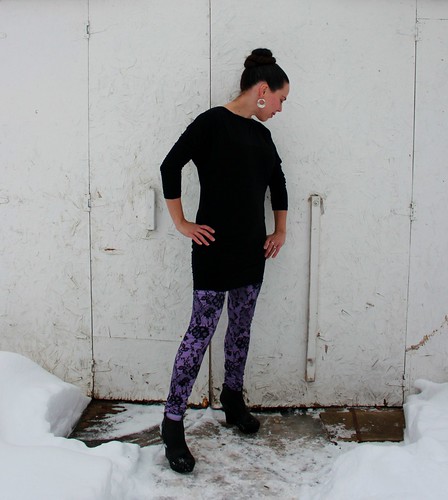
Burda Magazine 04/2011-118 tunic top
I made more #oonapants, y'all. They are so crazy comfortable. That means I need more tunics though.
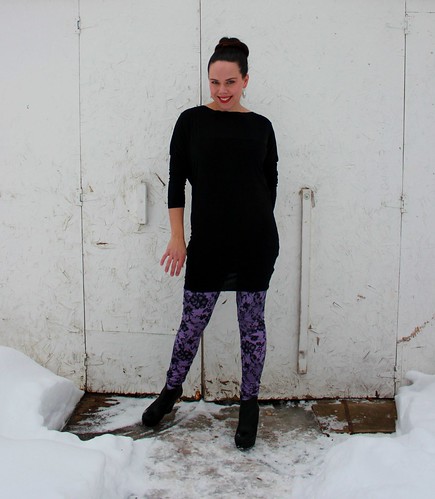
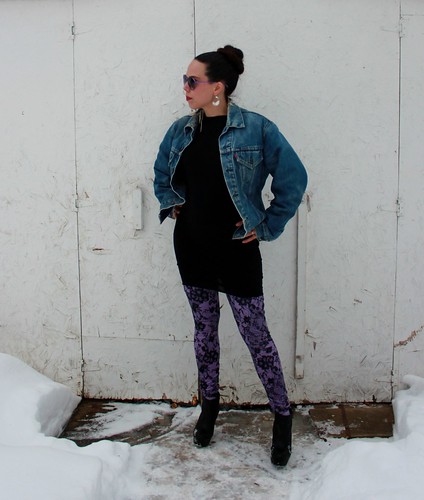
Right?!?! I'm pretty sure I wore this outfit in 1989. I'm totally breaking my rule about wearing a trend the second time around, but I don't care.
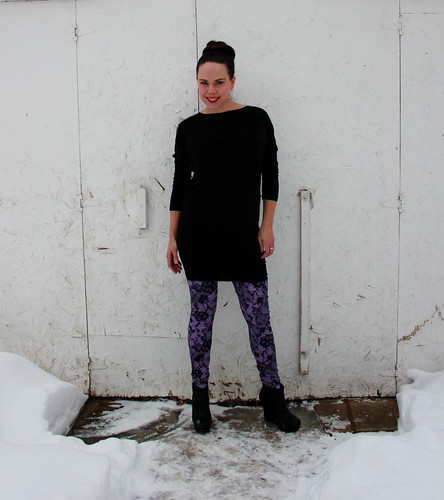
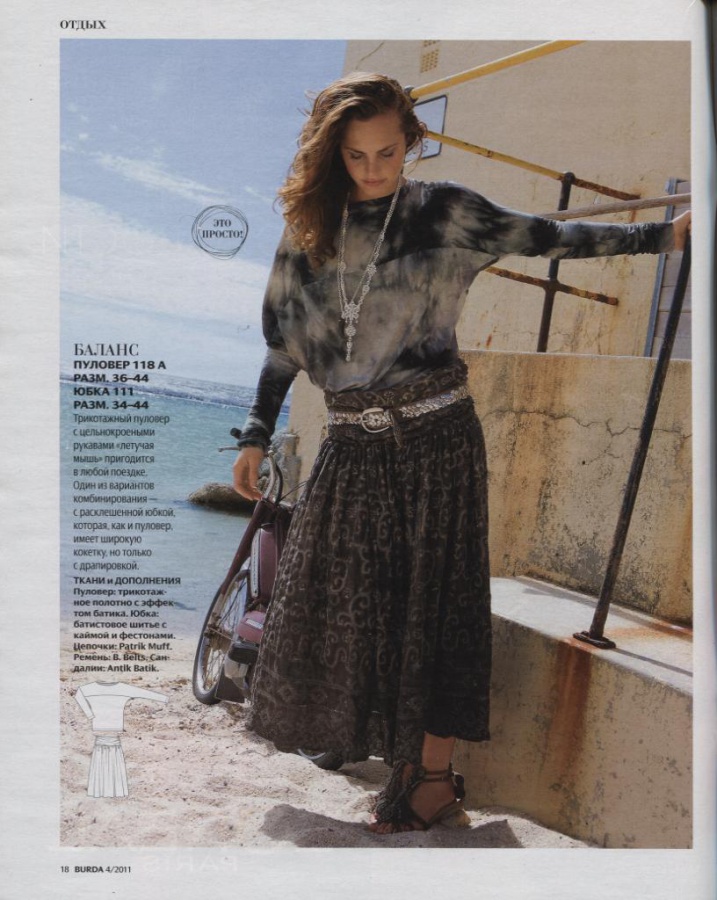
The top is from the 04/2011 issue of Burda magazine. This is top #118, but lengthened to about halfway to the dress length. It is a really simple top - only 4 pattern pieces, and it went together really easily, at least it would have, if I had chosen an easier fabric...
The fabric is a poly/lycra single jersey from Fabric.com. They called it "Roma" jersey, whatever that means. It was literally the only piece of solid black jersey in my stash, which is sort of ridiculous. It's pretty thin and crazy curly, so it was a serious pain to sew. Such a pain in fact, that I couldn't bring myself to hem the bottom.
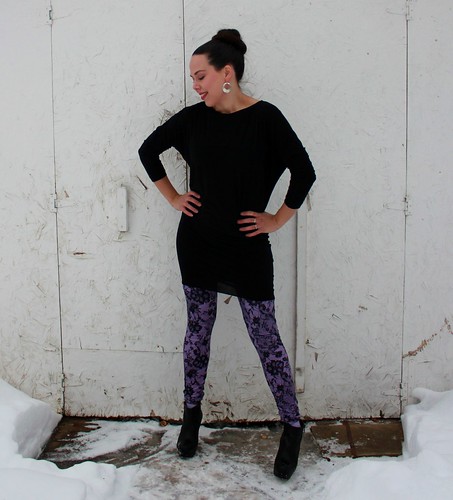
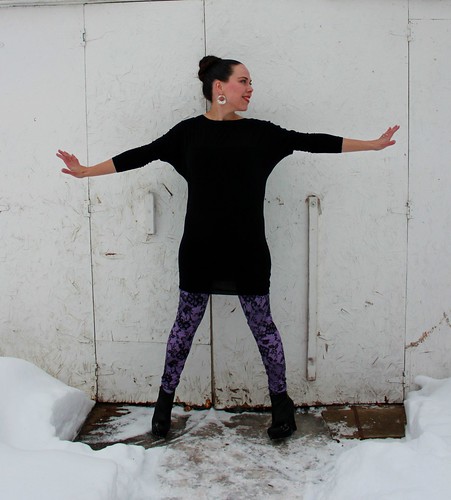
You can see the design features a little better here. The top has batwing sleeves, cut on to a yoke both front and back. The seam hits just above the bust. The neckline is a bateau style and finished with a simple turn and stitch hem. The sleeves are drafted VERY long, but I had to shorten them 7 inches because of fabric limitations. In this pic, I have them slightly scrunched up. They are bracelet length when pulled down. They are also VERY slim. If my fabric had any less stretch (this stuff could be swimwear lycra, it's so stretchy), the sleeves would be too tight.
The other major alteration I made was to the length. I cut it between the dress and top length, as I wanted sort of a minidress/long tunic look. Initially, I put in the pockets, but they were an utter disaster in this thin knit. I looked like I had saddlebags hanging from my hips. I serged them off, and the silhouette is much better, but now I have no pockets. Boo.
I wore my top today in full out 80s style, with my newest pair of leggings. These are the same pattern as the previous pair, this time in a cotton-lycra jersey from Nature's Fabrics. I wore it with wedge heel booties from Target, a vintage jean jacket and purple glitter sunnies from Target.
Right?!?! I'm pretty sure I wore this outfit in 1989. I'm totally breaking my rule about wearing a trend the second time around, but I don't care.
The top is from the 04/2011 issue of Burda magazine. This is top #118, but lengthened to about halfway to the dress length. It is a really simple top - only 4 pattern pieces, and it went together really easily, at least it would have, if I had chosen an easier fabric...
The fabric is a poly/lycra single jersey from Fabric.com. They called it "Roma" jersey, whatever that means. It was literally the only piece of solid black jersey in my stash, which is sort of ridiculous. It's pretty thin and crazy curly, so it was a serious pain to sew. Such a pain in fact, that I couldn't bring myself to hem the bottom.
You can see the design features a little better here. The top has batwing sleeves, cut on to a yoke both front and back. The seam hits just above the bust. The neckline is a bateau style and finished with a simple turn and stitch hem. The sleeves are drafted VERY long, but I had to shorten them 7 inches because of fabric limitations. In this pic, I have them slightly scrunched up. They are bracelet length when pulled down. They are also VERY slim. If my fabric had any less stretch (this stuff could be swimwear lycra, it's so stretchy), the sleeves would be too tight.
The other major alteration I made was to the length. I cut it between the dress and top length, as I wanted sort of a minidress/long tunic look. Initially, I put in the pockets, but they were an utter disaster in this thin knit. I looked like I had saddlebags hanging from my hips. I serged them off, and the silhouette is much better, but now I have no pockets. Boo.
I wore my top today in full out 80s style, with my newest pair of leggings. These are the same pattern as the previous pair, this time in a cotton-lycra jersey from Nature's Fabrics. I wore it with wedge heel booties from Target, a vintage jean jacket and purple glitter sunnies from Target.
Saturday, October 20, 2012
Daisy Duck costume
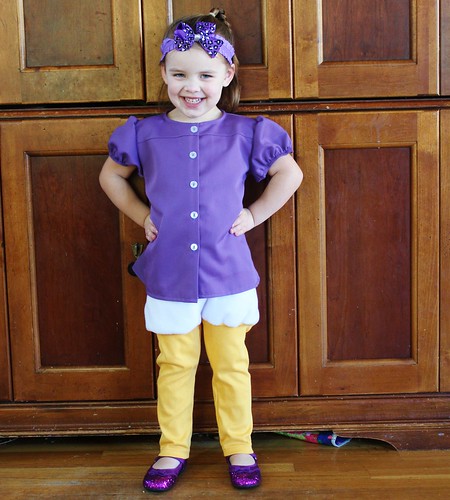
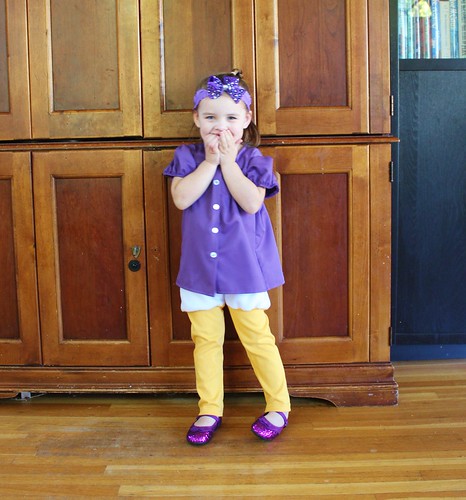
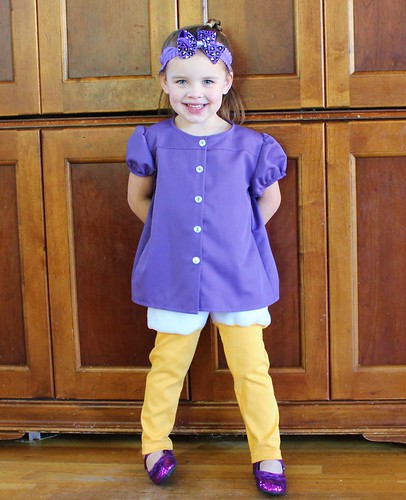
Our sweet Donald needed his Daisy, and Myra (for once) was happy to oblige.
Daisy's costume was even simpler than Donald's. I let Myra choose the fabric for her blouse, and she picked a poly-rayon gabardine from my stash. It was a pretty small piece, and apparently had been used by someone else to make binding, as there was a giant bias slash through the middle of the yardage. I worked around it, but there was just enough. We did have a brief hairy moment when Myra insisted that Daisy wear a skirt, which wasn't a possibility since I had already cut the blouse and there was just shreds of fabric left.
After perusing some pictures of Daisy online, Myra was convinced that there was no skirt. That's so silly!!
Myra's duck pants are the same as Logan's (although a couple sizes smaller). I sewed them at the same time, and somehow managed to switch them around, so Myra's pants actually were made with the lengths of elastic I should have used for Logan's. It didn't make a huge difference, but her bloomers are gathered a little bit less and her waistline is a little loose. The blouse is the Summer Blouse for Girls by Lily Bird Studios. I've made it before here, so it was already traced in her size. I omitted the ruffle collar and gathered the sleeves just at the cap to give them more upward pouf. Hopefully, she can still wear the blouse after Halloween. I love dual duty costumes!
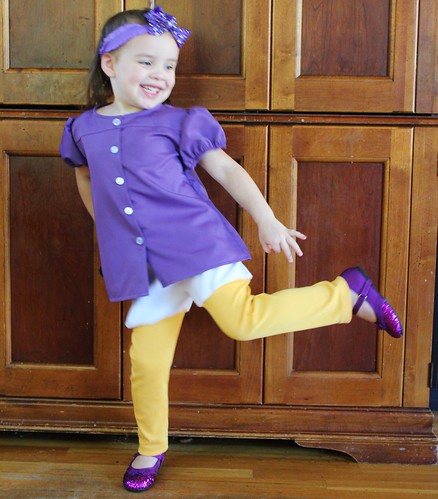
Once she was all decked out, she had to practice her Hot Dog dance. I had to wrestle the costume off her, so I think it's a win.
Daisy's costume was even simpler than Donald's. I let Myra choose the fabric for her blouse, and she picked a poly-rayon gabardine from my stash. It was a pretty small piece, and apparently had been used by someone else to make binding, as there was a giant bias slash through the middle of the yardage. I worked around it, but there was just enough. We did have a brief hairy moment when Myra insisted that Daisy wear a skirt, which wasn't a possibility since I had already cut the blouse and there was just shreds of fabric left.
After perusing some pictures of Daisy online, Myra was convinced that there was no skirt. That's so silly!!
Myra's duck pants are the same as Logan's (although a couple sizes smaller). I sewed them at the same time, and somehow managed to switch them around, so Myra's pants actually were made with the lengths of elastic I should have used for Logan's. It didn't make a huge difference, but her bloomers are gathered a little bit less and her waistline is a little loose. The blouse is the Summer Blouse for Girls by Lily Bird Studios. I've made it before here, so it was already traced in her size. I omitted the ruffle collar and gathered the sleeves just at the cap to give them more upward pouf. Hopefully, she can still wear the blouse after Halloween. I love dual duty costumes!
Once she was all decked out, she had to practice her Hot Dog dance. I had to wrestle the costume off her, so I think it's a win.
Friday, October 19, 2012
Donald Duck costume
Now that my kids are a little older, they have decided opinions about how they want to dress for Halloween, and I was afraid that my days of a cute coordinating family were over, but this year Logan and Myra want to dress as Donald and Daisy Duck!! I'm all over it.
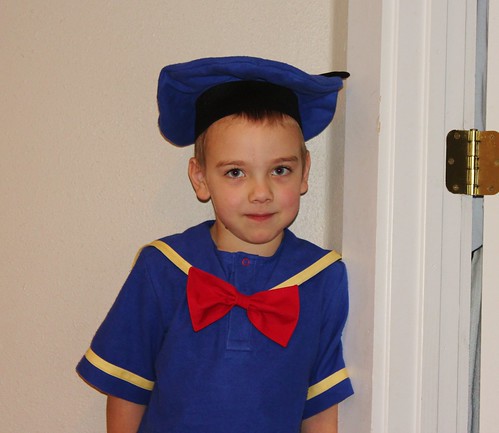
Donald came first. This is one of those costumes that looks a lot harder than it is. It actually came together pretty easily, once I figured it out. When Logan asked to be Donald Duck, I wasn't sure how I was going to make it work. There are a couple of commercial patterns out there, but they are all full body suits, stuffed with batting and made of fur. I knew that wouldn't work for my guy. Since Logan has some sensory integration issues, the costume had to be soft and simple. I actually started with the pants.
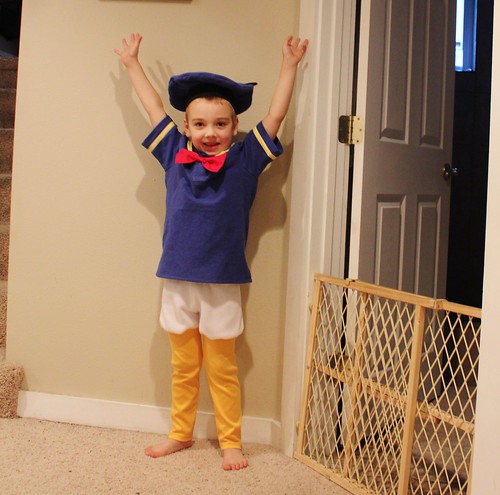
Believe it or not, this is an actual pattern, meant to be worn as daywear. I know. When this issue of Ottobre came out (it's the 04/2011 issue), I actually laughed out loud when I got to the page these pants are on. As ridiculous as they are, they make the perfect duck pants. The upper section is basically bloomers that are gathered into the legs with clear elastic. I used a soft anti-pill fleece from Joann for the "duck butt" section and yellow interlock, also from Joann, for the legs. Soft and simple, with no scratchy fur or heavy batting.
The top is the "Art Camp" shirt from the 03/2011 of Ottobre. It is made of flannel (again, Joann.) so that it would be warm and comfortable. I lengthened the sleeves and trimmed them with yellow bias tape, as well as drafting a sailor collar which I inserted into the back neckline and the front placket. The placket closes with red ring snaps, and the bow tie is just quilting cotton with stiff interfacing, hand stitched over the lower snap on the placket.
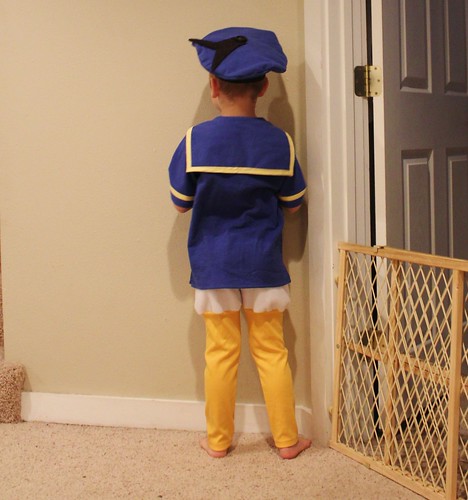
From the back, you can see the sailor collar, which I bound around the outer edges with bias tape. I even mitered the corners y'all. They look awesome. You can also see the hat in a little more detail. I'm pretty darn proud of that hat, actually. For some reason, there just aren't many Donald Duck hats available out there. All I could find were cheesy baseball caps or headbands with fascinators and feathers. That was so not going to work. I was a little surprised that Mr. Google didn't turn up any online tutorials for making your own Donald hat. We'll be taking care of that oversight in the near future.
He's pretty thrilled with his Donald Duck costume, and so am I. Up next, Daisy. She's actually even easier, so hopefully I'll have something to show you tomorrow or the next day. Then I'll get on that tutorial. Halloween is just around the corner!!
Donald came first. This is one of those costumes that looks a lot harder than it is. It actually came together pretty easily, once I figured it out. When Logan asked to be Donald Duck, I wasn't sure how I was going to make it work. There are a couple of commercial patterns out there, but they are all full body suits, stuffed with batting and made of fur. I knew that wouldn't work for my guy. Since Logan has some sensory integration issues, the costume had to be soft and simple. I actually started with the pants.
Believe it or not, this is an actual pattern, meant to be worn as daywear. I know. When this issue of Ottobre came out (it's the 04/2011 issue), I actually laughed out loud when I got to the page these pants are on. As ridiculous as they are, they make the perfect duck pants. The upper section is basically bloomers that are gathered into the legs with clear elastic. I used a soft anti-pill fleece from Joann for the "duck butt" section and yellow interlock, also from Joann, for the legs. Soft and simple, with no scratchy fur or heavy batting.
The top is the "Art Camp" shirt from the 03/2011 of Ottobre. It is made of flannel (again, Joann.) so that it would be warm and comfortable. I lengthened the sleeves and trimmed them with yellow bias tape, as well as drafting a sailor collar which I inserted into the back neckline and the front placket. The placket closes with red ring snaps, and the bow tie is just quilting cotton with stiff interfacing, hand stitched over the lower snap on the placket.
From the back, you can see the sailor collar, which I bound around the outer edges with bias tape. I even mitered the corners y'all. They look awesome. You can also see the hat in a little more detail. I'm pretty darn proud of that hat, actually. For some reason, there just aren't many Donald Duck hats available out there. All I could find were cheesy baseball caps or headbands with fascinators and feathers. That was so not going to work. I was a little surprised that Mr. Google didn't turn up any online tutorials for making your own Donald hat. We'll be taking care of that oversight in the near future.
He's pretty thrilled with his Donald Duck costume, and so am I. Up next, Daisy. She's actually even easier, so hopefully I'll have something to show you tomorrow or the next day. Then I'll get on that tutorial. Halloween is just around the corner!!
Sunday, March 11, 2012
Ottobre 04/2011-15
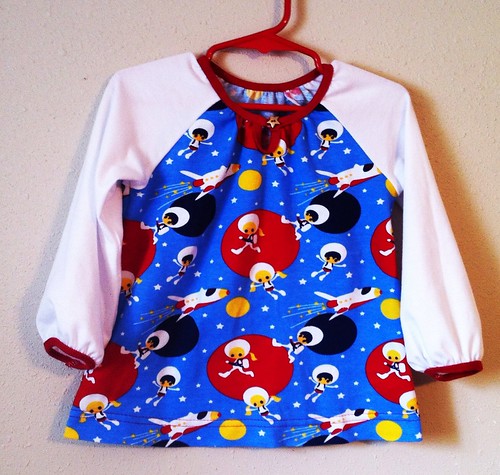
For Myra's "Make it in a Metre" astronaut tee, I wanted to make sure that the end result fit her uber girly personality.
I think the fabric is nicely androgynous, so I wanted a pattern that upped the girl factor. I also wanted to play with raglan sleeves again in this fabric. Ottobre 04/2011 had the perfect thing, #15 - the "Dreamland" tunic. It has simple style lines that allow the fabric to be the focus, while the gathered sleeves and neckline with keyhole opening add some girliness.
I used the same three fabrics as I did for Logan's tee. This time, I used my coverstitch binder to bind the neckline and armholes with ribbing. Prior to applying the binding, Ottobre has you gather them with clear elastic cut to the finished measurements. This method worked so well. It was much better than gathering with stitches and then staying the gathers with more stitches. It left a nice stretchy edge. Myra can even get the top over her head without unbuttoning it, and she has a giant melon.
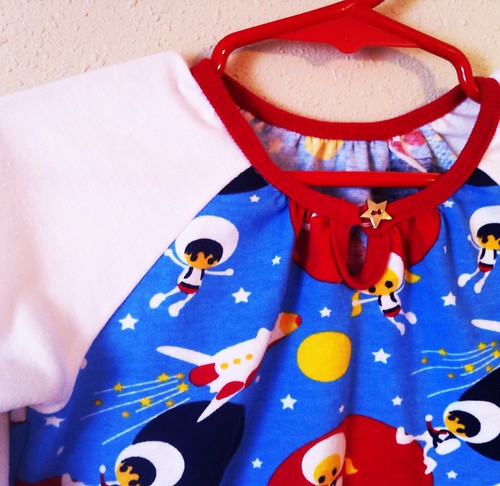
Here is the cute little keyhole. I love it. I used a fun star button to tie in to the theme of the print. This is totally Myra's favorite part of the top. She shows everyone her star button. For the loop, I used a clear hair elastic. Easy peasy and works great. This piece used up the largest pieces of my knit, but I think it was worth it. We both love this cute top!
I think the fabric is nicely androgynous, so I wanted a pattern that upped the girl factor. I also wanted to play with raglan sleeves again in this fabric. Ottobre 04/2011 had the perfect thing, #15 - the "Dreamland" tunic. It has simple style lines that allow the fabric to be the focus, while the gathered sleeves and neckline with keyhole opening add some girliness.
I used the same three fabrics as I did for Logan's tee. This time, I used my coverstitch binder to bind the neckline and armholes with ribbing. Prior to applying the binding, Ottobre has you gather them with clear elastic cut to the finished measurements. This method worked so well. It was much better than gathering with stitches and then staying the gathers with more stitches. It left a nice stretchy edge. Myra can even get the top over her head without unbuttoning it, and she has a giant melon.
Here is the cute little keyhole. I love it. I used a fun star button to tie in to the theme of the print. This is totally Myra's favorite part of the top. She shows everyone her star button. For the loop, I used a clear hair elastic. Easy peasy and works great. This piece used up the largest pieces of my knit, but I think it was worth it. We both love this cute top!
Subscribe to:
Posts (Atom)