Showing posts with label Cake Patterns. Show all posts

Tuesday, June 25, 2013

Cake Patterns: Hummingbird, Pink skirt

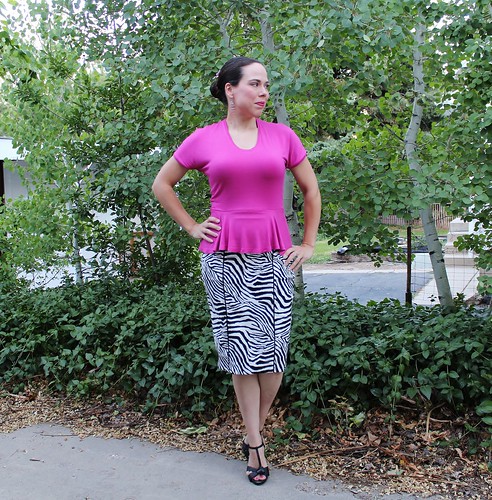
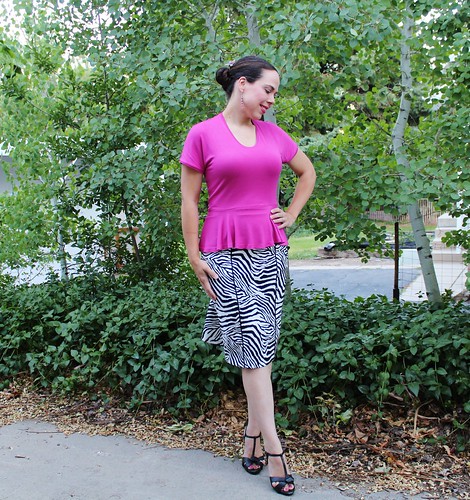
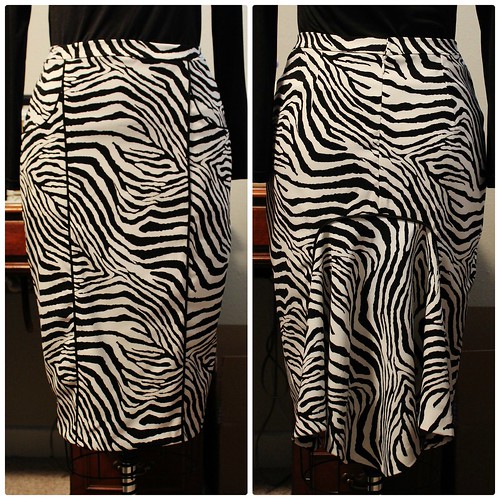
Both views of the Hummingbird skirt are cute, but the flounce really caught my eye. I've had this zebra print stretch twill in my stash for a while, waiting for just the right thing to come along and this was definitely it.
Yes and yes!! I wore it with the raspberry pink rayon jersey top and I think it's perfect.
I decided to pipe the pockets, front seams and flounce area, to really make them pop. I was really impressed with how well the zebra print flowed across the seams. I made no attempt to print match, but it worked out really well, even on the bias cut flounce.
The skirt also has a customized sizing system, based on waist and hip measurements. My hip is 38 inches, and the 35 was 37 inches at the hip, so I went with the 40, but it ended up quite a bit too large and I took a total of 4 inches off at the side seams. As you can see, the skirt still looks awesome, since it is designed for side seam alterations. And since the waistband is customized to my waist measurement, it still fit onto the skirt, and on me.
While I love the seaming and pockets in front, really the action is all in back. This flounce! I love it so much. It is applied with a lapped seam, which was actually pretty easy, particularly since I had basted the piping, so I had a nice clean fold line. The flounce allows for amazing freedom of movement. I generally feel a bit restricted in pegged skirts, but I can make my usual long strides comfortably in this.
In fact, I can even dance! Or more relevant for my life, run after kids and sit on the floor.
With most multi-garment patterns, I generally have one piece that is a clear favorite. Not so here. Both top and skirt are pretty, fun to wear, easy to sew and fit my lifestyle. And I know I will make them multiple times.

Monday, June 24, 2013

Sewing Cake: Hummingbird top - Green view

When Steph unveiled the Hummingbird pattern, at first I wasn't going to bite. I had made a peplum top that I don't love and I have a zillion skirt patterns, but the more I looked at it, the more I realized how much I loved all the details. So I jumped and ordered my pattern just days before the presale ended, which means I get to play along with the sewalong! Yay! Go, Violetear House!!
I started with the top. I was going to keep pace with the sewalong, really I was! But I got impatient to wear my top.
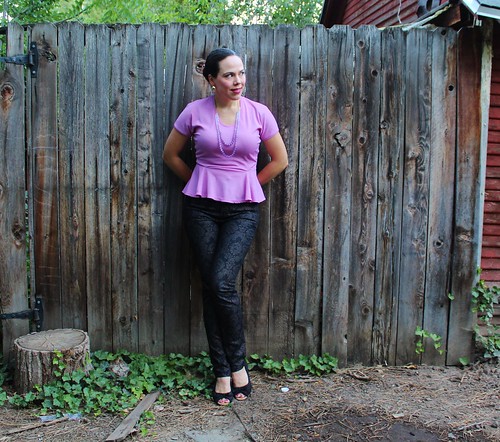
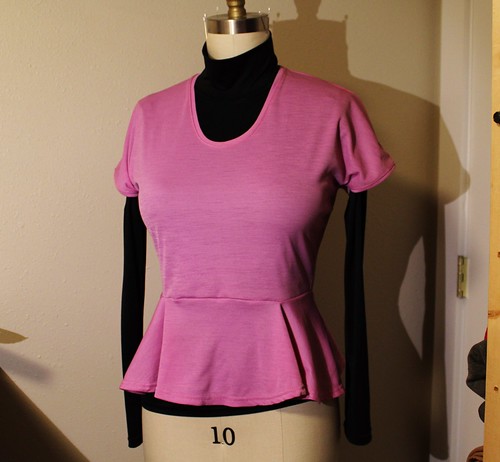
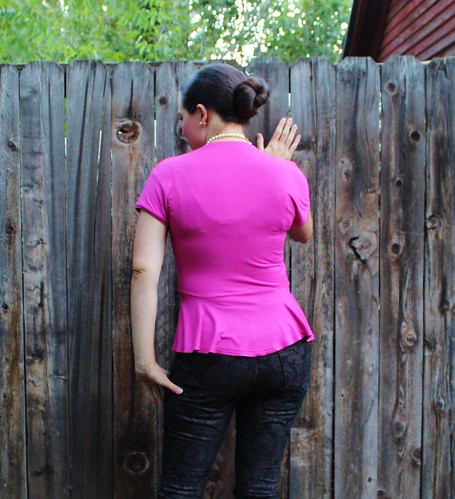
Although it wasn't something I initially noticed about this pattern, I really LOVE the neckline! It hugs the neck closely in back and along the shoulders, but has a demure, but sexy scoop neckline. 
The cloverleaf peplum was one feature that really drew me to this pattern, and it totally lives up to the hype. It falls gracefully and is so flattering. Mitch generally dislikes full skirted styles on me - says they make me look hippy - but he says this top is quite slimming. I also love the way it falls in gentle scallops. I actually thought I'd chop the peplum even once I had it sewn on, but I really like it this way.
The pattern uses Steph's creative customized sizing system, and I was very pleased with the fit. This hot pink is actually my second version, but I changed nothing between the two. So nice to have it fit right out of the packet!

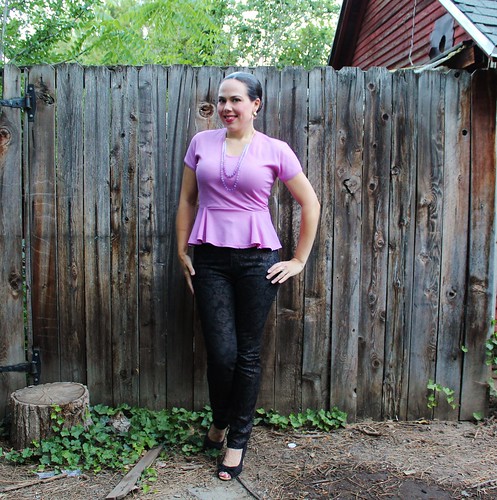
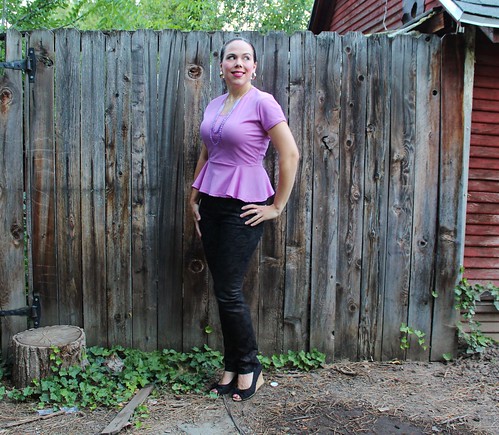
This one is my first version. I made it out of a mauve poly/nylon crepe knit from FabricMart. It's kind scratchy and I really just wanted it out of my stash, but the color is really pretty, so I'll likely wear it a bit despite the fabric imperfections.
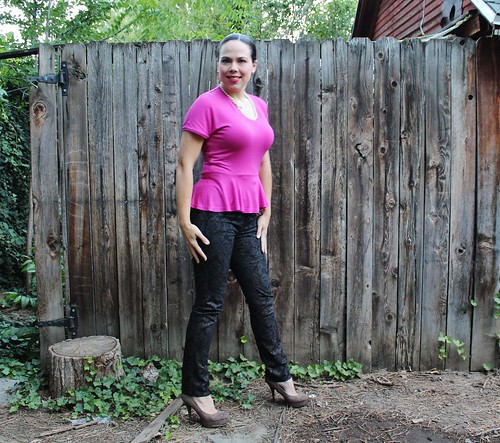
I made this one on Saturday. My In-laws came and took the monkeys so that I could sew. I finished up the Hummingbird skirt (which I will show you tomorrow) and then whipped up this top. Since I already had the pattern ready, it took about an hour and a half from cut to finish. Not too shabby! I made this one out of a raspberry pink rayon/lycra jersey from Spandex World. It's very soft and the color is really amazing.
So, Humminbird green is definitely a win for me. It's comfortable, classy, sexy and easy to sew. And both versions look awesome with my brocade printed jeans!

Thursday, May 16, 2013

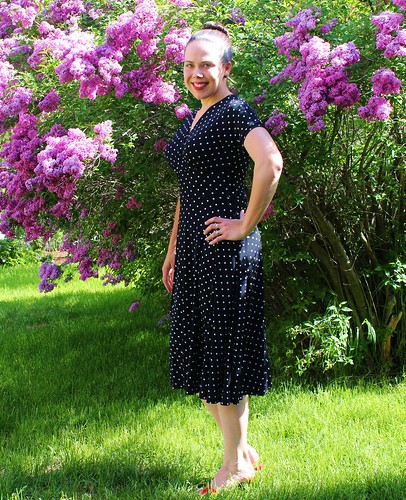
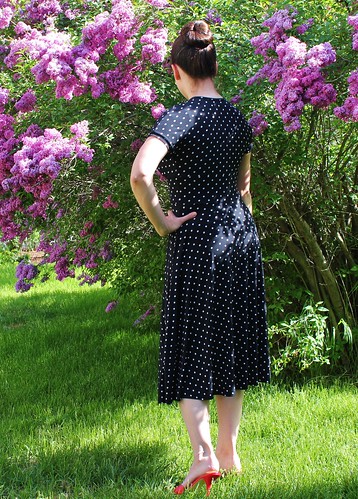
Cake Patterns Tiramisu dress #2

What? The serger's still threaded with black! There will be a lot of black knits comin' atcha.
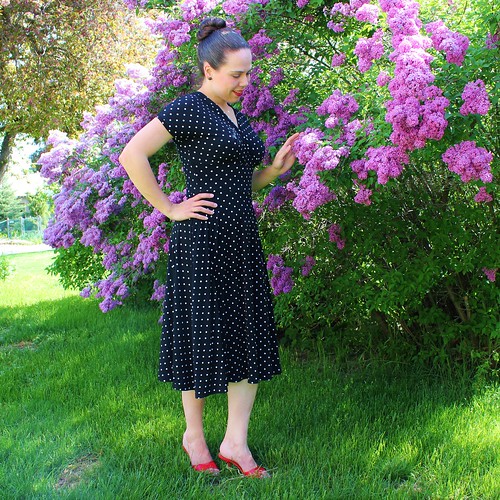
But really that was just an excuse to make a polka dot Tiramisu. I think everyone should have a polka dot Tiramisu.
The fabric is an ITY knit from FabricMart. It's a little thinner than their usual ITY, which made it a little harder to control. Fortunately, this pattern is a super easy make.
While I love my first Tira and wear it often, I did make a few changes to this one. The biggest change was to the neckline. Instead of binding the neckline with my coverstitch machine, I used the band provided in the pattern. And it's SO MUCH BETTER. No gaping at all. The neckline stays snug and tight against my body no matter what I do.
I didn't want to fuss with pattern matching, so I cut the back and skirt panels on the fold. I love how this fits in back. Perfect right out of the envelope. Love.
I also shortened the midriff panel 1/2 inch and the skirt 3 1/2 inches from my initial make, which still leaves it a bit longer than the pattern as drafted. I like the proportions of this one a little better I think, particularly the midriff area.
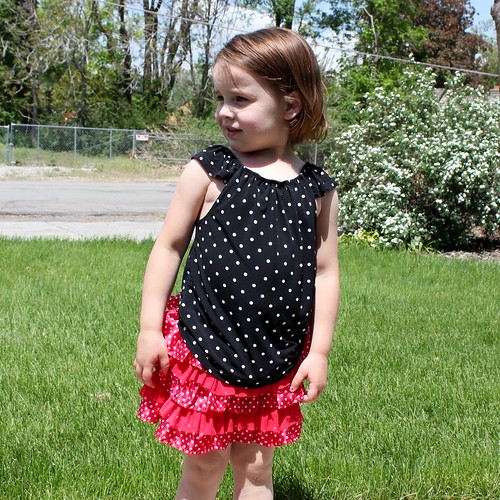
Myra freaked out at my "Minnie Mouse" dress when she saw it, so I used the little piece I had left to make her a cap sleeve peasant top. I used Simplicity 2377, which I've used several times for her before. Naturally she styled it with more polka dots...

Today's Tip

Hemming fine gauge knits can be a tricky proposition, particularly if they are slippery, as ITY tends to be. I know many sewing gurus recommend interfacing knit hems, but I've never been happy with that method. For me, it seems to stiffen the hem, even with really lightweight interfacing, as well as reducing stretch. I prefer to use fusible thread.
I love this stuff so much! I really allows you to get a nice crisp, stable hem on unruly fabrics. Here's how.
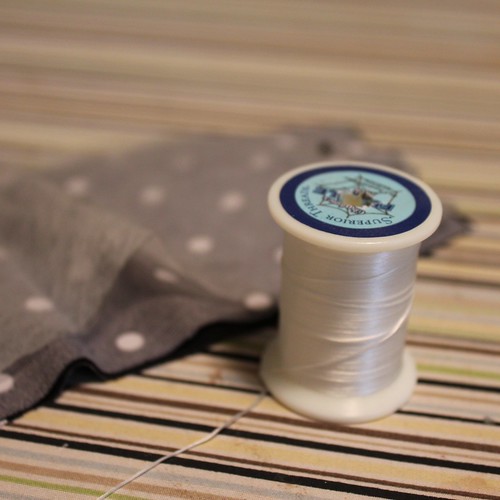
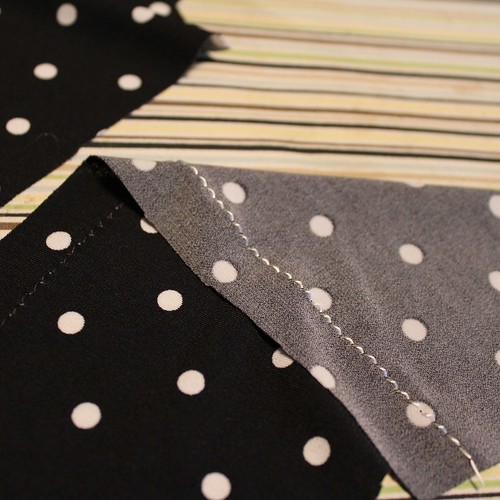
First, you need a bobbin wound with fusible thread. No special winding method - just use the winder on your machine. Then sew a line of straight stitching at the fold line of your hem. Be sure that the right side of the fabric is facing up.
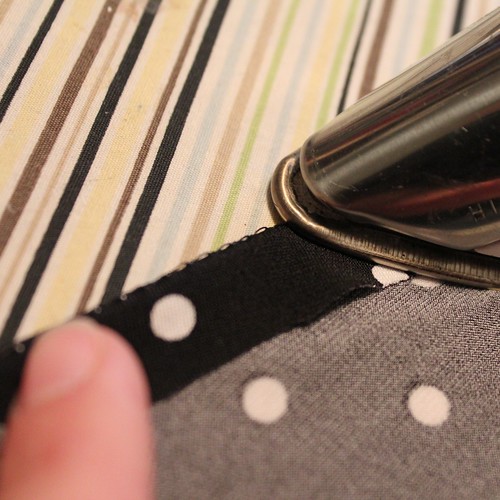
The black stitching in the above picture is regular sewing thread. The white is the fusible. Now you'll turn and press your hem, using your stitching line as your guide. Use lots of steam to melt the fusible. You may find that a bit of the fusible thread sticks to your iron, so use a press cloth if needed.
Once the entire hem is fused, you can easily pull away the top thread. You needn't be gentle - your hem isn't going anywhere! It may take a tug or two to pull it away from the fusible.
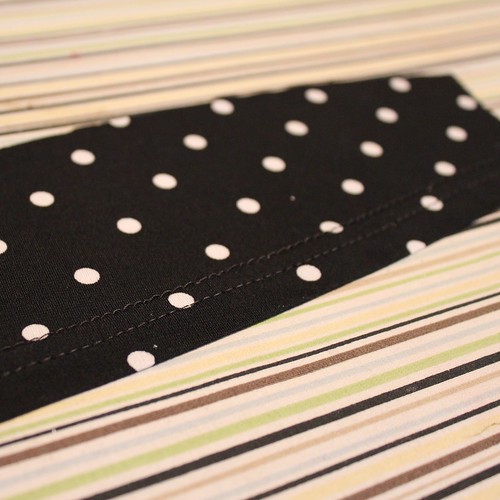
Now take your crisply pressed hem to your machine. Sew it with a stretch twin needle or a coverstitch machine. I don't use any pins for a short hem, but a might put in a few for a longer hem, like a circle skirt. For the Tiramisu, I pinned at the seams.
Once it's stitched, I like to give it a final press from the right side, to be sure that the fusible is really set. It doesn't wash out, so if your hem has rippled slightly, this is your chance to fuse it into place.
Now isn't that lovely? This technique also works well on woven fabrics that don't press well, like polyester suitings. Give it a try! I think you'll like it!
Sunday, December 9, 2012

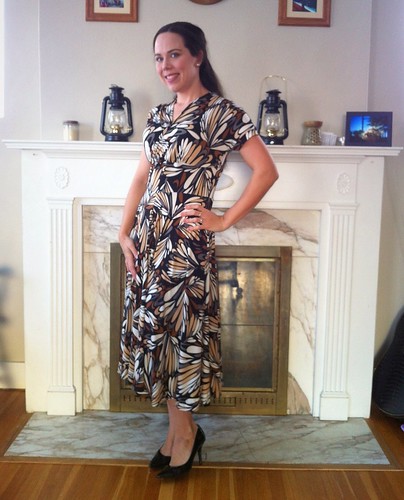
Cake Pattern Tiramisu

I have a new favorite dress.
May I introduce you to Tiramisu by Cake Patterns? You've probably met her before, but this time she's mine. This pattern - it's true love.
I used a ITY knit that was a lucky find at the Hancock Fabrics sale area. It's nice and beefy, but still has a sumptuous drape. They pretty much never have nice knits at Hancock's, so I was thrilled. The gentleman working at the cutting table told me that he had been waiting to see what classy lady (his words, not mine) chose this fabulous fabric.
Of course, this classy lady fabric had to be Tiramisu. Can I gush a little about how great this pattern is? You choose the bodice based on your upper bust measurement, and each size has 4 different variations that you choose based on your full bust. If you don't fall within the ranges that Steph has drafted, she includes lines for making additional bust adjustments right on the tissue. The midriff bands are also personalized based on your bodice and skirt sizes, so if you are two different sizes on top and bottom, that is all taken care of for you as well.
Did I mention it has pockets? I love a dress with pockets. I did naturally make a few very minor alterations. I lengthened the skirt to the largest size length line. Steph has made shortening and lengthening the skirt so easy, since the pattern pieces are nested so that you just extend the line down or up a size or two. So easy! I also widened the sleeve bands and used my coverstitch machine to bind the neckline instead of the band provided in the pattern. For fit, I thought I would need a little extra length over the bust, so I added 1/2 inch before I cut, but I ended up taking it out when I basted the bodice for fit. Steph reminds you to baste for fit a couple of times in the pattern instructions. So helpful!!
The skirt is nicely full. It is perfect for free movement, but not so much fabric that it gets in the way or looks costume-y. I've worn it all day, wrestling and chasing kids, doing chores, running errands and pretty much abusing it in every way I could think, and I was comfortable through it all. But still pretty. I love pretty dresses.