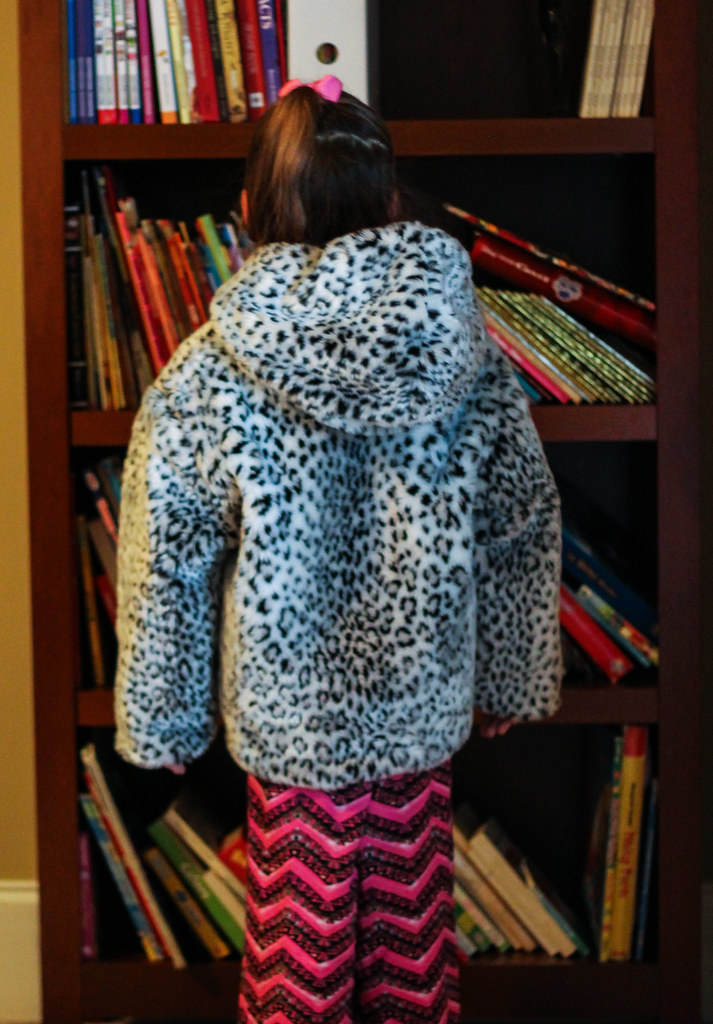
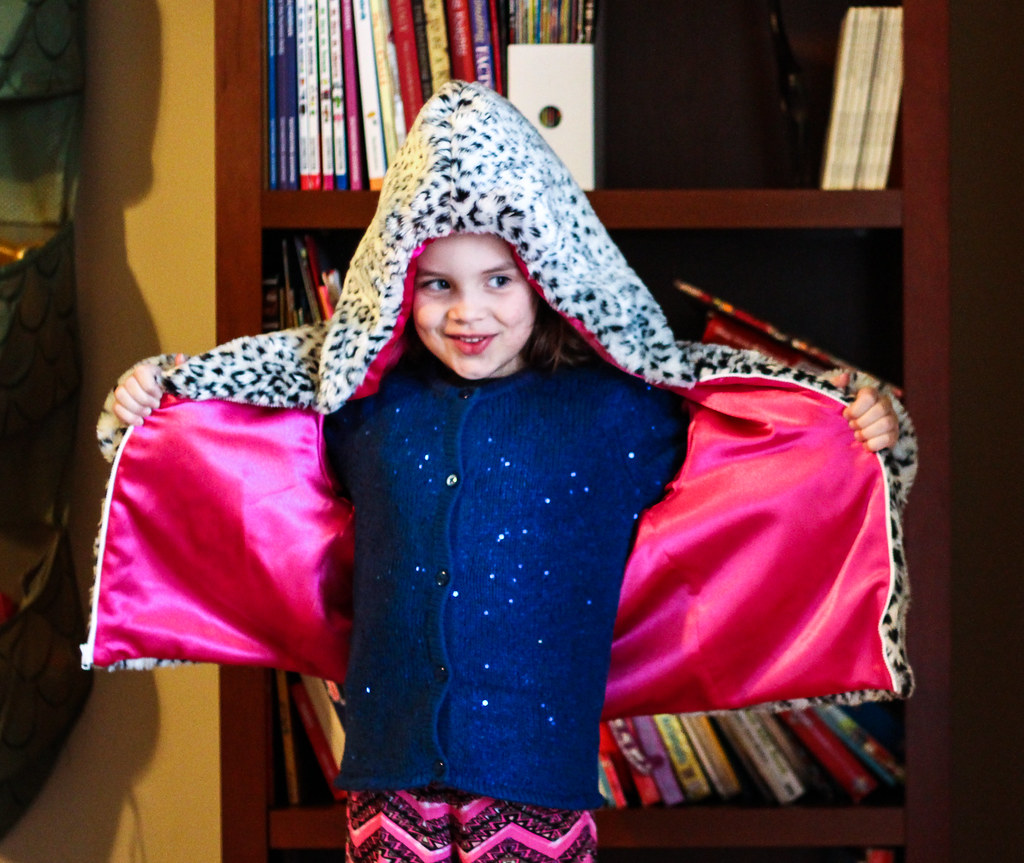
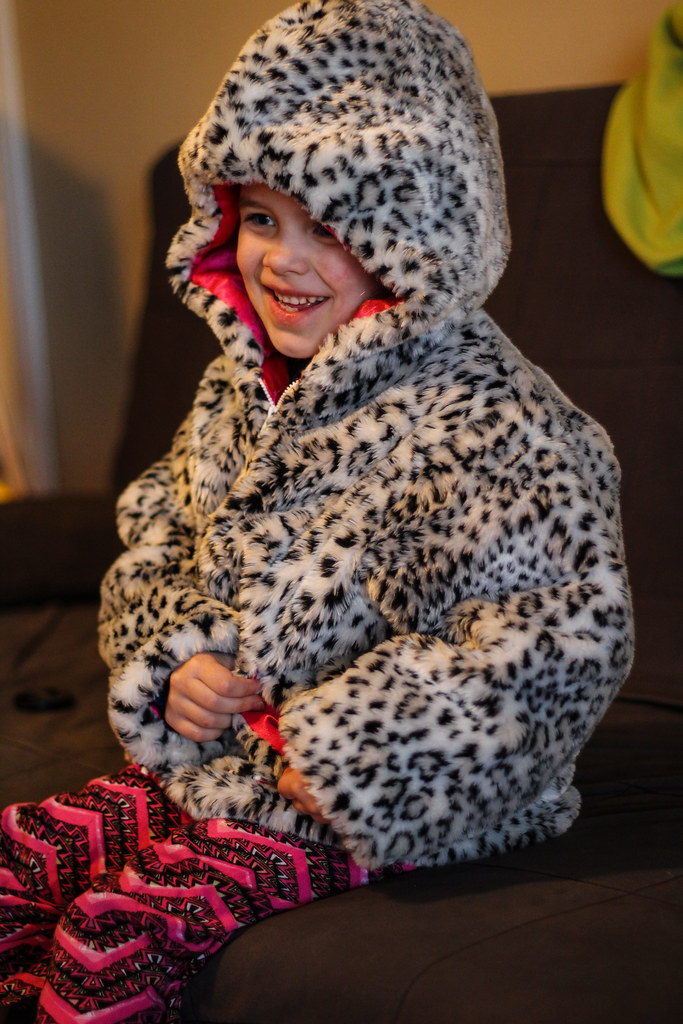
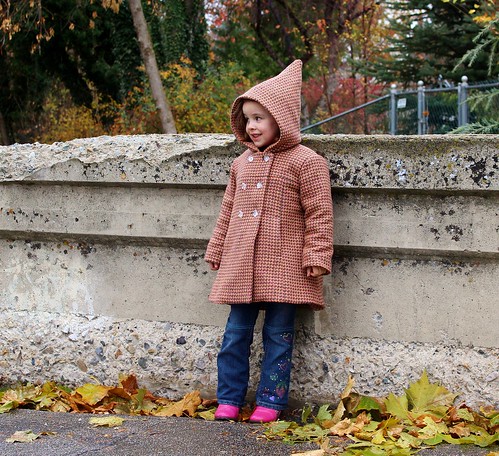
We've had some chilly weather around here lately. Myra has a nice warm wool coat that I made her last year. Sadly, she has decided that she is too sophisticated for a pointy gnome hood... Fortunately, I had a piece of faux fur that was just the right size for a Myra coat.
She loves it so much that she refused to take it off after I gave it to her. She even wore it over her nightgown when she got ready for bed. I'm so happy that she loves it! Faux fur and satin are an unholy combination. There was a significant amount of seam ripping, and I even managed to sew my finger trying to get this bulky stuff to feed.
But all is forgiven, because it really is adorable. The pattern I used is from the 03/2004 issue of Ottobre. It is designed for faux fur, so the sleeve cap is quite low and has no ease. There isn't any shaping in the body, which works for this bulky fabric. The wrists and top of the hood are fitted with elastic, which makes them even cozier.
Size-wise, I made it a size larger than she usually wears, and patterns from this era of Ottobre tend to have more ease than the more current ones. As a result, it is large on her, and I'm hoping it will still fit her next winter, since we don't have a whole lot of winter left this season.
The coat is lined to the edge with hot pink crepe back satin. It's nice thick satin, which should serve to block the wind. The fur itself is quite thick, with a heavy knitted backing, so the two layers together are plenty warm for our climate.
Myra is particularly enamored of the round patch pockets. I lined them with the pink satin, and she loves how soft they are. Overall, this coat is a total win. And thanks to Myra's love of all things animal print, we're still on for Jungle January!!
Showing posts with label coat. Show all posts
Saturday, January 24, 2015
Sunday, February 9, 2014
Advance 9938: Barbie out on the town
I picked up this Advance pattern (9938) for the great chinoiserie inspired sheath dress, but Myra has been asking for a new coat for Barbie. This cute 60s swing coat was a must.
I made it out of fleece, which I think looks much more luxe at Barbie's scale. It almost looks like fur. It is a bit bulky though. Her collar is pretty full, even though I used black batiste for the undercollar. I also made her a quick little clutch to go with her outfit. It's just a square of satin with a pointed end for the envelope opening. I sewed a silver bead on as a "closure".
The coat closes with snaps, but I was thrilled to find these fab little buttons at Hobby Lobby. Aren't they perfect for a Barbie coat? Myra will love the sparkle.
Of course, I HAD to make the dress, too! Isn't it fun? The fabric is a prepleated polyester. It was a bit fussy to sew, but looks fabulous. I'm really pleased with how well this pattern fits as compared to other patterns I've used. The darts are all in the right place, and the amount of ease is much more appropriate. Even on the modern body type (which this Barbie has) the dress looks great.
The Asian style "opening" at the neck is actually just a decorative element. The dress is closed with velcro at center back. Much easier to get on and off than a traditional neckline opening! The ribbon is stitched on by machine, but I added the beads by hand. I also hand stitched the armhole hems. This was actually much easier and faster than doing it by machine.
The final piece of her outfit are her sleek black "satin" gloves. I used this pattern, but slimmed the wrist area significantly. The pattern comes out looking more like oven mitts than the elegant glove I was going for. The fabric is a heavy tricot, so it has a lot of stretch, making these easy to get on and off the doll, but still have a sleek fit. They were the devil to sew though. The finished gloves look pretty awesome, so I'm pleased.
I made it out of fleece, which I think looks much more luxe at Barbie's scale. It almost looks like fur. It is a bit bulky though. Her collar is pretty full, even though I used black batiste for the undercollar. I also made her a quick little clutch to go with her outfit. It's just a square of satin with a pointed end for the envelope opening. I sewed a silver bead on as a "closure".
The coat closes with snaps, but I was thrilled to find these fab little buttons at Hobby Lobby. Aren't they perfect for a Barbie coat? Myra will love the sparkle.
Of course, I HAD to make the dress, too! Isn't it fun? The fabric is a prepleated polyester. It was a bit fussy to sew, but looks fabulous. I'm really pleased with how well this pattern fits as compared to other patterns I've used. The darts are all in the right place, and the amount of ease is much more appropriate. Even on the modern body type (which this Barbie has) the dress looks great.
The Asian style "opening" at the neck is actually just a decorative element. The dress is closed with velcro at center back. Much easier to get on and off than a traditional neckline opening! The ribbon is stitched on by machine, but I added the beads by hand. I also hand stitched the armhole hems. This was actually much easier and faster than doing it by machine.
The final piece of her outfit are her sleek black "satin" gloves. I used this pattern, but slimmed the wrist area significantly. The pattern comes out looking more like oven mitts than the elegant glove I was going for. The fabric is a heavy tricot, so it has a lot of stretch, making these easy to get on and off the doll, but still have a sleek fit. They were the devil to sew though. The finished gloves look pretty awesome, so I'm pleased.
Labels:
Advance 9938,
Barbie,
coat,
dress
Tuesday, December 10, 2013
Lolita Spearmint Coat
I have had the hardest time keep this pattern under wraps
until it was released, and I’m sure you can see why.
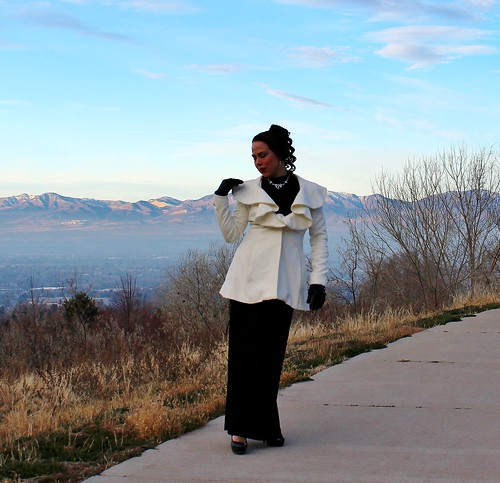
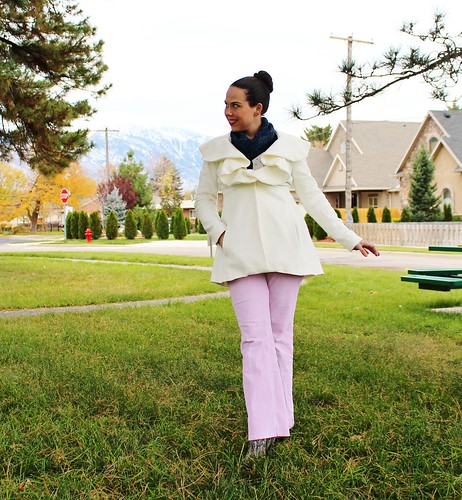
THIS COAT!! Seriously, y’all. I’m so in love with this
design.
From the dramatic, ruffled collar, down to the flared,
twirly hem, I love everything about it.
Enough teasing, may I present, the latest pattern in the
fabulous Lolita Pattern line, Spearmint! She’s a stunning coat featuring a slim
fit shaped with princess seam, long, slim sleeves and a full, ruffled collar.
The most amazing feature isn’t on the outside though. No
indeed, Spearmint is fully lined BY MACHINE! Yes, that’s right, the only hand
stitches on this entire coat are to attach the button. The technique is
ingenious. I’ve already used it on Myra’s Rosy Red coat, and it worked beautifully
without any alterations to the pattern. Amity is a genius.
You even get a perfect jump hem! The first time you do it
is a little mind bending, but the instructions and diagrams are very clear and
easy to follow.
Spearmint also has deep pockets, inserted into the princess
seams. The pockets are faced, so your lining fabric doesn’t have a chance of
peeking out. There are several lengths available. I made mine short,
but you can also choose a knee and calf length option for even more drama.
But this collar, y’all. How gorgeous is this?? The collar is
a circular flounce, given body with fusible hair canvas (which Amity is also
stocking in her shop at an amazing price). The neckline is quite low, but the
collar fills it in beautifully and it is perfect to showcase a spectacular cowl
or scarf.
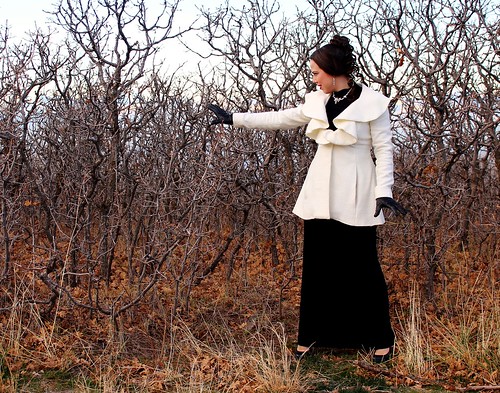
From the back, you can see how closely fitted the coat is.
Princess seaming gives you a beautiful line and a very comfortable fit.
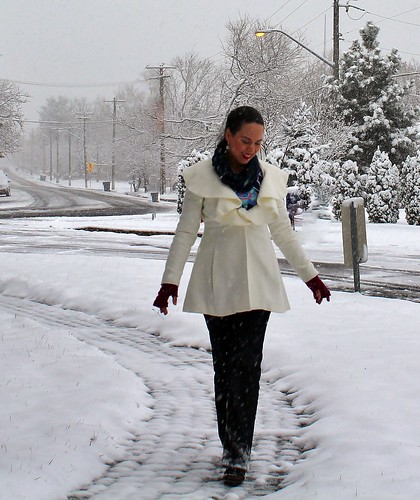
I made my Spearmint from a winter white wool blend coating I
scored at Hancock. It is interwoven with eyelash and Lurex yarns for texture
and drama. Since the weave is a bit loose, I underlined it with Imperial
Batiste. The lining is rayon satin from FabricMart.
I’m so in love with this coat. I get compliments on it
wherever I go. I know you’ll love sewing and wearing your Spearmint. Head over
to Lolita Patterns and put in your pre-sale order now! For a limited time, you can even get Spearmint bundled with Gunmetal and Sugar Plum for a discounted price!
Sunday, November 17, 2013
Ottobre 06/2008-17: the Rosy Red coat
Myra loves wearing her fleece hoodie, but winter weather in Utah requires more serious warm gear.
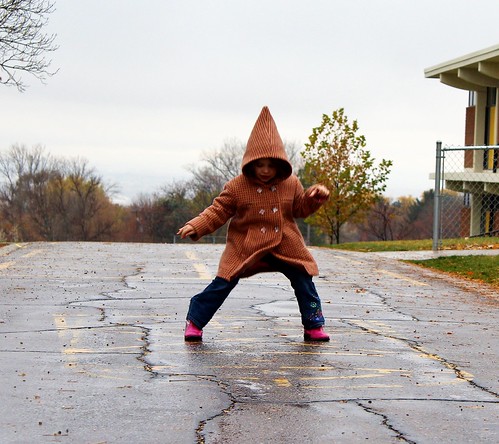
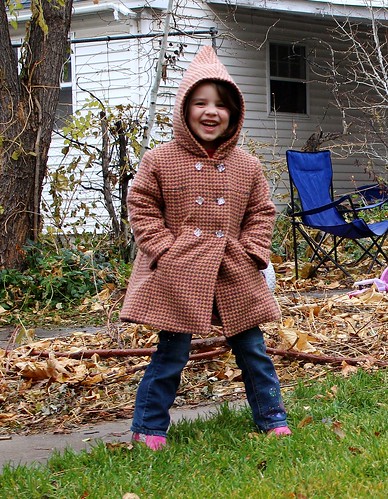
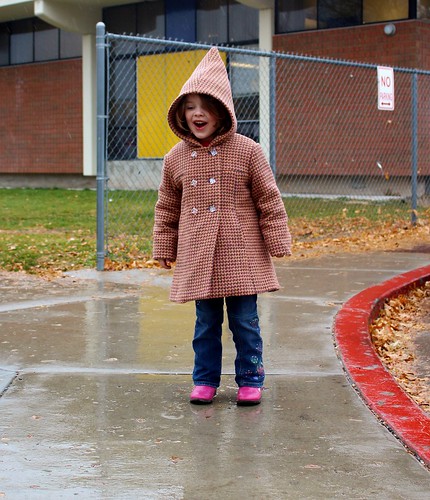
It was time for a coat. A real, warm, cozy wool coat. With a hood. THE CUTEST HOOD EVER. Myra calls it her unicorn horn, but I think she looks like a little elf.
It's cute with the hood down too, but Myra always wears it up.
The pattern I used is Ottobre 06/2008-17, the Rosy Red coat. It has a generous cut, with the shoulders and chest shaped with yokes.
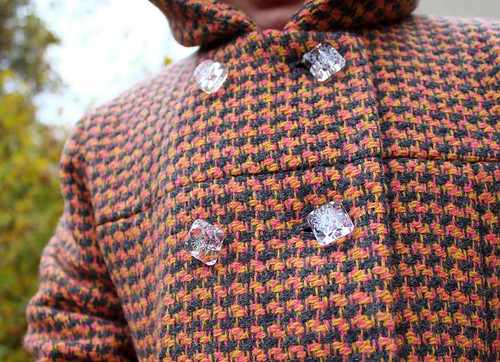
Here is the front yoke seam, as well as the bling-tastic buttons Myra chose. You can't really see it in the picture, but they have iridescent glitter embedded in them. Very Myra.
The back yoke curves across the shoulder and provides shaping there. The sleeves are one piece, but eased at the elbow for shape. Very nice drafting.
The length of the coat is really great. Long enough to be very warm, but short enough and with enough ease to allow for play.
The fabric I used is a wool/poly blend coating from Fabric.com. I'm not sure how long I've had it, probably about a year. The colors are a little unusual, with a neon yellow and pink plied yarn woven with a graphite grey in a houndstooth pattern.
Myra chose this neon pink satin as her lining fabric. It's a perfect match to the pink element in the wool. I used an all machine method of lining this coat that I learned testing a pattern that is soon to be released. I'll tell you more about that when I can, but suffice it to say, the method is awesome.
The pattern called for a layer of batting for warmth, but my wool is plenty thick, so instead I underlined the shell with cotton flannel. I used up some scraps from Myra's nightgowns. Since it is hidden under the lining no one sees it.
The only hand stitching I did on this entire coat was to catch stitch the pocket bags to the underlining. I didn't want them flopping around in there.
The pockets are nicely recessed, and since I underlined them with flannel as well, very cozy. You can see just a flash of pink here as Myra jumps.
Myra loves her new coat, and I'm pretty thrilled with it, too. I was looking back today at some of my early projects and it kinda hit me how far I've come. I made a COAT! And it didn't even scare me!
Can you believe how grown up she's getting?? It wasn't so long ago that she looked like this. We've come so far, the both of us.
It was time for a coat. A real, warm, cozy wool coat. With a hood. THE CUTEST HOOD EVER. Myra calls it her unicorn horn, but I think she looks like a little elf.
It's cute with the hood down too, but Myra always wears it up.
The pattern I used is Ottobre 06/2008-17, the Rosy Red coat. It has a generous cut, with the shoulders and chest shaped with yokes.
Here is the front yoke seam, as well as the bling-tastic buttons Myra chose. You can't really see it in the picture, but they have iridescent glitter embedded in them. Very Myra.
The back yoke curves across the shoulder and provides shaping there. The sleeves are one piece, but eased at the elbow for shape. Very nice drafting.
The length of the coat is really great. Long enough to be very warm, but short enough and with enough ease to allow for play.
The fabric I used is a wool/poly blend coating from Fabric.com. I'm not sure how long I've had it, probably about a year. The colors are a little unusual, with a neon yellow and pink plied yarn woven with a graphite grey in a houndstooth pattern.
Myra chose this neon pink satin as her lining fabric. It's a perfect match to the pink element in the wool. I used an all machine method of lining this coat that I learned testing a pattern that is soon to be released. I'll tell you more about that when I can, but suffice it to say, the method is awesome.
The pattern called for a layer of batting for warmth, but my wool is plenty thick, so instead I underlined the shell with cotton flannel. I used up some scraps from Myra's nightgowns. Since it is hidden under the lining no one sees it.
The only hand stitching I did on this entire coat was to catch stitch the pocket bags to the underlining. I didn't want them flopping around in there.
The pockets are nicely recessed, and since I underlined them with flannel as well, very cozy. You can see just a flash of pink here as Myra jumps.
Myra loves her new coat, and I'm pretty thrilled with it, too. I was looking back today at some of my early projects and it kinda hit me how far I've come. I made a COAT! And it didn't even scare me!
Can you believe how grown up she's getting?? It wasn't so long ago that she looked like this. We've come so far, the both of us.
Tuesday, February 26, 2013
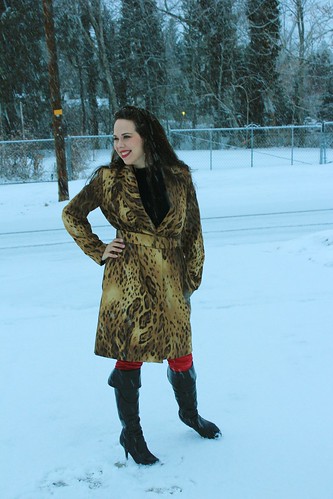
Burda Magazine 08/2007-112B leopard coat
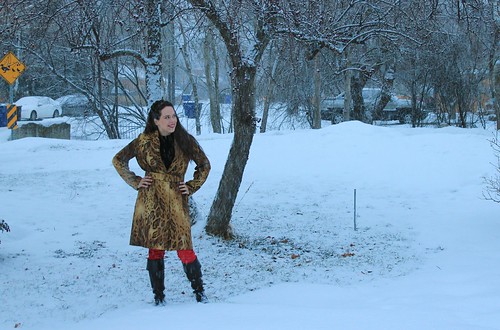
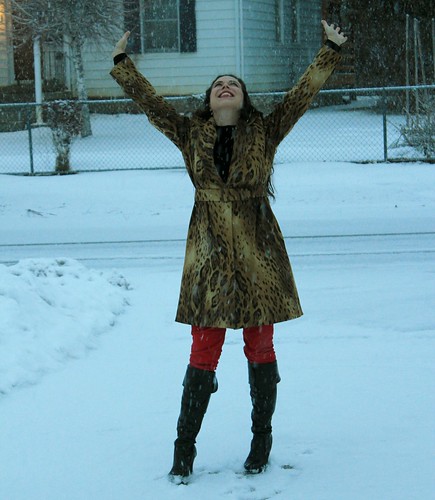
This morning I made the belt, stitched the belt loops and came upstairs to force Mitch to admire show Mitch my new creation, and he noted that it had just started to snow - perfect for pictures!!
And he was right. Not to mention he gave up his own man-cave time to take my blog pictures. He's the best, y'all.
But you want to hear about the coat, don't you? I apologize if I gush a bit, but I am very pleased with it. There may be an excessive number of pictures. You've been warned.
So, the coat began with this amazing fabric. It is a stretch poplin from Mood, which is still available as I type this. You can get yours here. I ordered it knowing that I wanted a leopard print coat, which it obviously became, but if you aren't really coat inclined, this fabric would also make great pants, a skirt or a lighter jacket. It has a nice amount of stretch and is fairly hefty in weight.
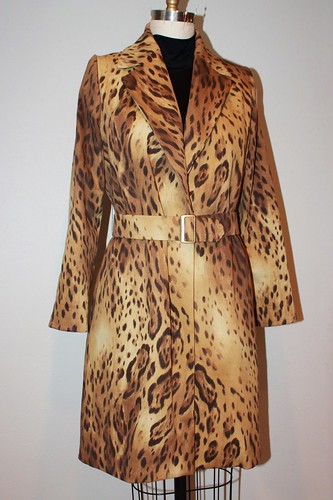
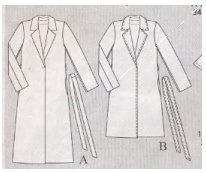
The pattern that I used is from the 08/2007 issue of Burda magazine. I made the shorter length. I chose this pattern for it's uncomplicated lines, as I really wanted my fabric to be the star. Despite it's simplicity, this is really a well thought out pattern. Some details...
The collar construction was really interesting, and built a ton of shaping into what would otherwise have been a big old sack. It's a bit difficult to see from this photo, but the undercollar is in two pieces, with a separate stand that adds shape to the back neckline. The collar back also extends into a dart that shapes the front of the coat and the lapel. The construction was a little tricky, and the Burda instructions were not particularly helpful. If you make this coat, the thing to remember is that the lapel to collar seam has to be sewn first, then the back neckline seam, which extends down into the dart in one pass. It was really fun to sew, once I figured it out. If you want to see details of the tailoring, click here.
The pattern called for a self fabric tie belt, but I decided I wanted a wide buckled belt. I went with a 2 inch wide buckle, as that was as wide as I could find, and I do like it. The belt was simple to make, as the buckle has no tongue, which meant no eyelets to set and made the buckle assembly easier. It works with this thick fabric.
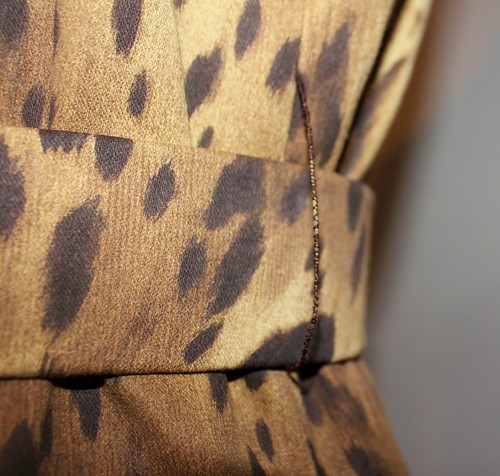
Thread loops hold the belt in place. I used this method, so the only handwork was actually attaching them.
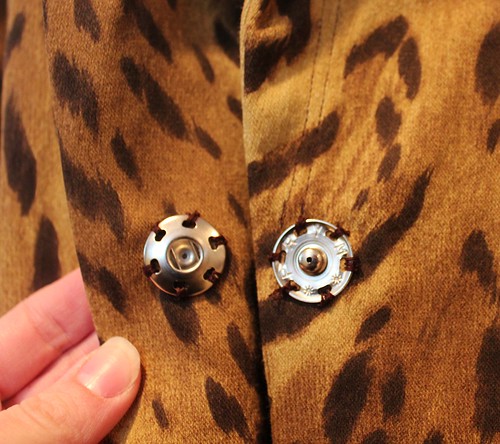
One of the things I really like about this style is the lack of visible closures. This snap is actually covered by the belt, so it looks like the belt is the only thing holding it closed. No buttons or zippers to distract from my fabulous fabric.
As far as fit goes, I did make a few alterations, primarily in the shoulders and back. The back was drafted with a totally straight seam, which on me, meant tons of extra fabric pooling at the waist, while it was still a bit snug in the back and backside. I basically just drew a curved back seam, shaping it in at the waist and giving myself more ease in the mid-back and down from my hips.
You can see on the dress form that it is fairly sleek in back, although I did leave more ease in the waist. The belt pulls that in, while the coat stays comfortable. I also narrowed the shoulders a little. The style is meant to have a slightly dropped shoulder, but that isn't what I was looking for. I added a small pad as well to firm up the shoulder line.
You wanna see the lining?
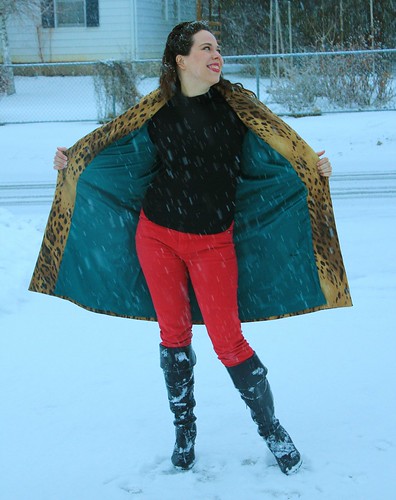
Teal!! Isn't it gorgeous!?! It's a stretch satin from Fashion Fabrics Club and it is really luscious. It's soft and silky, but also a little beefy - really perfect for a coat lining. The pattern actually only called for a half lining to the waist, but I went ahead and drafted a lining to the hem. If you're going to make a coat, you really ought to line the thing for real, right?
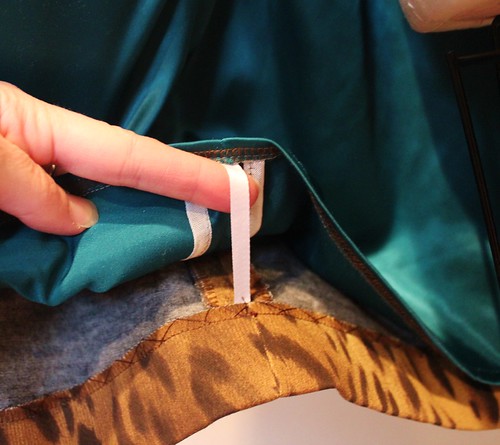
Coat linings are generally left free at the hem, and tacked in place at the side seams. I used a technique from Connie Long's Easy Guide to Sewing Linings that uses narrow ribbon, or in this case, twill tape in place of hand sewn French tacks. You simply stitch in the tape as you hem the lining, then tack it (I did this part by hand) into the coat hem.
I made a coat! And I love it!
And he was right. Not to mention he gave up his own man-cave time to take my blog pictures. He's the best, y'all.
But you want to hear about the coat, don't you? I apologize if I gush a bit, but I am very pleased with it. There may be an excessive number of pictures. You've been warned.
So, the coat began with this amazing fabric. It is a stretch poplin from Mood, which is still available as I type this. You can get yours here. I ordered it knowing that I wanted a leopard print coat, which it obviously became, but if you aren't really coat inclined, this fabric would also make great pants, a skirt or a lighter jacket. It has a nice amount of stretch and is fairly hefty in weight.
The pattern that I used is from the 08/2007 issue of Burda magazine. I made the shorter length. I chose this pattern for it's uncomplicated lines, as I really wanted my fabric to be the star. Despite it's simplicity, this is really a well thought out pattern. Some details...
The collar construction was really interesting, and built a ton of shaping into what would otherwise have been a big old sack. It's a bit difficult to see from this photo, but the undercollar is in two pieces, with a separate stand that adds shape to the back neckline. The collar back also extends into a dart that shapes the front of the coat and the lapel. The construction was a little tricky, and the Burda instructions were not particularly helpful. If you make this coat, the thing to remember is that the lapel to collar seam has to be sewn first, then the back neckline seam, which extends down into the dart in one pass. It was really fun to sew, once I figured it out. If you want to see details of the tailoring, click here.
The pattern called for a self fabric tie belt, but I decided I wanted a wide buckled belt. I went with a 2 inch wide buckle, as that was as wide as I could find, and I do like it. The belt was simple to make, as the buckle has no tongue, which meant no eyelets to set and made the buckle assembly easier. It works with this thick fabric.
Thread loops hold the belt in place. I used this method, so the only handwork was actually attaching them.
One of the things I really like about this style is the lack of visible closures. This snap is actually covered by the belt, so it looks like the belt is the only thing holding it closed. No buttons or zippers to distract from my fabulous fabric.
As far as fit goes, I did make a few alterations, primarily in the shoulders and back. The back was drafted with a totally straight seam, which on me, meant tons of extra fabric pooling at the waist, while it was still a bit snug in the back and backside. I basically just drew a curved back seam, shaping it in at the waist and giving myself more ease in the mid-back and down from my hips.
You can see on the dress form that it is fairly sleek in back, although I did leave more ease in the waist. The belt pulls that in, while the coat stays comfortable. I also narrowed the shoulders a little. The style is meant to have a slightly dropped shoulder, but that isn't what I was looking for. I added a small pad as well to firm up the shoulder line.
You wanna see the lining?
Teal!! Isn't it gorgeous!?! It's a stretch satin from Fashion Fabrics Club and it is really luscious. It's soft and silky, but also a little beefy - really perfect for a coat lining. The pattern actually only called for a half lining to the waist, but I went ahead and drafted a lining to the hem. If you're going to make a coat, you really ought to line the thing for real, right?
Coat linings are generally left free at the hem, and tacked in place at the side seams. I used a technique from Connie Long's Easy Guide to Sewing Linings that uses narrow ribbon, or in this case, twill tape in place of hand sewn French tacks. You simply stitch in the tape as you hem the lining, then tack it (I did this part by hand) into the coat hem.
I made a coat! And I love it!
Subscribe to:
Posts (Atom)