Showing posts with label mens. Show all posts

Monday, July 1, 2019

Reversible Scrub Cap Tutorial with Free Pattern and SVG!

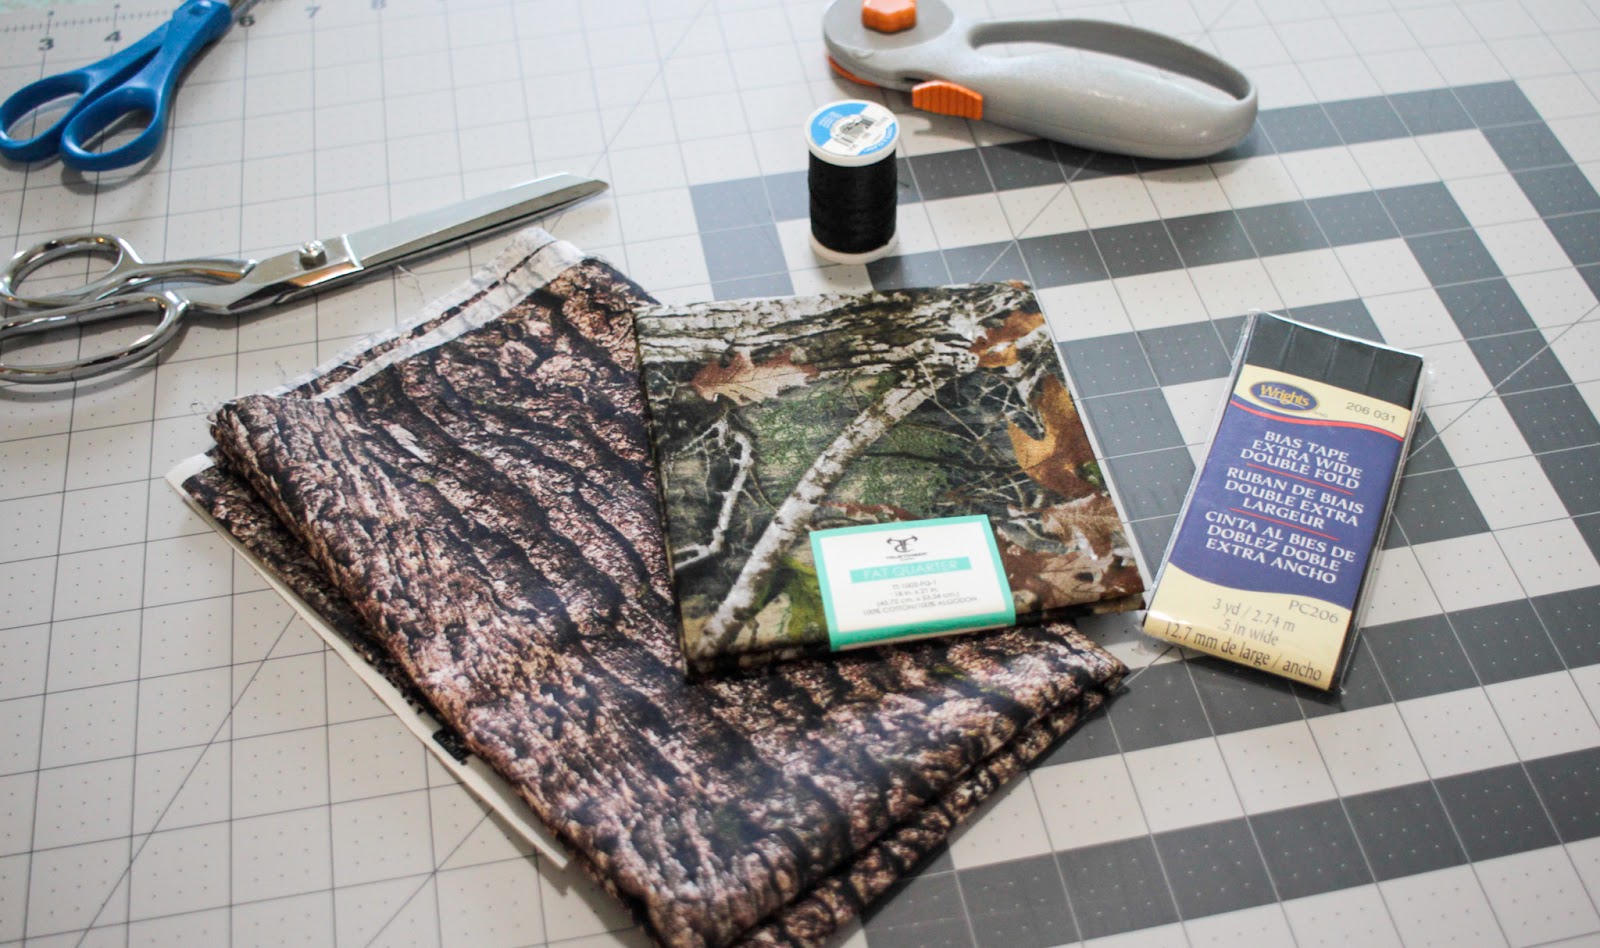
You will need:
The pattern pieces (click here). Be sure to assemble the band piece by overlapping the two pieces and taping as indicated on the pattern pieces.
2 pieces of coordinating fabric, ½ yard each or a fat quarter will work
42 inches bias tape. I used extra wide for this tutorial, but if you prefer narrow, that also works
Thread
Something to use to cut - either shears or rotary cutter
A sewing machine
An iron
Nice to have
Press cloth
Pressing ham


1: Press your fabric! Particularly if you are using a fat quarter as they are often quite creased from being folded.

2. Cut out your pieces. You will need one top piece and one band (cut on the fold) out of each coordinating fabric. If you are using fat quarters, fold in half and cut the band first, then unfold to cut the top. As you are cutting, be sure to notch or mark the center front and back of the top and center front of the band at the upper (curved) edge. If you are using a cutting machine to cut your pieces, you will need a 12x24 inch mat, as this will cut out single layer.
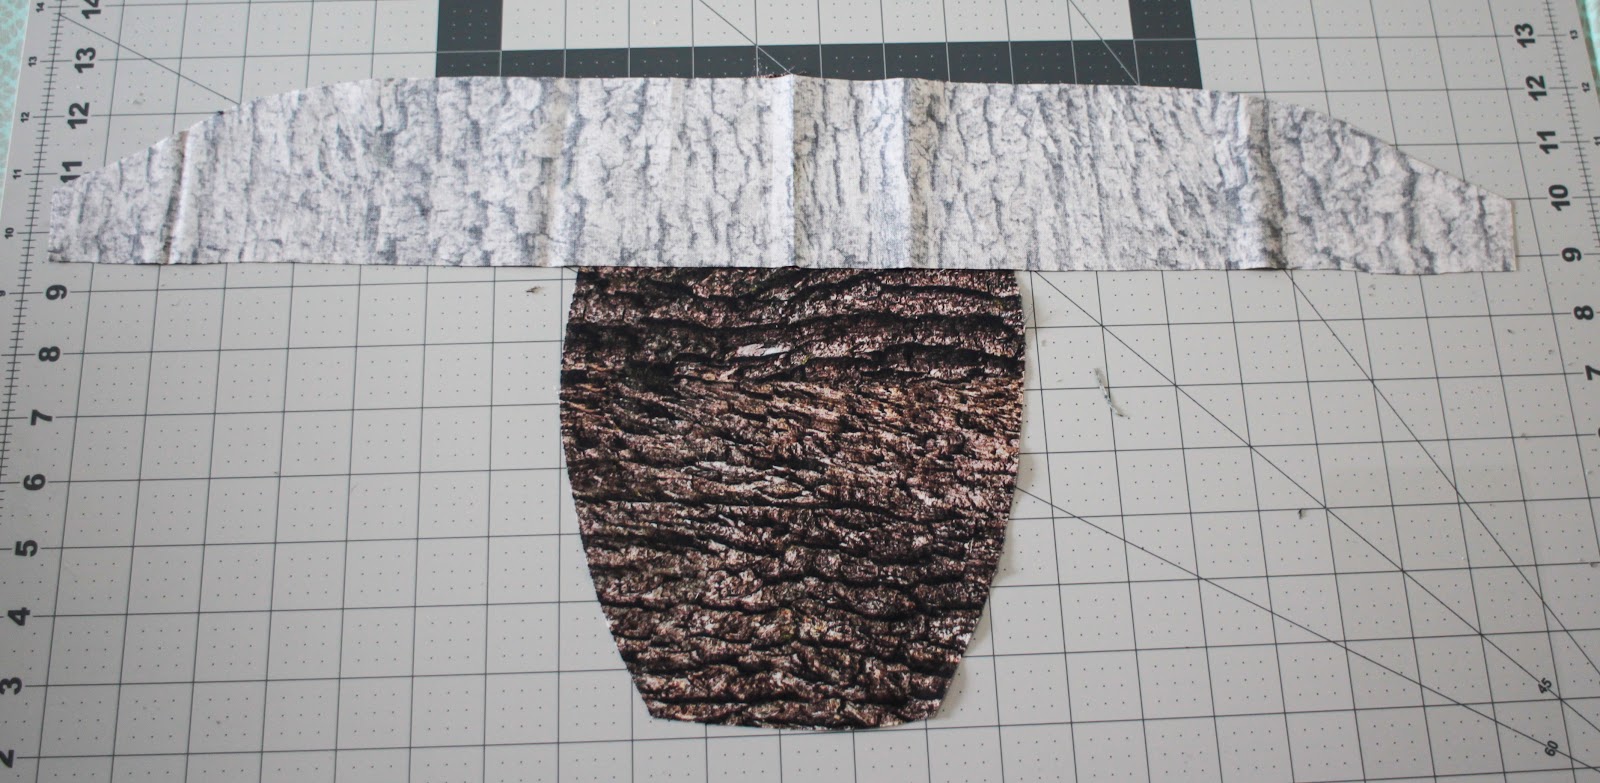
3. Right sides together, match up the center front of the top with the center front of the band and pin.
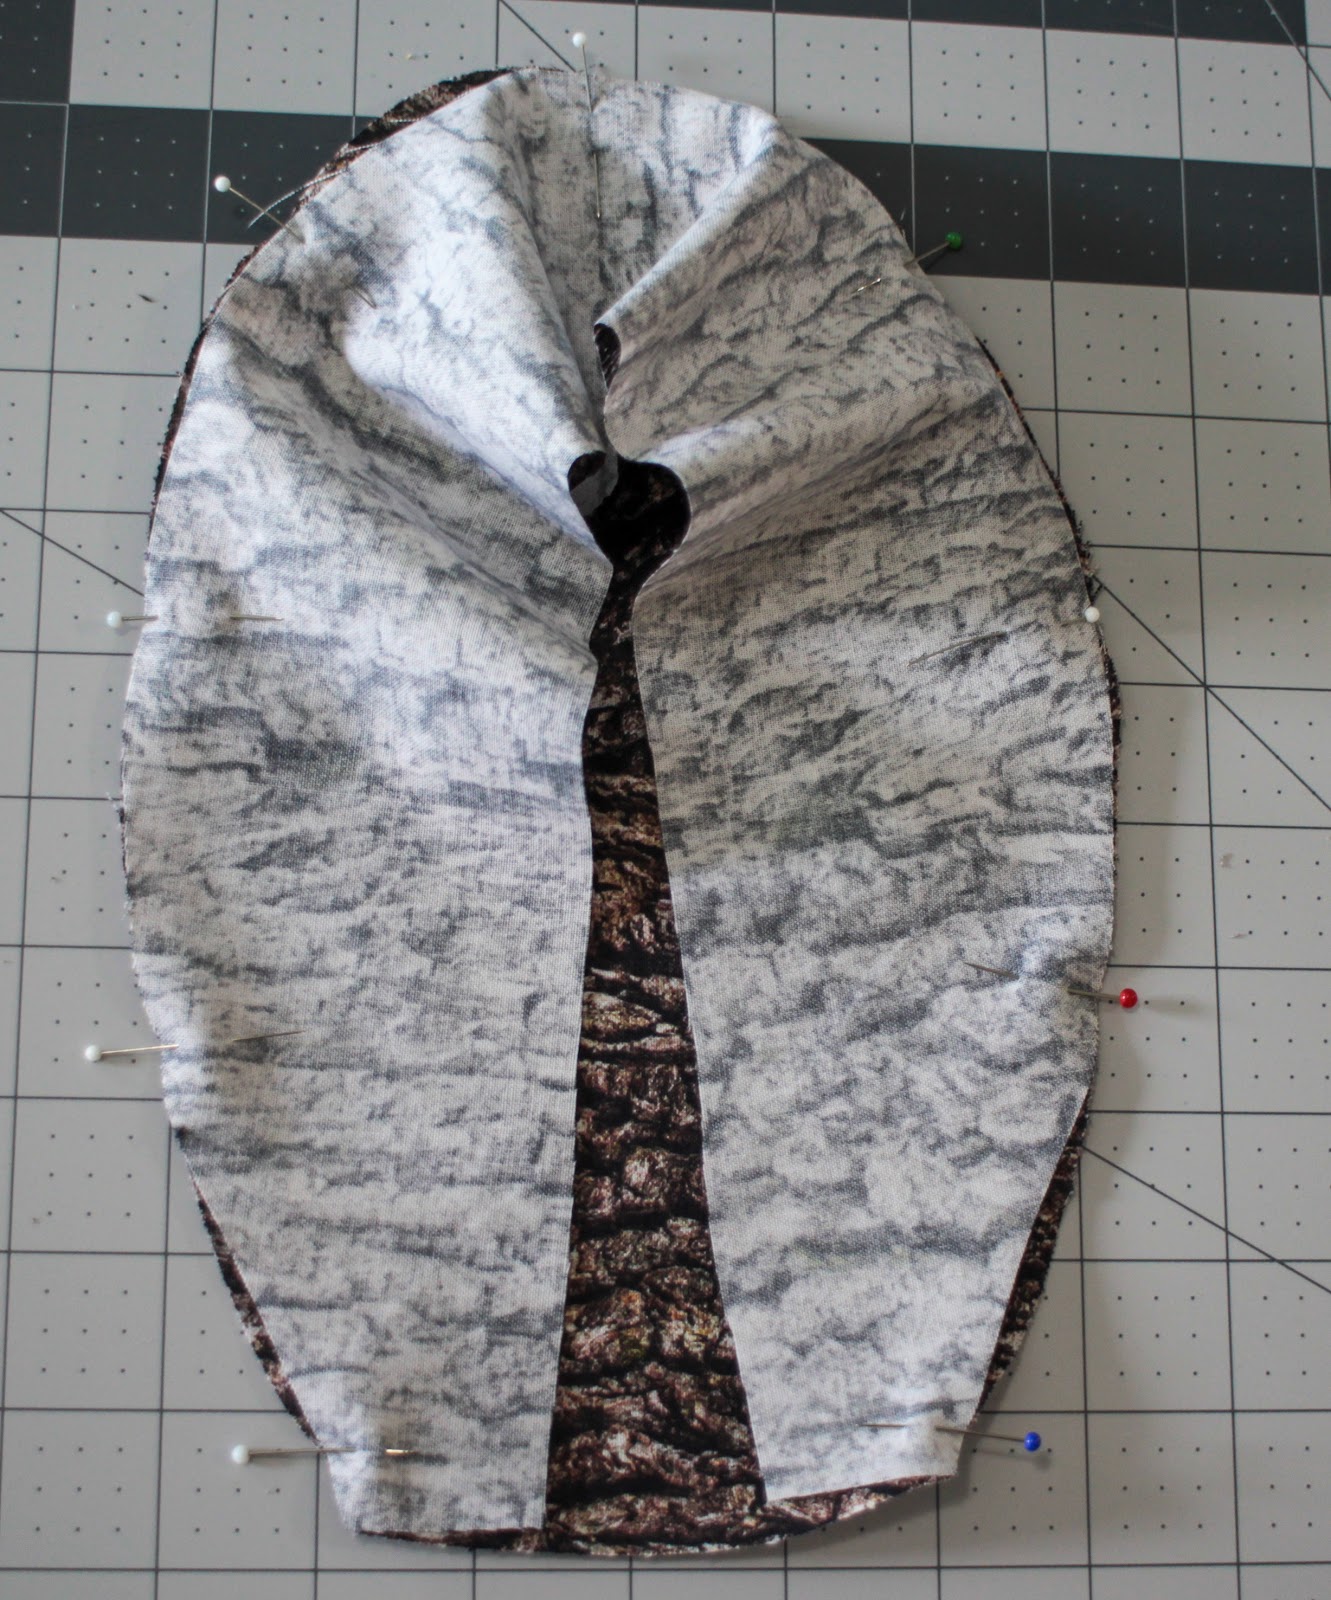
4. Going around the top, pin the band in place right sides together along the round edge. Sew with a 1/4 inch seam allowance all around the curved edge of the cap. Leave the bottom edge unsewn. Your band should match fairly closely, but as you are matching up curved edges, you may have to ease the top piece slightly into the band. Don’t worry about basting stitches or anything - it’s not that much. When you stitch this at your machine, be sure that the top is down against the feed dogs as your sew, and hold your work taught as it stitches. This will allow the feed dogs to ease in the top as needed.

5. Press your seam down toward the band. This is much easier if you have a pressing ham!
6. Now repeat steps 3-5 with your other coordinating fabric.

You should have 2 little caps!
7. Fold one wrong side out and the other right side out and nest them right sides together.
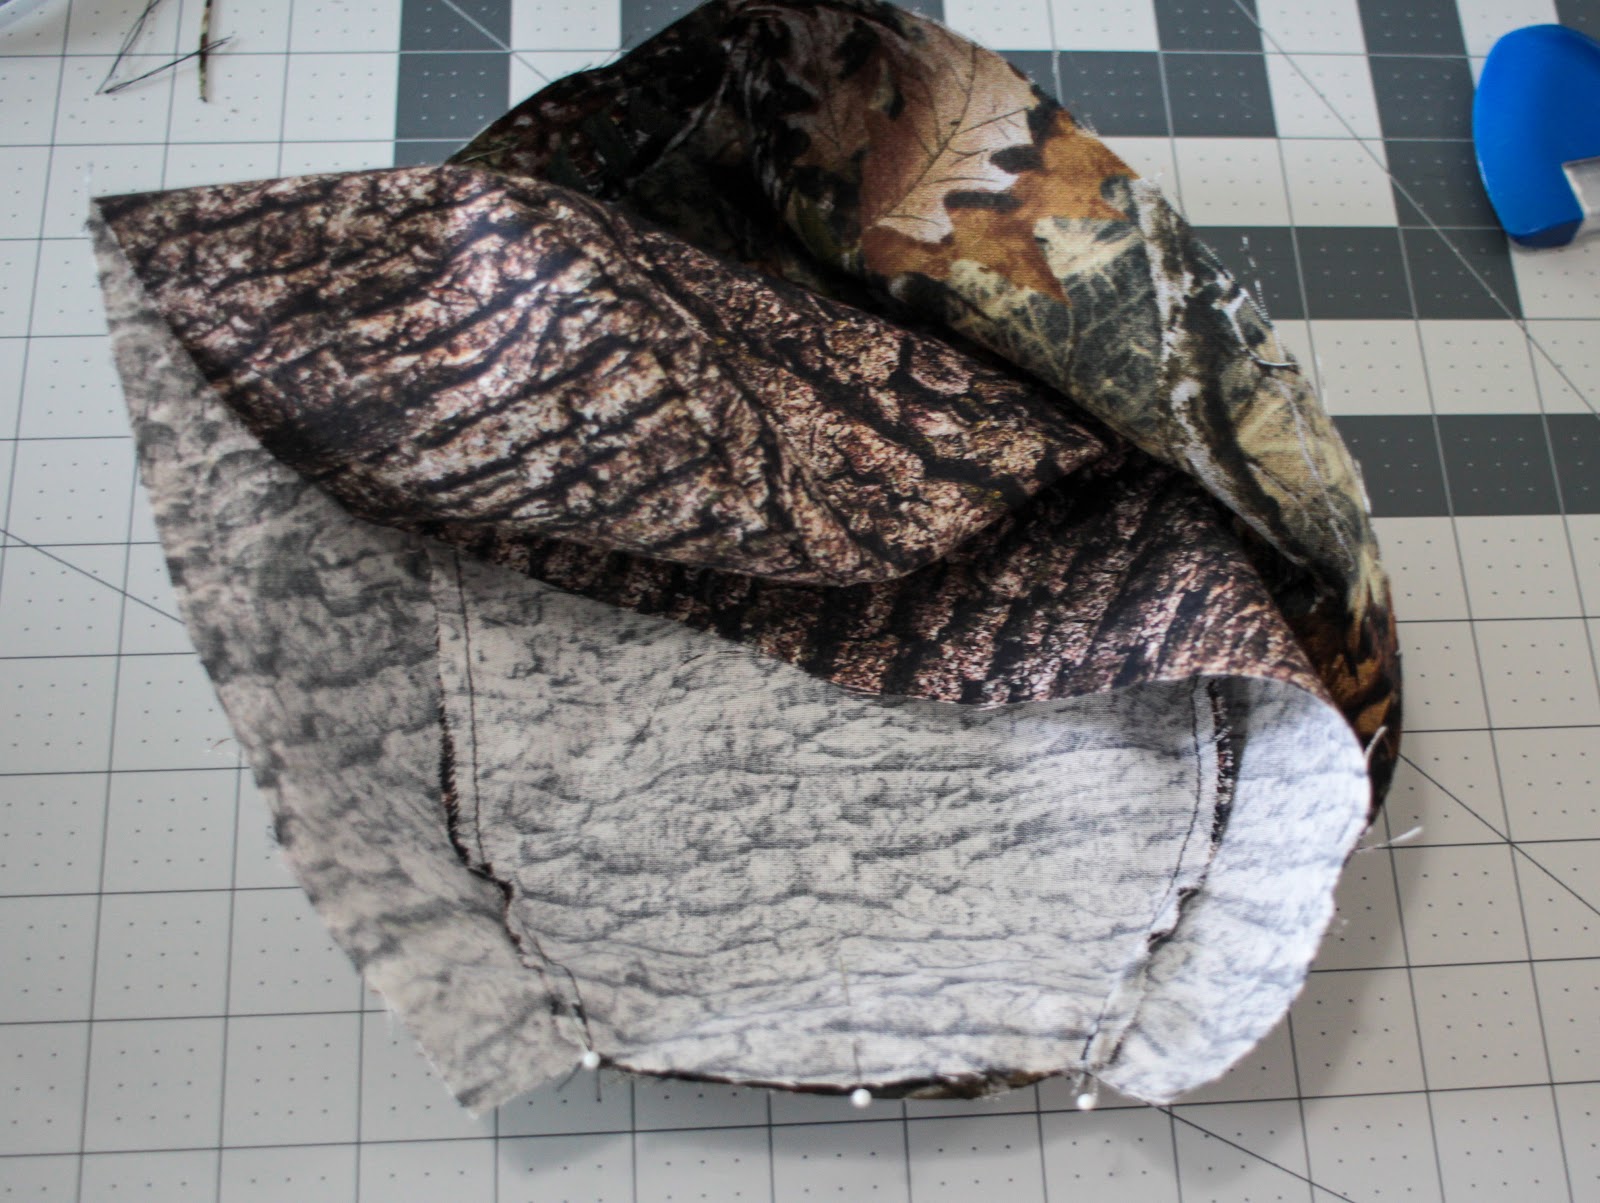
8. PIn and stitch the two layers together along the back edge of the cap, matching the center back and the seams.

9. Press the seam open, then nest the two layers WRONG sides together, folding at your newly pressed seam. Now Press the seam flat, making sure your fabric isn’t rolling to one side or the other.
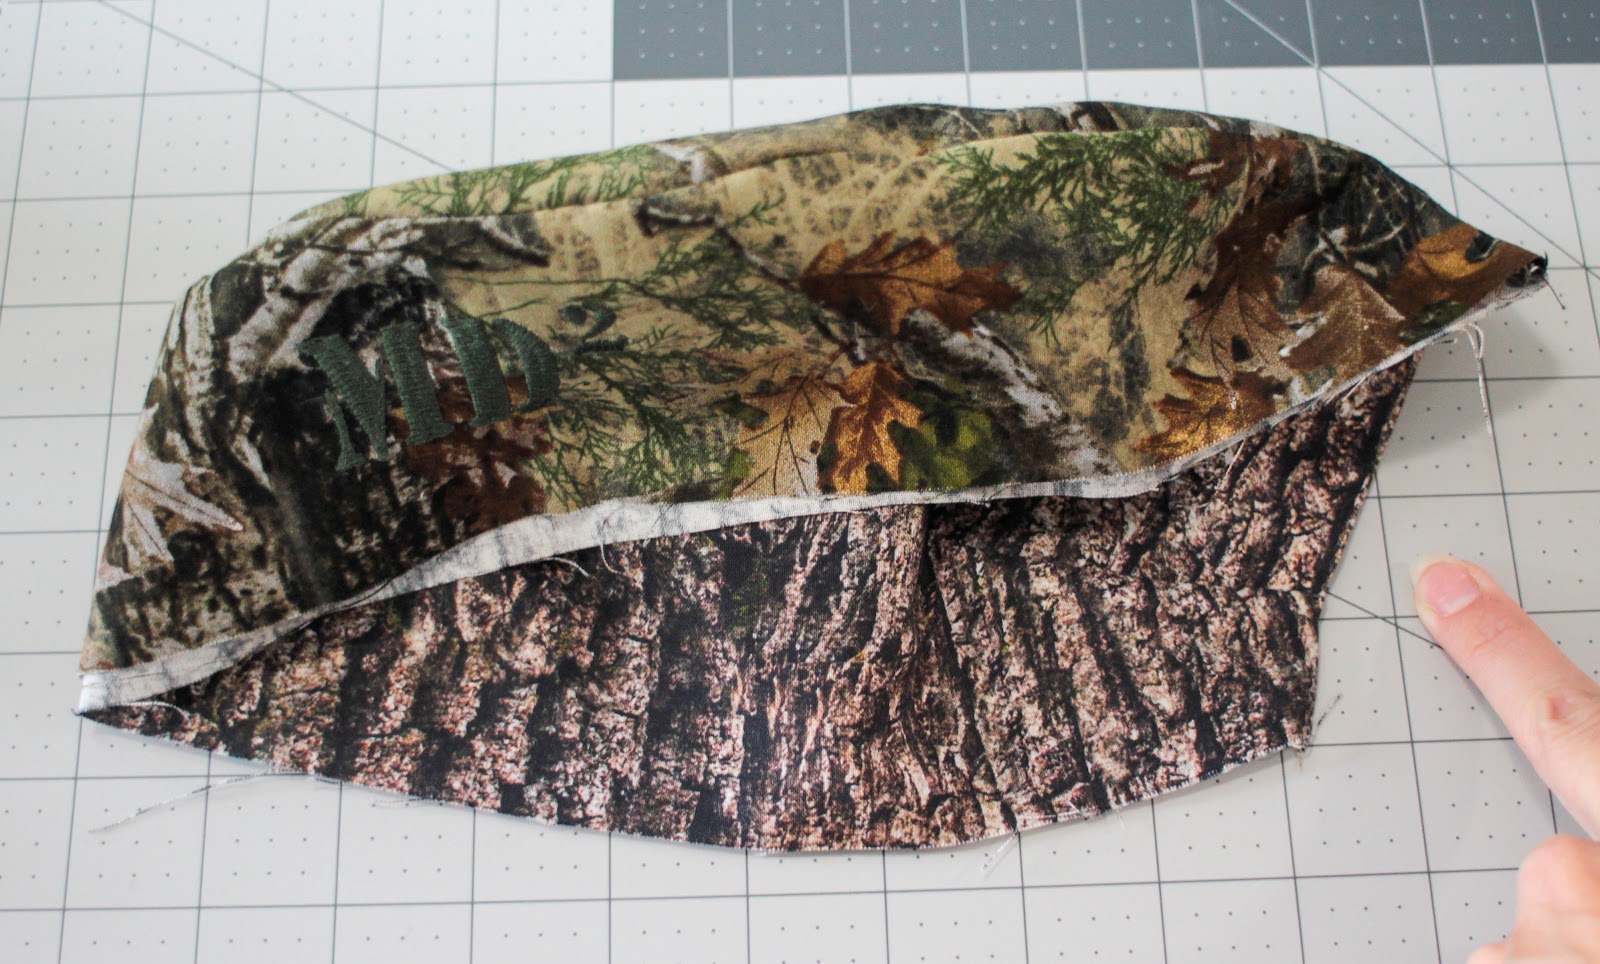
Now it’s starting to look like a cap! My finger is indicating your back seam. You still should have raw edges along the lower border of the cap. Let’s take care of that, as well as making ties all in one step.
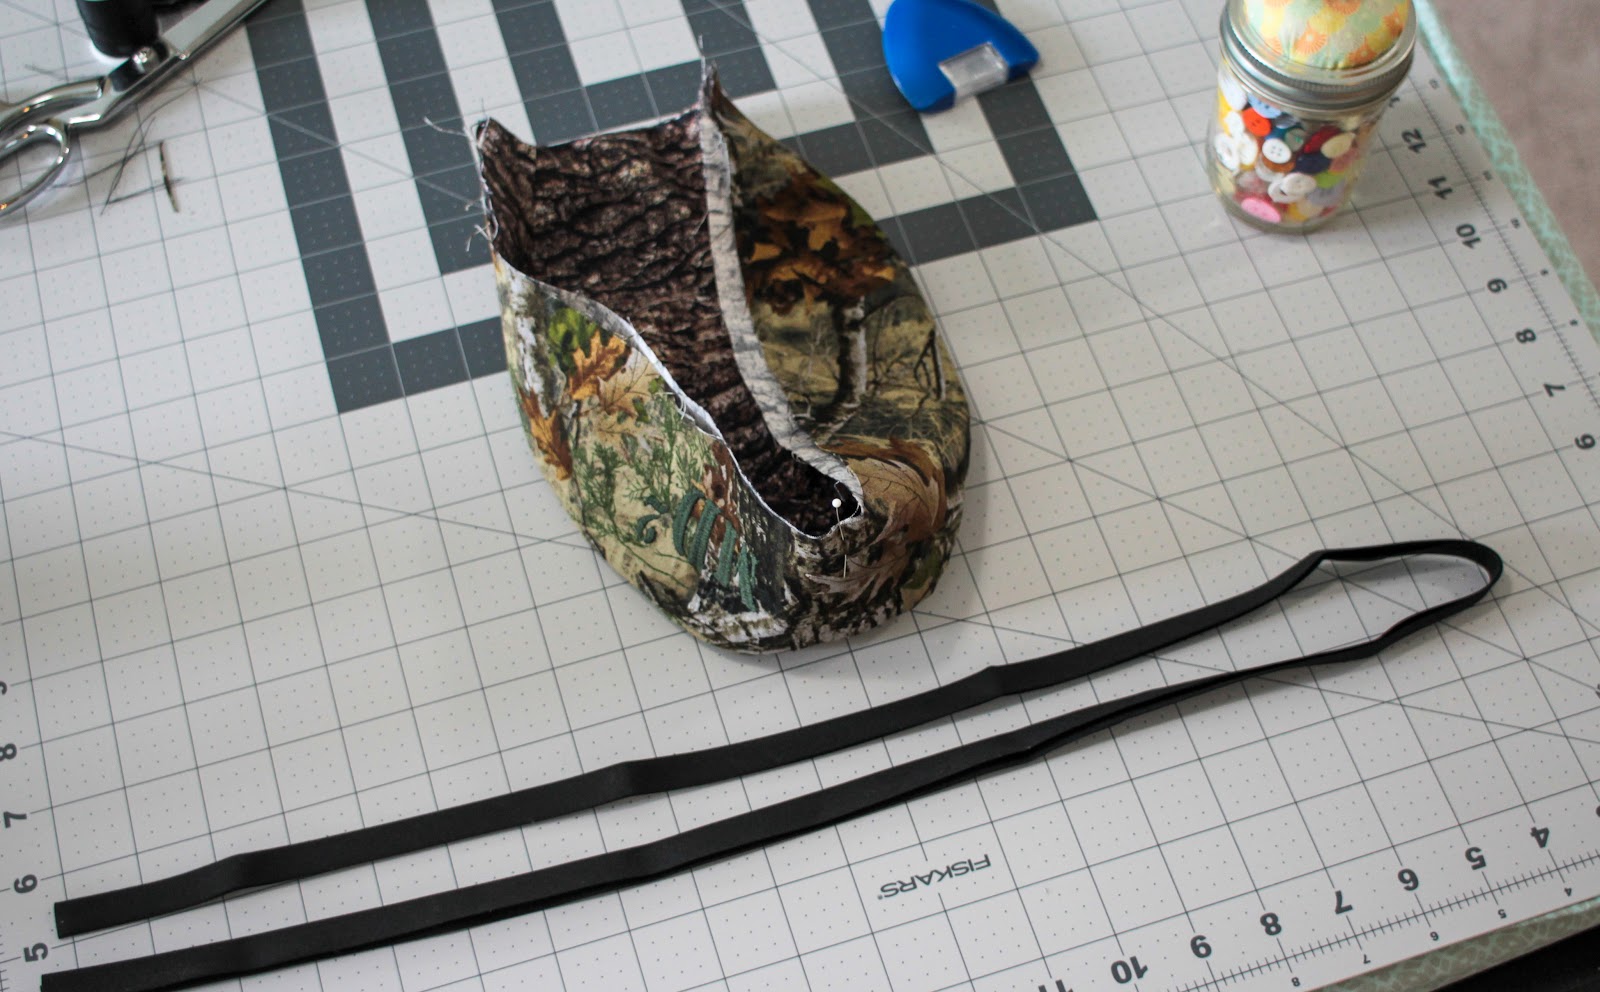
10. Make sure that the raw edges of your cap are aligned and place a pin at center front of the band. Get your bias tape and if you haven’t already, cut a 42 inch long piece and fold it in half to determine the center.

11. Matching the center of your tape with your center front pin, wrap the tape around the raw edges of your cap. You want to stick it in as far as you can, aligning the cut edge with the fold inside the tape. Pin the tape in place all around the cap. (Note: If you are a bias tape pro, you can do this without all the pinning. Your ties will be 10 inches long, so just stitch up the 10 inch ties first, and insert the cap at the point, and then stitch around, adding the second 10 inch tie at the end.)

12. Start stitching at one end of your bias tape. If you notice in the above picture, one side of the bias tape is less wide than the other. This is done intentionally at the factory to make it easier to apply. Be sure you are stitching with the “shorter” side up so that when you get to the cap section, you will be confident you are stitching through all the layers, since the bottom side hangs farther over. Stitch all the way down the edge of your first tie, around your cap and along the edge of the other tie, all the way to the end in one pass.
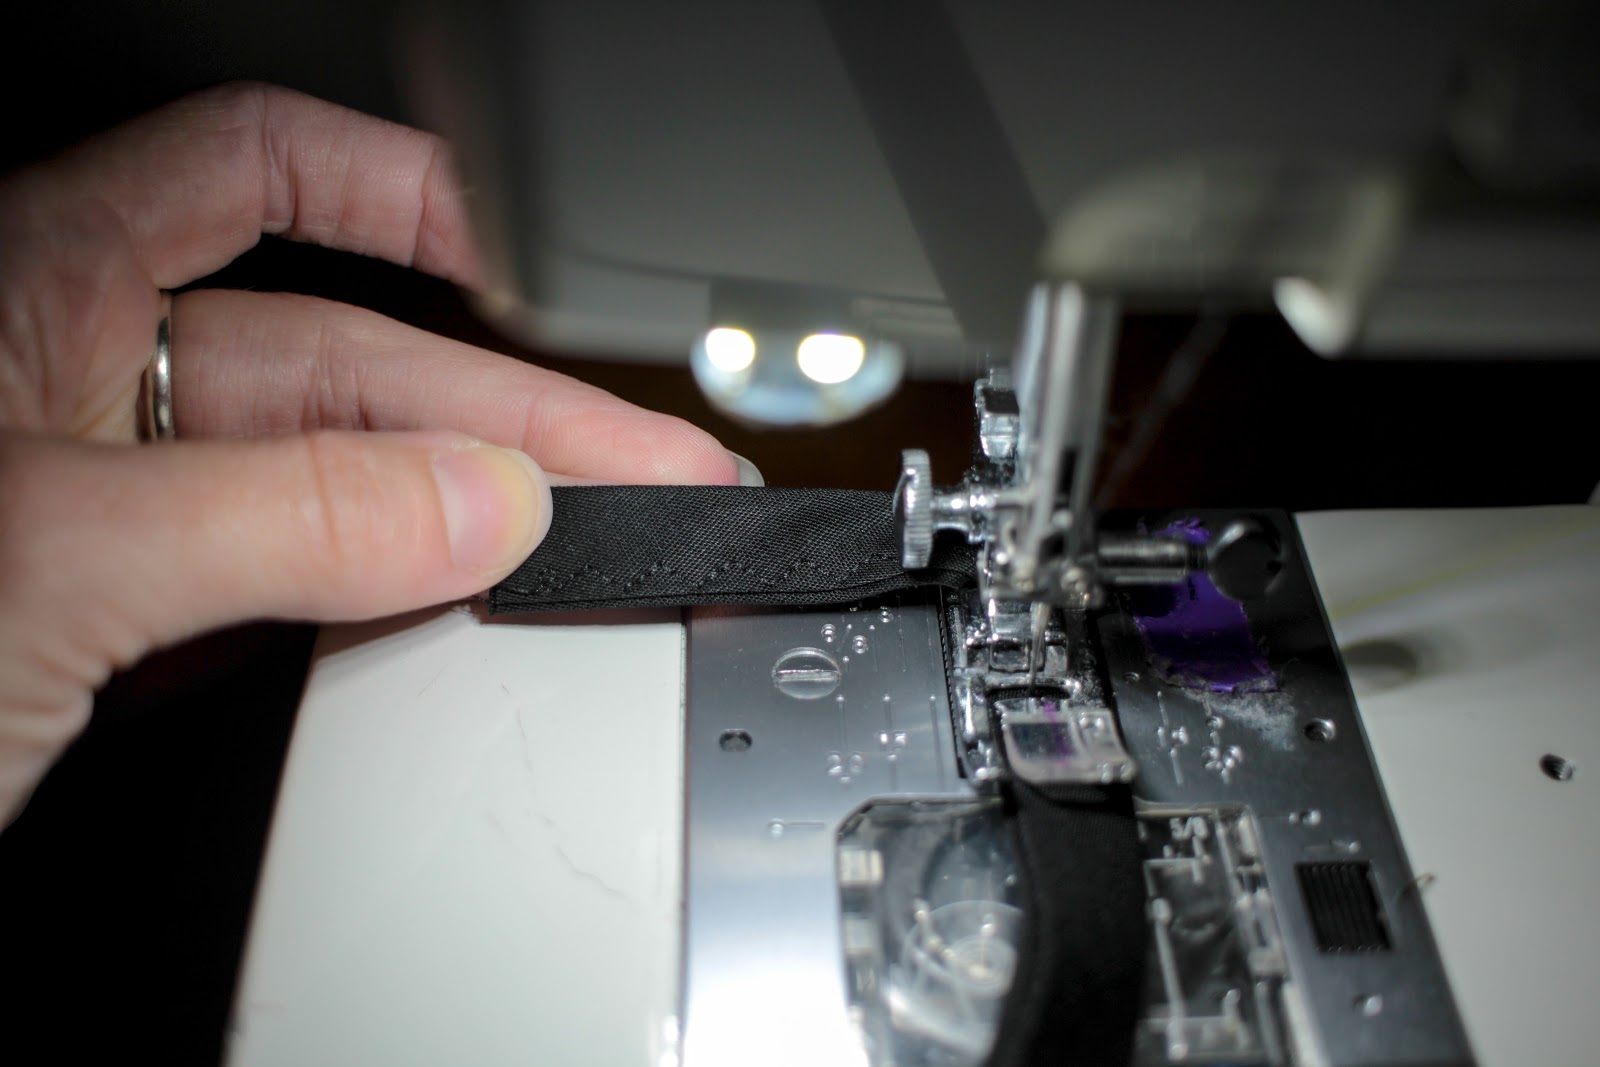
I like to use a 3 step zigzag stitch for this - I just like the way it looks - but you can choose any stitch you prefer. Some machines have interesting decorative stitches and this would be a great place to use them! Have fun!
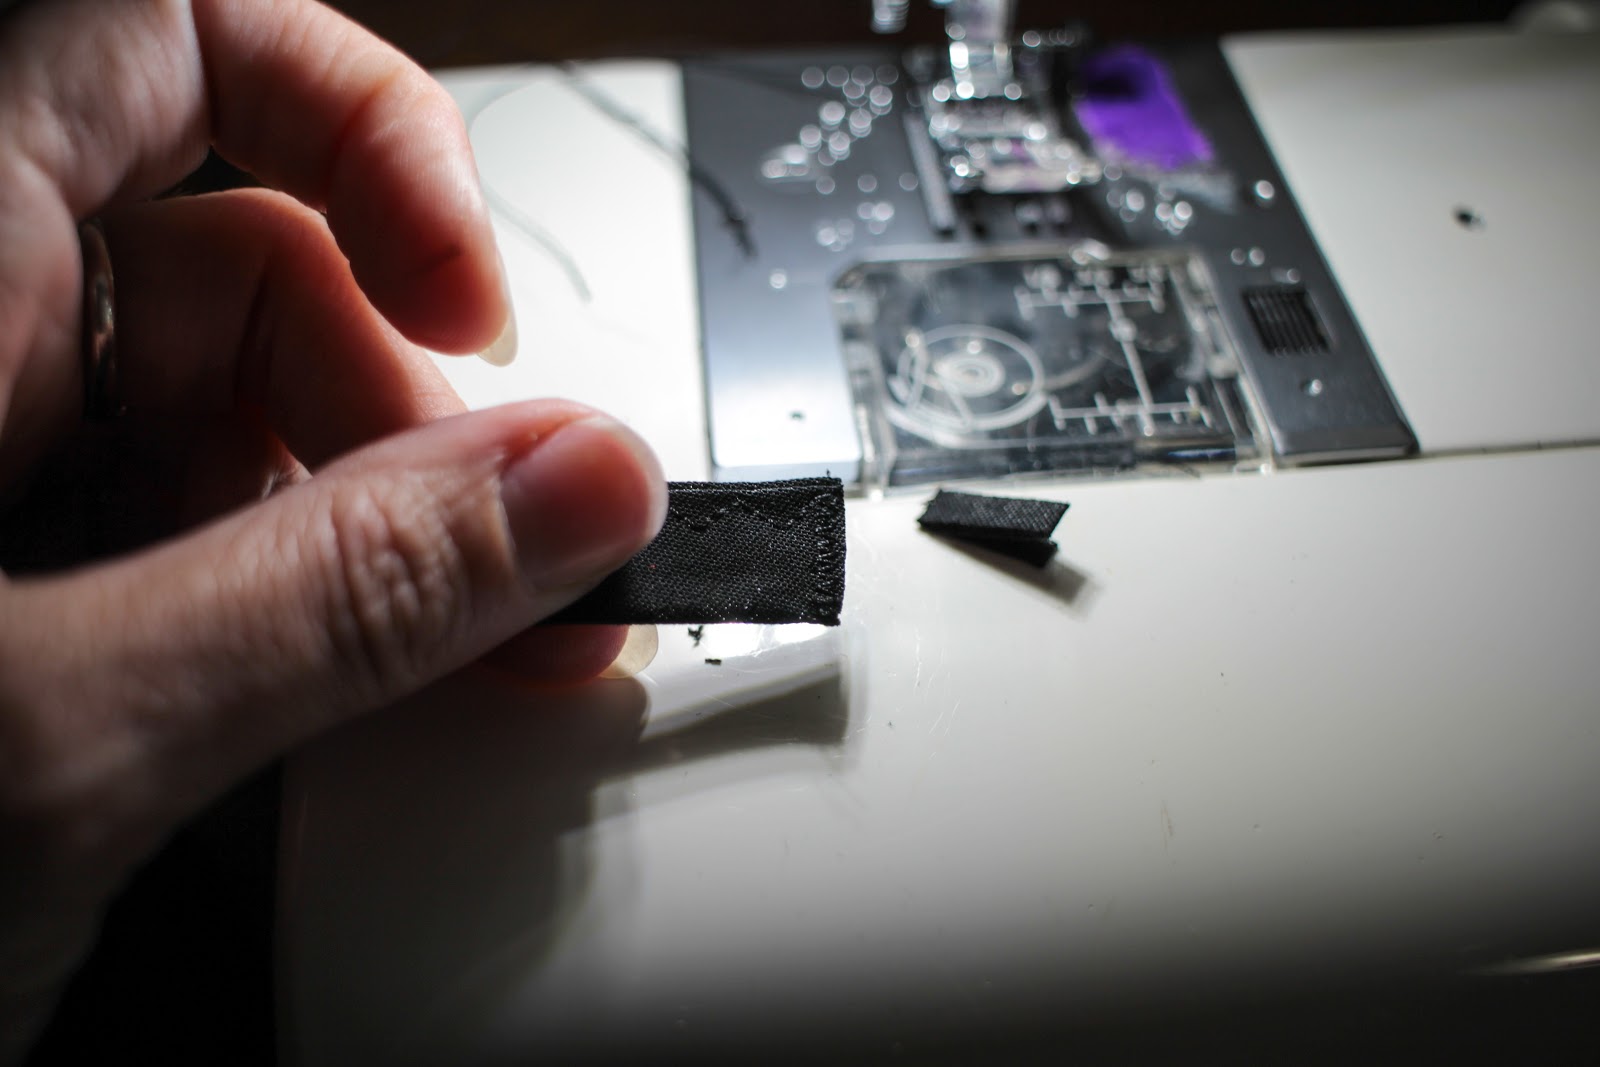
13. Finish the end of your bias tape ties by either narrowly hemming them, or zigzag stitching across the ends and trimming off any excess. I find hemming a bit bulky, so I go the zigzag route. You could also add a knot at the end, or even a decorative bead.
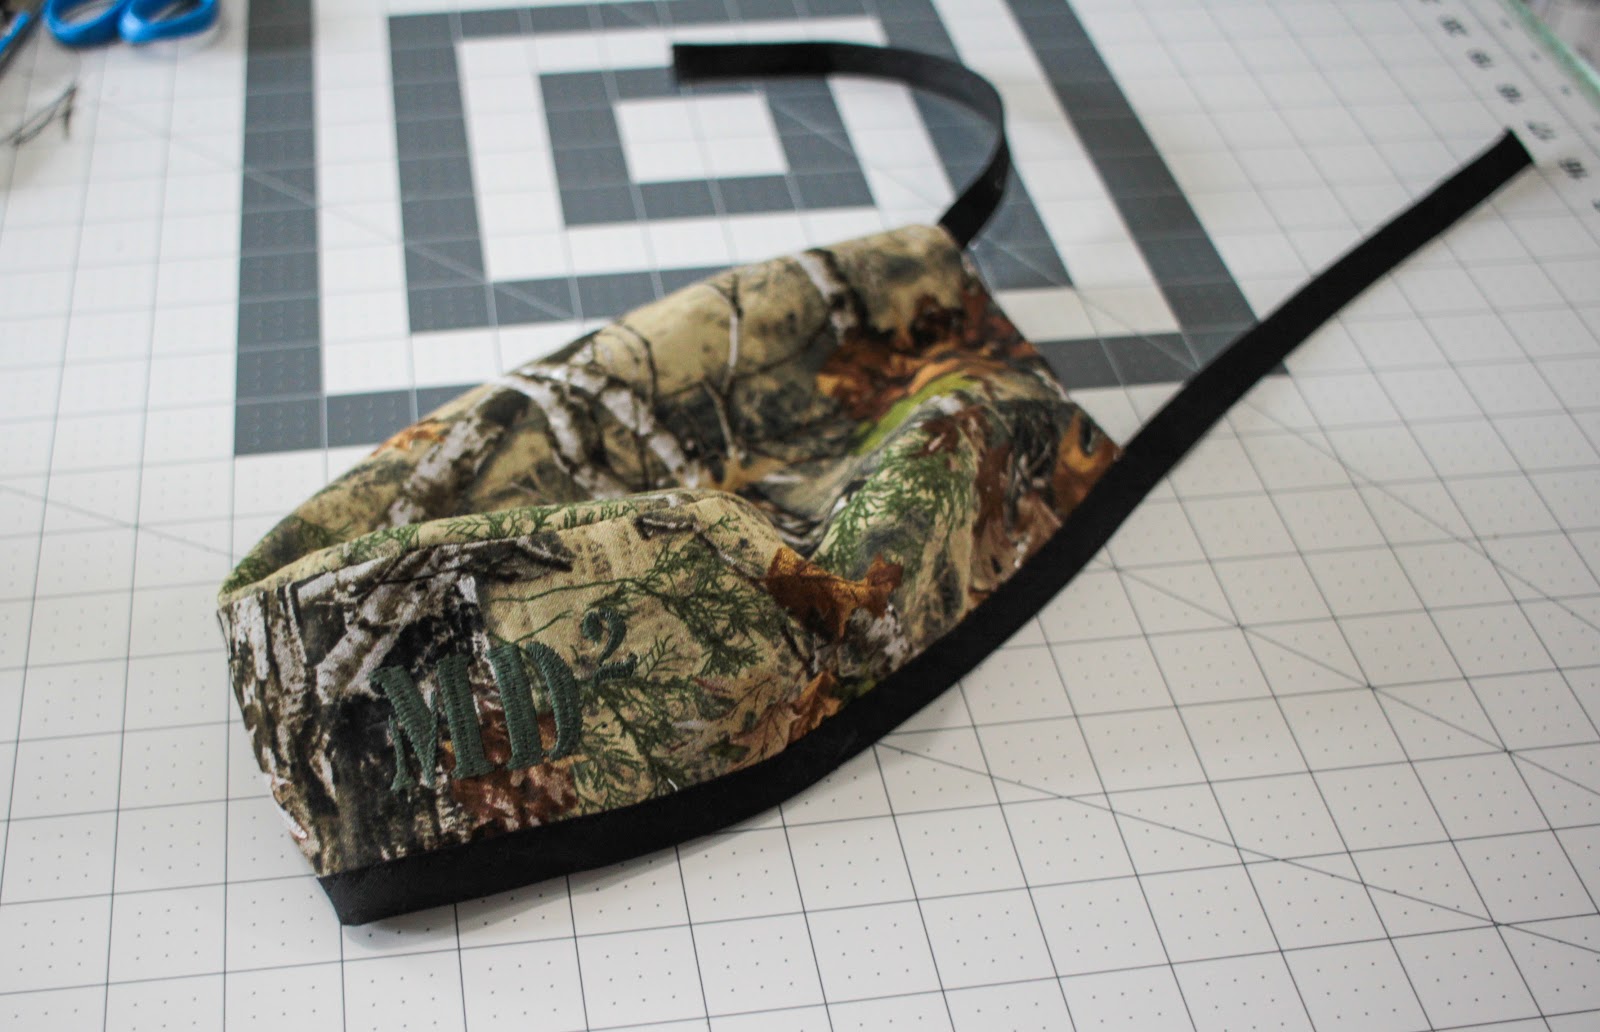
Look at that! You’re done! Now you’re the most stylish in the OR! I added some embroidery to mine, and if you are interested in embellishing your cap in some way, do so before you assemble the pieces. It’s much easier to embellish flat fabric!

ETA: Several of y'all have asked about making these caps in a single layer, which is a great way to conserve fabric and make them faster! My friend Kristine made a great video showing us all how to easily convert the pattern to a single layer. Even if you are doing a double layer cap, she has some great tips for sewing the pattern in general! Check out her video here!

To download the pattern pieces, and a pdf of the instructions, click below!
Pattern
Instructions

And just for kicks (and so I could play with my new Cricut Maker), I also created an SVG file for those of you who have cutting machines that can handle unbonded fabric. You can download the SVG here. If you need to resize, the band should measure 4.324in x 22.648in, and the top should measure 6.758in x 10.408in.
Note: the svg file will not open in your browser, so if you click on it, you will get a plain black screen and it looks like it doesn't work. You will need to right click on the link and download the file, then upload the svg file into your cutter software.

Thursday, March 23, 2017

Jalie 3669: the Nico MEN'S raglan!

Hey y'all! Long time no see! I've been sewing some, but mostly boring stuff and repeat patterns, but today I have a brand new release pattern, as well as a model y'all haven't seen in a while. Poor Mitch. I don't sew for him enough, but thanks to Jalie, that's changing at least a little!
This is the brand new Nico Men's Raglan (Jalie 3669). I've been on the hunt for a good men's raglan for literally years. Most of the patterns available out there are terribly drafted or are not well proportioned, but as you can see, Jalie brought their usual excellent drafting to the table, and the proportions are spot on.
There is a bit of fabric bunching under the arms, but I find that typical for a raglan style and raising the armhole would restrict movement. Mitch loves the fit, so we're happy. The length for both the torso and sleeves is just right for him.
The fit through the back is also great. The neckband is nice and flat against the back neck and the shoulder fit is good. Through the body the fit is close without being too snug.
Since this was sort of a trial run, I used random fabrics from the stash. Both pieces are soft cotton/lycra single jersey left over from other projects. I was afraid the navy would be a bit thin, but it actually worked out really well. Mitch loves the softness of the fabrics, and I do too. ;)
I am so thrilled with this pattern! Jalie wins again. Mitch is happy too, and has requested a few more of these. Since they're a quick, easy sew, he'll definitely be getting his wish! Anybody know a good place to get camo jersey?

Friday, March 11, 2016

Kwik Sew 3299 with manly embroidery

If you follow me on Instagram, you may have spotted some attempts at manly embroidery. My poor hubby gets very little sewing attention, but this seemed like a fun challenge. I've been playing around with fitness type designs, as Mitch is active in Crossfit.
I was editing this design on my laptop, and Mitch saw it and couldn't stop laughing. But it was a good kind of laughing, and he asked me to put it on a tee shirt. YAY!! Man embroidery!
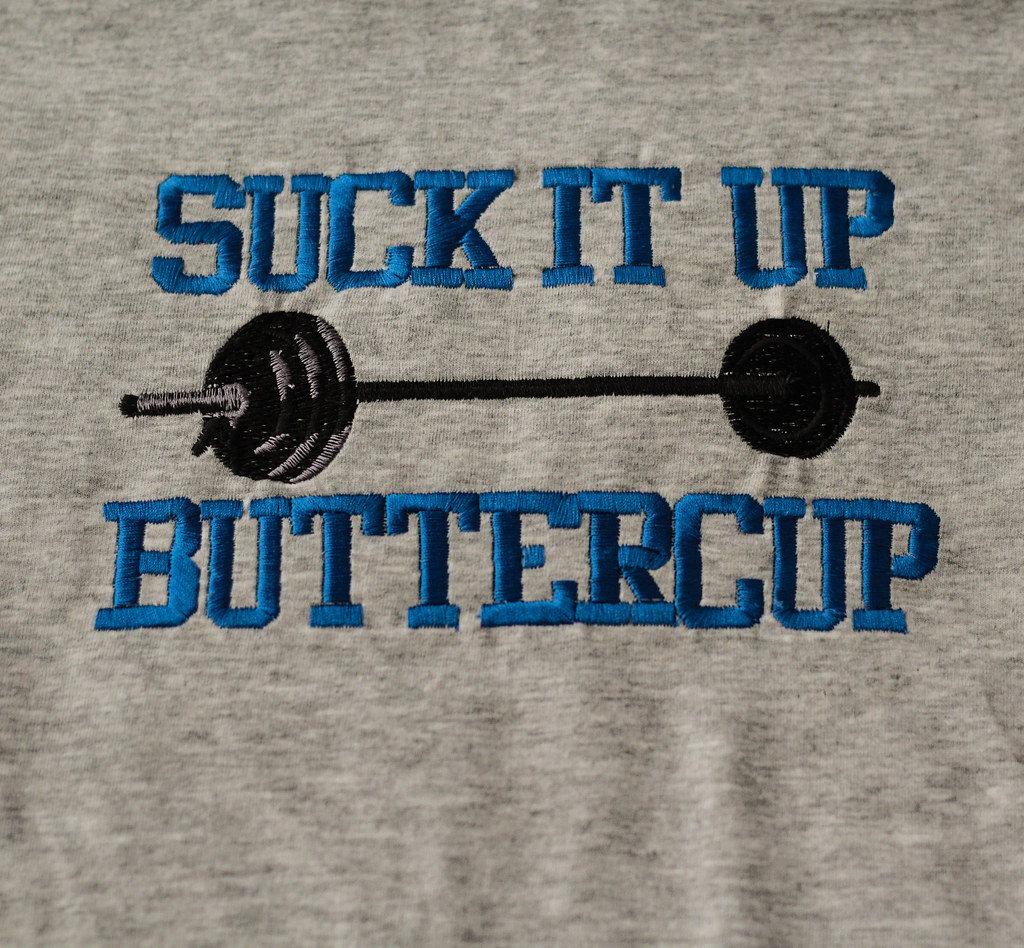
Here is the design itself. The barbell is from Embroidery Library (you can get it here), although I stitched it out with darker greys. The font is from Etsy, and I purchased it here. I struggled to get the proper stabilization for this design on this fabric! The knit is fairly lightweight and quite stretchy. I test stitched the design out quite a few times before I found a stabilization method that worked. I ended up with two layers of mid-weight cutaway stabilizer hooped with the fabric, then with a layer of water soluble stablilizer floated on top.
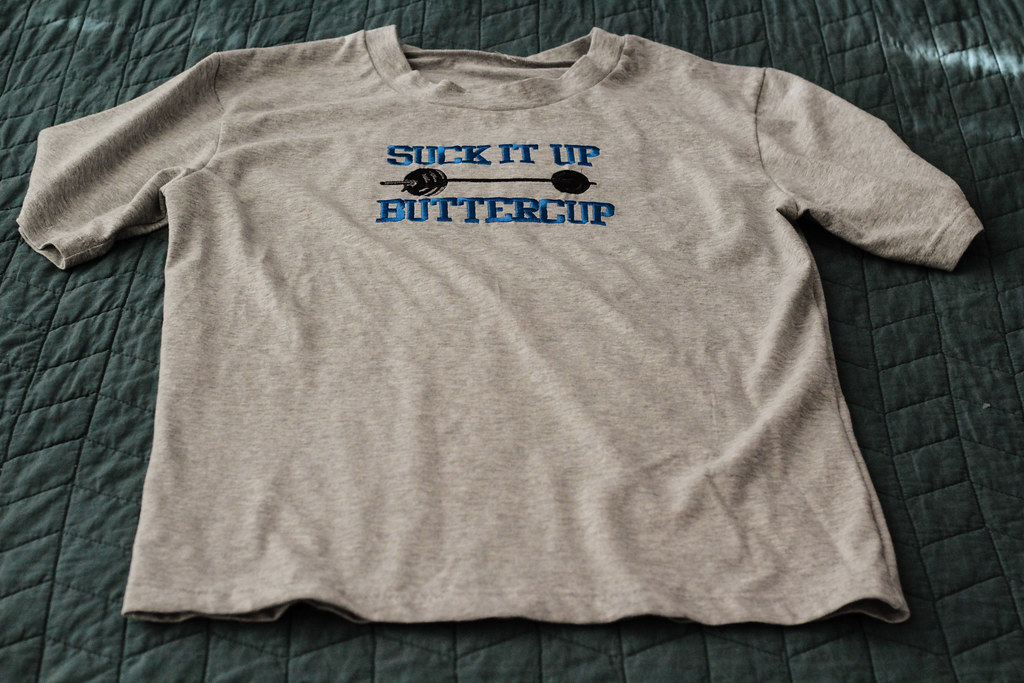
The shirt pattern is Kwik Sew 3299. It's been out of print a while. It's a fairly loose fit tee and I think I might go looking for another tee shirt pattern. *Jalie, Cough, Cough* This one has slightly odd proportions.
The neckband is the worst offender. It's weirdly wide. The pattern piece looked odd when I cut it out, so I stitched it with an extra 1/4 inch seam allowance, and it still looks too wide. The sleeves are also slightly short. That actually works for this, since Mitch will wear it to the gym, but for casual wear I think a slightly longer sleeve is more masculine.
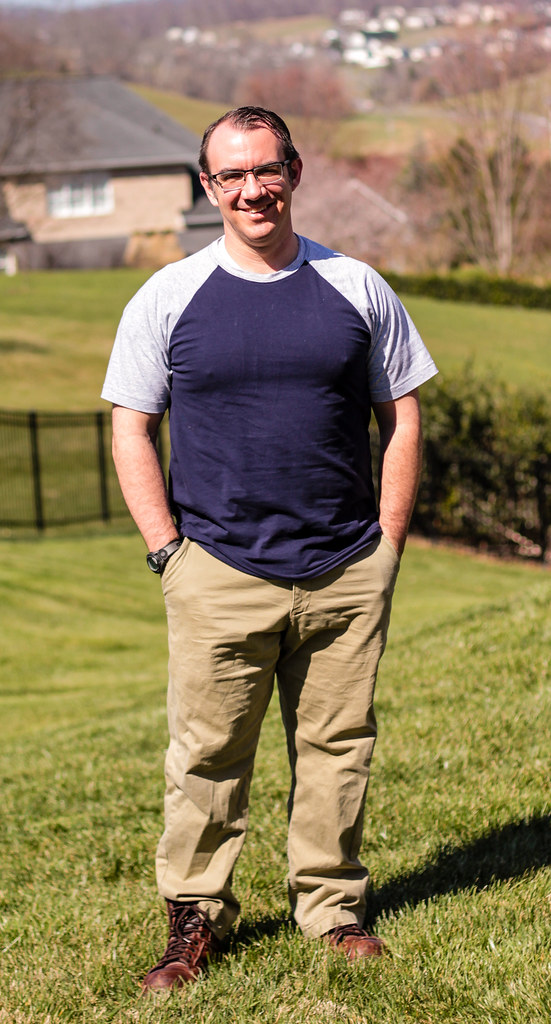
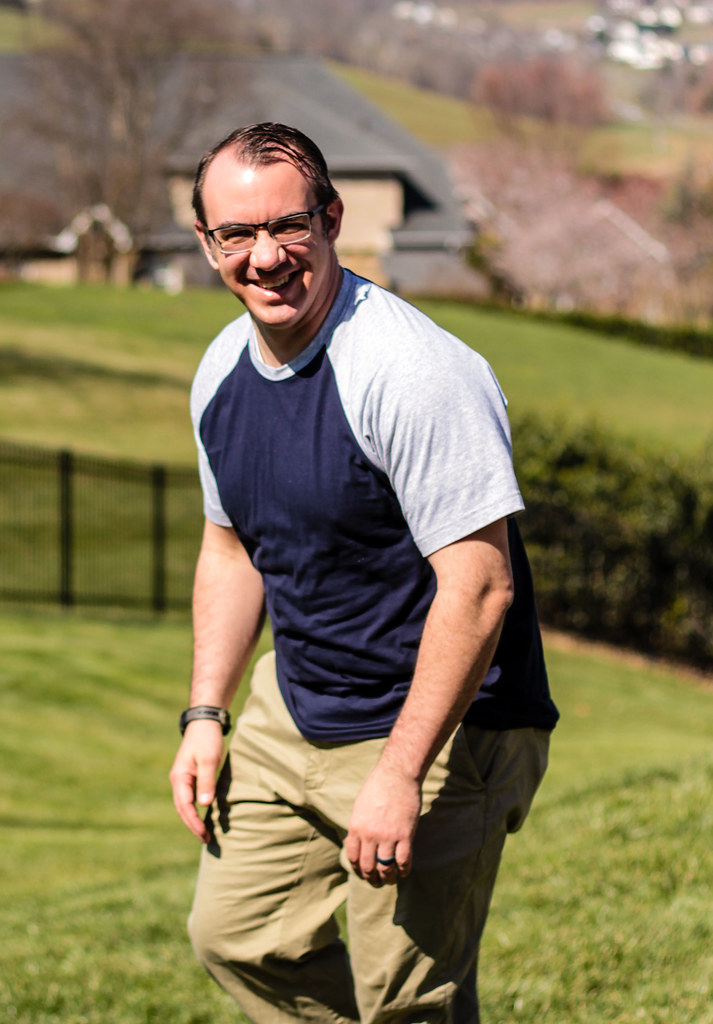
Mitch did consent to a photo so you could see how it fits. As I mentioned, this is a workout shirt, so it is intentionally snug. Mitch's broad shoulders make the sleeves look even more disproportionally short. Must order new men's tee pattern. Because there will be more manly embroidery!! I wonder if anyone has digitized something with guns...

Tuesday, September 3, 2013

The Burdastyle David Bow Tie

This project is actually from last month, but it took a while to get pictures, so you get to see it now. I actually have a ton of stuff to show you, since Mitch gave me a sewing day yesterday, but I still need to take lots of pictures. It'll come.

But today is about the tie. Mitch has been talking about switching from a long tie to a bow tie. The long dangly tie gets into everything. Anyway, I'd been kind of dragging my feet about making one. I was worried about interfacing and things like that. Finally, I decided to just bite the bullet and do it.
And he likes it! It isn't perfect by any means, but I did learn a lot making it.
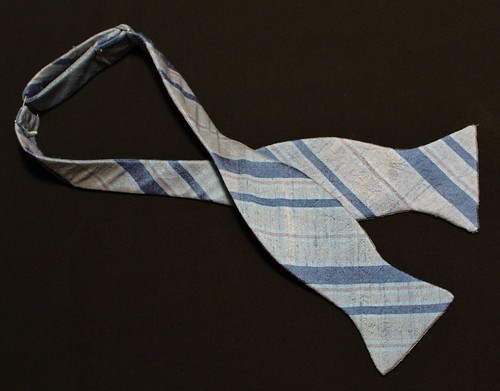
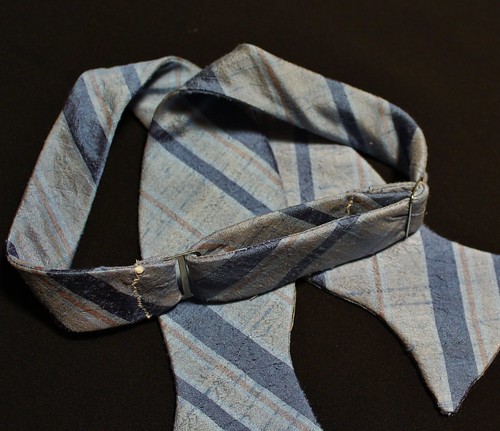
Here is how it looks untied. You can see that there are sliders in back to make it adjustable, which was the trickiest part of the construction. It was actually really easy to make, although turning the two halves of the tie was a little tricky. 
The fabric is a beautiful slubby silk, given to me by a good friend. For interfacing, I scavenged interfacing from old ties, but I actually think this was a bad idea. I was using regular ties, and the interfacing for the RTW bow ties I have since examined is much thinner and more flexible, so this one was nearly impossible to turn right side out and Mitch has difficulty getting it tied.
The thick interfacing is especially notable in the area of the sliders, which makes it really hard to adjust. In fact, it's so stiff, that it ends up being impossible getting it to the length that Mitch prefers. He can get it tied, but it is a little tighter than he finds comfortable.
For a first attempt, I think it's not too bad. Mitch really loves the fabric and I learned a few things that should make the next one great. Fortunately, I have a bit more of this silk for version 2.0.

Sunday, April 21, 2013

Burda magazine 10/2005-132 man pants

I feel like there a certain "big" sewing projects that are sort of sewing milestones. For me, successfully fitting and making pants for Mitch is one of those big milestone projects.
AND I DID IT!! Ahem. Sorry for the screaming, but I am so excited to have finished this project well. They are not perfect, but Mitch likes them and I intended them to be a wearable muslin of sorts anyway, so I wasn't going for perfect.
I already talked about the fitting journey we went on in this post, so I'm not going to go there. I do want to tell you about this pattern though. It is from the 10/2005 issue of Burda magazine, so naturally it has some really interesting details. I chose it because it features a faced waist rather than a waistband. Mitch's favorite RTW pants have this feature, so I thought we'd start with something that we knew worked.
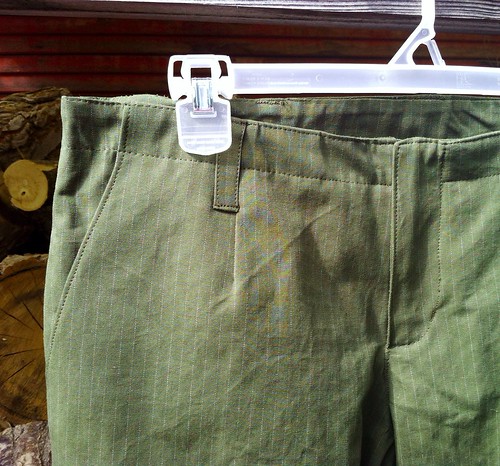
Here is the waistline up close. I did topstitch it to give a sort of waistband appearance, but you can see that the topstitching stops at the fly. Oh my goodness, that fly construction was wacky, and Burda was no help at all.
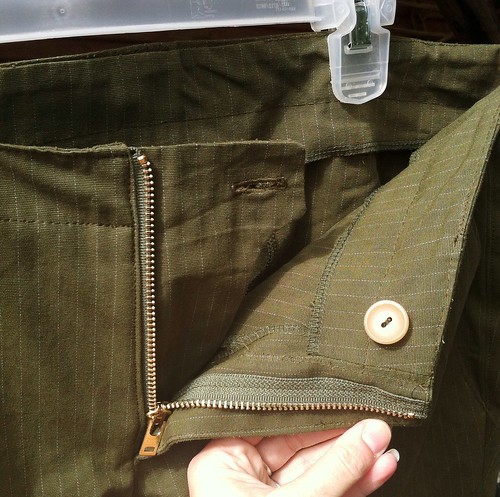
Here is how the fly looks on the inside. I truly have no idea how it all came together. The facing had to be attached to the fly and the waistline, but without covering the zip. I ended up just ripping and rearranging until it worked. Hopefully I can replicate it on the next pair... Anyway, after all the pain, I really like how clean this looks. The shaped underlap looks seriously professional and the finish is so neat. But yeah, man pants are hard.
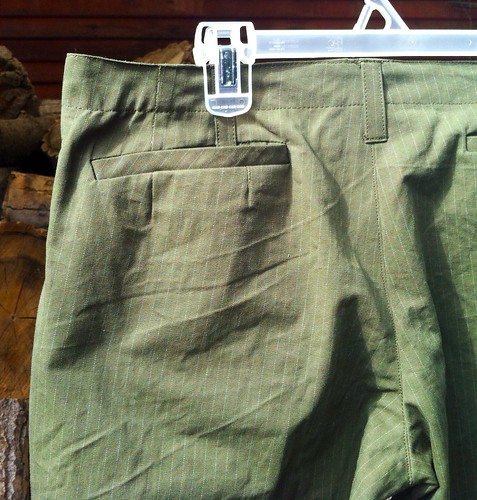
I wish I could have done the fly first, because after all that, these back welt pockets were laughably easy. I cut the welts on the bias to avoid having to match the pinstripes because it looked snazzy. I always get nervous slashing through darts and these pants have two per pocket, but all was well.
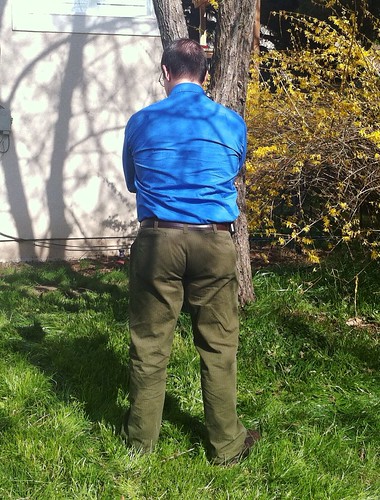
You can see here how much fabric can affect fit. These pants are made from a heavy cotton canvas from FabricMart, and my muslins were all light cotton sheets. In the final product, we could use just a touch more room back there, and I think that all has to do with how relatively heavy and rigid this fabric is. Even without stretch, fabric makes a difference.
So while they have some imperfections that I'll tweak for the next pair, they are significantly better than the best RTW has to offer, and we are both very pleased with them. Yay for man pants!!

Todays tip:
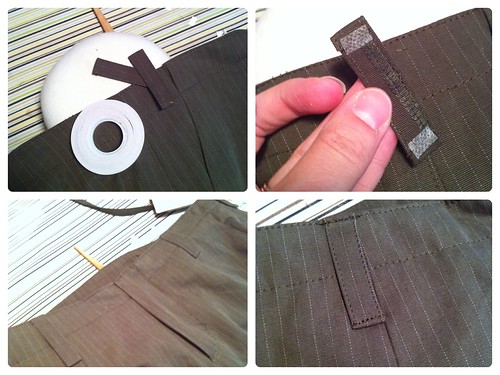
While sewing this stiff, heavy canvas it was really hard to pin anything, but particularly when attaching the belt loops, the pins wouldn't even penetrate all those layers (and I used heavy steel corsage pins!).
Enter one of my favorite notions, Wonder Tape! Instead of pinning, I use Wonder Tape to stick on anything I need to sew down that I don't want slipping around. It's double sided, so you cut it to the length you need, stick on the sticky side and peel the backing away to reveal the second sticky side. You can see that in the top right pic. Then position your fabric, and sew! It is perfect for belt loops, pockets, zippers - pretty much anything you want to stay put as you sew it. I've even used it for small appliques. It won't gum up your machine and it washes away, so it doesn't permanently affect the drape or appearance of your fabric. If it doesn't stick well, a quick shot of steam from your iron will fuse it more securely.

Thursday, April 11, 2013

Pants, pants, pants, pants...Pants!

I mentioned that one of my major projects this month was going to be pants for the hubby. He has a very hard time finding well fitting pants in RTW - y'all know the story - which means it's no treat for me to fit him either. Still, the man needs pants that fit, so I toiled on. Our first wearable muslin is in process, but I noticed something really interesting as I was going through the muslin process, and I wanted to share it with you.
And here it is. My hubby and I have exactly the opposite fitting challenges when it comes to making pants. Can you see how different our shapes are from the side? His waist sits very low, while mine is quite high. The curve of his buttocks starts almost immediately after his waist, while I have a "ski slope" (Thank you Heather, for that term) down to my actual butt. The shape of his butt is much more round, while mine is flat. After having this epiphany, I realized that this was why I was having such trouble fitting his pants. I was trying to make them work like mine, and they don't.
So, for my low-butted, long & high waist, the alterations I make are these. This is Jalie 2908. The orange line is the original pattern, and the red is mine. You can see I raised the waistline - an inch at CB, tapering down to 3/4 inch at the side seam. The front is raised 3/4 inch all around as well. For the crotch, I have to scoop out the curve to allow for my lower backside, but since my butt is flat, I don't need any extra space down there really, so I leave the hip line and the crotch hook alone.
Here is Mitch's pant pattern. This is BWOF 10/2005-132. Again, the original pattern (without seam allowances) is in orange. The red line is the altered pattern. You can see that I shortened the rise quite a bit. I also shortened the darts significantly, although that isn't as obvious here. Joost reminded me that darts should point to the area of maximal fullness, which on Mitch is quite close to his waist. While Mitch's rise is fairly short, she still has a fairly long total crotch length, since he is quite full back there. I added length back to the crotch hook, giving the length he needed to go over his buttocks, but without increasing the rise, which would have just put us back to square one. Since his fullness is much higher than mine, instead of scooping out the crotch curve, I actually had to flatten it a bit. I also added width to the hip area, to go around the circumferential length, which balanced out the additions elsewhere.
Here is the final muslin, with the changes as above. I could probably tighten up the fit in the thigh area, but Mitch likes his pants on the more relaxed fit side, so I'm leaving it for this first version, which I'm making in a pretty stiff cotton canvas. Hopefully, I can show you the fruit of my labors soon.

Thursday, August 23, 2012

Vogue 8759, part deux

After my last attempt at Vogue 8759, I wasn't sure if I wanted to carry on with the pattern in the next size up, or try something different. Since the next size up would have required a pattern purchase, I decided to just try adding a bit more room, since Mitch really liked the way that the neckline and sleeves fit.
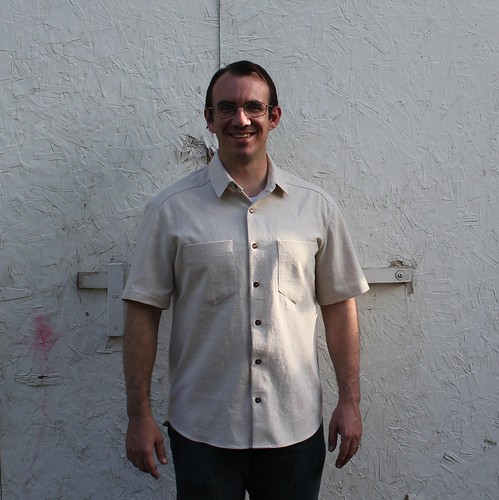
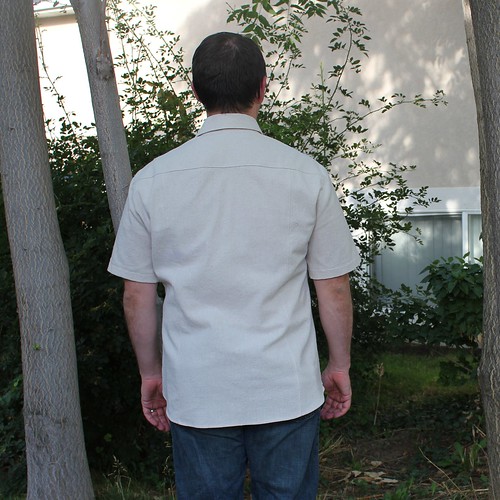
And it was a win!! You know he likes it if he lets me take pictures of him in it. The fabric is osnaburg, which is a somewhat coarse fabric woven from cotton, linen or flax. In this case it is cotton. I really enjoyed sewing it, as it pressed well and has a nice give which makes it easy to ease. It did have a tendency to fray, so seam finishing is essential.  I serged mine, even within the yoke, since I didn't want any fraying in there.
Here's a shot where you can actually see how it fits. The last attempt had a bit of a sausage casing effect, which was not particularly flattering. It was also a bit snug in the shoulder and restricted movement there. I added 1/2 inch through the shoulder, which widened the shoulder line, giving his more ease for movement there, as well as a total of 2 inches in circumference. It wasn't a big change but it was just enough.
I also moved the yoke seam forward on the shoulder. This is just a personal preference of mine, but it turns out to be practical as well. Mitch tells me that a seam right on the shoulder digs in when he wears his backpack. This way, with the lined yoke, he has a bit of extra padding there, as well as no unruly seam.
Here is the back. There are a few wrinkles back there, but Mitch says it is comfortable, so I'm not going to stress over them. I'm happy to have worked out the fit on this! Now I can whip out some nice shirts for my honey.

Thursday, August 16, 2012

Vogue 8759

Poor Mitch kind of gets the shaft on his birthday every year. His special day is 4 days after Myra, who pretty much eclipses everything, but this year he had the wedding to contend with as well. On the plus side, his parents were in town for the wedding, so he got to celebrate with them.
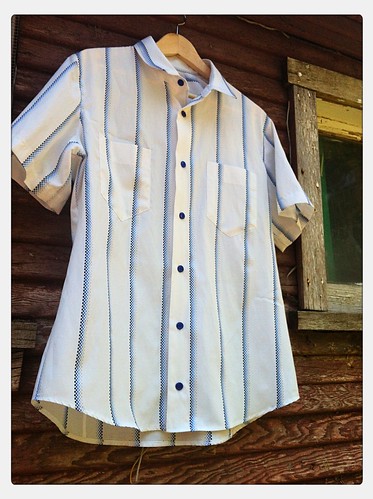
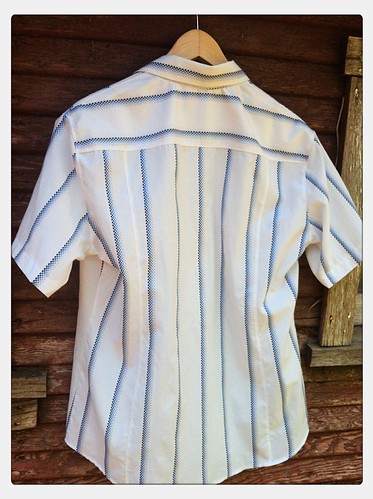
I finally got around to making him a shirt. The pattern is Vogue 8759, and the fabric is a poly-cotton shirting from fabric.com. I used Pam's Shirt Crisp interfacing in the collar and Pro-Weft in the button bands. I really like this combo and it has become my standard for buttoned shirts.
Mitch likes pockets, so I added an extra one. I also totally goofed up the collar. After carefully trimming the undercollar to ensure a nice turn of cloth with the seam carefully placed to the underside, I managed to attach the collar upside down, so the seam is on top. D'oh!
What I really like about this pattern is the shaping. Mitch has a very athletic figure, with broad shoulders and a small waist, so the typical menswear shirt with a back pleat just billows out around his waist. This shirt has princess-style seaming in back to allow for a closer fit at the waist, which is perfect for Mitch.

He really does need new clothes, but getting him to sit still long enough for measurements proved to be impossible, so I just took a guess and sewed. And I guessed wrong. It is just a we bit too snug - wearable, but  not comfortable. On the plus side, Mitch really likes the shaping, so I'll make it again in the next size up and we should have a winner.