When I was visiting my parents in North Carolina over Christmas, all the girls went shopping in Asheville. For fabric, of course.
I brought home several lovely pieces, and this is the first to make it to the sewing table. Mostly because I've been kvetching over which pattern to use.
I hate it when I decide fabric is "too special" to use. Then it just gets wasted. I was determined this wasn't going to get wasted.
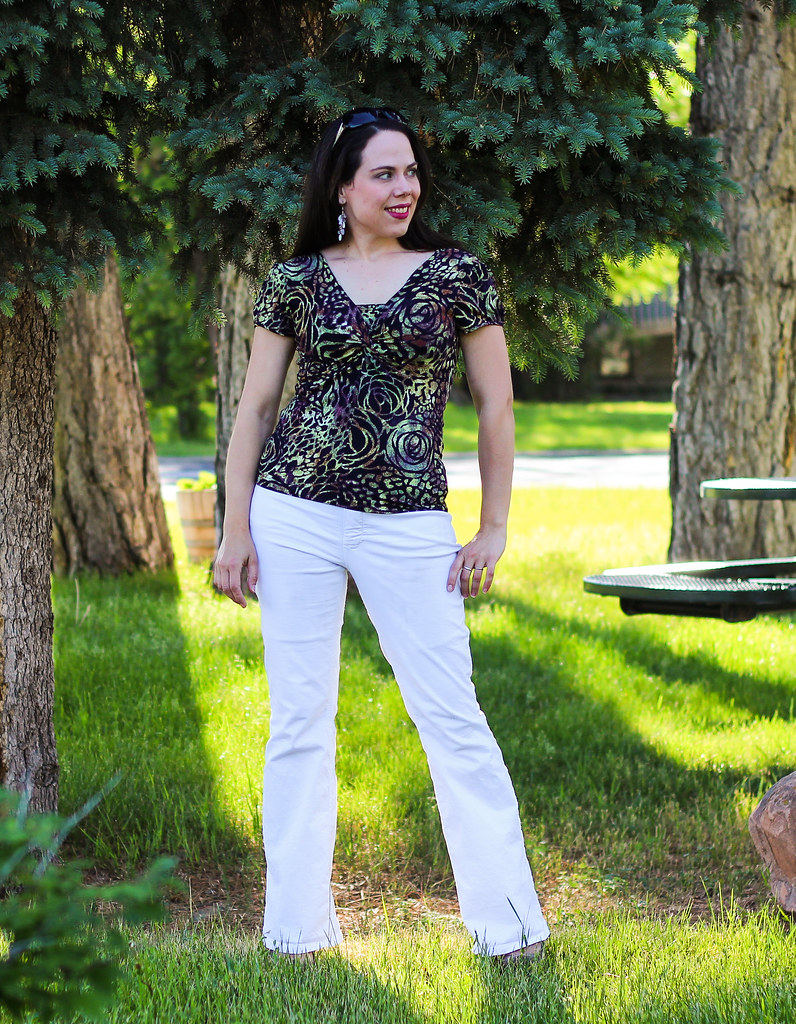
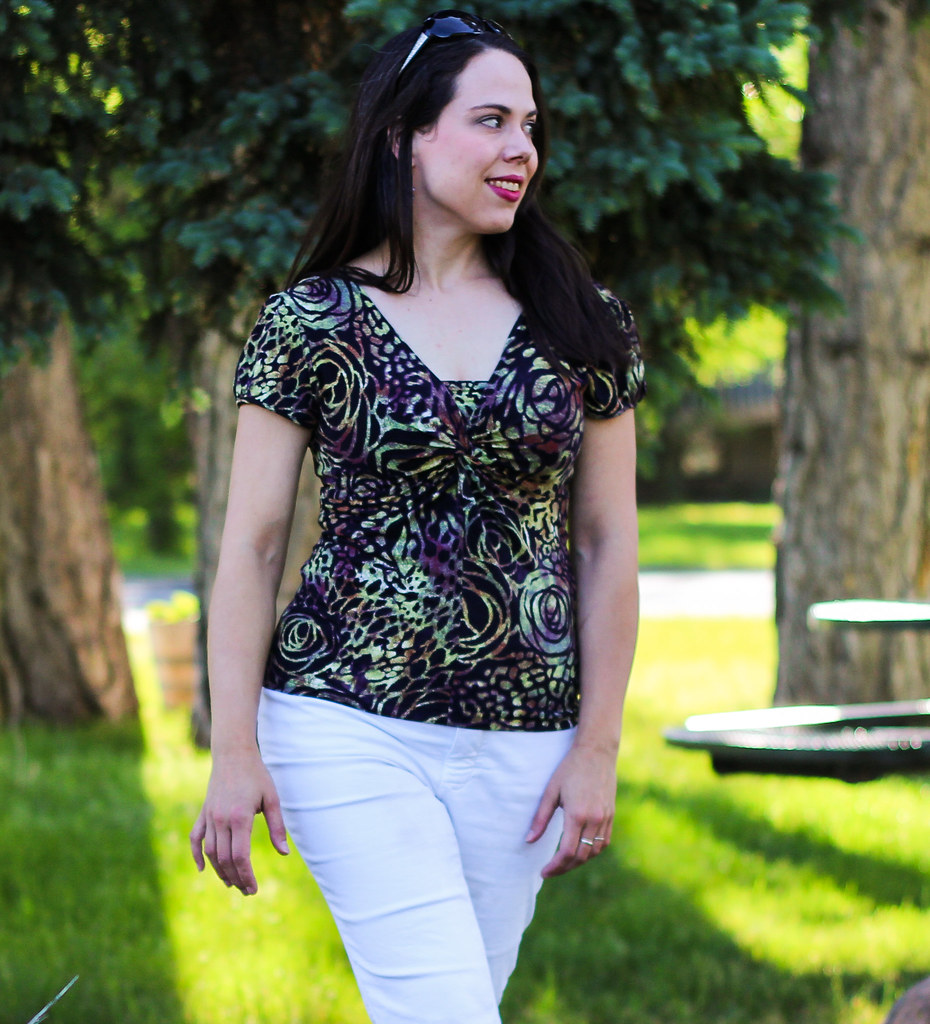
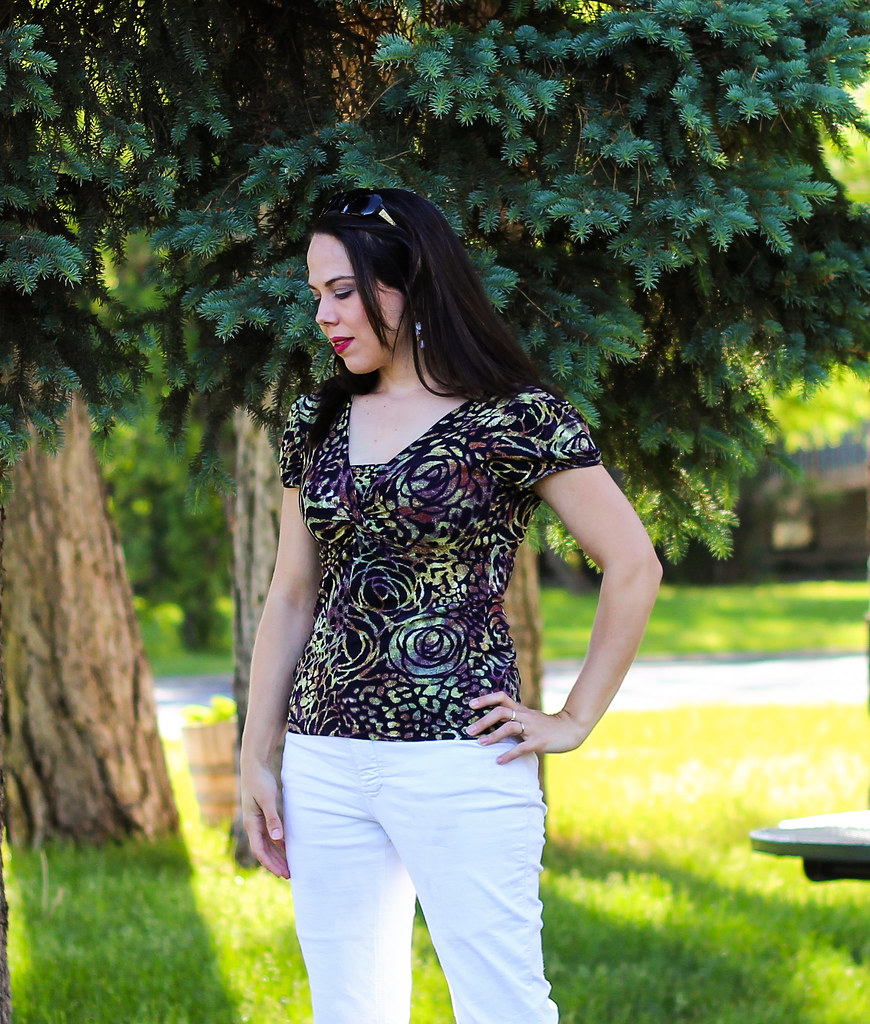
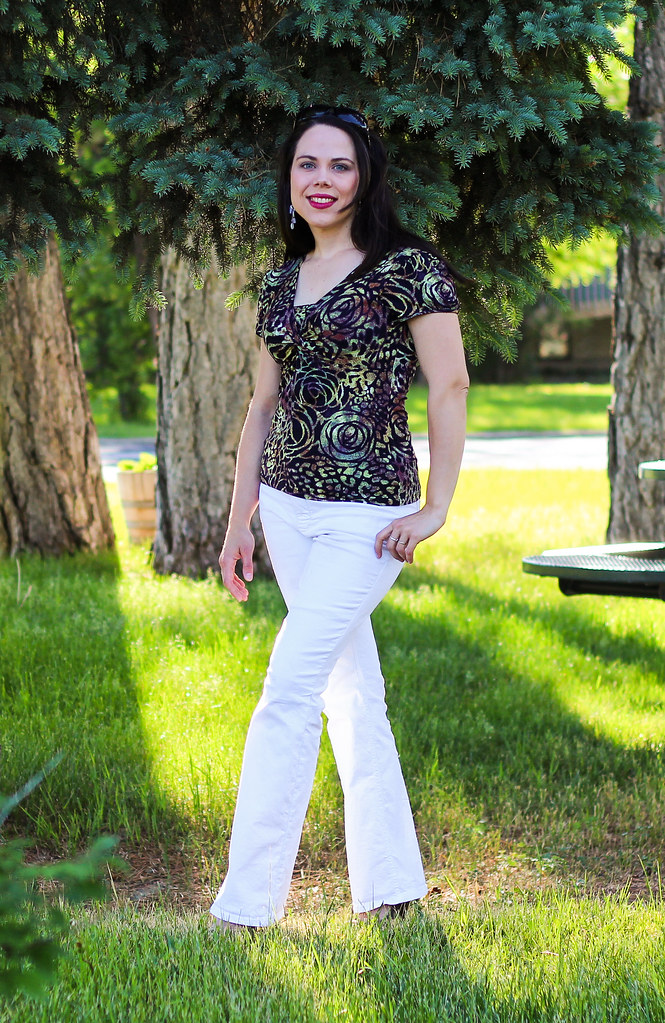
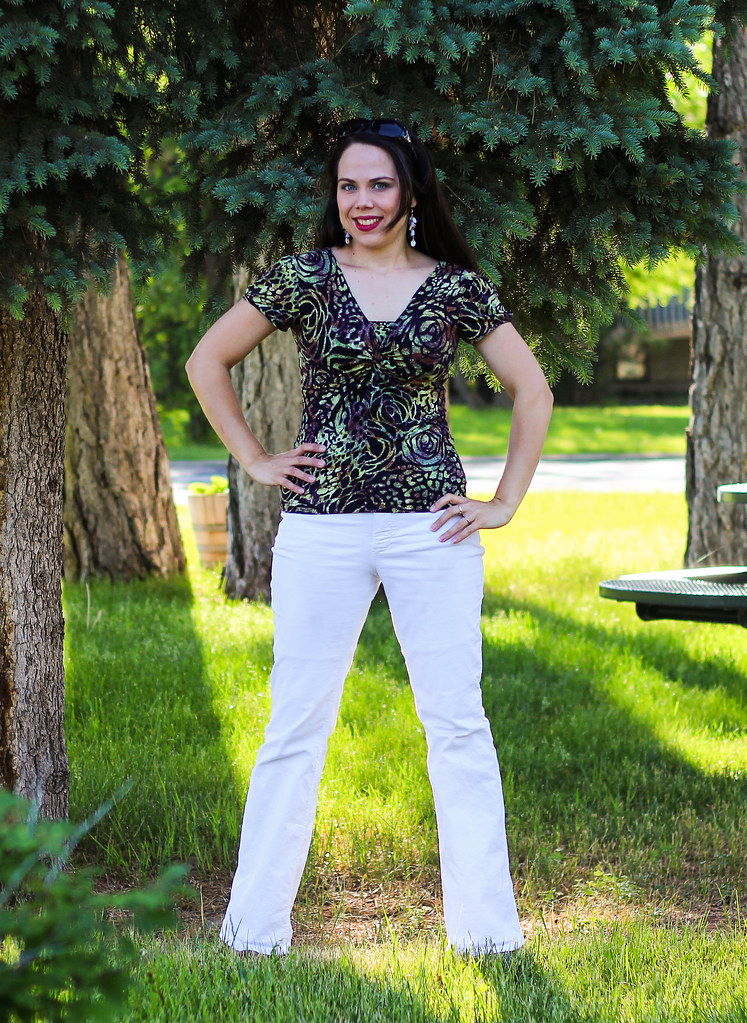
The pattern I finally decided on is Jalie 2788. I've used it once before here, and I love that top. This jersey is so much better quality than the one I used the last time, there was no way this wasn't going to be a big fat win.
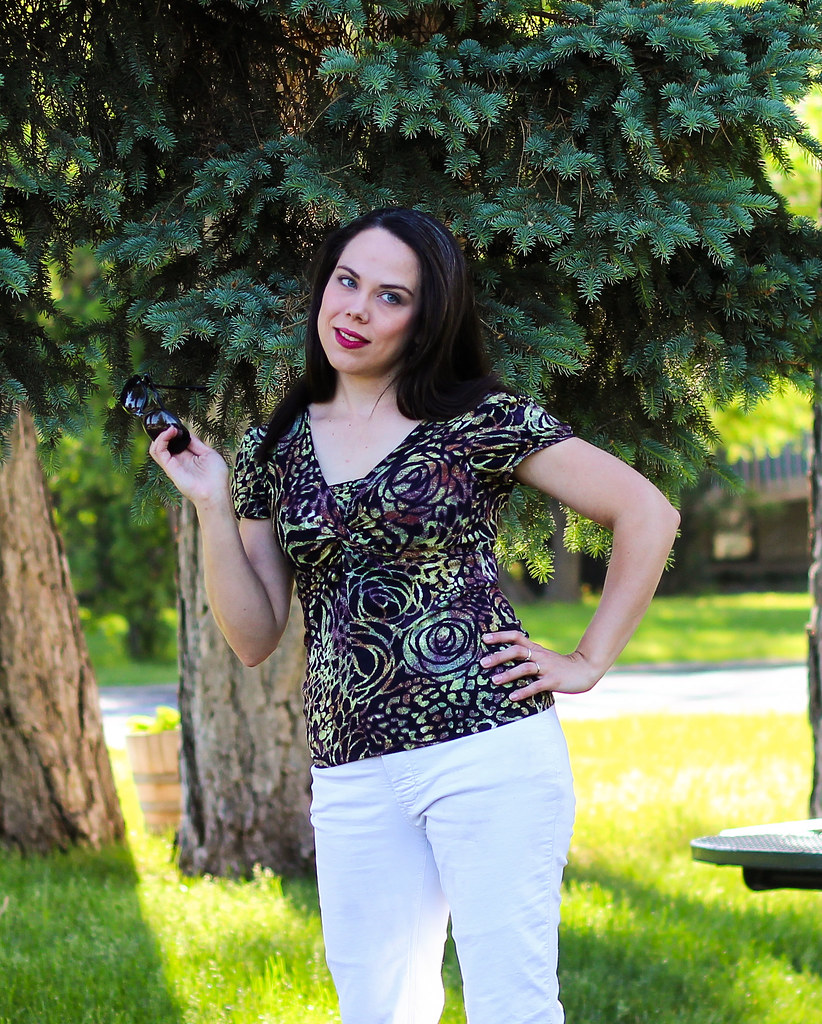
This pattern is so pretty and the twist makes it super fun to sew. Even though I've made it once before, I still had to follow the directions for the twist. It makes no sense until you do it, and then it is like magic.
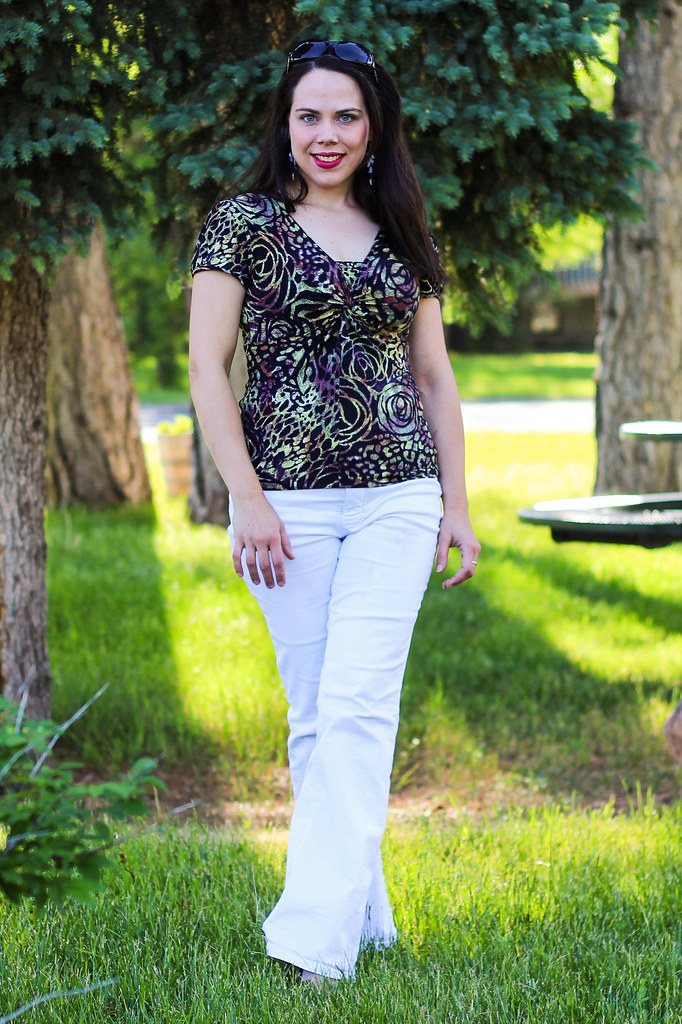
I really love the back of this top. That low scoop is so sexy, without being overt. It's the perfect depth for underwear coverage too. I can wear my regular old bra with this and nothing peeks out. Hey, can you see the center back seam there? Me, either!! That pattern matching was total serendipity. I cut this out with a blithe disregard for pattern placement.
Said disregard did result in a boob rose, but given the position of the rose and the busy-ness of the pattern, I think it still works. It's not going to stop me from wearing this. I love it.
I decided to pair it with my white Jalie jeans, so that the top could be the star. With this crazy rose/animal/stained glass print, I think it would overwhelm pretty much anything else.
This fabric really is divine though. I found it at House of Fabrics in Asheville. It is a viscose jersey, so it is divinely soft and drapey. Viscose jerseys can be thin in my experience, but this one is beefy and skims lightly, instead of clinging.
I'm so thrilled I got this fabric out of my stash and into my wardrobe. It's going to give me much more joy there. What beauties are you holding on to because they're "too good" to sew??
Friday, May 30, 2014
Wednesday, May 28, 2014
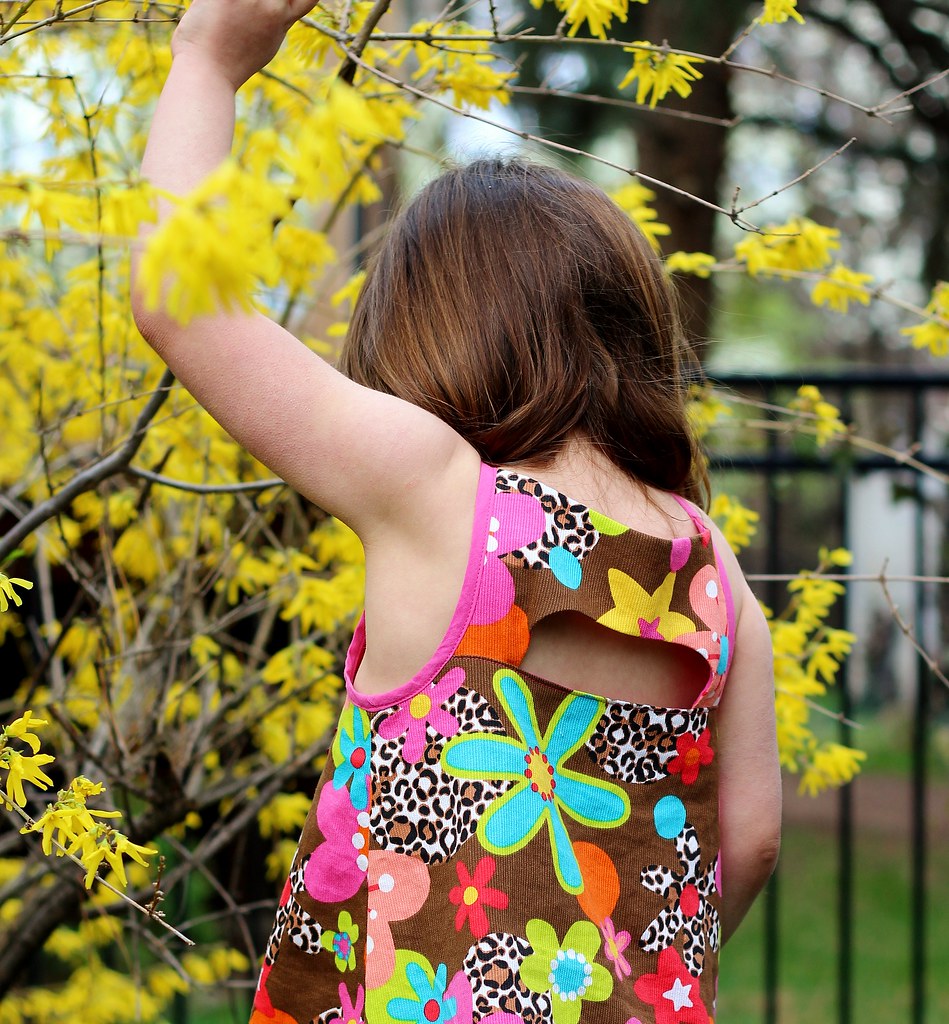
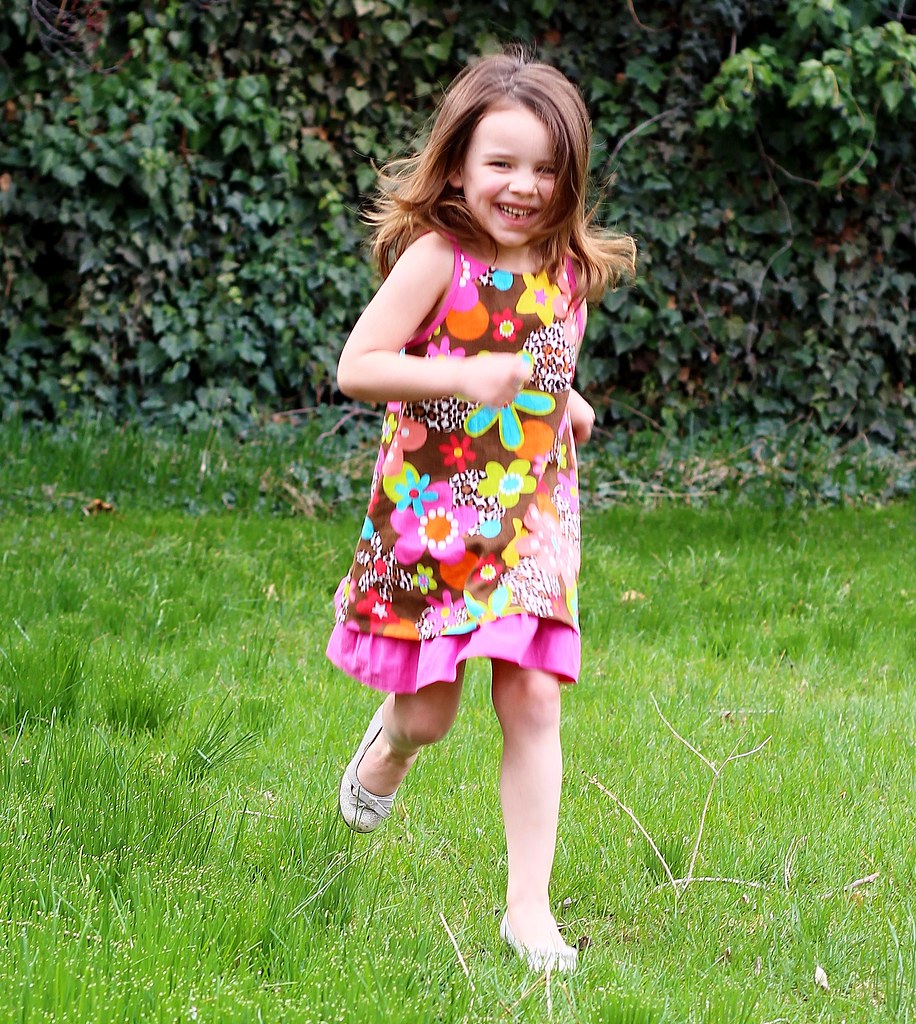
LouBee Clothing Shandiin DRESS!!
After making Myra's Shandiin tunic, I knew this was going to be my summer go-to pattern.
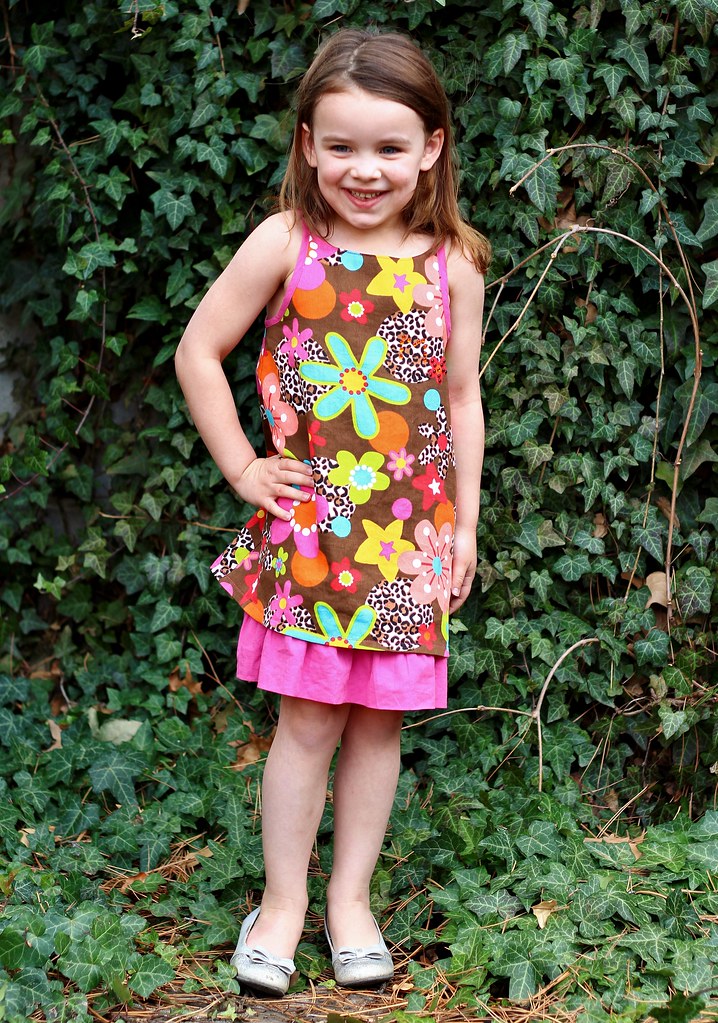
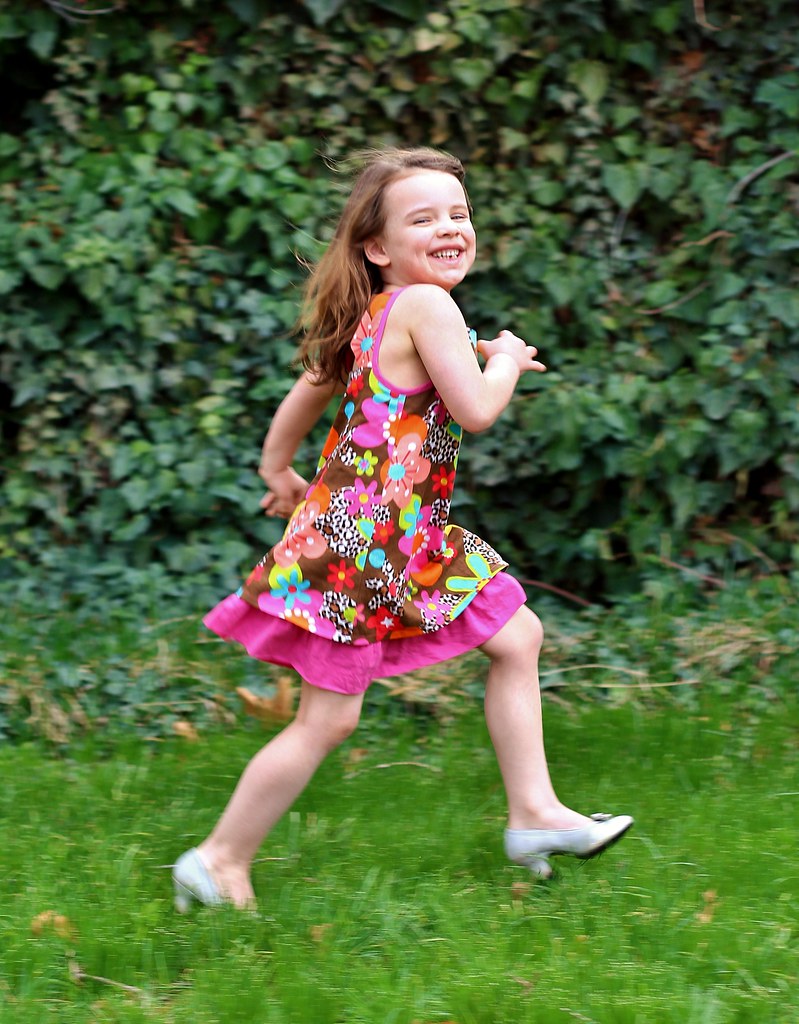
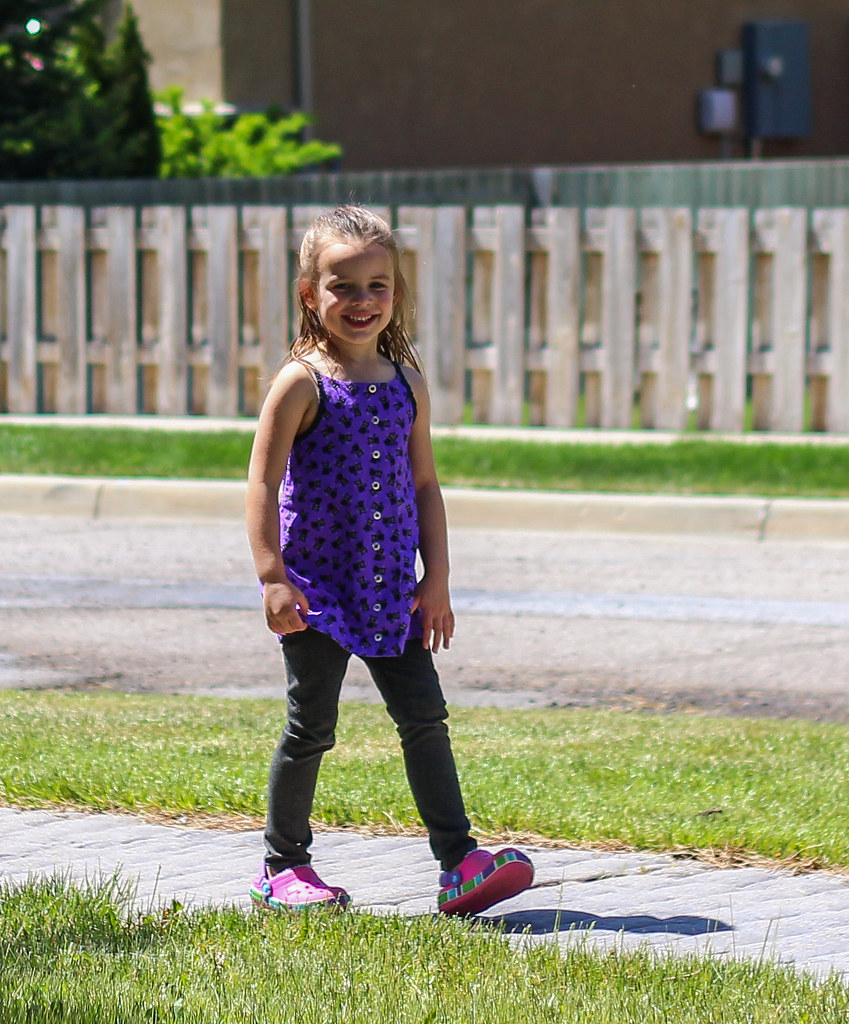
And while she has gotten more flexible about wearing pants and shorts lately, Myra is at heart a dress girl. Especially a dress with pink and ruffles. Nothing better.
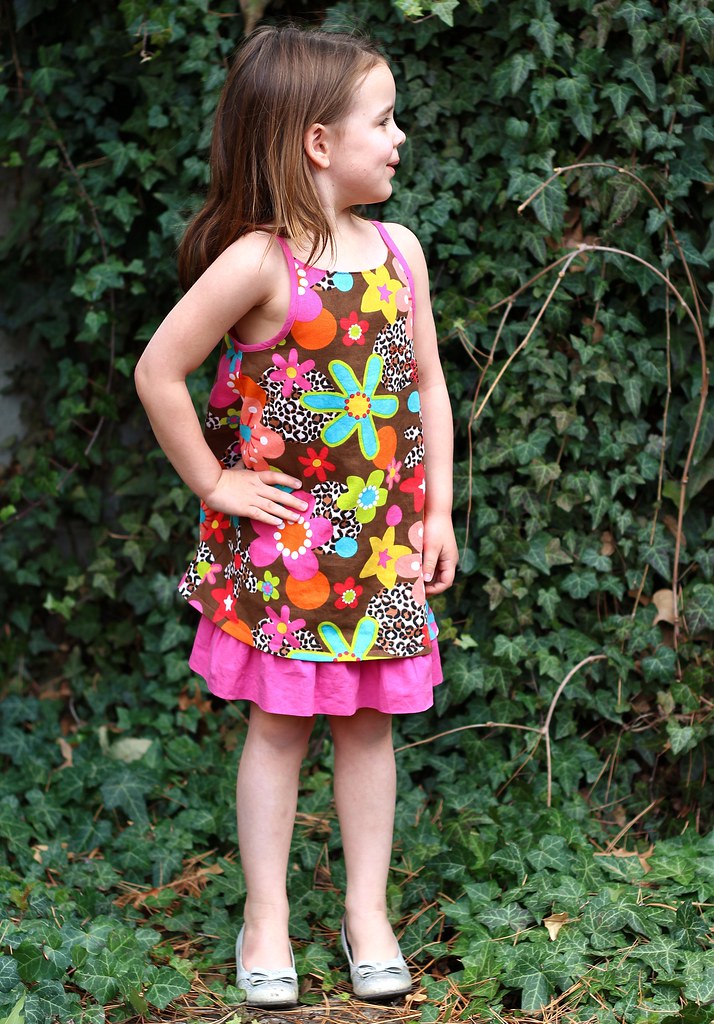
And so, Shandiin became a dress!! With ruffles.
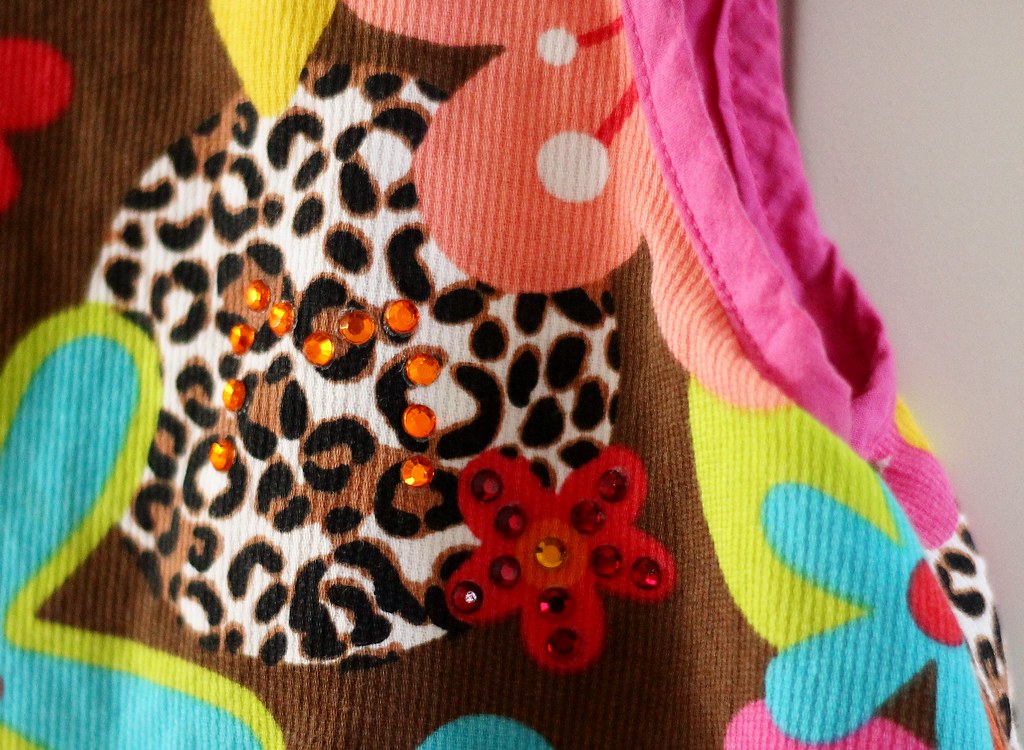
And bling. Because what is a ruffly dress with out sparkles.
It's even reversible! Fully lining the dress was super easy. All I did was use the body pattern pieces to finish the upper front and lower back sections, instead of bias strips. Since the armholes are finished with the bias straps, there's no turning it right side out puzzle. Easy peasy.
To make the tunic a dress, I literally just added the length of the ruffle to the tunic length. Myra is quite petite, so take that into account if you make your Shandiin into a dress.
I made my ruffle about 3 inches wide (finished). It is a double layer with the fold as the hem edge, so that it would be easily reversible. It's stitched to the lining for that double layer effect. You could just as easily stitch it on under the hem if you didn't want to line your Shandiin.
The fabrics I used were a lightweight corded cotton print from Joann for the main fabric. The lining is a cotton voile from FabricMart.
Myra loves each one of her Shandiins. The tops, the tunic and the dress all get regular wear. I love sewing it. While it is quick and easy, it's also fun and interesting. Have you sewn up a Shandiin yet?
Thursday, May 22, 2014
LouBee Clothing Shandiin: Tunic style
Last post, I showed you Myra's favorite Shandiin, but here was the one that started it all!
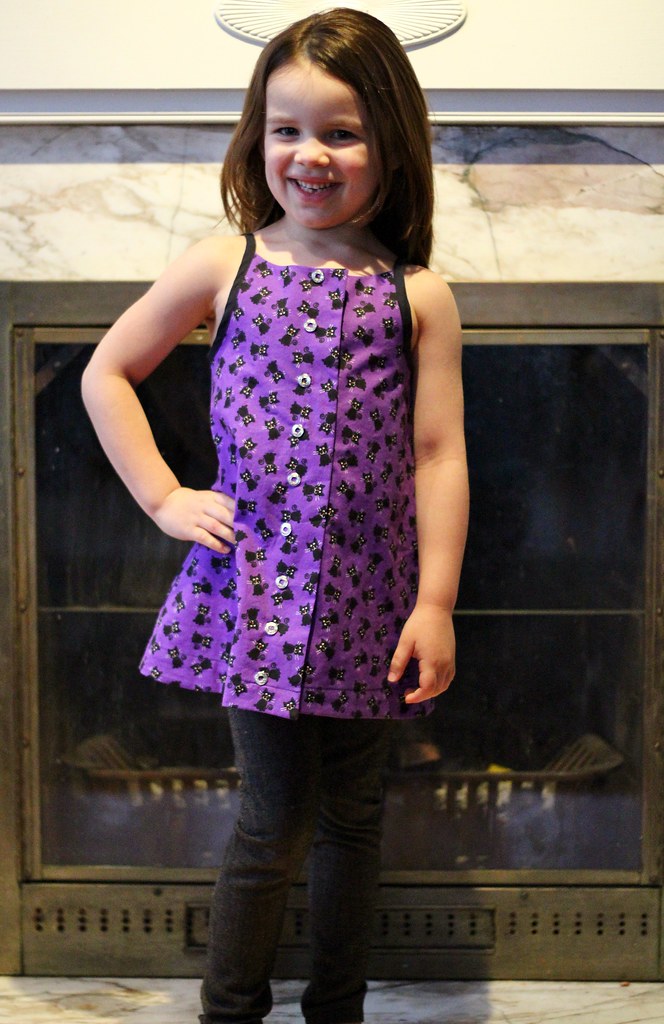
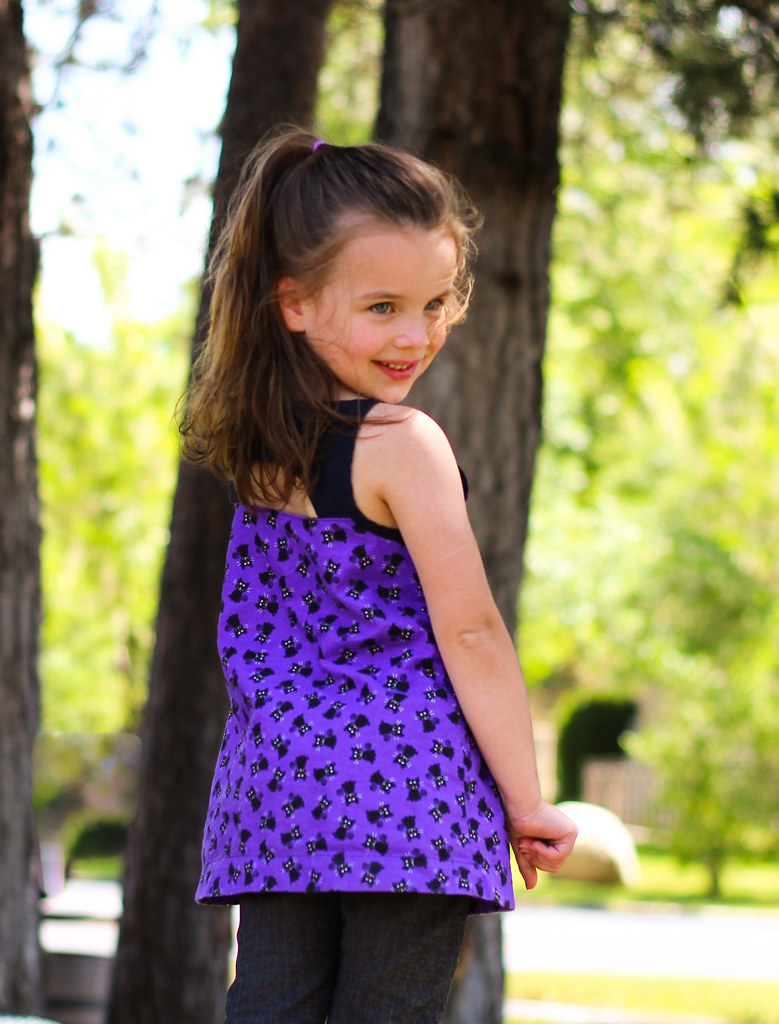
This is the tunic length with button (or in this case, snap) opening in front. The cat print is a quilting cotton from Joann, and the black is voile from FabricMart. Boy did that voile make nice bias straps! So flexible.
That keyhole opening in back is just stunning. Even on this early version, the fit in back is lovely.
In the testing process, the placket was narrowed and the fit through the armholes refined, but you can see that even the first version is very wearable. Myra loves it.
We both really like the tunic length. It hits just past her backside, and it looks perfect with leggings and slim pants. She likes to wear this with her Hosh Pants, of course.
It's one of her favorite school outfits - Shandiin and Hosh. She really likes how comfortable and cute this combo is.
Wait, you don't have this pattern yet?? Myra wants to know what you're waiting for! Go get it now!!
Tuesday, May 20, 2014
The LouBeeClothing Shandiin is HERE!!!
Y'all! I have been just biting my tongue to keep this adorable pattern under wraps, but today I get to tell the world! The Shandiin is here!! You can also pick it up here.
When Sarah asked me if I would be able to test this one, I had to think about it for approximately a millisecond. And that was just to decide how many I was going to make.
For the record, there have been 4. So far. There will be more. Myra loves these tops, and so do I.
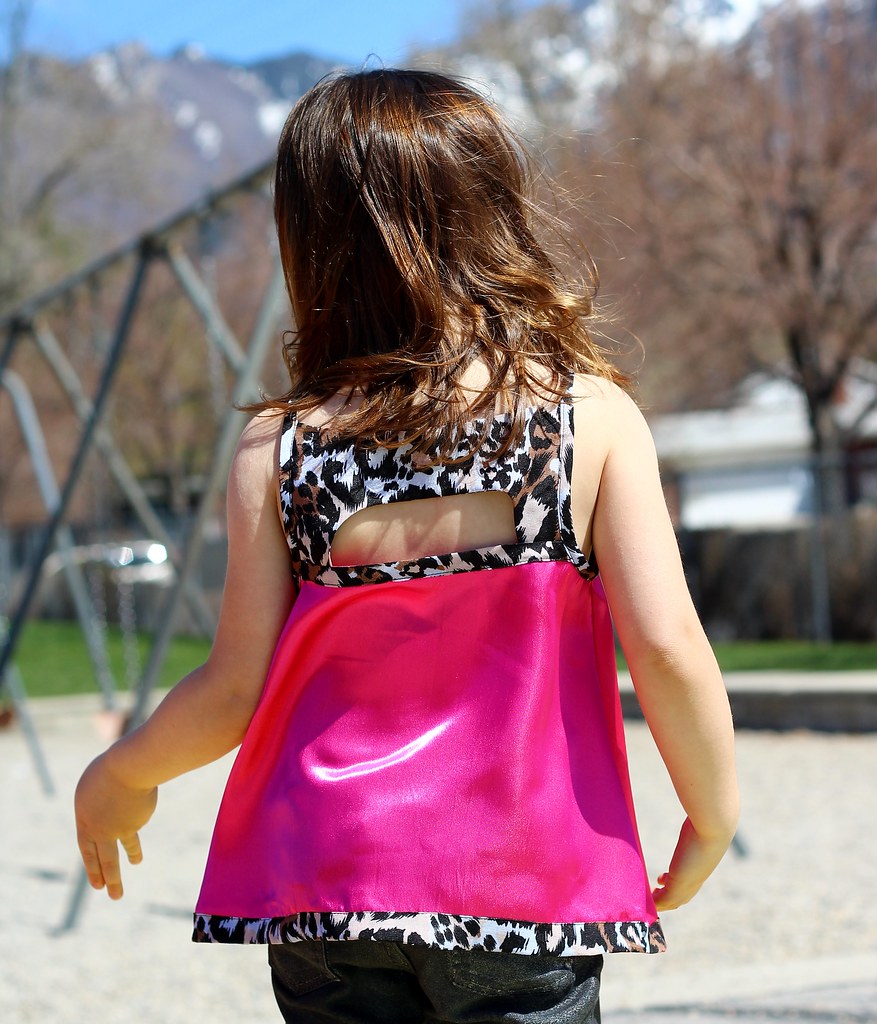
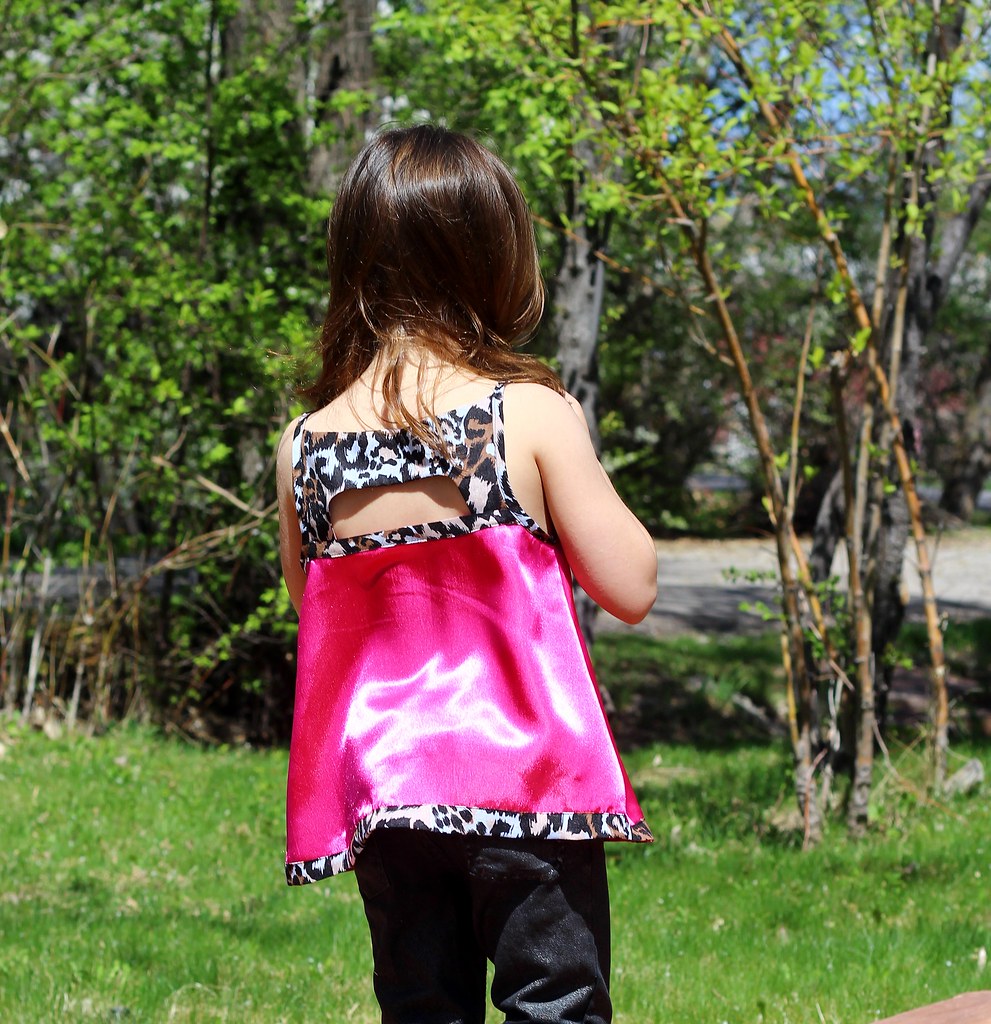
So, the details. Shandiin is a tank style top or tunic (I even made one into a dress. More on that soon.) with a beautiful keyhole back. The pattern can have a button or snap closure in front, or just pull on like this one.
The back. I know, right?!!? I love it so much. This pattern is perfect for mixing fabrics - prints, solids, knits wovens - the sky is the limit!
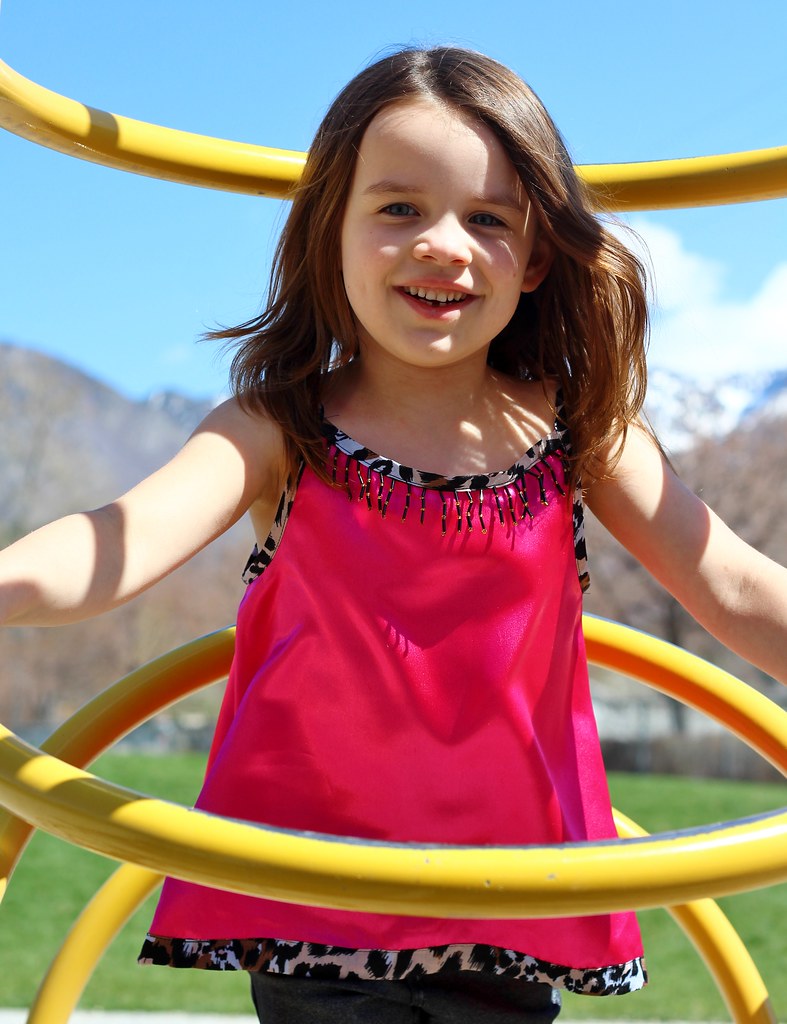
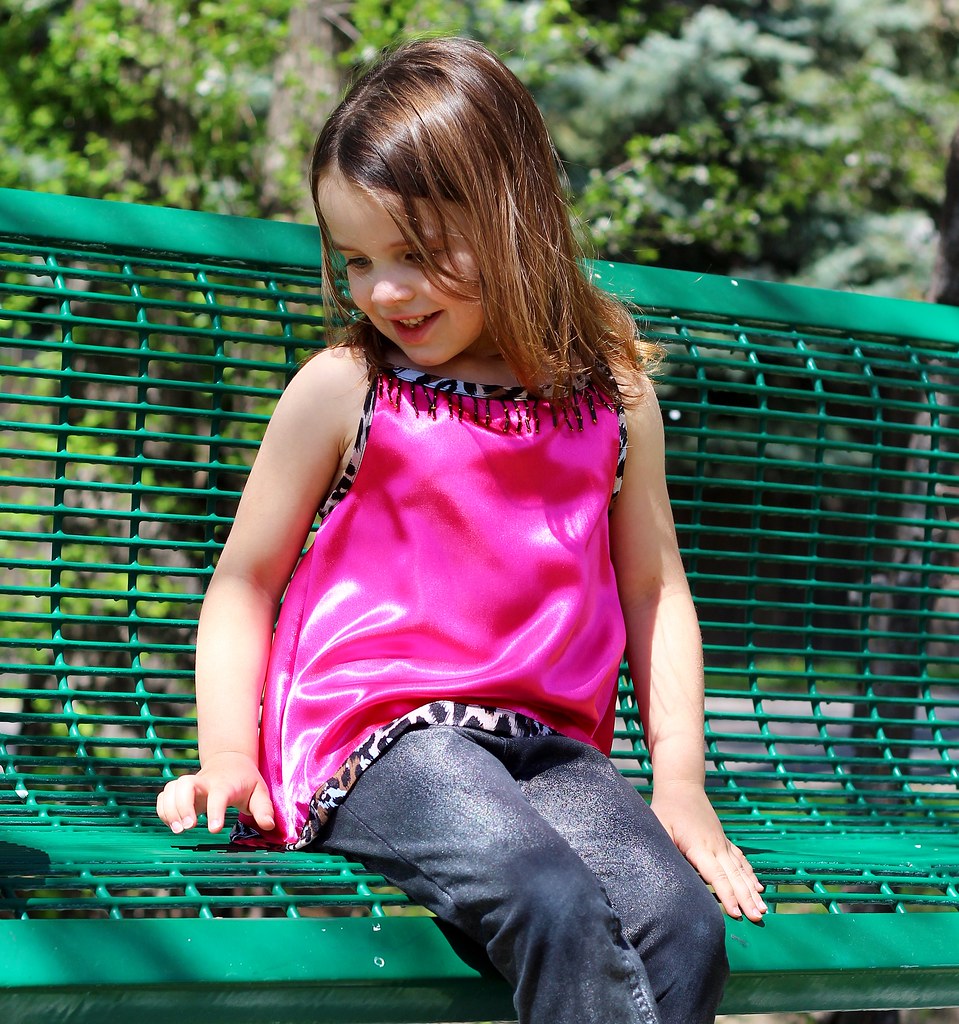
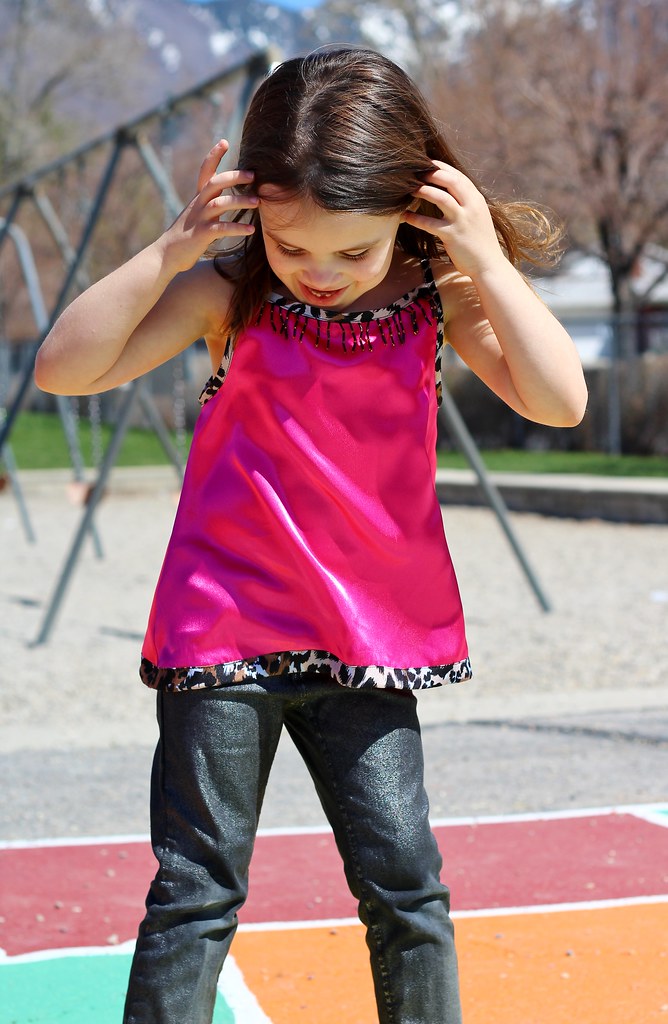
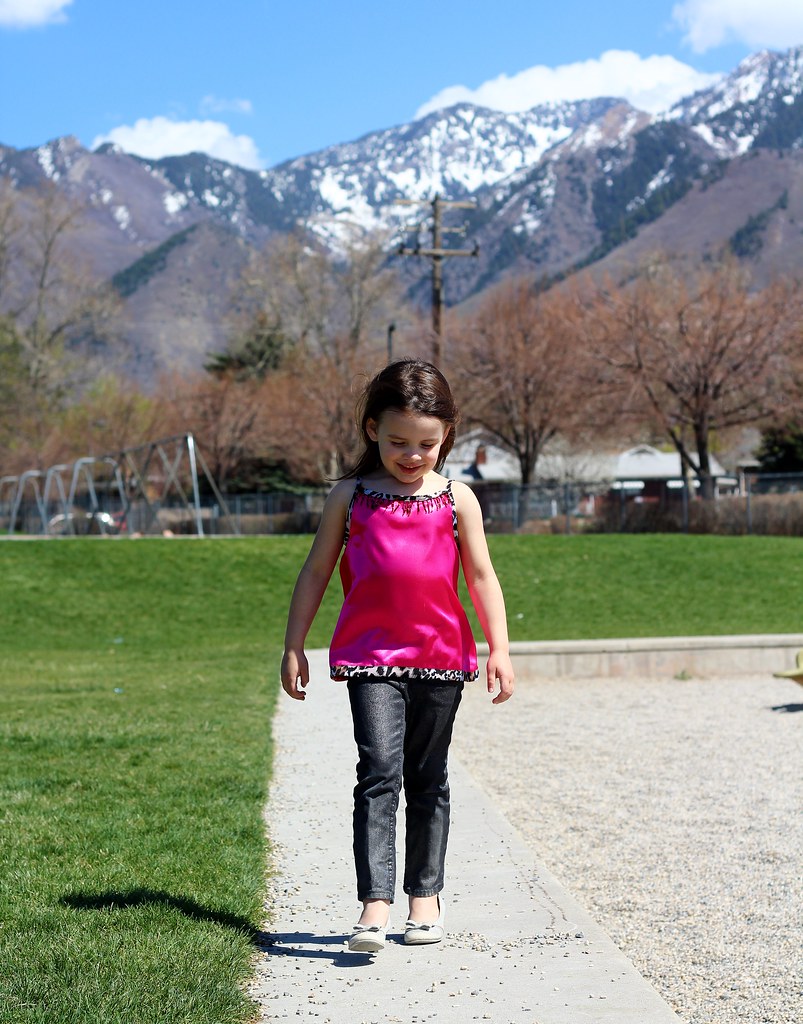
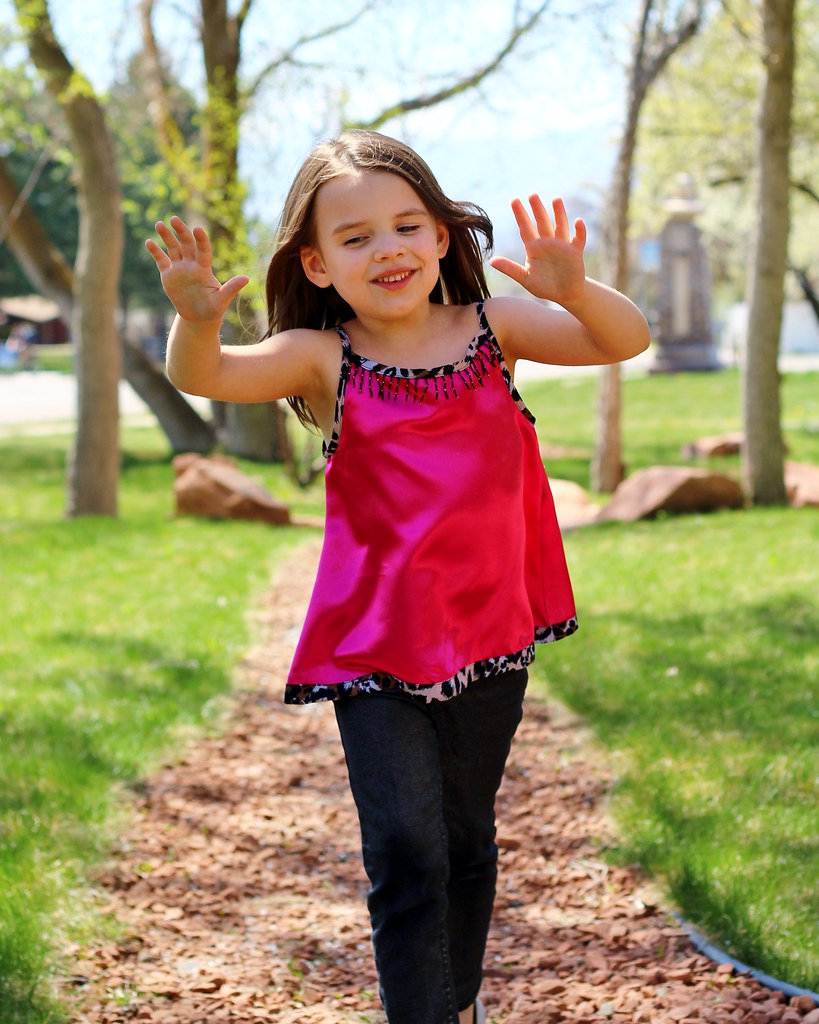
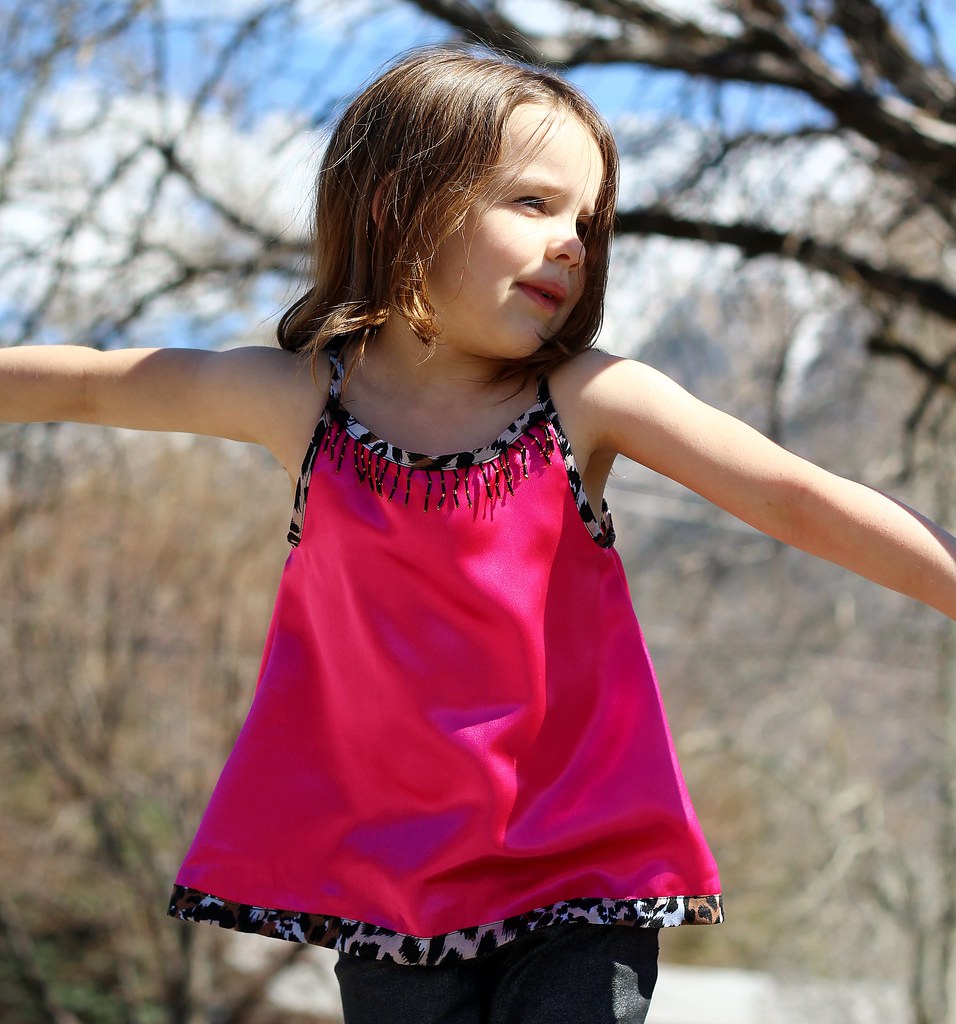
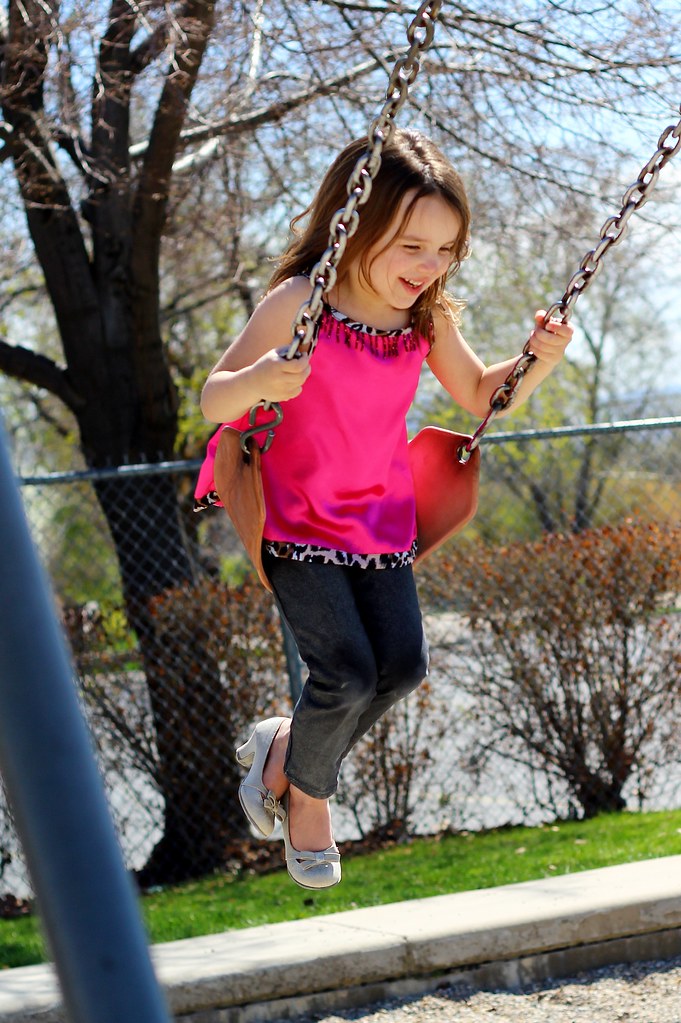
For this Shandiin, I used hot pink bridal satin for the body and a leopard poly-cotton sateen for the trim. At Sarah's suggestion, I tucked some beaded fringe trim into the binding at the neckline. Myra LOVES this top. It fits her personality perfectly.
I mentioned that Shandiin offers two length options. This is the top length. The hem is finished with a shaped facing, which is another fun place to put your contrast fabric. I chose to flip the facing to the outside on this Shandiin, just for an additional pop of leopard print. There is also an elasticated option, which will be my next make...
Another feature of this pattern that is amazing is how clean the finish is. It is constructed it such a way that the only exposed edges or seams are the two seams in the body, which are basically straight, so they're so easy to make as french seams. I'm a serger happy sewist, and my poor serger barely got used for these makes. No need! The insides are gorgeous.
Can we talk about the fit though? Because - fantastic. Tank tops are prone to gaping and accidental nip slips, but not this one! Shandiin has nice snug, bias straps. They conform to the body without worry of exposure. The armhole is high enough for coverage, but close enough in that the straps don't slide down the shoulder. No fussing with this top. It is effortless to wear.
The shape through the body is an a-line. Nice and breezy for comfort, but not so full that you have to worry about it flipping up in a gust, or vigorous swinging.
This is the ideal playground friendly top. Even if you make it in satin!
Shandiin is pretty much the perfect top for summer. Myra wears hers constantly. She's actually wearing another version as I type this. (The pink one is in the wash.) It is sleek enough to wear under a sweater for chilly mornings, and just right as the weather warms up.
I hope I've convinced you that you need Shandiin! It really is an amazing pattern. Head over and pick it up now! And stay tuned. Next up, I'll show you the tunic length with a snap closure in front, then a lined dress!
Friday, May 16, 2014
2 for 1: Sewaholic Gabriola skirt and Burdastyle Liz blouse
My other warm weather staple, aside from knit dresses, is maxi skirts.
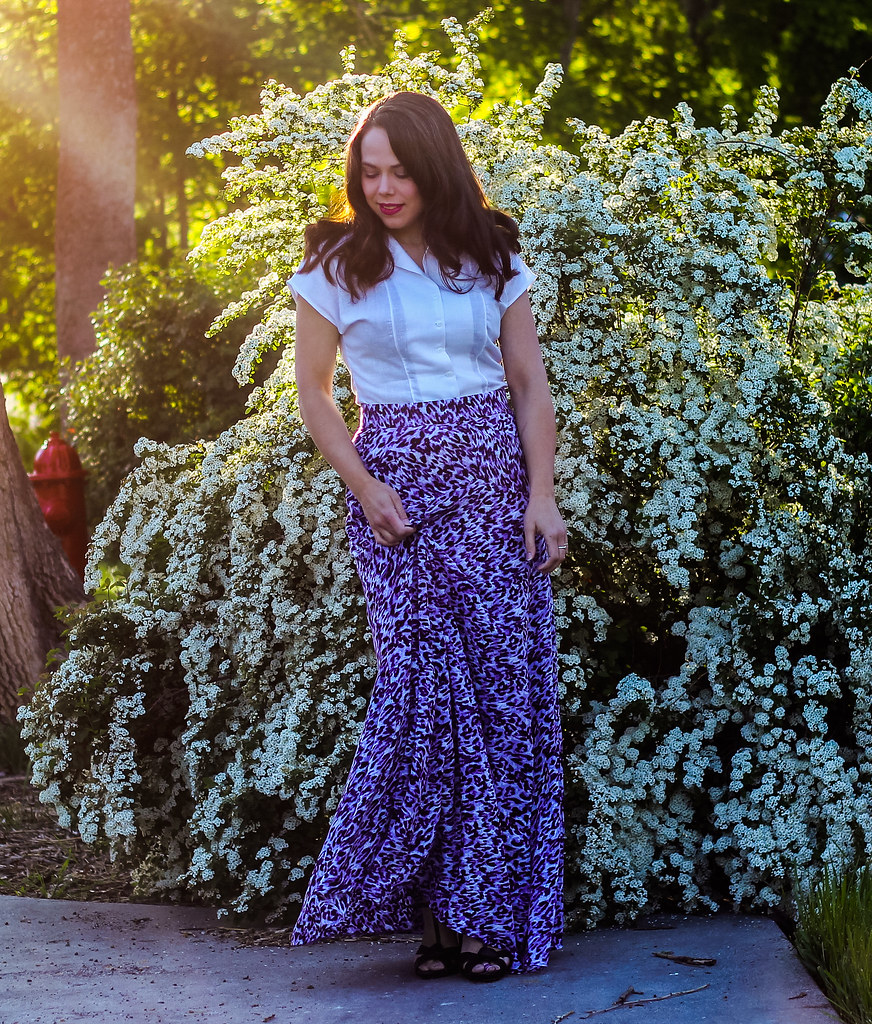
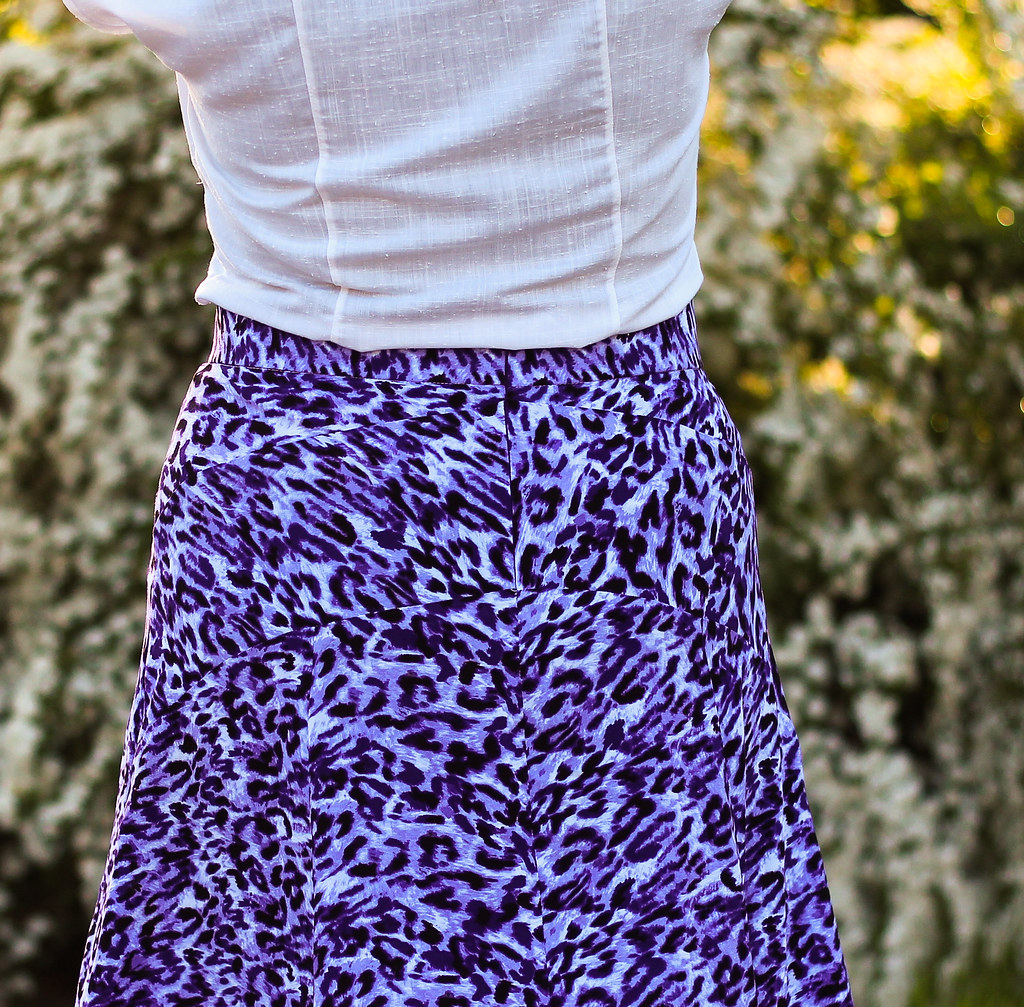
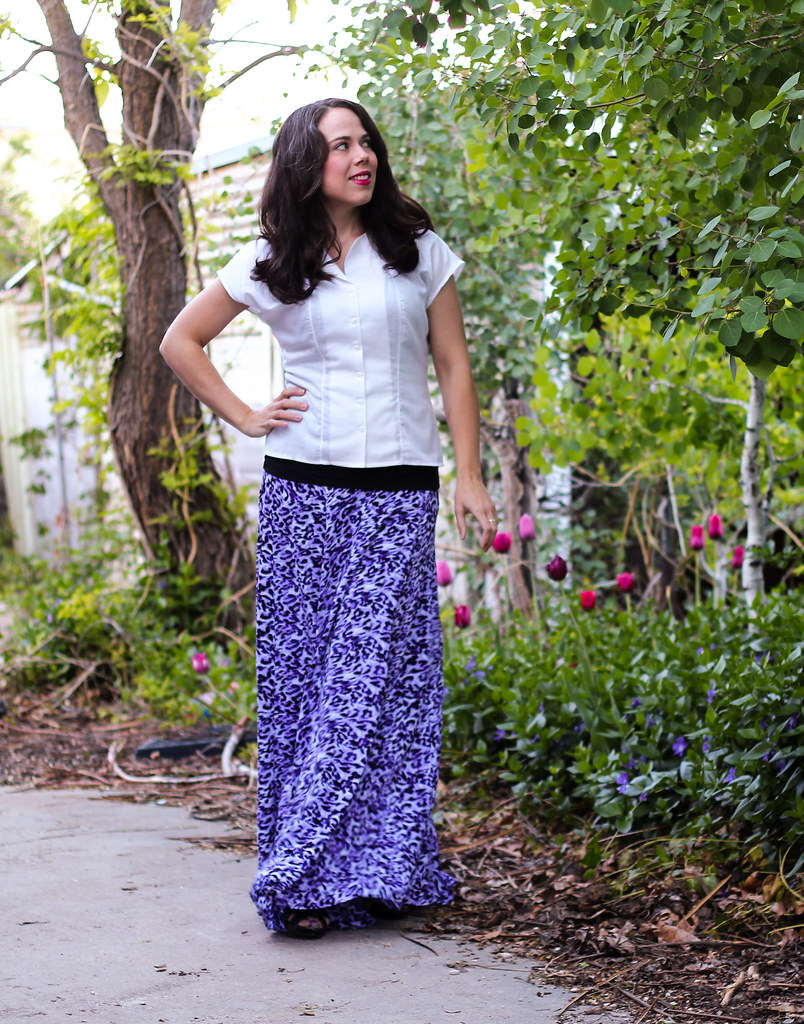
And the maxi that is the current darling of the sewing world is Gabriola. And I can see why! I usually take a bit of convincing before I jump on a new pattern, but as soon as I saw this one, I knew I had to make it. It's so graceful and swishy! And the yoke seaming is both ingenious, as all the shaping is done with the yoke pieces, but also beautiful. Sadly, I used a print that conceals the seaming (This turned out to be a good thing - more on that in a moment) so you can't see the lovely seam lines of the yoke, but the shaping is divine.
She makes me want to dance. The fabric is a drapey, soft rayon challis from FabricMart in a purple leopard print. Because we should all have some purple leopard in our lives.
But alas, all was not rainbows and sunshine as I constructed Gabriola. This is no fault of the pattern, which is divine. Had I followed instructions and cut correctly the first time, there would have been no tale of woe to tell. Sadly, direction following is not my forte.
This wonderful, swirly skirt is composed of panels - three in front and four in the back. The side panels are the same front and back, and you are instructed to cut four of them. I noted that fact in my head, and thought as I was tracing that perhaps I should trace an extra side panel, so that I could just lay out the pieces and cut, rather than having to remember to reposition the piece. Sadly, lazy past Katie did not trace an additional piece, so it was left to my faulty memory, which remembered to cut 4! Yay!
Unfortunately, I cut 4 back panels, which are narrower than the side panels by a significant margin. And which error I did not recognize until I had already sewn the too narrow panels to the center front panel. And serged them. There was only a teeny 1/3 yard of fabric left - not enough to recut the panels, but by piecing the remaining fabric into 3 1/2 inch wide strips, I was at least able to get the width I needed at the hip, so that the skirt fit onto the yoke. Sadly, this means my skirt is not so swishy and lush as the pattern intends.
I can't really tell, and the print hides the piecing. I made a straight size 6, without alterations, save one. For the closure, instead of a zipper and button, I extended the zipper up through the waistband, eliminating the button. If you choose to do this, you'll want a longer zipper than the pattern calls for. An 11-14" should do you. I have a 9" zipper here, and I can *just* squeeze it over my hips.
Invisible zipper is invisible. And my seam matching makes me happy. It is surprisingly easy to match up all these points. Don't be afraid. This skirt is SO worth the (very minor) trouble.
As I was planning this skirt, I realized that I really don't have a blouse that works with it. I wanted something simple and basic, so as not to fight with the skirt. I chose the Liz blouse, from Burdastyle. I made it here in pink swiss dot.
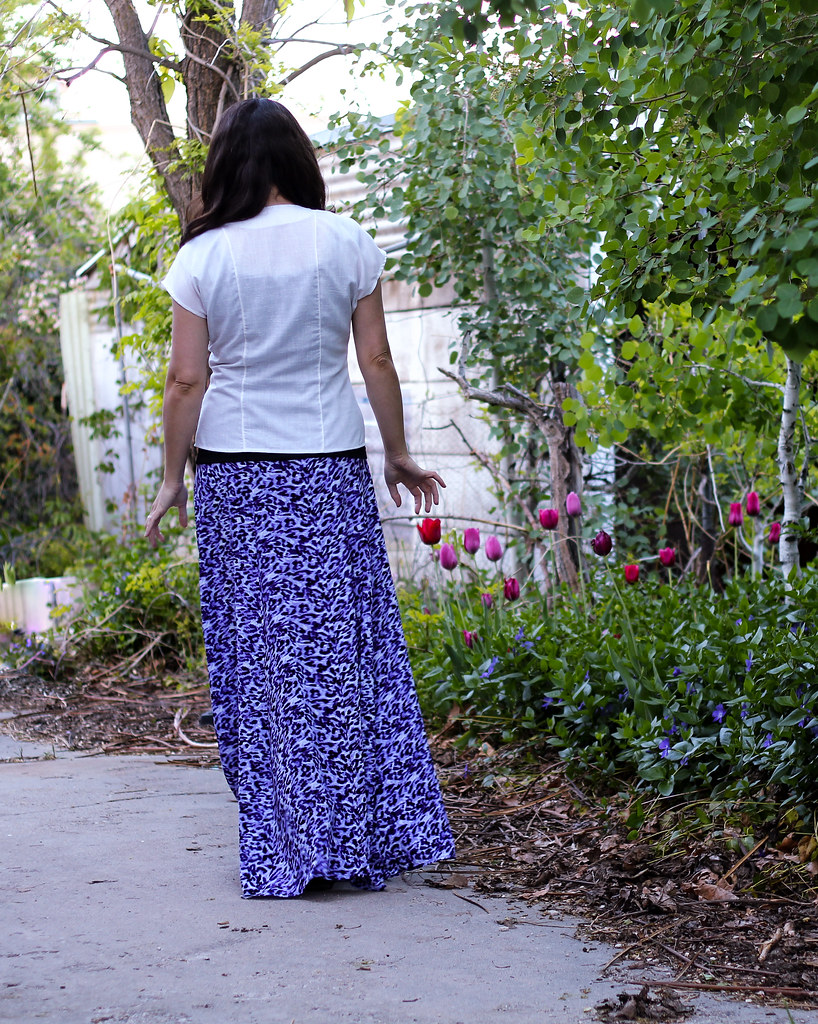
At the time, I didn't really like that first version, but I wear it a lot and it is a great basic. For this one, I used a piece of ?tablecloth? that was given to me by a friend. It acts like a cotton blend, but it has a cool slubby texture and looks linen-like. It's a bit sheer, so I wore it layered over my Sammy Cami.
Instead of the madarin collar on the pattern, I drafted a back neck facing, and skipped the collar altogether.
Overall, I think this pattern is a huge winner. It was fairly simple to sew (as long as you pay attention to the panels) and it is gorgeous and shapely. I'll be making it again for sure. In fact, I'm already planning the next one...
And the maxi that is the current darling of the sewing world is Gabriola. And I can see why! I usually take a bit of convincing before I jump on a new pattern, but as soon as I saw this one, I knew I had to make it. It's so graceful and swishy! And the yoke seaming is both ingenious, as all the shaping is done with the yoke pieces, but also beautiful. Sadly, I used a print that conceals the seaming (This turned out to be a good thing - more on that in a moment) so you can't see the lovely seam lines of the yoke, but the shaping is divine.
She makes me want to dance. The fabric is a drapey, soft rayon challis from FabricMart in a purple leopard print. Because we should all have some purple leopard in our lives.
But alas, all was not rainbows and sunshine as I constructed Gabriola. This is no fault of the pattern, which is divine. Had I followed instructions and cut correctly the first time, there would have been no tale of woe to tell. Sadly, direction following is not my forte.
This wonderful, swirly skirt is composed of panels - three in front and four in the back. The side panels are the same front and back, and you are instructed to cut four of them. I noted that fact in my head, and thought as I was tracing that perhaps I should trace an extra side panel, so that I could just lay out the pieces and cut, rather than having to remember to reposition the piece. Sadly, lazy past Katie did not trace an additional piece, so it was left to my faulty memory, which remembered to cut 4! Yay!
Unfortunately, I cut 4 back panels, which are narrower than the side panels by a significant margin. And which error I did not recognize until I had already sewn the too narrow panels to the center front panel. And serged them. There was only a teeny 1/3 yard of fabric left - not enough to recut the panels, but by piecing the remaining fabric into 3 1/2 inch wide strips, I was at least able to get the width I needed at the hip, so that the skirt fit onto the yoke. Sadly, this means my skirt is not so swishy and lush as the pattern intends.
Invisible zipper is invisible. And my seam matching makes me happy. It is surprisingly easy to match up all these points. Don't be afraid. This skirt is SO worth the (very minor) trouble.
As I was planning this skirt, I realized that I really don't have a blouse that works with it. I wanted something simple and basic, so as not to fight with the skirt. I chose the Liz blouse, from Burdastyle. I made it here in pink swiss dot.
At the time, I didn't really like that first version, but I wear it a lot and it is a great basic. For this one, I used a piece of ?tablecloth? that was given to me by a friend. It acts like a cotton blend, but it has a cool slubby texture and looks linen-like. It's a bit sheer, so I wore it layered over my Sammy Cami.
Instead of the madarin collar on the pattern, I drafted a back neck facing, and skipped the collar altogether.
Overall, I think this pattern is a huge winner. It was fairly simple to sew (as long as you pay attention to the panels) and it is gorgeous and shapely. I'll be making it again for sure. In fact, I'm already planning the next one...
Subscribe to:
Comments (Atom)










.JPG)
