Showing posts with label Simplicity 2065. Show all posts

Wednesday, October 26, 2011

Magic Hair! Simplicity 2065

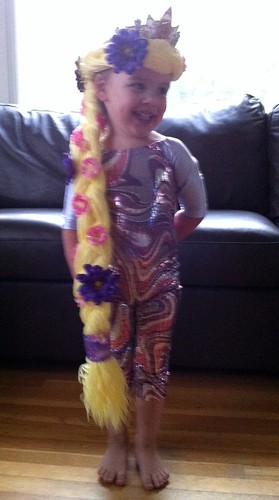
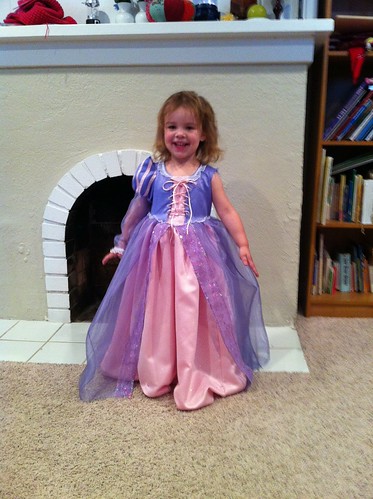
The final piece of the Rapunzel ensemble is ready, so Halloween can commence. The pattern (Simplicity 2065) also included instructions for a yarn "hair" piece, which Myra has been calling her Magic Hair.
While I really thought the pattern had generally good instructions for the dress, those for the hairpiece left much to be desired. I actually wish I had taken pictures of the process so I could do a little tutorial, because anyone attempting this thing will want to pull their own hair out.
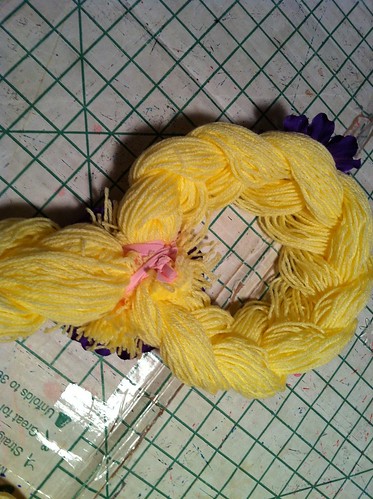
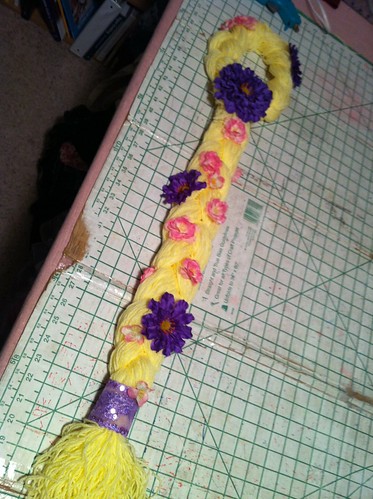
Here is the finished hairpiece. It is basically a braided loop that has been attached to a long braid. It sounds simple, and really it is, but Simplicity's directions are terse at best and inaccurate at worst. You start the process by cutting lengths of yarn to their specifications. There is only one set of measurements, despite the fact that the pattern includes sizes 3-8. The first set you are instructed to cut is for the braid that hangs down.  You are to cut 60 36 inch pieces for each braid segment, then braid them all together and tie off both ends. I found it nearly impossible to braid the segments without tangling the yarn, so I tied off each segment individually, then braided them and tied off the braid. Using scrap yarn to tie off blends nicely. The second segment, which forms the crown part, is to be 18 inch long segments. Seriously, that has to be a typo. Even for a 3 year old that is woefully inadequate, and Myra (and in fact all of my children) have HUGE heads. Instead, I used the long braid that I already had made (which was the 36 inch pieces braided) and wrapped it around her head to approximate how much yarn I would need. It overlapped by about 4 inches, so I went with 34 inch pieces of yarn, which I thought would be a bit too long, but ended up being just right. I only trimmed about an inch of tails off. Crazy. So, measure, then overestimate. Trimming is MUCH easier than redoing the whole thing.
The other complete inadequacy in these instructions is the attachment. All Simplicity has to say is "Hand sew or glue the crown portion into a circle, them attach the braid, covering the intersection with a large flower." Hand sew a bunch of yarn tails together??? I really had no idea how to go about doing that, so I didn't.
Instead, I took some scraps of jersey and overlapping the ends of the crown, tied them together with the jersey strips. I used jersey partly because I had just cut out a cardigan and it was lying around, but also because the stretch allowed me to get the ties really tight. I then laid the braid over the intersection of the crown and lashed it on with more strips of jersey. I'm really glad I paid attention at camp when I was a teen. Who knew I'd use all those knots one day?
After the braids were secured, I hot glued some of the sequin trim I used on the skirt to the bottom of the braid, then hot glued the flowers in place.
I'm glad I struggled through putting this together, because it totally makes the costume, but I hope my notes make it a little easier on some of you. I think as a finishing touch I'm going to crack open a yellow glow stick so the hair actually glows on Halloween night. Was I the only one who used to paint themselves with glow sticks as a kid? Everyone I've said that to IRL looks at me like I'm crazy, but won't it be cool if Rapunzel's hair actually glows?

Wednesday, October 19, 2011

Simplicity 2065 finally!

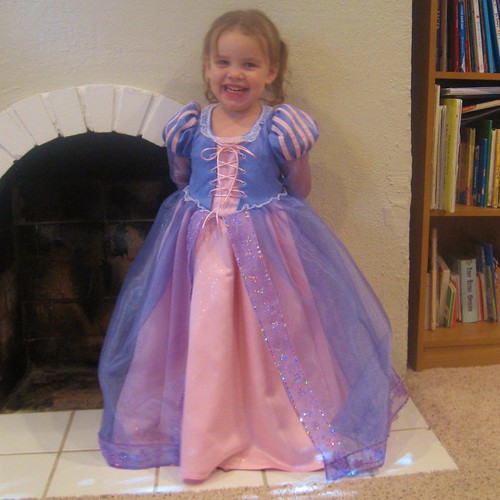
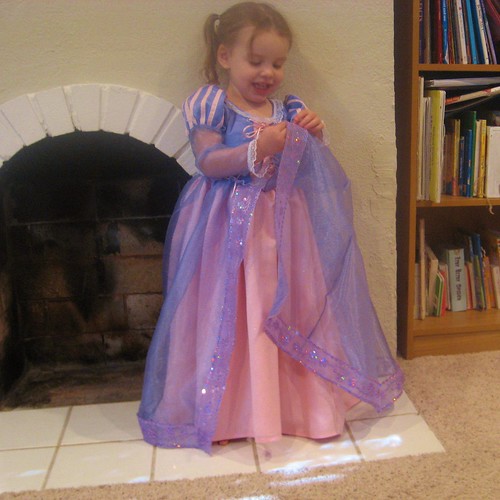
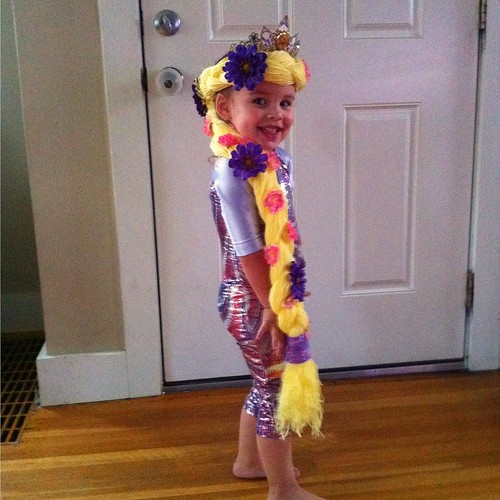
Myra Her Majesty's costume royal gown is finished, and in plenty of time for Halloween the ball.
I wish I had posted a few "in progress" posts, as I have a lot to say about construction. Feel free to skip to the cute pictures and ignore the words. :)
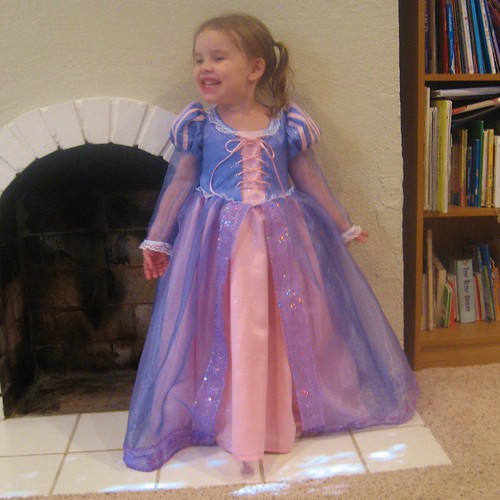
The pattern I used I Simplicity 2065, which is a licensed Disney Tangled pattern for Rapunzel's dress. As with the last Disney Princess pattern I've made, I found this one to be quite low cut, overly long and large in the shoulders and upper chest. At least they are consistent. I did a bit of a cheater fix. Rather than re-draft the neckline and do a narrow shoulder alteration, I just pinched out an inch from the shoulder seams. This raised the neckline and tightened up the shoulders nicely. If only fitting patterns for me was so easy...
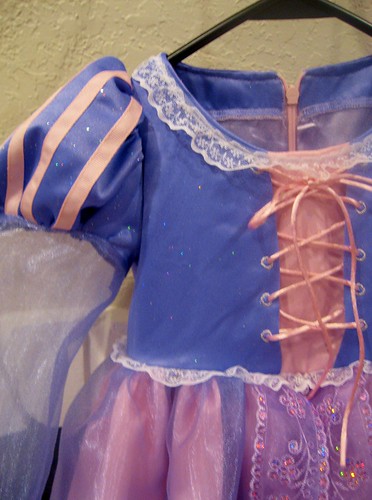
Here is the neckline closer up. In retrospect, I think I should have lowered the placement of the eyelets a little. There is a gap between the bottom of the eyelets and the waist, but the top eyelet is hidden under the lace trim. You can also see the glitter finish on the satin in this picture. I let Myra choose the fabric and trim for the dress. The purple and pink satin (both from Joann's "Special Occasion" line) have a glitter finish. I wasn't sure how this would survive in the wash, so I didn't prewash the satin. At least it will still be there for Halloween. I steered Myra toward the heavier weights of satin rather than the "costume" satin. I hate sewing that thin slippery stuff, and the special occasion fabrics have more heft.
The dress is fully lined. I used stash fabrics here, so it's a bit of a mish mash. The bodice is lilac satin left over from this dress, and the skirt is a rayon lining that I had hanging around. There is a 7 yard long strip of tulle stitched to the lining to give the skirt body, since three layers of gathered skirt weren't enough. The neckline is faced, which I went back and forth about. It probably wasn't necessary, since the trim is topstitched to the neckline, which provided stability and prevents the lining from rolling out.
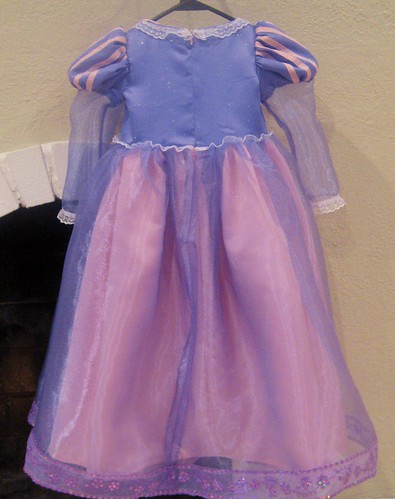
Here is the back view. I debated about how to close this. The pattern calls for a lapped zipper, which I think is reasonable, although I find it a bit more difficult to install with the overskirt in the way. I considered velcro, but velcro in the wash with organza and tulle is a recipe for disaster.
In the end, I went with my standby, the invisible zip. Naturally, I had a pink one in stash. It went in perfectly on the first attempt, and I love that I can attach the lining to the zipper by machine, so it looks good on the inside and encloses all the zipper seam allowances nicely.
Construction-wise I thought this pattern was fairly good. The instructions were logical and complete, and went in an order that made reasonable sense, with the exception of just a few things.
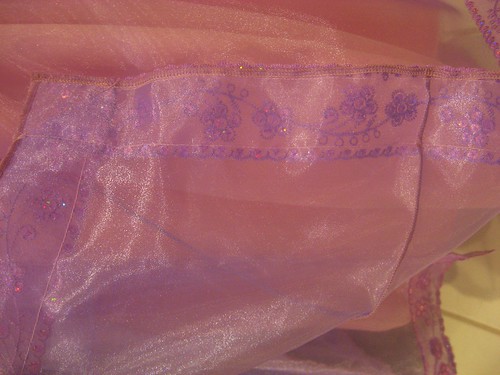
After constructing the bodice shell (for which the instructions were great), you construct the overskirt, narrow hem the front edges, do a 1 inch hem on the lower edge, then apply the trim. Once all that is done, you gather the overskirt onto the bodice and baste it in place. For the construction seams, Simplicity (in the "General Instructions" part of the pattern instructions) suggests that you either double stitch and trim closely or serge finish the seams. I'm not sure how well the double stitch and trim would work with this ravelly organza. Typically for sheer fabrics, I would do a french seam. For this, I serged with a narrow 3 thread stitch. For the front edges, rather than a narrow hem, I elected to serge finish, then apply the trim to cover the serged sedge.
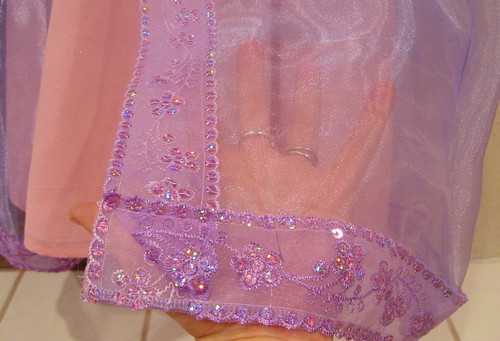
Here is how it looks on the underside. I actually think this is a nicer finish than a hem, which would have added bulk and weight. This way, the overskirt is very light and floaty. I did not finish the lower edge at this time, as I wanted to check the final length of all the layers on Myra prior to hemming. Once I had finished the dress and was ready to hem, I serged off the hem allowance (I ended up taking off only 1/2 inch, so I'm glad I waited!), then applied the trim in the same way as the front edges, mitering the corners at the front.
Isn't that lovely trim? I think is is Myra's favorite part of the dress.
For the underskirt hem, Simplicity allowed 2 inches, which they wanted you to double fold and hand sew. I've never had good luck invisibly sewing satin - it shows every teeny stitch. Instead, after measuring my hem on Myra, I lightly pressed it. Then I used the pressed edge to sew a line of fusible thread at the hemline. I serged off all but a 1/2 inch hem allowance, then fused the fusible thread to give a sharp crease. I then fused the hem down with steam-a-seam lite, rather than sewing it.
And here is the finished hem. It looks nice and crisp and the Steam-a-seam is quite sturdy. If she does manage to pull it out, repair is quite easy.
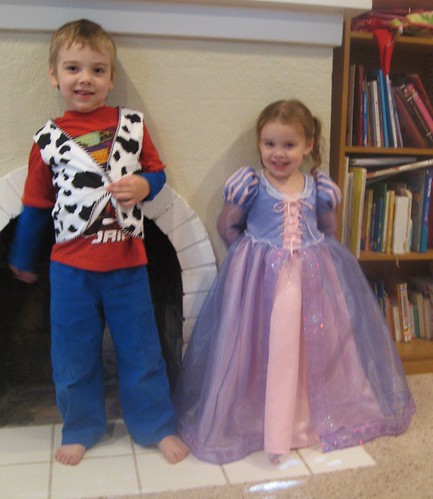
Logan wanted to get into the action with his Woody vest. I'll tell you about that once I make his shirt!
My only other piece of advice to those who are making this dress is this - Baste, baste, baste! I am typically not a baster. I like to just sew and let the seams fall where they may, but all these layers of slippery fabrics will bite you if you do not baste. Other than that, I really think that despite the many yards of annoying to sew fabrics, this is not a difficult pattern, but it does turn out a phenomenal princess dress. I suspect I'll be using it again, although perhaps with less fullness for dress up. It's perfect for a Halloween costume, but perhaps a bit too tulle-normous for everyday dress-up. (Credit to Ginnie for coining the word "tulle-normous" - Love it!)
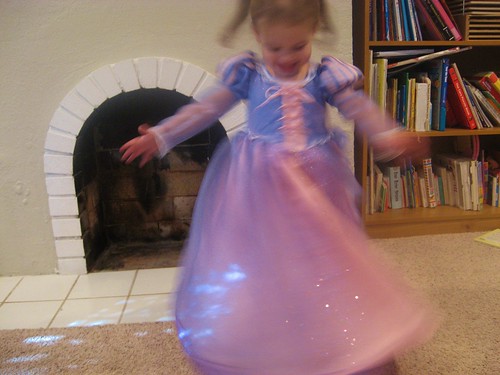
Sparkles and twirls! What else could a little princess ask for?
Sunday, October 16, 2011

FO: Norobi

Myra's not the only one knitting around here! I finally finished a project that I cast on before Duncan (who is now 10 months old) was born.
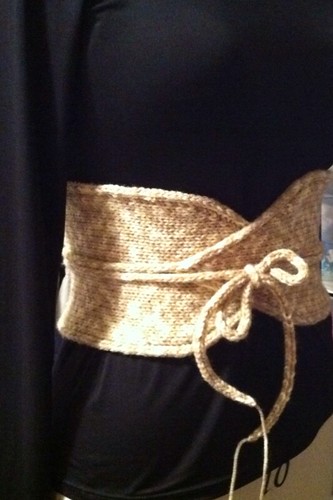
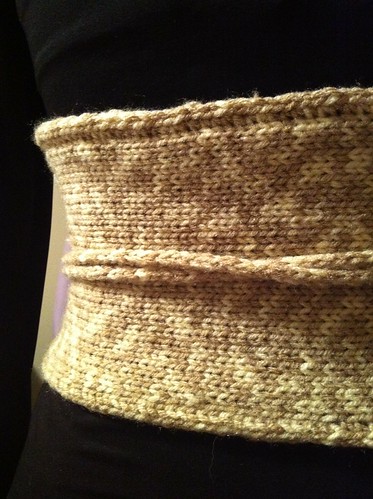
And it wasn't even a very complicated or large project either. This is Norobi, a knitted Obi style belt. I alternate between thinking that this is a really fun and funky idea and thinking that it is just odd. Since I wasn't sure how I felt about it, I used some leftover RHSS, so if I hate it, at least the yarn wasn't dear.
The main reason I decided to knit this was the way the edges and ties are constructed. The edges are finished with an applied I-cord and the ties are stand alone I-cord. I wanted to learn this technique, and this seemed like a good way. As you can see if you compare the top (uneven and loose) edge to the bottom (tighter and more polished looking), it was a learning process for sure. It didn't help that I put this project away for months while in the middle of the applied I-cord and when I picked it back up, I had totally forgotten how to do it!
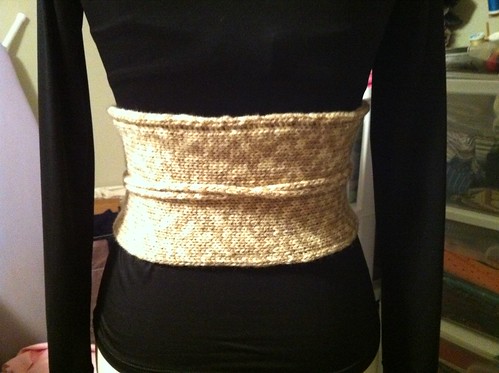
Here it is from the back. It looks quite sleek and cute on Sandra Dee, but then everything looks good on her. I'm not even sure how I will wear this. What do you think? How would you go about styling a knitted obi? Or would you??

In the sewing world, Rapunzel is coming together. We had a final fitting this morning and measured the hem.
I still need to set in the sleeves (that one is pinned in place), hem the underskirt and overskirt and apply the trim to the overskirt hem. Myra loves it and I had to fight her to get it off. At least this one looks like a win! It better be! It wasn't difficult to construct, per se. It was just tedious. And I hate sewing polyester organza.

Wednesday, September 14, 2011

Simplicity 2065 "muslin"

I've mentioned that Myra has requested a Rapunzel costume for Halloween, and Simplicity was kind enough to provide an excellent pattern, but the last Simplicity/Disney Princess pattern I made for Myra had some major fit issues, so I knew I'd need a muslin. Have you ever tried to get a 3 year old to sit still long enough for a fitting? I don't recommend it. Myra is a sucker for a new dress however.
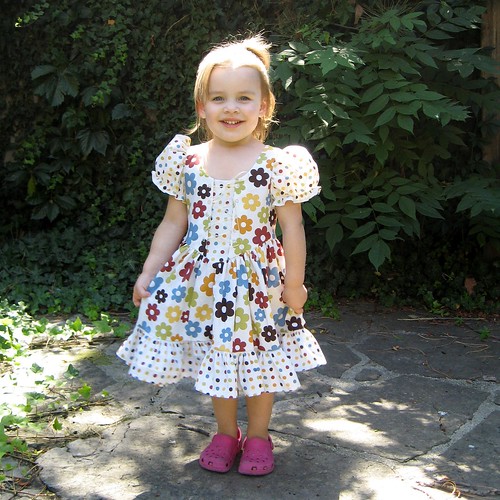
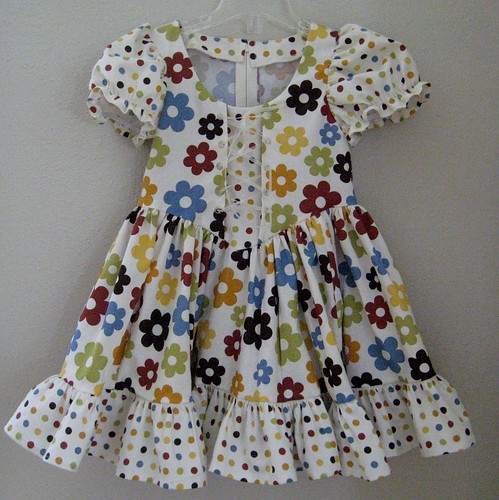
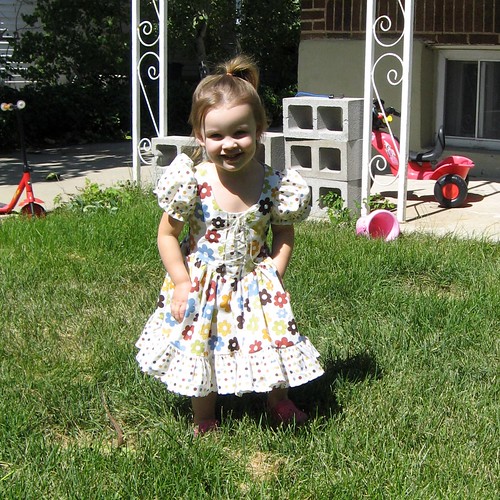
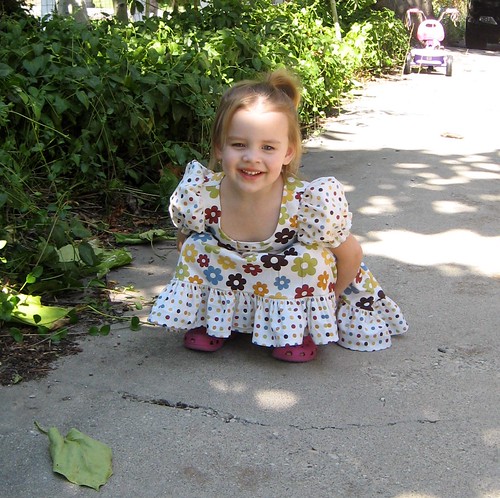
It's a bit more Bavarian bar wench than I envisioned, but she LOVES it. It would make a great Ren Fest costume...
The pattern is Simplicity 2065, the licensed Disney Tangled costume pattern. Since this was a trial garment, I didn't go to all the trouble of lining it, skipped the overskirt and the long lower sleeves. I used some remnant cotton coordinates from Hobby Lobby, so I shortened the skirt based on what my fabric would allow. I ended up having to add the bottom ruffle to make it a wearable length, but I think it's cute.
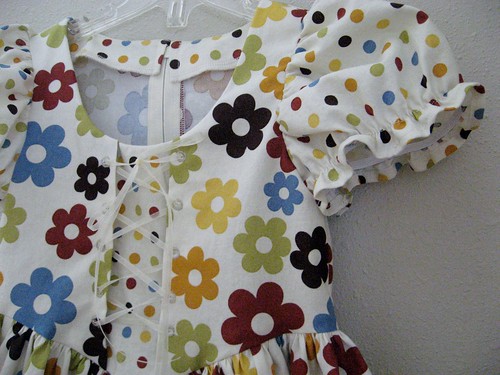
Since it really is mostly a fit muslin, I considered just using the lining pattern piece as the bodice front, rather than going to the trouble of assembling the lacings, but I wanted to make sure the construction wasn't weird, (it wasn't) and I wanted to try stitching the eyelets rather than using metal ones. My vintage buttonholer makes a very pretty eyelet, and particularly in this dress, where the eyelets bear no real stress, I thought that would be nicer than those dreadful metal ones that I can never seem to get in without destroying something.
I didn't have an invisible zipper in the right color, so I put in a centered one. It's like riding a bike... I've actually been contemplating closures for the final, costume dress. My friend, Lynn, who also has a wee princess and is making this dress, suggested velcro for ease of dress up play. Myra needs help getting in and out of this much dress anyway, so I'm on the fence. I already have a pink invisible zip and velcro in the stash.  What do y'all think?
After stitching it all up, it looked pretty short, so I tried it on Myra, and it was even too short for a bar wench, so back to Hobby Lobby for more polka dots we went. 160 inches of gathering later (whew!) it is wearable. Even without the extra ruffle, this pattern has a LOT of gathering, with the sleeves, skirt, overskirt, lining and net petticoat on the lining. I think I'm going to learn to use my ruffler.
All that gathering does result is a very full skirt. It curtsies well.
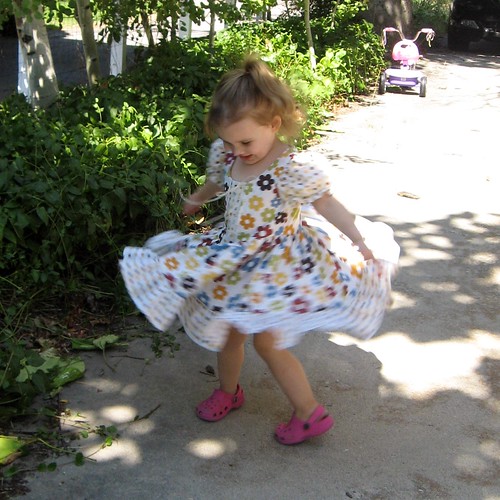
And it is seriously twirl-tastic!!
But I'm definitely going to have to raise the neckline. I noticed that with my last Disney pattern - the neckline was quite low and it was large in the shoulders, which is what I'm seeing so far here. I'm going to watch her wearing it a few times before I decide what all needs to be changed, then we'll be cutting a ridiculous amount of satin and organza.