Showing posts with label burda style. Show all posts

Tuesday, January 19, 2016

Burda 10/2005-115: Still in the Jungle

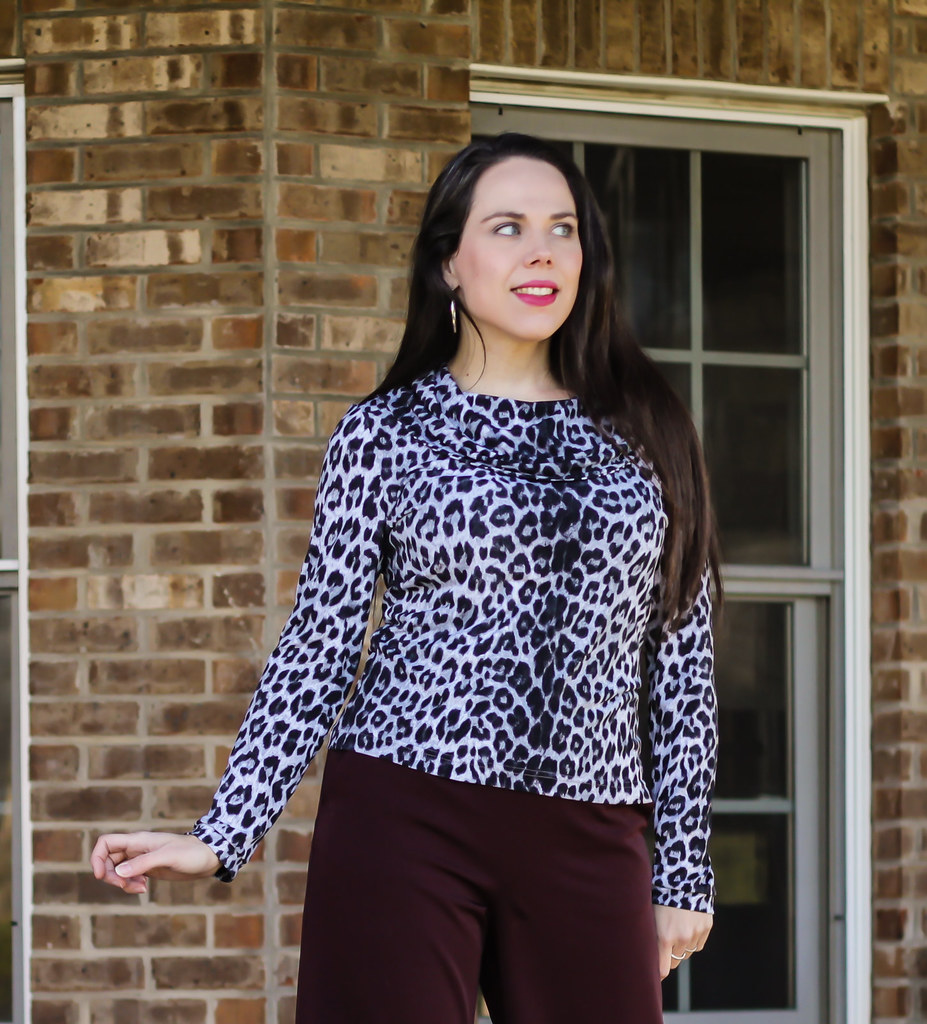
This great snow leopard ITY was just crying out to be sewn for Jungle January, but none of my usual knit top patterns were singing to me. I was randomly flipping through some old issues of Burda, when I ran across this great top with draped collar in the 10/2005 issue that I had mentally earmarked to make, then forgot.
10 years later... Ok, not really. It's an issue my mom gave me, but it has still been several years. I'm always impressed at the longevity of some Burda patterns. When you weed through the uber-trendy, there are always a few high quality classics that will stand the fashion test of time. I think this design is one of those.
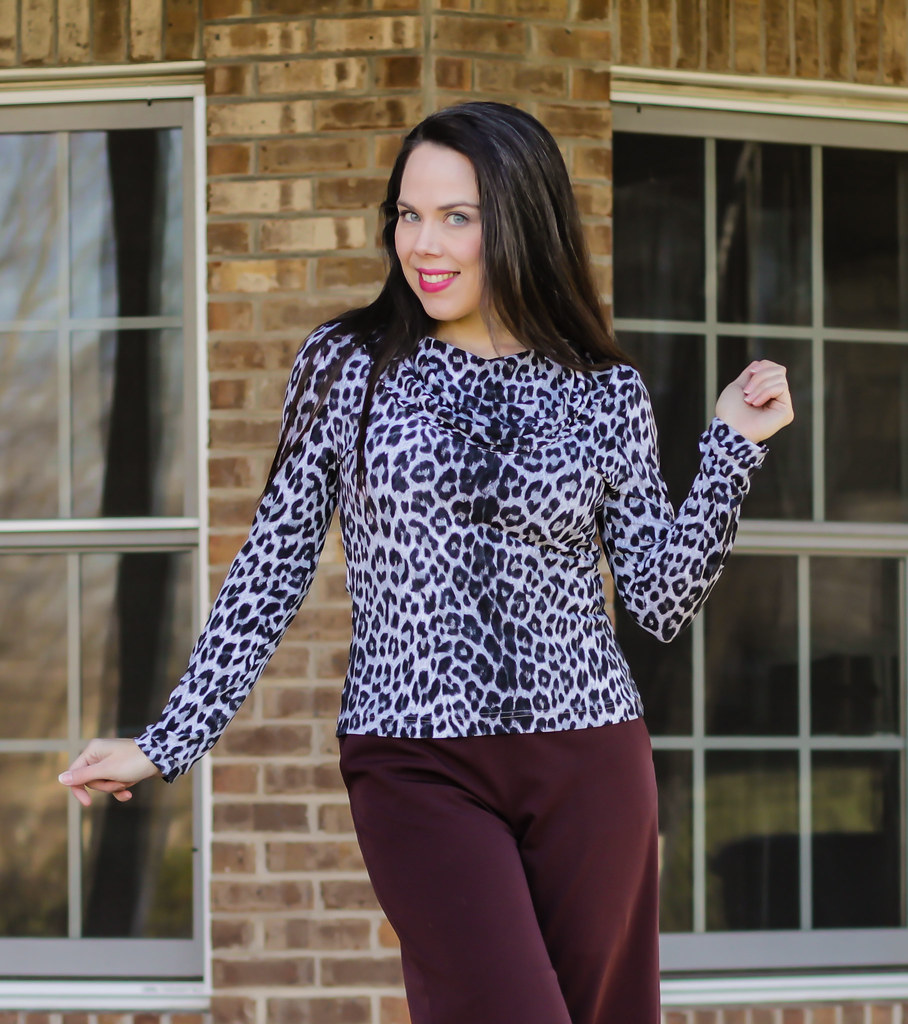
In essense, this is a simple design; a basic fitted tee with long, banded sleeves. The interest comes in with the semicircular, not-quite-a-cowl collar.
In an atypical move for Burda, there is not cleavage baring plunge here. The neckline is fairly high and the collar wraps around to drape over the shoulders.
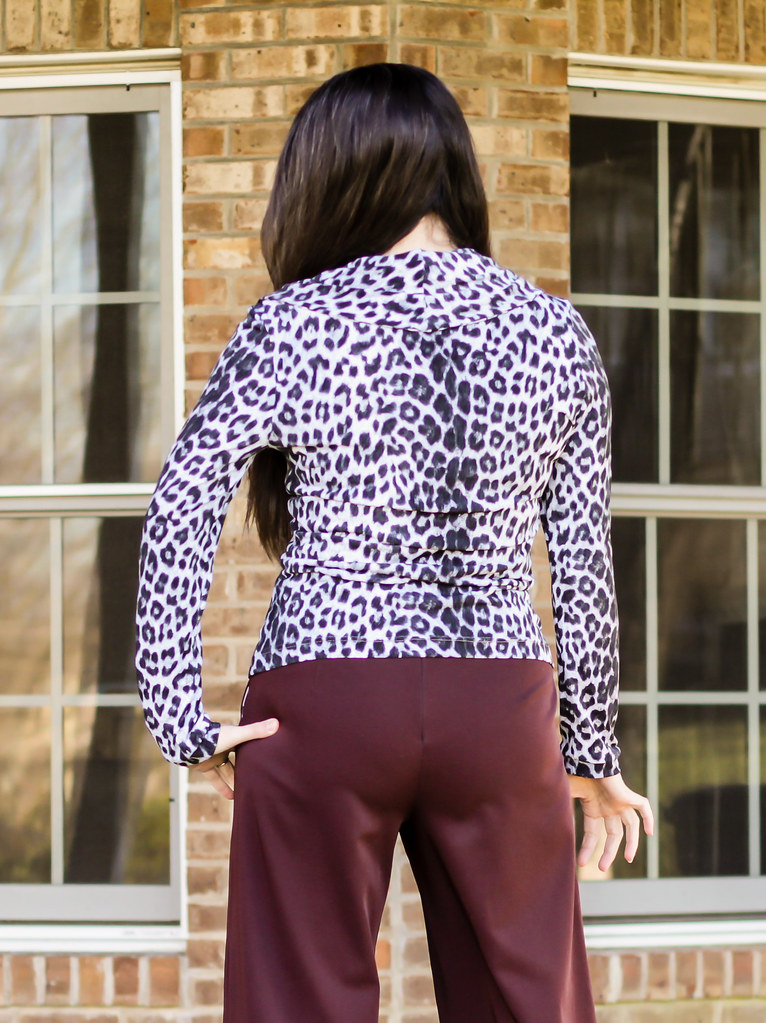
In back, the shape of the collar is more evident. In matching the dominant black stripe of the print across the collar in front, the circularity of the collar makes matching in the back impossible. You can see how the collar is shaped by following the rotation of the leopard print. You can also see that I should have done a full butt adjustment. Next time.
I made no alterations to the pattern, other than the construction of the collar. Burda had the collar a single layer, with a plain hem around the edge, but this fabric is fairly slinky and I knew there was a much greater than zero chance of the wrong side showing as I moved, so I did a double layer collar, seamed at the outer edge rather than hemmed. It has very nice weight and drapes beautifully without exposing the wrong side, but it did eat up a lot of yardage, particularly as I matched the dominant black stripe.
All in all, I'm pretty thrilled with this top! I'll definitely  be using this pattern again. I'll probably lengthen it a bit to give it a more modern feel (and to balance out my short-waisted, long torso), and adjust for my prominent backside, but this is well on its way to becoming a favorite pattern. Now to breeze through those old Burdas again! Who knows what other gems they are hiding?

Friday, May 29, 2015

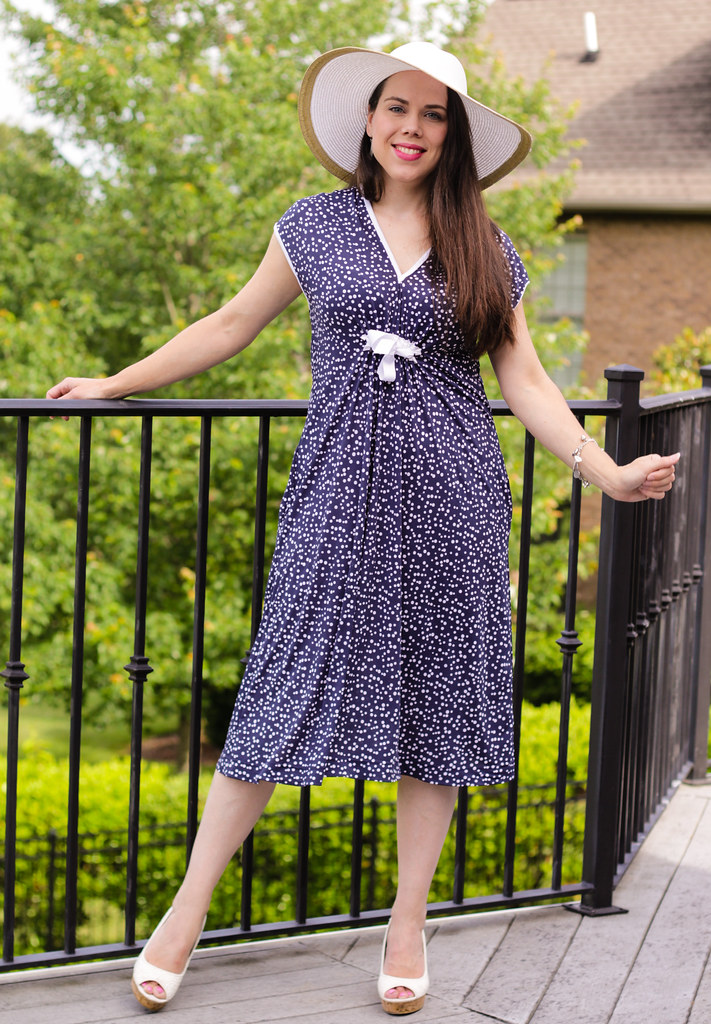
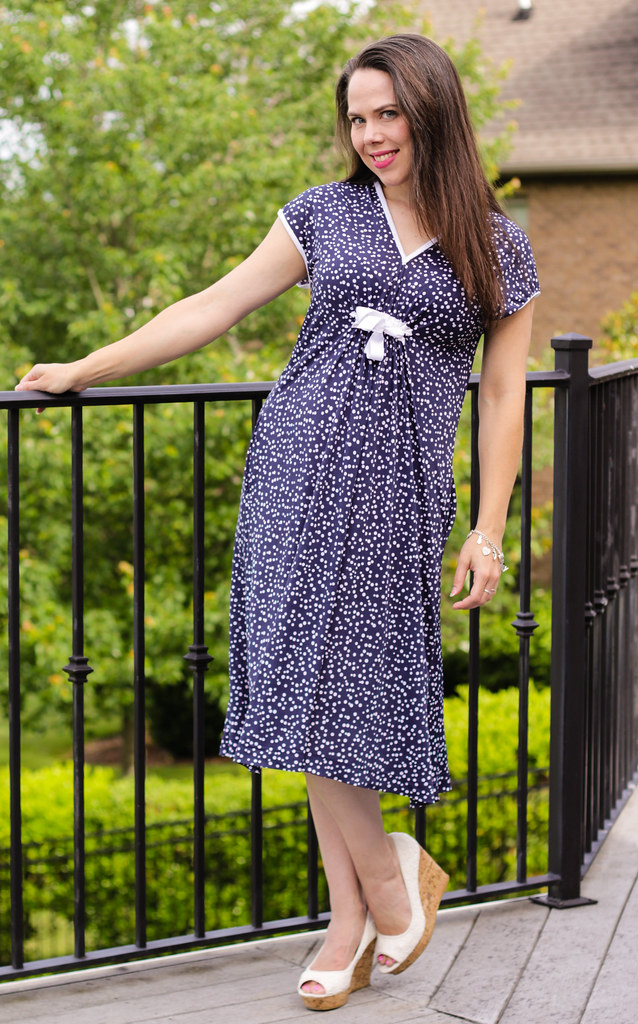
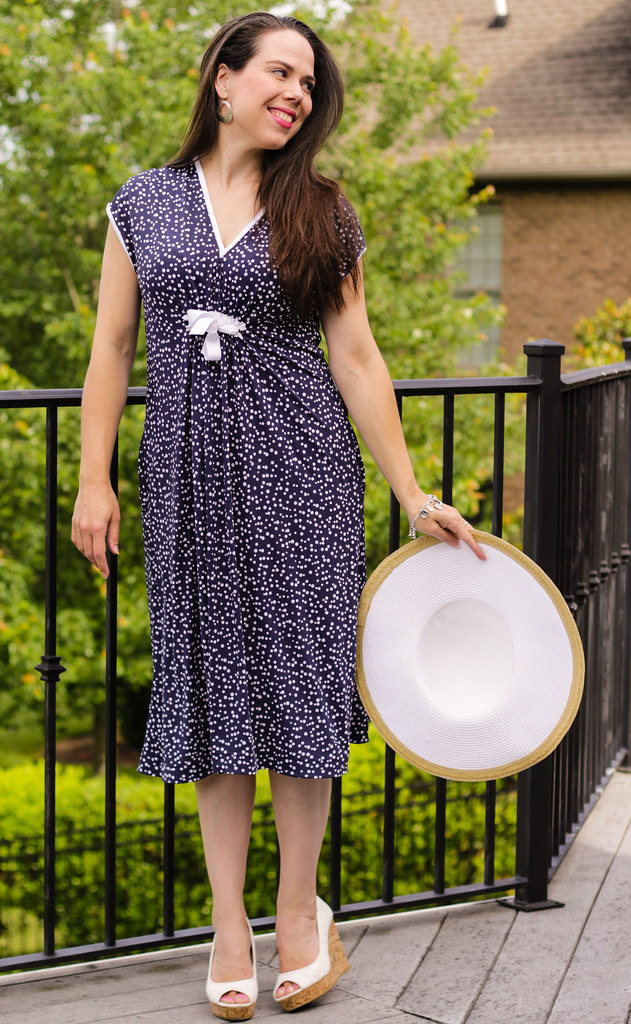
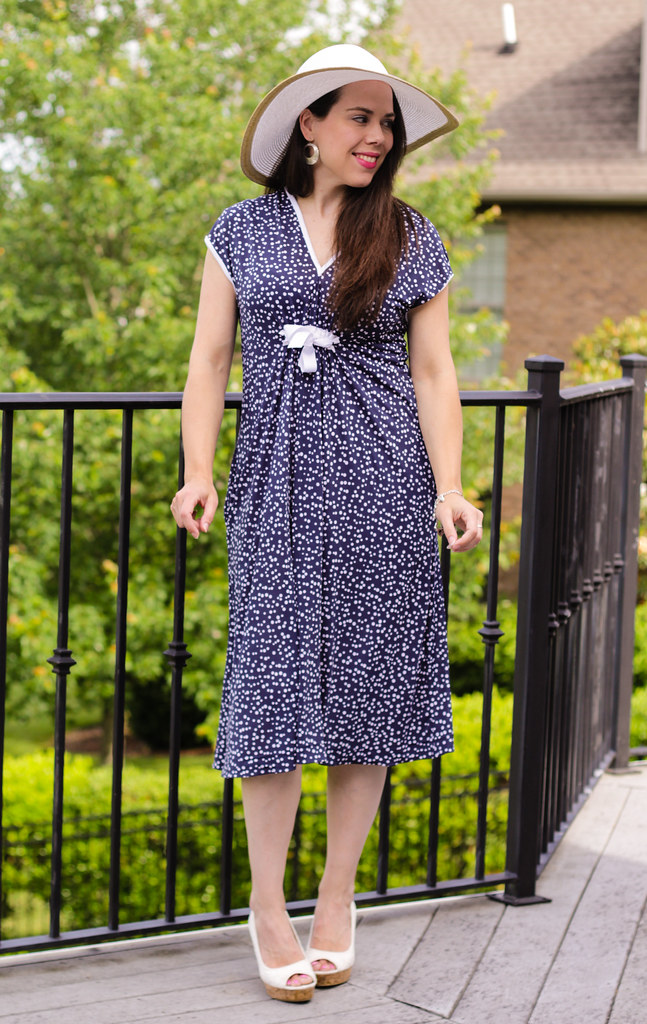
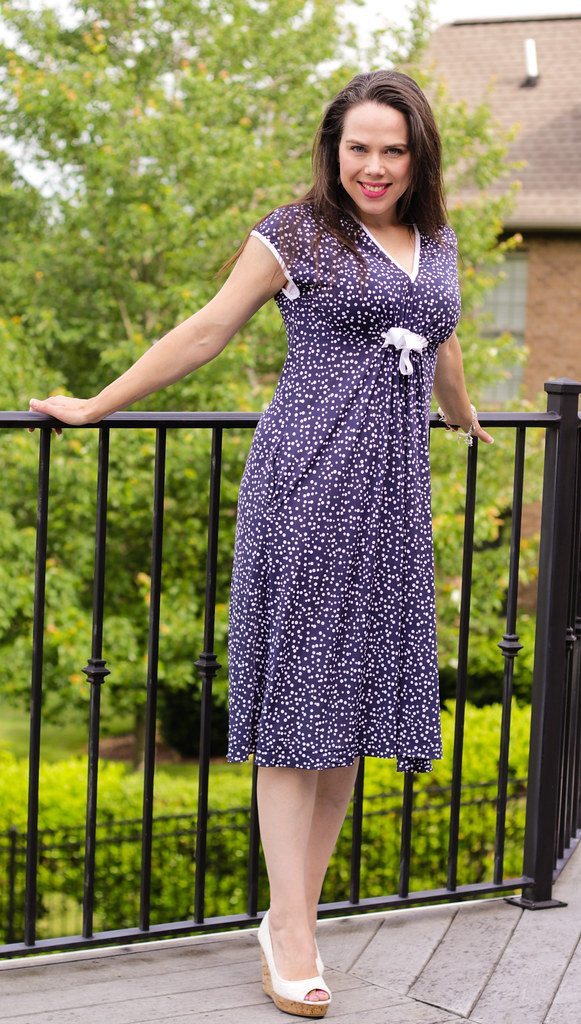
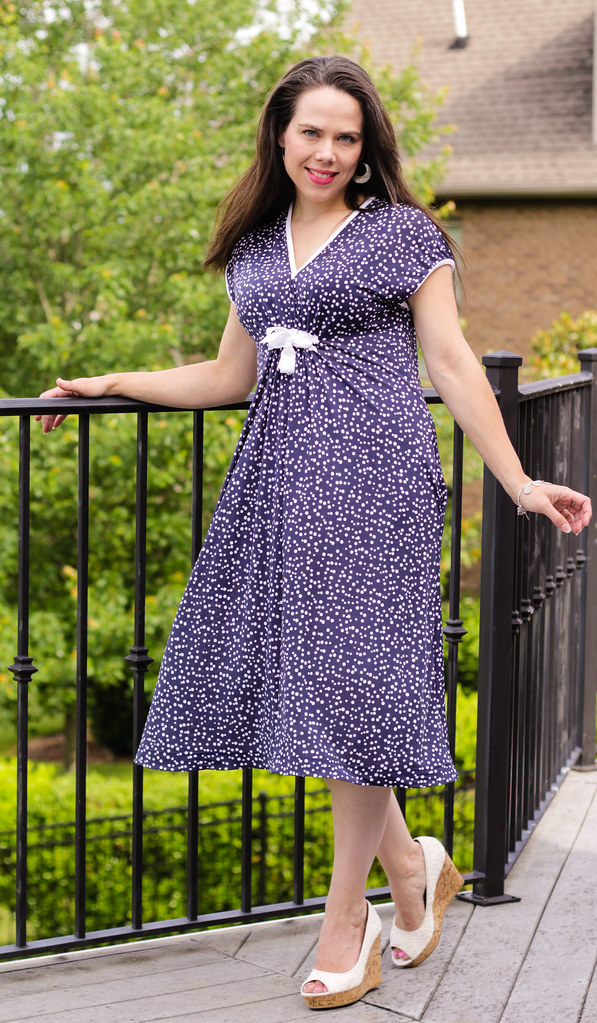
Burda June 2015 dress

In January I decided I had missed my Burda magazine long enough, and decided to renew my subscription after a 3 year lapse. After 6 months I finally found something that I HAD to sew.
In fact, I was flipping through the magazine when it arrived, and Mitch looked over my shoulder and said, "That dress is so you!" so I had to make it.
He's right, of course. It is very me! Comfy knit, with cute details and a swingy skirt is definitely my style all summer long.
The pattern is from the current (June 2015) issue of Burda Magazine. It is number 120, which includes both a top and dress version of the style and is made up in both knit and woven fabrics. Very versatile!
The pattern itself is really interesting, It only has one main pattern piece for the dress! Which made it manageable to trace on the crazy pattern sheets. There are no shoulder seams, only side seams and a center back seam.
There is minimal shaping at the side seams, so most of the shape of the dress comes from the front tie. There is a casing which is stitched onto the front of the dress just under the bust. A self fabric tie is called for by the pattern, but I used wide grosgrain ribbon instead.
In back, the neckline forms a pretty V that echos the front. I raised it about an inch, but as drafted it is actually pretty modest. I did take in the center back seam as there was no shaping back there and it looked very sack-like without some curves.
I also elected to bind the neckline and armholes with my coverstitch, rather than do a bias tape finish as the pattern called for. I like the bright white contrast there, and with my binder on the coverstitch machine it was super easy. Since there isn't a seam at center front, I darted the binding there to form the V. One thing I would change for the future would be to raise the armhole. It gapes open a bit too low, as you can see from this pic.
I also added pockets, of course, I regretted it at first, since they gaped a bit and made my hips look huge, but once I took in the center back, that tamed the pockets and they lie nicely now. I cannot wear a dress without pockets so I'm glad they worked out!
While there are a few minor things I would change should I make this again, I am really quite pleased with my first Burda make in several years. Maybe I'll tackle that pattern sheet again! Once I've recovered from this time...

Friday, May 16, 2014

2 for 1: Sewaholic Gabriola skirt and Burdastyle Liz blouse

My other warm weather staple, aside from knit dresses, is maxi skirts.
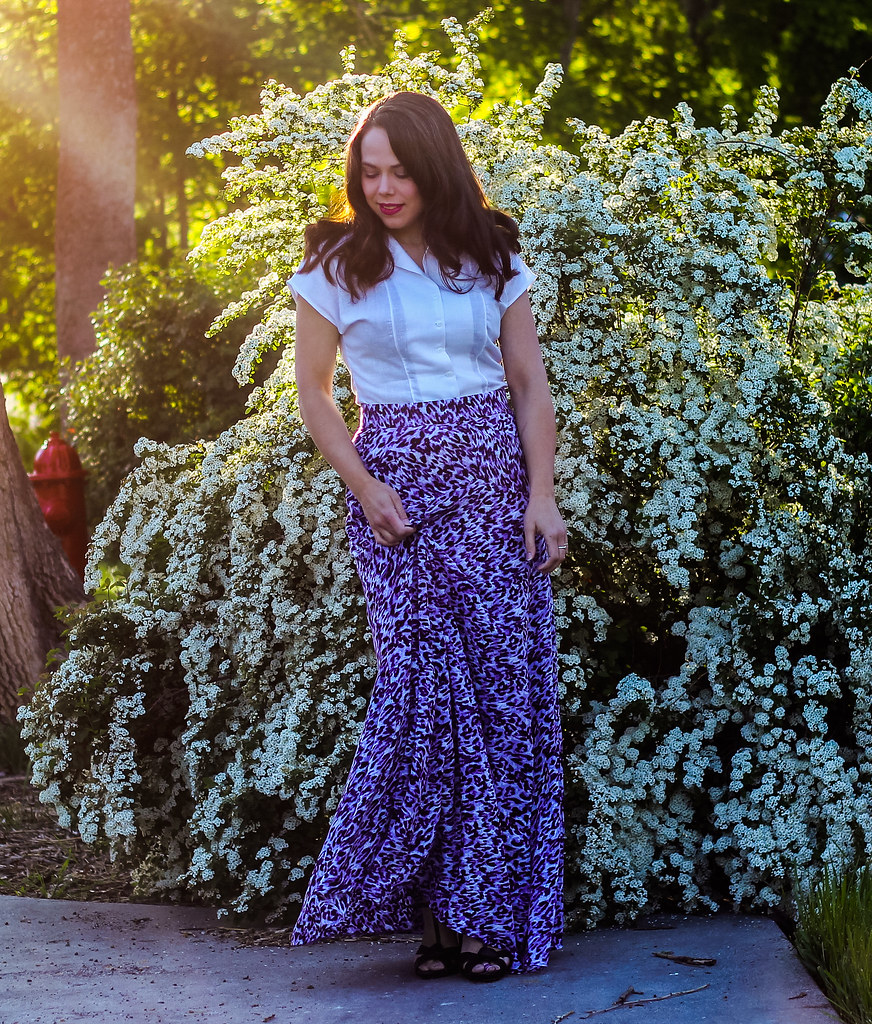
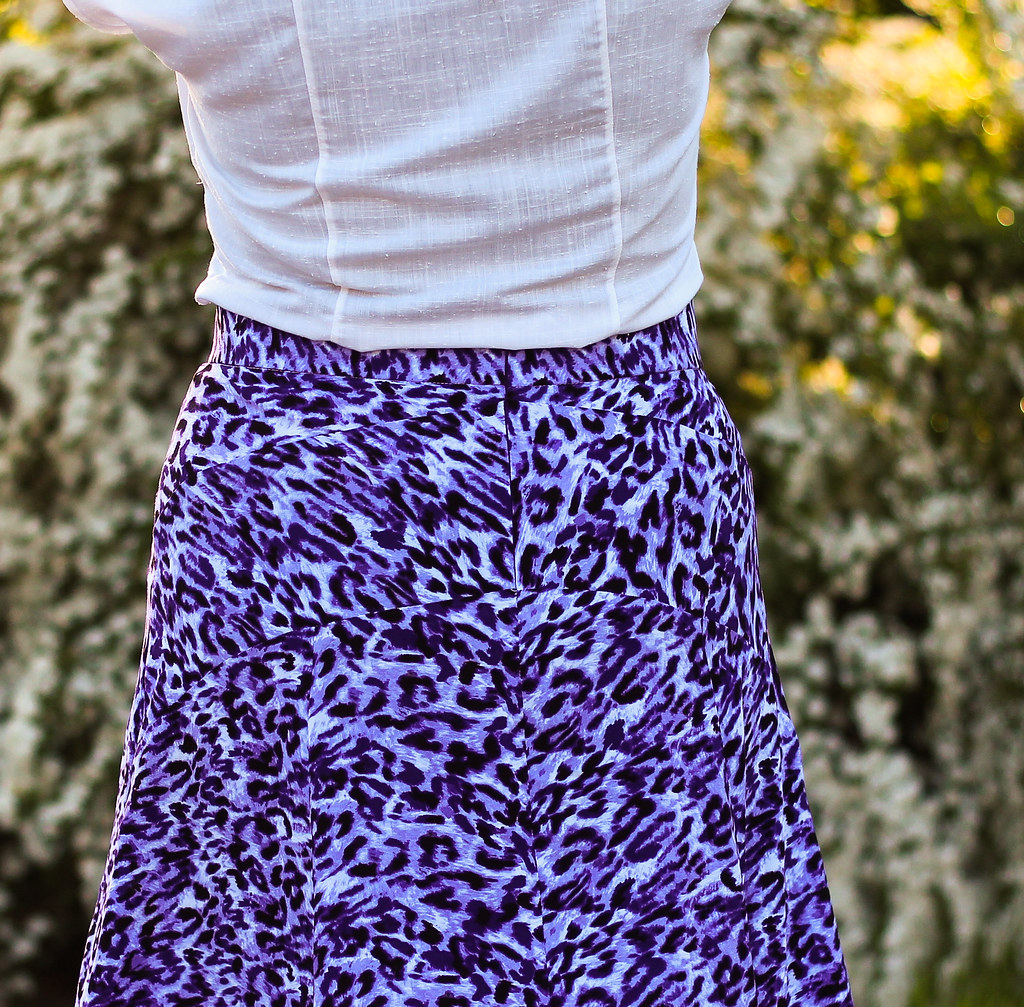
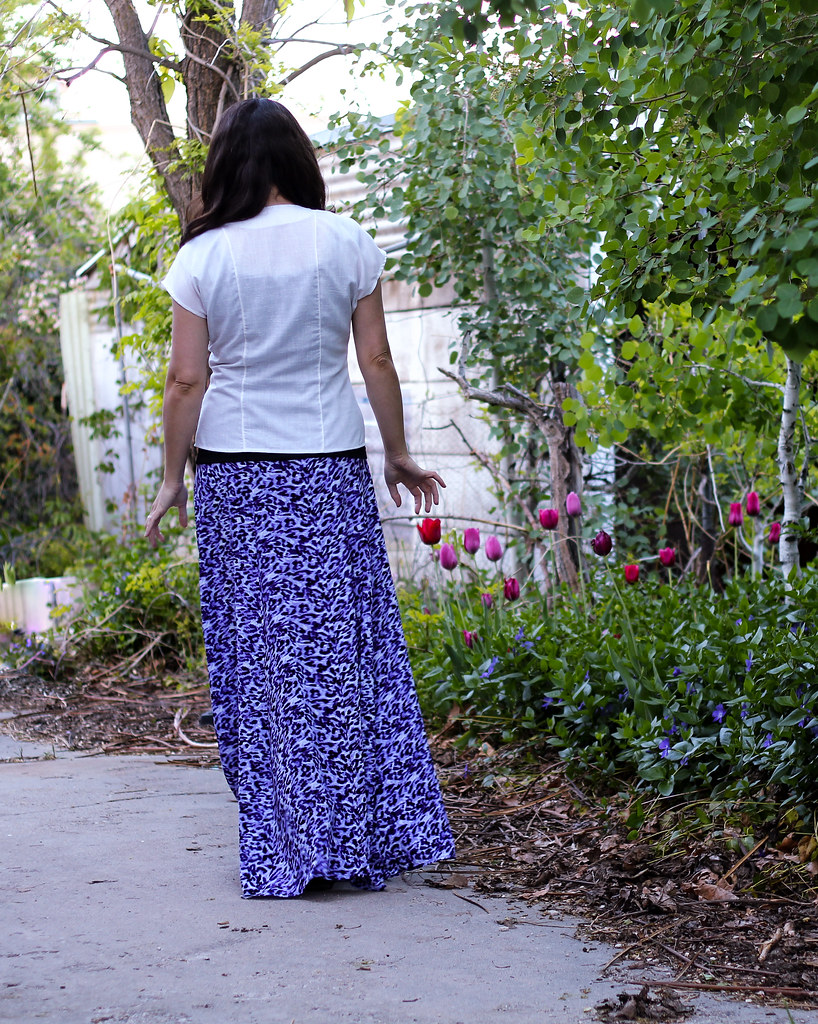
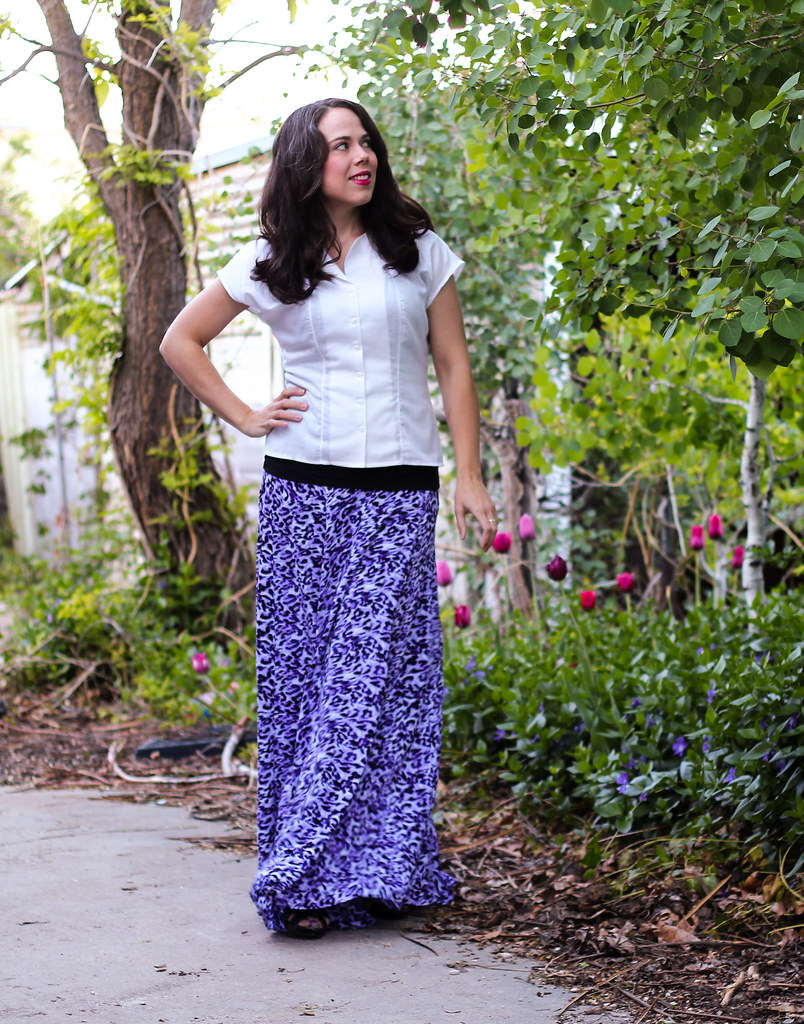
And the maxi that is the current darling of the sewing world is Gabriola. And I can see why! I usually take a bit of convincing before I jump on a new pattern, but as soon as I saw this one, I knew I had to make it. It's so graceful and swishy! And the yoke seaming is both ingenious, as all the shaping is done with the yoke pieces, but also beautiful. Sadly, I used a print that conceals the seaming (This turned out to be a good thing - more on that in a moment) so you can't see the lovely seam lines of the yoke, but the shaping is divine.
She makes me want to dance. The fabric is a drapey, soft rayon challis from FabricMart in a purple leopard print. Because we should all have some purple leopard in our lives.
But alas, all was not rainbows and sunshine as I constructed Gabriola. This is no fault of the pattern, which is divine. Had I followed instructions and cut correctly the first time, there would have been no tale of woe to tell. Sadly, direction following is not my forte.
This wonderful, swirly skirt is composed of panels - three in front and four in the back. The side panels are the same front and back, and you are instructed to cut four of them. I noted that fact in my head, and thought as I was tracing that perhaps I should trace an extra side panel, so that I could just lay out the pieces and cut, rather than having to remember to reposition the piece. Sadly, lazy past Katie did not trace an additional piece, so it was left to my faulty memory, which remembered to cut 4! Yay!
Unfortunately, I cut 4 back panels, which are narrower than the side panels by a significant margin. And which error I did not recognize until I had already sewn the too narrow panels to the center front panel. And serged them. There was only a teeny 1/3 yard of fabric left - not enough to recut the panels, but by piecing the remaining fabric into 3 1/2 inch wide strips, I was at least able to get the width I needed at the hip, so that the skirt fit onto the yoke. Sadly, this means my skirt is not so swishy and lush as the pattern intends.
I can't really tell, and the print hides the piecing. I made a straight size 6, without alterations, save one. For the closure, instead of a zipper and button, I extended the zipper up through the waistband, eliminating the button. If you choose to do this, you'll want a longer zipper than the pattern calls for. An 11-14" should do you. I have a 9" zipper here, and I can *just* squeeze it over my hips.
Invisible zipper is invisible. And my seam matching makes me happy. It is surprisingly easy to match up all these points. Don't be afraid. This skirt is SO worth the (very minor) trouble.
As I was planning this skirt, I realized that I really don't have a blouse that works with it. I wanted something simple and basic, so as not to fight with the skirt. I chose the Liz blouse, from Burdastyle. I made it here in pink swiss dot.
At the time, I didn't really like that first version, but I wear it a lot and it is a great basic. For this one, I used a piece of ?tablecloth? that was given to me by a friend. It acts like a cotton blend, but it has a cool slubby texture and looks linen-like. It's a bit sheer, so I wore it layered over my Sammy Cami.
Instead of the madarin collar on the pattern, I drafted a back neck facing, and skipped the collar altogether.
Overall, I think this pattern is a huge winner. It was fairly simple to sew (as long as you pay attention to the panels) and it is gorgeous and shapely. I'll be making it again for sure. In fact, I'm already planning the next one...

Tuesday, September 3, 2013

The Burdastyle David Bow Tie

This project is actually from last month, but it took a while to get pictures, so you get to see it now. I actually have a ton of stuff to show you, since Mitch gave me a sewing day yesterday, but I still need to take lots of pictures. It'll come.

But today is about the tie. Mitch has been talking about switching from a long tie to a bow tie. The long dangly tie gets into everything. Anyway, I'd been kind of dragging my feet about making one. I was worried about interfacing and things like that. Finally, I decided to just bite the bullet and do it.
And he likes it! It isn't perfect by any means, but I did learn a lot making it.
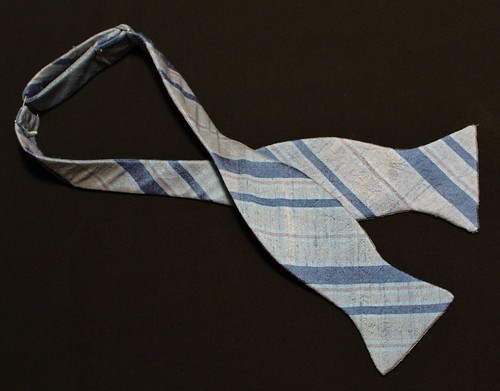
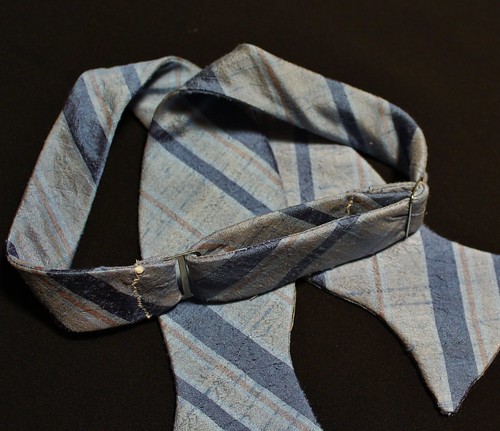
Here is how it looks untied. You can see that there are sliders in back to make it adjustable, which was the trickiest part of the construction. It was actually really easy to make, although turning the two halves of the tie was a little tricky. 
The fabric is a beautiful slubby silk, given to me by a good friend. For interfacing, I scavenged interfacing from old ties, but I actually think this was a bad idea. I was using regular ties, and the interfacing for the RTW bow ties I have since examined is much thinner and more flexible, so this one was nearly impossible to turn right side out and Mitch has difficulty getting it tied.
The thick interfacing is especially notable in the area of the sliders, which makes it really hard to adjust. In fact, it's so stiff, that it ends up being impossible getting it to the length that Mitch prefers. He can get it tied, but it is a little tighter than he finds comfortable.
For a first attempt, I think it's not too bad. Mitch really loves the fabric and I learned a few things that should make the next one great. Fortunately, I have a bit more of this silk for version 2.0.

Monday, September 10, 2012

Burdastyle 05/2011-142

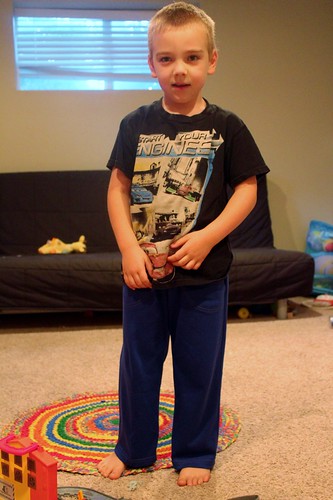
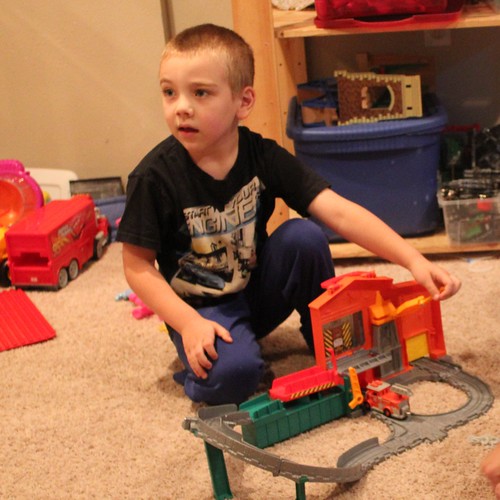
In between fighting with my jacket muslins, I needed a little mental break, and the big boy child needs some pants, so I sewed him a pair.
I know, they look a little like pajamas. He never wears wovens.
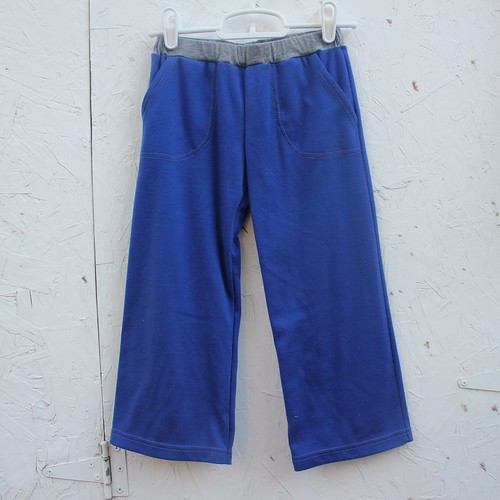
The pattern I used was #142 from the 05/2011 issue of Burdastyle magazine. It is designed for woven fabrics with a jersey waistband, but I used an interlock from the stash for the pant and jersey for the waistband. I also replaced the drawstring with elastic.
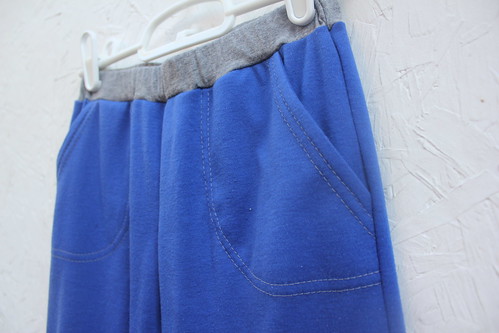
I chose this pattern for the cute pockets. In front, there are hip pockets that I topstitched in place with my coverstitch machine. I was sort of copying the look of these pants by Mini-Boden. I matched the topstitching thread to the color of the waistband.
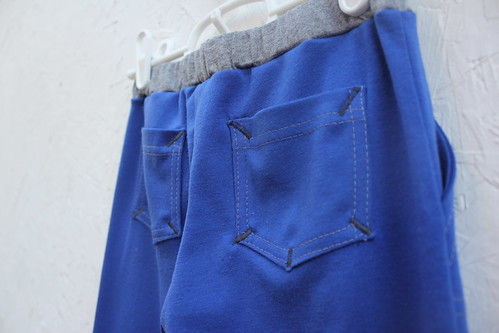
The back has patch pockets, which I attached with the coverstitch, and reinforced the corners with bar tacks in a darker shade of grey.
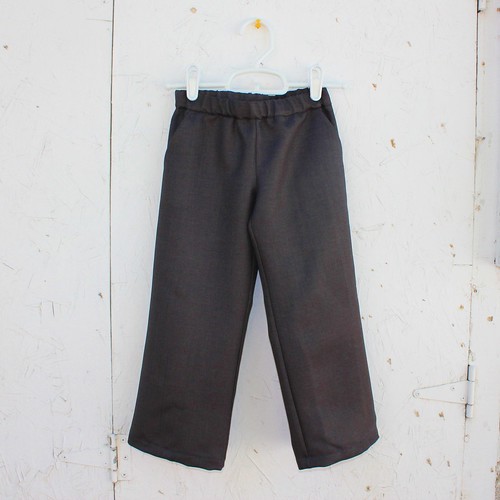
He wore them to school and all afternoon playing and reports that he likes them and they are comfortable. High praise from Logan, so I immediately made another pair. This time I let him choose the fabric, and he surprised me by choosing a woven herringbone suiting in a nice dark grey.
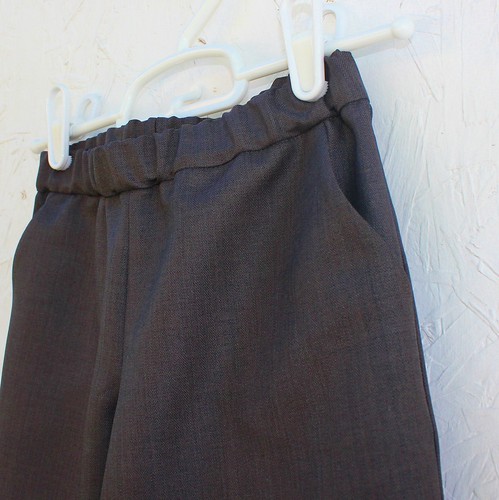
Since these are a bit dressier than the knit pair, I left off all of the topstitching and omitted the back pockets, but i kept the front hip pockets. A boy needs pockets.
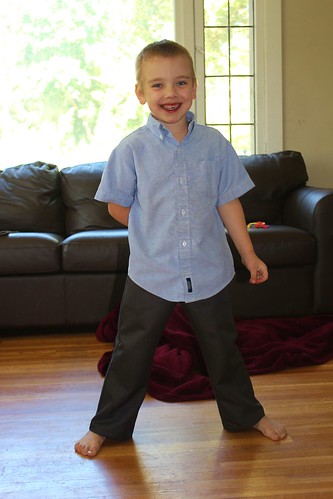
Instead of a contrasting jersey waistband, I made this one of self fabric. I did have to ease the pants into the waistband just a little, since the original was drafted for a stretch fabric, but it worked out and Logan is really pleased with his new church pants.
Purple smile courtesy of bribery with popsicle.

Tuesday, June 12, 2012

Burda Magazine 10/2011-146

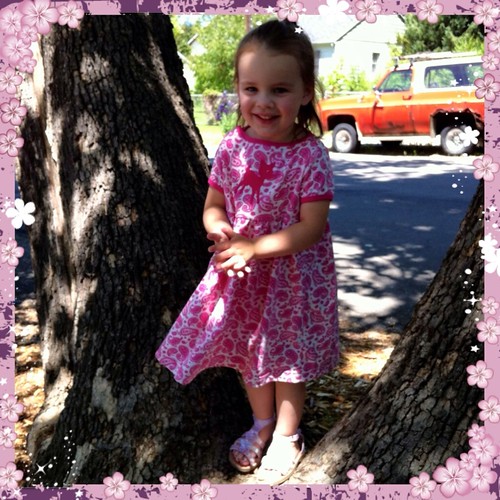
Myra was having a really tough day a few days ago, so I let her in to my sewing room (a big treat!) to choose some fabric for a dress. Naturally, she chose this craptastic old jersey sheet that was on its way to the thrift store...
Fortunately, it turned out really cute. The kid has a great eye.
She actually inadvertently chose the pattern as well. We were sitting on the couch, flipping through Burda back issues together, when she spotted #146 from the 10/2011 issue and asked me to make that dress for her. The smallest size was a 104 and she is still a 98, so I thought I'd peruse my Ottobre collection to see if there was something similar in her size, but there wasn't anything I liked as well, so I decided to just make the 104 and call it room to grow. I know, I could have graded down the one size. I'm lazy.
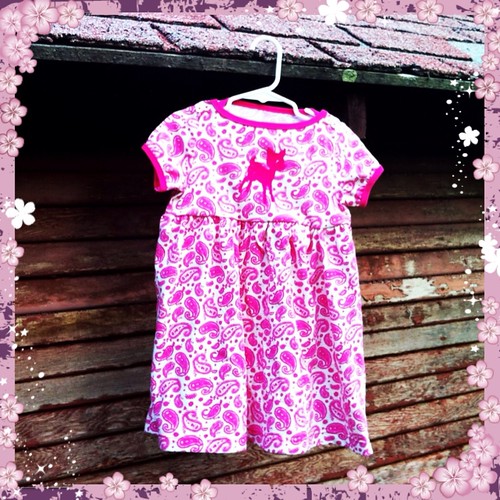
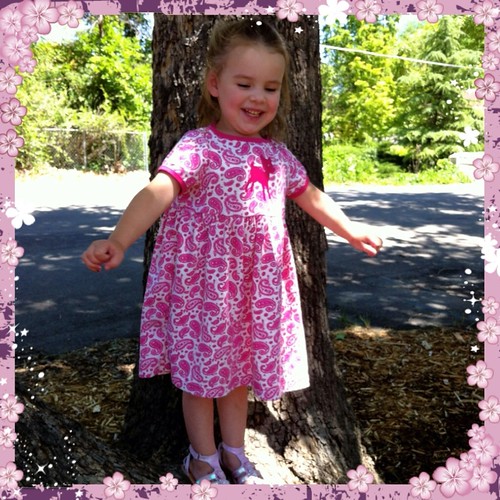
The dress is simple, but with some really cute details. It has a high waisted bodice with a set in sleeve, which is long in the magazine, but I shortened for summer wear. The neckline was to be finished with a simple turned and stitched hem, but I decided to bind it instead. The skirt is a simple dirndl skirt at about a 3:1 ratio, so there is plenty of volume for twirling. The neckline is high and wide - almost a boatneck.
The shoulder is buttoned rather than seamed and the buttons are functional, which makes it easy to get over Myra's melon head. Burda's instructions for creating the button placket were totally incomprehensible - something to do with twill tape. I just made it up as I went along, backing the buttonholes with extra wide bias tape and binding the underlap seam allowance with the same and turning it under. It works and it looks fine, but I'm pretty sure Burda had something else in mind. There was also no marking for the shoulder point, so I have no idea where it was supposed to overlap. I managed to get the sleeves in, so I must have been in the ball park with my guess, but who knows?
Size-wise, the 104 is definitely roomy, but the neckline is fine, so it is very wearable. The length is really good, hitting Myra just below the knee. Since there is plenty of room in the bodice, I suspect that once she outgrows it as a dress, I can get an extra season out of it as a tunic.
Myra's favorite part (and I admit, mine as well) is the little velour decal of a deer I added to the bodice front.  It blends a little with the crazy print, but Myra loves it. It's soft and fuzzy. She's calling the dress her "deer dress" in honor of the decal.
Overall, I am pleased with my first attempt at a Burda kids pattern. Aside from the typically useless Burda instructions, the pattern is great and Myra really likes her new dress.

Friday, June 8, 2012

Burda Magazine 10/2010-118A

Thanks everyone for your lovely comments on my Qiana maxi dress! It is definitely a new favorite and I know I'm going to wear it a lot.

I've been browsing through my patterns lately, with an eye toward one that would make the perfect gingham blouse. This one totally wasn't even on my radar, until I saw ManiMayor's  review on PR. Her version was so lovely, I knew I needed one of my own.
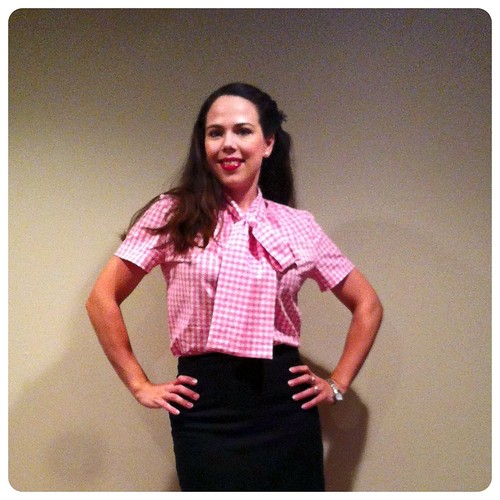
The pattern is from the 10/2010 issue of Burdastyle magazine. It has three different views in the magazine, each view with a different tie. It is a very basic blouse with little in the way of shaping, set in sleeves, and a bias bound, gathered neckline with a slit. The fabric I used is a stretch cotton from FabricMart. It reads as a gingham at a glance, but is actually an even plaid.
When I first put it on Sandra Dee, I thought I had a total wadder on my hands. It was seriously frumpy and sacklike. Fortunately, I had a belt lying around and popped it on. With some waist definition, I think it is pretty darn cute.
The only changes I made to the pattern were to the neckline. Several of the reviewers on PR mentioned that the slit was quite low, so I didn't even bother transferring the marking per the pattern. I just marked the slit where I wanted it while I was tissue fitting. Burda has you put the button on the inside, but I found a cute one that matched, so I sewed it on the outside instead.
For the tie, Burda's instructions called for the neckline to be finished with the bias strip, then for the tie to be topstitched on between the two shoulder seams. I didn't think this gave it a very nice finish, so I sandwiched the tie in between the neckline of the top and the bias strip and stitched them together to enclose the tie with the neckline. It looks very nice both inside and out.
The other major change I made was to make the tie significantly smaller. I cut the width in half and shortened the tie so that when tied in a bow, the ends fell at my waist. The original tie is really huge, and since my fabric already had a lot of body, it was really overwhelming. I think it would have worked in a softer, more draping fabric though.
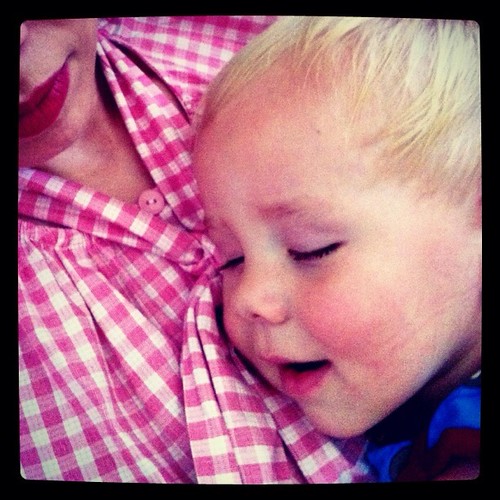
It passes the sleeping baby test of comfort.
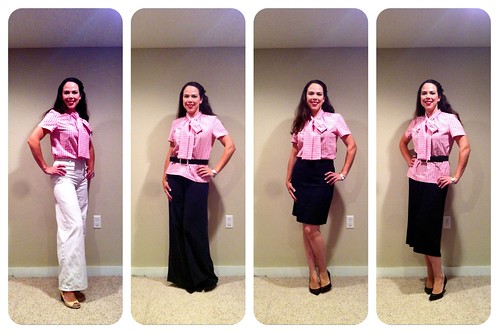
I had fun taking some pictures with different bottoms. I don't generally wear my tops tucked in, but this one has a good shape for it. The bottoms I paired it with are; McCalls 5592 white jeans, New Look 6816 silk pants, McCalls 3830 pencil skirt and black knit column skirt (pulled up to midi length). I'm kinda partial to the short black pencil skirt look myself. What do you think?