Monday, March 24, 2014

Mini Penny Pinafore: Deer, and bunnies and gnomes, oh my!

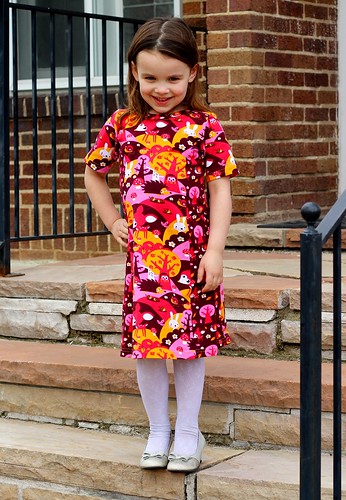
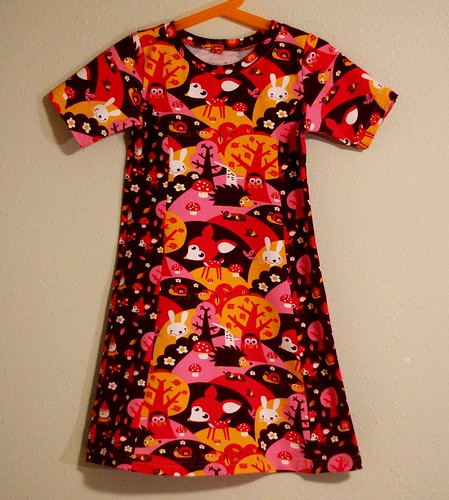
I bought this fabric in the fall, thinking the colors would make a nice autumn look. Ahem. Or spring...
Of course, I bought it fully intending to flagrantly copy the Mini Penny Pinafore cover look, as modeled by the lovely Maia.
I ended up making mine a little different though. The main thing is the short sleeve. Since we are in fact, slowly defrosting here in Utah, I decided she'd probably not be wearing her long sleeve dresses much longer, so short was the way to go. I just hemmed the sleeve, rather than banding it, since the length was dictated by how much fabric I had left.
Since I was doing a short sleeve, I had enough of the center panel fabric to do these sleeves to match it, rather than matching the sleeve to the side panel.
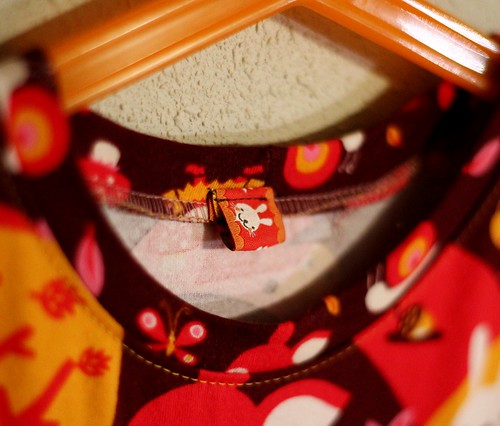
I used the side panel fabric for the neckband though. This Lillestof cotton-lycra jersey has such good recovery, it really is great for neckbands. I added a little bunny ribbon tag to the back neckline, to make dressing easier. I think the cheeky little bunny is Myra's favorite part.
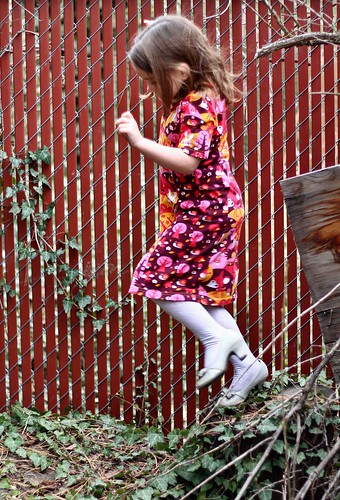
I had just enough fabric left to make Myra a pair of undershorts for modesty purposes. The playground can be a treacherous place.
I love how nicely this pattern fits Myra, both front and back. And it's so cute!
Perfect for playtime.

Friday, March 21, 2014

March of the Shieldmaidens: Barbie style

Hwæt! March of the Shieldmaidens is upon us! This was the perfect opportunity to sew a fun ensemble for this cute Nordic looking Barbie I stumbled upon at the thrift store. Disclaimer: There are many historical inaccuracies here. It's purely for fun.
The outfit begins with a simple underdress in a spring green. I think this color was a reasonable one, that would have been easily obtainable in Norse times. The fabric is a rather unfortunate polyester faille, but Barbie's skin doesn't need to breathe. The pattern I used (Simplicity 8333) is a peasant top, which I lengthened into a dress. I also added a drape to the sleeves, which is pretty, but probably not very practical for your average Shieldmaiden.
The second piece is her Viking apron. This is made of an earthy brown linen. It is just two rectangles sewn together at the sides. I left long vents below the hip for easy mobility, should Barbie need to do any sword play.
The broaches are decorative beads. I like the simplicity of them. I gathered the neckline of her underdress with some anachronistic elastic. There's a bit of velcro back there, too.
I added a leather thong tied in a square knot for some waist definition.
And of course, our Shieldmaiden needed a Shield! I made this one out of a picture I printed off the internet and glued to a bit of cardboard.
Then all semblance of historical accuracy flew out the window, as I really wanted to sew her a leather corset. This is the same pattern as my last post, but made from a rayon bonded leather from fabric.com. I love it over her underdress.
But it's even more "fantasy Viking wench" over her apron! I'm loving how these pieces work together, and despite the historical inaccuracies, I think I did a better job than Mattel. Have you seen Viking Barbie??

Wednesday, March 19, 2014

McCalls 658: Itty Bitty bustier

I've been thinking about my March of the Shieldmaidens make. (Spoiler: This isn't it.) My first thought was to make a corset for Barbie to go over a simple shift style dress. But first I needed a good corset/bustier pattern. I decided to start with McCalls 658, which includes several princess seamed dresses.
I didn't want to cut into my teeny scrap of leather without testing the pattern first, so I grabbed some pink gabardine with a similar weight and stretch and made it up, cutting off the dress length at the high hip.
But it turned out so cute, I had to finish it and add some bling. And make a skirt. Basically, this is the muslin that became an entire outfit.
Fit-wise, I did have to take around 1/8 inch off each seam, which ends up being about 3/4 inch all around. Inside, the bustier is finished with twill tape to keep the edges stable. It closes with velcro at center back.
I added some hotfix crystals to define the neckline a little better. And because bling is fun. The skirt is faux stretch leather left over from my leggings and sweater. I drafted the pattern myself by wrapping the leather around the doll and chalking in the seam lines. It has a velcro closure at the side seam. I left the hem unfinished.
I continued the line of crystals in back. I hate when decorative elements are only in front. The rear line of the skirt is very sleek, thanks to the lack of CB seam.
Overall, I'm completely thrilled with this spur of the moment, muslin turned outfit. I think it is my favorite Barbie outfit I've made so far!

Monday, March 17, 2014

Ottobre 06/2012-3 & 06/2008-2 baby outfit

One of my friends is having a little baby girl. After 3 boys, she's very excited (and a little nervous!) to be welcoming some pink into their family.
I thought this little set was nicely girly, but without making her big brothers want to run and hide! Both fabrics are from Chez Ami. The floral print is a cotton/lycra jersey and the aqua is a coordinating interlock. It's so soft I want to make my entire wardrobe out of it. Perfect for a wee princess.
The tunic is from the 06/2012 issue of Ottobre. It's very simple, but with some fun details.
The body of the tunic is gathered into a sweet round yoke, which is finished with a knit binding. The neckline is snug, but the binding has a lot of stretch, so it should be easy to get onto baby and comfortable to wear.
The full sleeve is gathered into a hemmed cuff. It's a pretty little detail. A full sleeve is lovely, but gets in the way sometimes. I think this is a nice functional compromise.
The pants are a basic legging pattern from the 06/2008 issue. I've made them quite a few times now. In fact, I think I've made a pair for every baby gift I've given for the last several years. Leggings are such an essential baby basic.
For this pair, I finished the leg opening with a binding, rather than a plain hem. I think this is a nice look and ties the two pieces together well.
I hope the sweet princess and her mom like her new clothes. I can't wait to meet her!

Saturday, March 15, 2014

Kitschy Coo Trifecta Top: Mermaid style

So, here is my 4th, and final (for the moment - there will  be more) Kitschy Coo Trifecta Top. I saved this one for last for a couple of reasons.
The first reason is that it is my favorite. But also, this is the one I made the most modifications to. I wanted you to see the Trifecta Top as it is, before I started messing about with it.
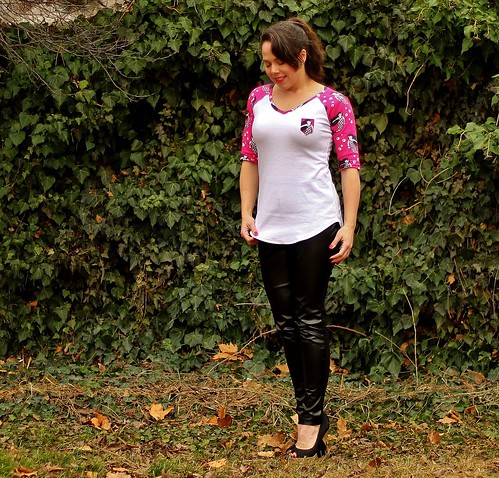
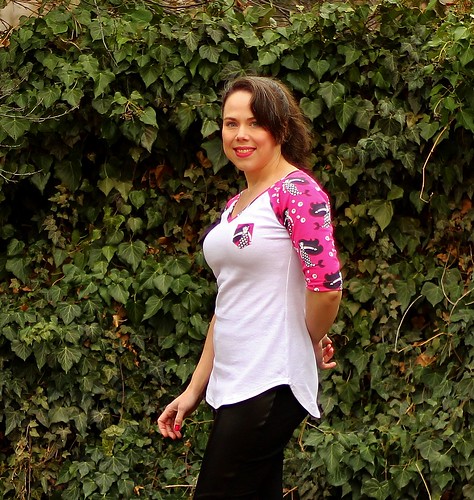
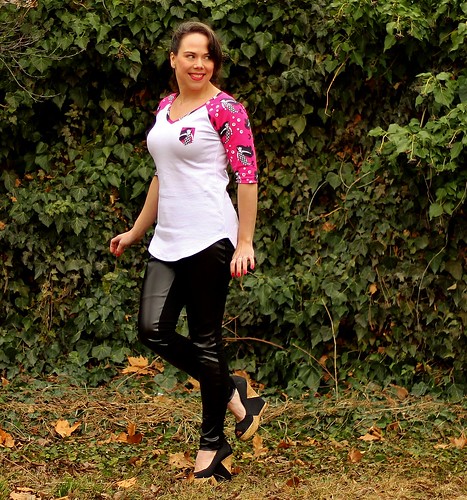
For starters, this is a V neck tee in my typical Kitschy Coo size. The white fabric is a very stretchy mesh-like double knit and the pink print is a cotton jersey from the Kitschy Coo shop, sadly now sold out. It has about 20% stretch.
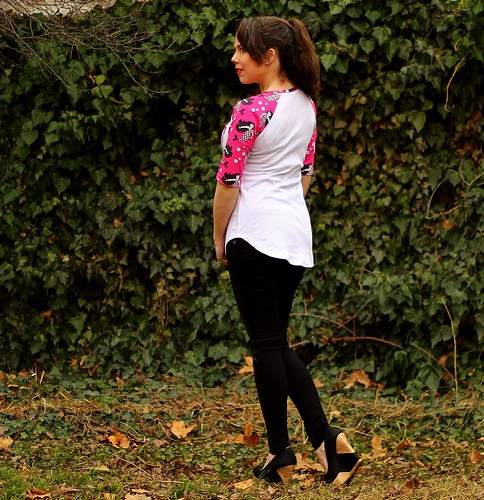
I only had 1/2 metre of the Mermaids, so the sleeves are an unorthodox length that was the longest I could scrape out of my short piece of fabric. I also added a teeny pocket, but this was before Amanda had added the pocket to the pattern, so the placement and size of the pocket on the pattern is different than this one.
The major change I made was to create a curved "baseball tee" type hemline. To do this I extended the length of the tee 5 inches at center back and 3 inches at center front, then curved up the hemline to the original length at the side seams.
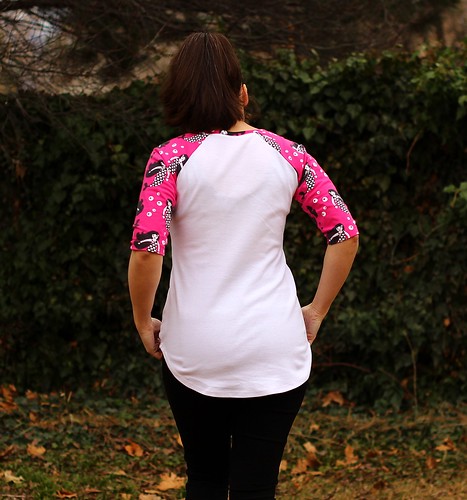
I'm really pleased overall with my sporty, fun top. And so was Myra! When I finished it, she demanded her own. She's lucky I had just enough of the Mermaids left to make a raglan for her.
Matchy Mermaids!
And well, that's it! I hope you've enjoyed seeing all the ways I've made the Trifecta Top my own. If you haven't ordered it already, you still have one more day to take advantage of the TRIFECTA coupon code to save 20% off and 2 Kitschy Coo patterns.