Thursday, April 11, 2013

Pants, pants, pants, pants...Pants!

I mentioned that one of my major projects this month was going to be pants for the hubby. He has a very hard time finding well fitting pants in RTW - y'all know the story - which means it's no treat for me to fit him either. Still, the man needs pants that fit, so I toiled on. Our first wearable muslin is in process, but I noticed something really interesting as I was going through the muslin process, and I wanted to share it with you.
And here it is. My hubby and I have exactly the opposite fitting challenges when it comes to making pants. Can you see how different our shapes are from the side? His waist sits very low, while mine is quite high. The curve of his buttocks starts almost immediately after his waist, while I have a "ski slope" (Thank you Heather, for that term) down to my actual butt. The shape of his butt is much more round, while mine is flat. After having this epiphany, I realized that this was why I was having such trouble fitting his pants. I was trying to make them work like mine, and they don't.
So, for my low-butted, long & high waist, the alterations I make are these. This is Jalie 2908. The orange line is the original pattern, and the red is mine. You can see I raised the waistline - an inch at CB, tapering down to 3/4 inch at the side seam. The front is raised 3/4 inch all around as well. For the crotch, I have to scoop out the curve to allow for my lower backside, but since my butt is flat, I don't need any extra space down there really, so I leave the hip line and the crotch hook alone.
Here is Mitch's pant pattern. This is BWOF 10/2005-132. Again, the original pattern (without seam allowances) is in orange. The red line is the altered pattern. You can see that I shortened the rise quite a bit. I also shortened the darts significantly, although that isn't as obvious here. Joost reminded me that darts should point to the area of maximal fullness, which on Mitch is quite close to his waist. While Mitch's rise is fairly short, she still has a fairly long total crotch length, since he is quite full back there. I added length back to the crotch hook, giving the length he needed to go over his buttocks, but without increasing the rise, which would have just put us back to square one. Since his fullness is much higher than mine, instead of scooping out the crotch curve, I actually had to flatten it a bit. I also added width to the hip area, to go around the circumferential length, which balanced out the additions elsewhere.
Here is the final muslin, with the changes as above. I could probably tighten up the fit in the thigh area, but Mitch likes his pants on the more relaxed fit side, so I'm leaving it for this first version, which I'm making in a pretty stiff cotton canvas. Hopefully, I can show you the fruit of my labors soon.

Saturday, April 6, 2013

Butterick 3475: A sewing milestone

We've reached a sort of sewing milestone around here.
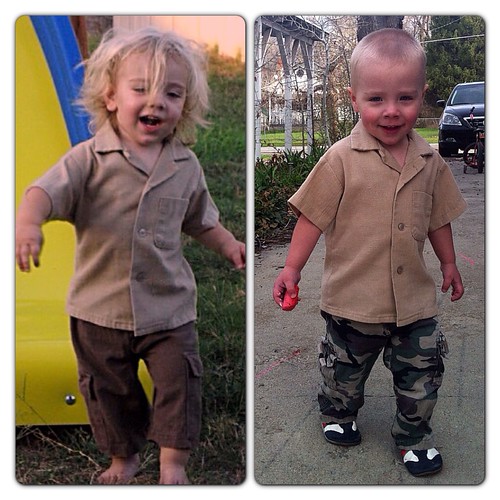
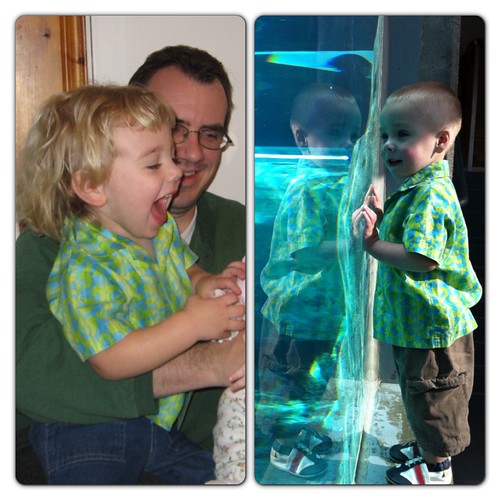
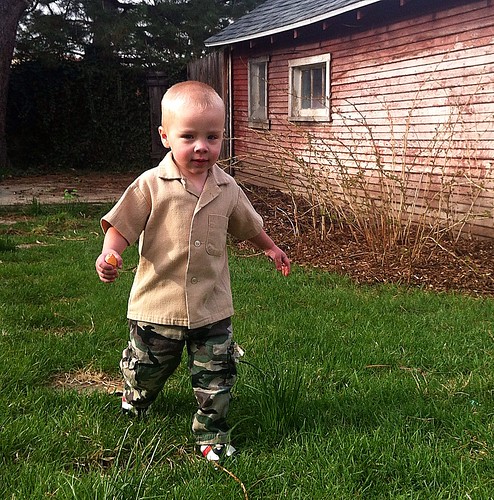
My smallest boy has finally grown in to some of the clothes I sewed for my biggest boy. Although I've known how to sew pretty much my entire life (Thank you, Mom!), I didn't really sew consistently until about five years ago, when I was pregnant with Myra. I started by sewing slings for babywearing, and before I knew it, making clothing for the kids, Mitch and eventually, for me. My first big clothing project was matching shirts for Logan and Mitch. I blogged about it here - before I even had a separate sewing blog.
I used this pattern at least a half dozen times in several different sizes. It was my go-to boys pattern up until I found Ottobre. The pattern is Butterick 3475, and amazingly, it is still in print! The brown shorts Duncan is wearing above are also from this pattern. Logan's wearing them in the top picture.
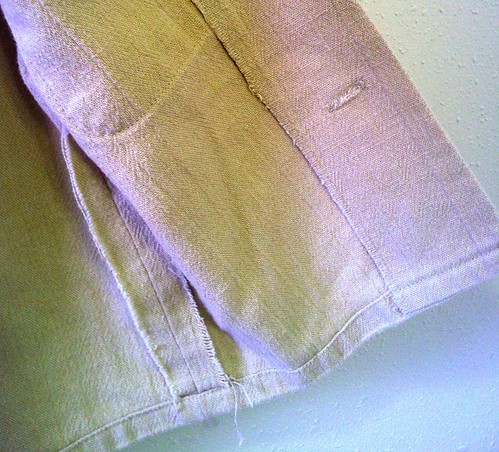
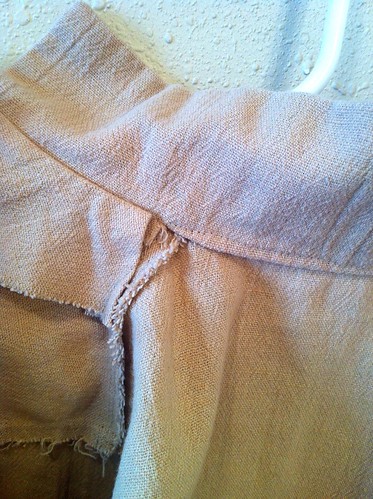
When I pulled this shirt out of the box it had been living in for nearly 5 years, I flipped it open to see how it was constructed, and I thought some of you might like to see my humble beginning. If I recall correctly, the fabric is a poly/rayon blend with a linen like appearance. It frays like mad, but as you can see, I didn't finish any seams. In fact, while the bottom hem is nicely double folded, the sleeve and pocket hems are a single fold. I can't believe this is still holding together, but it is! At least I zigzagged the facing edge. I'm pretty sure the pattern told me to do that.
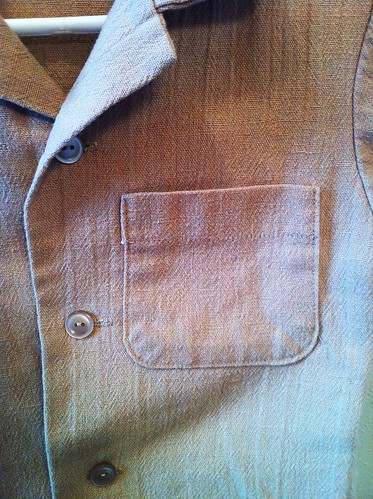
OK, I'm kind of proud of that smooth, rounded pocket. Nice work, Past Katie! But what is up with the buttonhole placement? They're like an inch away from the edge of the shirt. And the buttonholes themselves are no work of art either. Janome makes a pretty skimpy buttonhole if you only go over it once. I clearly only went over it once.
More shameful unfinished seams, here. This is inside the collar at the shoulder seam. This collar is constructed with a cut on front facing that wraps around to the shoulder, covering the collar seams there. The back neck seams are clipped and tucked inside the collar, which you are supposed to hand sew down. Ahem. You can see that my aversion to hand sewing is not a new thing.
So, even though my sewing was far from perfect, both my busy toddler boys have comfortably worn these shirts, and I suspect they'll survive another couple of kids as well. I wanted to share this with you, so that you can see that wherever you are on your personal sewing journey, what you make and do has value, and the more you create, the more you'll learn. Happy sewing!!

Tuesday, April 2, 2013

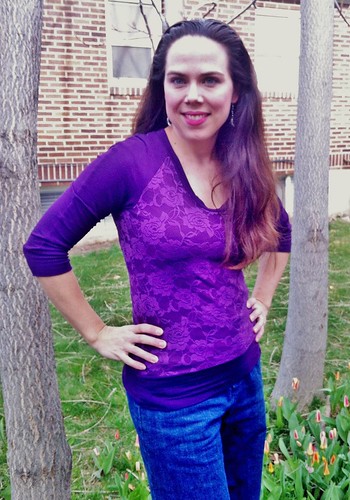
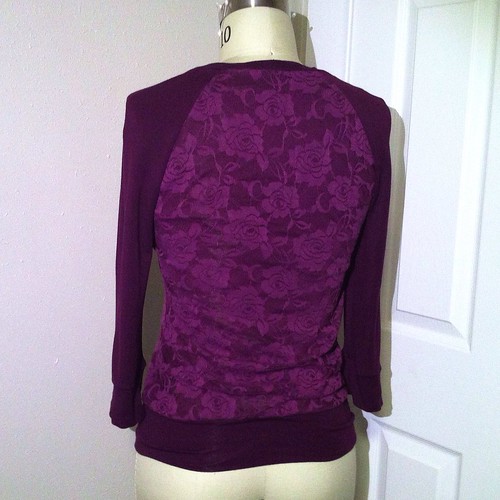
Burda Magazine 04/2009-112 lace knit top

I've been salivating over all of the lovely lace makes on the interwebs lately, but when I saw this on Pinterest, I knew what I wanted to make, like right now.
Obviously, mine is somewhat different than the inspiration piece, but I've seen several other lace overlay tees lately, so this is really more of a conglomeration of all of those.
The pattern I used was Burda Magazine 04/2009-112. I made it a couple of years ago in a striped slinky knit and I wore that one so much I wore the fabric threadbare.
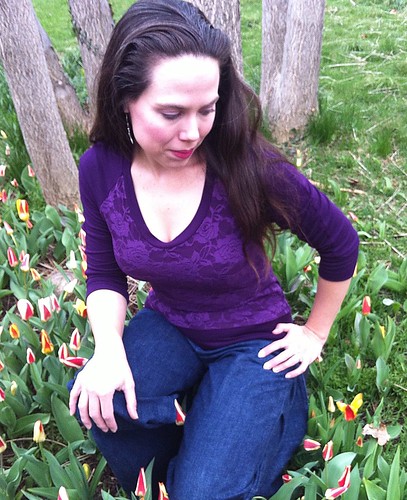
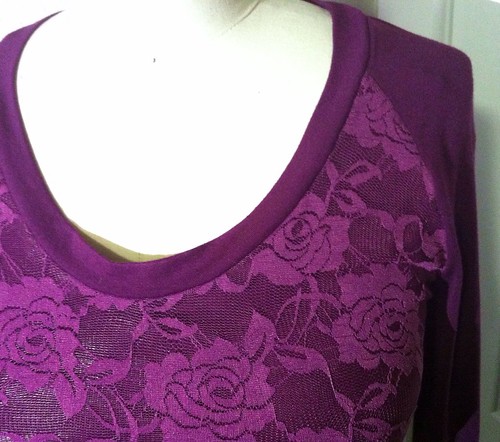
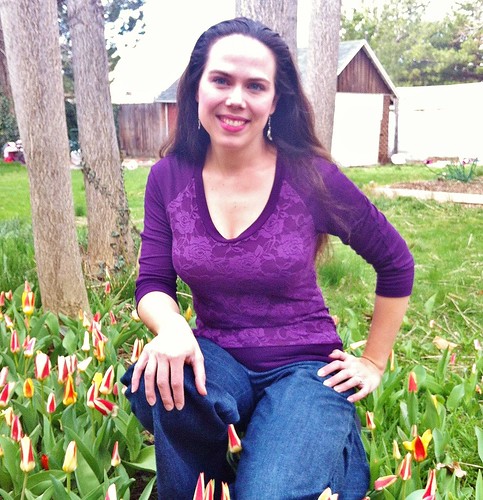
The fabrics I used both came from FabricMart, although I purchased them years apart. I'm thrilled with how well the colors match. For some reason, this color is really hard to photograph. The modeled pic at the top shows the color the best. The solid knit is a rayon-lycra jersey and the lace is poly-nylon stretch lace.
I elected to use the fashion fabric as for the neck, wrist and hip bands. Unfortunately, this fabric has a ton of stretch, so despite shortening the neckband by about 3 inches, it still collapses a little into the cleavage. Meh. I don't think I care enough to rip it off and reattach it again.
Should you be interested in recreating this look, it's really simple! Just choose your favorite raglan tee pattern (although if you use a set in sleeve pattern, that will work as well) - You could use this one, this one or this one. Cut out your knit as usual, then cut the lace (make sure it is stretch!) in just the front and back bodice pieces.
Overlay the lace on top of the jersey (like an underlining) and baste the two together around the edges only, inside the seam allowance. I use a zigzag stitch to baste, then I don't have to pull out the stitches later, since they are hidden inside the seam allowance. Now just assemble your top according to the pattern instructions, treating the basted pieces as one. Easy peasy!
I'm so pleased with this top. It was a really simple make, but I think it has a lot of impact. Mitch was pretty impressed with it, and even mentioned how versatile it would be. I think so, too. The lace allows it to be dressy, even though really it's just a tee shirt.

Monday, April 1, 2013

Monthly Roundup: March 2013

March was an interesting month. My sewing mojo totally tanked early in the month, and I spent a lot of time fighting a pant muslin. So, I really felt like I wasn't very productive, but the numbers tell a different story...

I sewed;
1) New Look 6000 dress for me
2) Kitschy Coo Skater Dress mermaid costume for Myra
3) Butterick 4910 nightgown for Myra
4) Ottobre 03/2004-20 pants for Logan
5) Jalie 2908 jeans for me
6) Ottobre 03/2007-20 pants for Logan
7) Sewaholic Renfrew v-neck tee for me
8) Ottobre 02/2007-1 tank for me
9) Burda 7248 skirt for me
10) Burda magazine 04/2009-112 top for me (now blogged)
11) Ottobre 03/2004-20 pants for Logan

I sewed 11 items (and 2 muslins) with a total yardage of 27 yards! Yay! 5 of the projects used stash fabrics and I used a Burda magazine pattern and Ottobre Woman, so I'm pleased there. My goal for fabric purchases from last month was 12 yards, and I added 28 yards to the stash. Oops. I think April needs to be a total fabric fast, just to get back on track. I can do this.
My big focus for March was pants fitting. I'm not going to pretend I aced this one, but I did learn a few things. The biggest thing was to start with a pattern that works well for me. After multiple muslins and countless alterations, the Vogue pattern I started with was still just OK, but with only a few typical alterations and no muslin at all, the Jalie jeans pattern was a winner. I need to really explore that a bit more. Perhaps I'll take y'all along for the ride, shall we?
I'm pretty excited about the April Challis Month that Lady Katza is hosting on her blog. If you don't follow her (well, you should!!), then you should head over there now and check out all the other fun things she's been sharing about fiber and fabric, as it related to challis, rayon in particular.
I've hunted through my stash for challis and patterns appropriate to it. I have these five pieces, although I probably won't get them all sewn up in April. I really think the drape of challis is well suited to the styles of the 40s, so my pattern choices are vintage 40s heavy. What do you think?
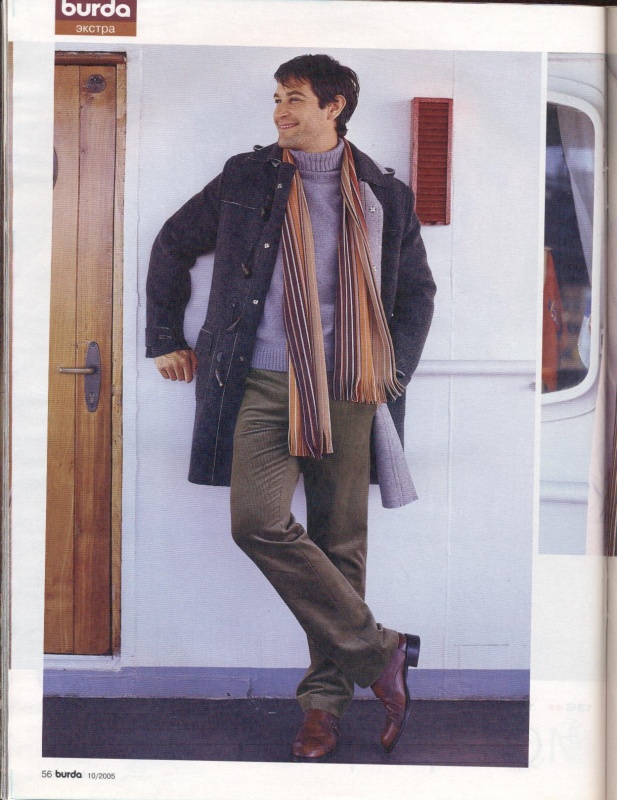
The final "big" project that I want to tackle this month is pants for my honey. He's been very long suffering about this, but he really does need pants, and RTW really doesn't work well for him. We're starting out with this Burda magazine pattern from 10/2005. It has a faced waist and doubled darts in back, which I think will work well with his shape.

Also in April, we'll be getting ready behind the scenes for a super-fun swimwear sewalong. I'm teaming up with Leila of Three Dresses Project and we have some amazing things planned for you, so stay tuned!!

Friday, March 29, 2013

Burda 7248 Spring Skirt

I have a bunch of projects that I really should do, but the sun has finally peeked from behind the clouds and melted the snow; my tulips are blooming and I wanted to sew for SPRING!
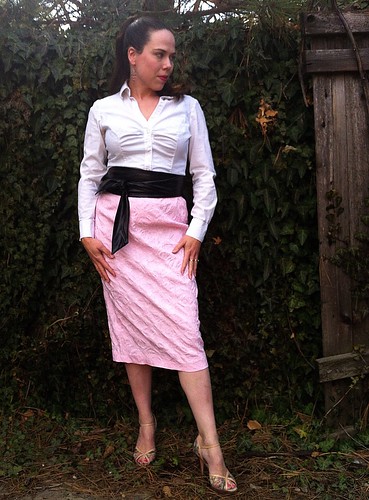
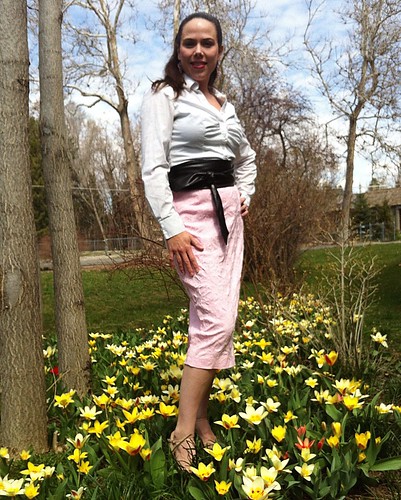
So I made a pink pencil skirt. With flowers on it.
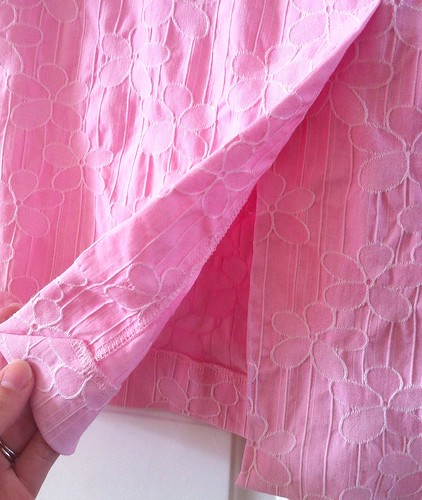
This is the fabric I used. Isn't it amazing!! Totally quintessential Spring. It is a stretch woven with an interesting interwoven floral design, given to me by the lovely and talented Lady Katza. I think this is actually the wrong side, but I liked it better so I used it this way. It has a ton of stretch, which runs with the grain like bengaline, so I cut the skirt on the cross grain to take advantage of the stretch around my body.
The pattern I used is Burda 7248, a vintage reprint from the 50s. I've used it before to make this Alexander McQueen knockoff, and really like the shape. This time, I actually sewed it as drafted, only making a few alterations for fit, based on the first version. While the skirt is pretty basic, it has all the bells and whistles.

Back vent with a nice fold over facing on the underlap, which finishes it nicely. You can see that I decided not to line this, both because I couldn't be bothered and because I didn't want to mess with the stretch of the fashion fabric.
I cut the waistband on the fabric's grain so that it wouldn't stretch and also to conserve yardage. Myra wants some, too. I accidentally attached the waistband without accounting for the underlap, so the skirt is a wee bit big in the waist, and there wasn't anywhere for a buttonhole. Instead, I sewed on a couple of hook and eyes. I kind of like it though. It's nice and flat without the bulk of a button back there.
You can't really tell from the line drawing, but this skirt is actually really long. I cut off an inch at the hem and added 1/2 inch to the hem allowance (functionally shortening it 1 1/2 inches) and you can see that it still falls an inch or so below my knee. As drafted it is a little bit of a frumpy length on me, but I really like the just below knee length, so future makes will be shortened.
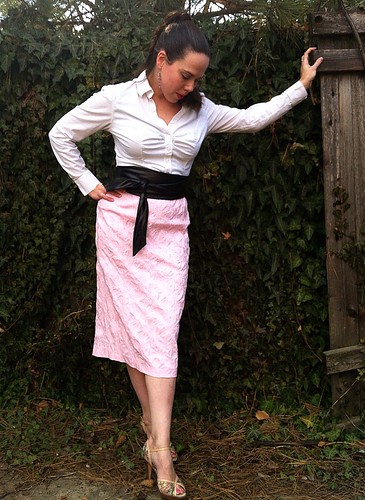
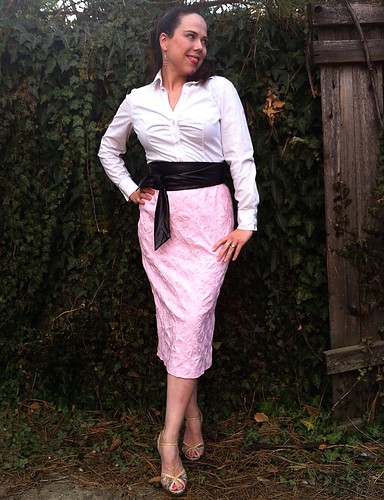
I'm really pleased with this skirt overall. The pattern is great and the fabric is cool and comfortable. It will definitely get a lot of wear this Spring. I'm planning to wear this as my Easter outfit on Sunday. The blouse is Vogue 8747 and I've belted it with a faux leather tied obi that I think is pretty fun. I'm not too sure about these shoes though. What do you think?
And should you doubt the appearance of Spring in the Salt Lake Valley - look! Tulips!