A big thank you to Tanit-Isis and Anonymous! I think I fixed that pesky front crotch curve.
Better, yes? Here is how it looked before.
So, Tanit-Isis got me thinking about the shape of the curve, but I wasn't sure what to do about it. Anonymous (who are you? You are a genius!) pointed me it the direction of the Savvy Sewer Salon over at Sawyer Brook Fabrics. Jennifer Stern had hosted a couple of sew alongs and addressed several fit issues, including this one (You'll find that thread here.). When the wee one went down for a nap, I decided to give it a try. It worked! And it only took about a 1/8 inch change to totally change the fit of these pants.
The original stitching line is in red, with the new stitching line in tan. You wouldn't think that teeny change would make any difference at all, but it did and I am thrilled!!
Thank you both for commenting and getting my mind working!!
Wednesday, November 23, 2011
Pant's fitting woes
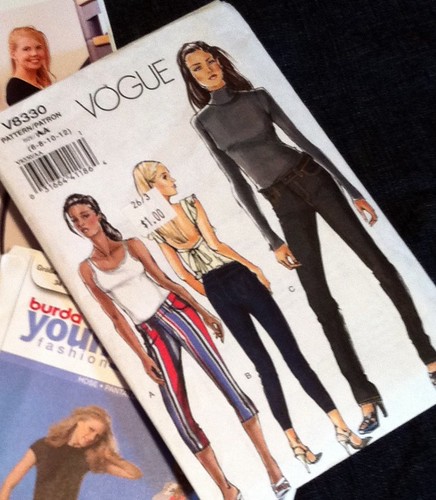
I've started in on my new jeans. I'm using Vogue 8330, which is an OOP pattern from 2006 or so.
It has several positive reviews on PR and I like the shape of it. I've been wanting to make a pair of "skinny" jeans for a while as I wear the RTW pair I bought often, even though it isn't all that great a fit. Anyway, I started out with some flat pattern alterations. This pattern is quite low rise, which isn't a great look for me, so I added some height to the rise and made my now usual crotch alterations (scoop out and lower the back, lengthen front hook slightly). Then I whacked a muslin out of some crazy orange stretch sateen, which has a similar weight and stretch to my denim.
This is back version 2.0, after I took 2 1/2 inches off the CB waistband and darted the yoke by the same amount. I'm pretty darn pleased with the fit back there, actually. There are a few under the seat wrinkles, but without them I can't sit down. Wearing ease is a must.
In front, I'm not so pleased. Those darn crotch wrinkles - what is that about?? I looked them up in The Perfect Fit, which said that this was a full thigh problem. I can buy that, so I tried releasing the side seams, but that actually made it worse! Sandra Betzina's Fast Fit says I need more space in the inseam, and I was about to try that alteration when the small people woke up and I had to stopplaying sewing.
So ladies, what do you think?? I know there has been a lot of discussion about these particular wrinkles out there in the blogosphere lately. I always see them in RTW. Do I just live with them, or is there something I can do to fix this??? This is why I sew! I'm off to check out Sunni and Sarai's pant fit tutorial's. If y'all have any suggestions, I am all ears!
It has several positive reviews on PR and I like the shape of it. I've been wanting to make a pair of "skinny" jeans for a while as I wear the RTW pair I bought often, even though it isn't all that great a fit. Anyway, I started out with some flat pattern alterations. This pattern is quite low rise, which isn't a great look for me, so I added some height to the rise and made my now usual crotch alterations (scoop out and lower the back, lengthen front hook slightly). Then I whacked a muslin out of some crazy orange stretch sateen, which has a similar weight and stretch to my denim.
This is back version 2.0, after I took 2 1/2 inches off the CB waistband and darted the yoke by the same amount. I'm pretty darn pleased with the fit back there, actually. There are a few under the seat wrinkles, but without them I can't sit down. Wearing ease is a must.
In front, I'm not so pleased. Those darn crotch wrinkles - what is that about?? I looked them up in The Perfect Fit, which said that this was a full thigh problem. I can buy that, so I tried releasing the side seams, but that actually made it worse! Sandra Betzina's Fast Fit says I need more space in the inseam, and I was about to try that alteration when the small people woke up and I had to stop
So ladies, what do you think?? I know there has been a lot of discussion about these particular wrinkles out there in the blogosphere lately. I always see them in RTW. Do I just live with them, or is there something I can do to fix this??? This is why I sew! I'm off to check out Sunni and Sarai's pant fit tutorial's. If y'all have any suggestions, I am all ears!
Labels:
fitting
Monday, November 21, 2011
New Look 6926 & Style 2687
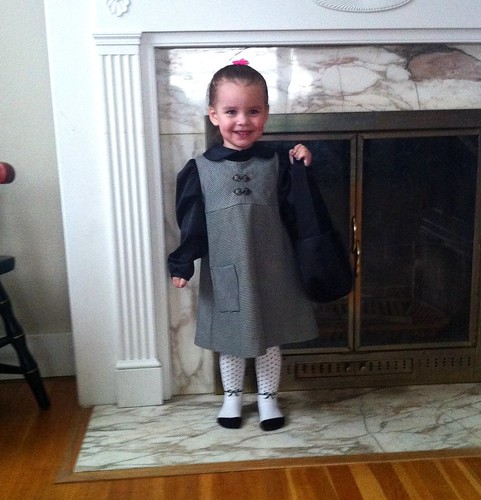
I was sorting through patterns the other day, attempting to impose some order on my sewing space, and I came across this pattern that I purchased intending to make Myra an outfit from the scraps of this skirt. She's about to outgrow this pattern, and since I am a bit obsessed with houndstooth right now, I decided its time had come.
I'm happy to say that we are both thrilled with the result!
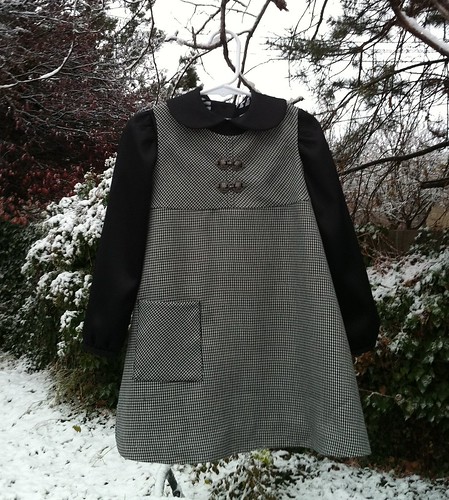
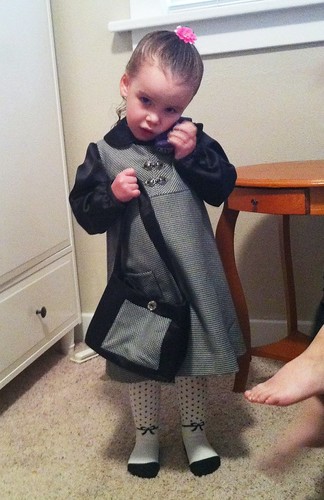
The dress is made with New Look 6926. I used view C, which is an unlined jumper with front and back bodice cut on the bias and bias cut patch pockets on the (straight grain) skirt. Per the pattern, the neckline and armholes are finished with bias tape, but I elected to fully line my version. The main fabric is a wool blend from Hancock's and the lining is a poly/acetate lining, also from Hancock's. As mentioned, they are both left over from this skirt.
I used an invisible zipper in back, and I'm so pleased with how well in came out. This is attempt #2, as the first time I managed to twist the zipper. I hate when I do that!! Since the bodice was on the bias, I stabilized the center back seam allowance with fusible tricot interfacing, cut on grain with no stretch in the vertical direction.
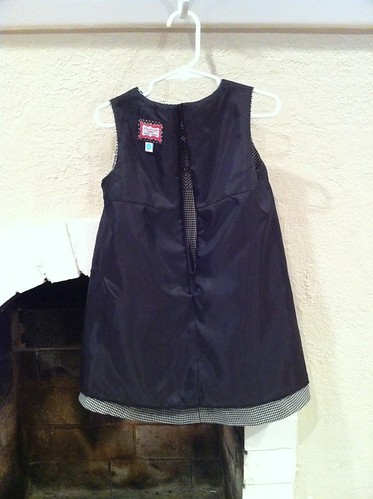
Here is the lining, from the back. I also stabilized the armholes and neckline with interfacing, and inserted the lining completely by machine following Trena's amazing tutorial. It looks completely amazing, if I do say so myself. You must try her technique. It was easy and looks great. The little tag comes from Izzy & Ivy. They have the cutest size and care tags.
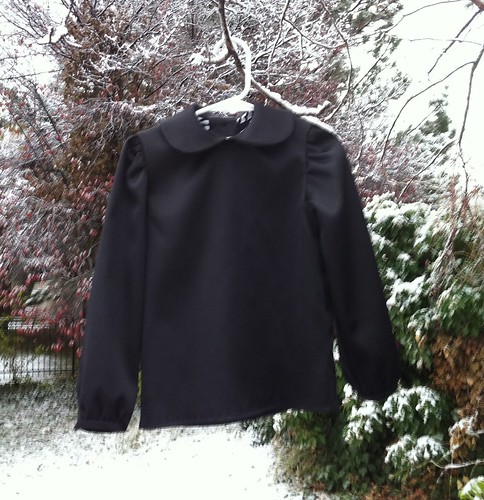
The blouse is from OOP Style 2687. It is a basic blouse with a Peter Pan collar and puffed sleeves gathered into a narrow binding. The neckline is finished with bias tape. I used a zebra print as Myra refuses to leave the house if there isn't some animal print on her person. It's a good basic pattern, and I'm sure I'll use it again, as it goes up to size 8. The fabric is a heavyweight polyester satin from Fabric Mart. I have miles of this stuff as I ordered some, then got a large length in a mystery bundle.
Myra's favorite part of the ensemble is the little purse. It is also from New Look 6926. I made it out of the same satin as the blouse. The bag body is interfaced with craft bond interfacing and the pocket and bag itself are lined with the satin as well. The pattern calls for a ribbon closure, but Myra can't tie a ribbon, so I found a cute silver flower button in my stash and made a loop out of black yarn to button it.
Myra loves her purse, and immediately filled it with the trappings of toddlerhood.
Linked up!...
Next up, I need a pair (or 2) of jeans. I joined up with Lynn to sew up some jeans in her sew-a-long.
Come and join us, or just follow along! There has already been some great info shared.
I'm happy to say that we are both thrilled with the result!
The dress is made with New Look 6926. I used view C, which is an unlined jumper with front and back bodice cut on the bias and bias cut patch pockets on the (straight grain) skirt. Per the pattern, the neckline and armholes are finished with bias tape, but I elected to fully line my version. The main fabric is a wool blend from Hancock's and the lining is a poly/acetate lining, also from Hancock's. As mentioned, they are both left over from this skirt.
I used an invisible zipper in back, and I'm so pleased with how well in came out. This is attempt #2, as the first time I managed to twist the zipper. I hate when I do that!! Since the bodice was on the bias, I stabilized the center back seam allowance with fusible tricot interfacing, cut on grain with no stretch in the vertical direction.
Here is the lining, from the back. I also stabilized the armholes and neckline with interfacing, and inserted the lining completely by machine following Trena's amazing tutorial. It looks completely amazing, if I do say so myself. You must try her technique. It was easy and looks great. The little tag comes from Izzy & Ivy. They have the cutest size and care tags.
The blouse is from OOP Style 2687. It is a basic blouse with a Peter Pan collar and puffed sleeves gathered into a narrow binding. The neckline is finished with bias tape. I used a zebra print as Myra refuses to leave the house if there isn't some animal print on her person. It's a good basic pattern, and I'm sure I'll use it again, as it goes up to size 8. The fabric is a heavyweight polyester satin from Fabric Mart. I have miles of this stuff as I ordered some, then got a large length in a mystery bundle.
Myra's favorite part of the ensemble is the little purse. It is also from New Look 6926. I made it out of the same satin as the blouse. The bag body is interfaced with craft bond interfacing and the pocket and bag itself are lined with the satin as well. The pattern calls for a ribbon closure, but Myra can't tie a ribbon, so I found a cute silver flower button in my stash and made a loop out of black yarn to button it.
Myra loves her purse, and immediately filled it with the trappings of toddlerhood.
Linked up!...
Next up, I need a pair (or 2) of jeans. I joined up with Lynn to sew up some jeans in her sew-a-long.
Come and join us, or just follow along! There has already been some great info shared.
Labels:
Bag,
blouse,
dress,
girls,
New Look 6926,
Style 2687
Saturday, November 19, 2011
Vintage pattern love
Hey ladies,
This is a totally shameless plug for my Etsy shop. I just listed some darn awesome 70s patterns. Hop on over and take a look! Here are a couple of my favorites.
And many more!! Click here.
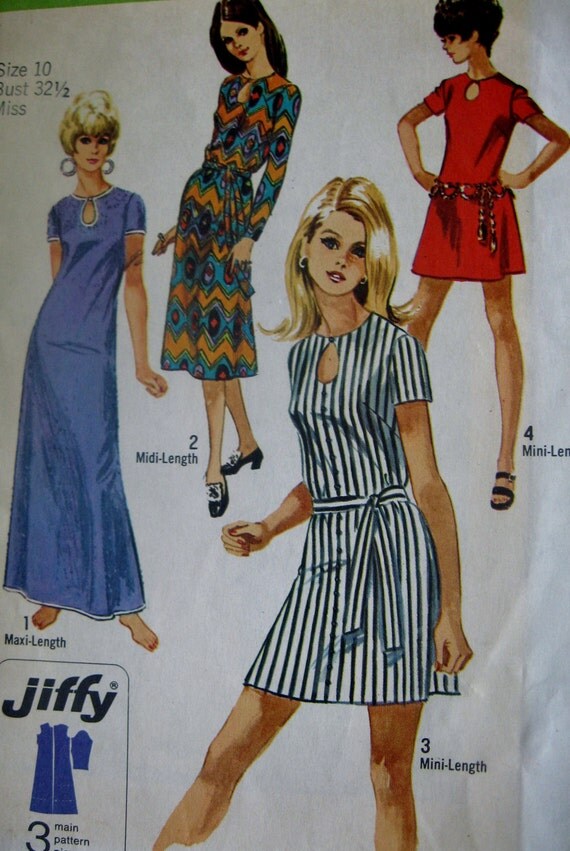
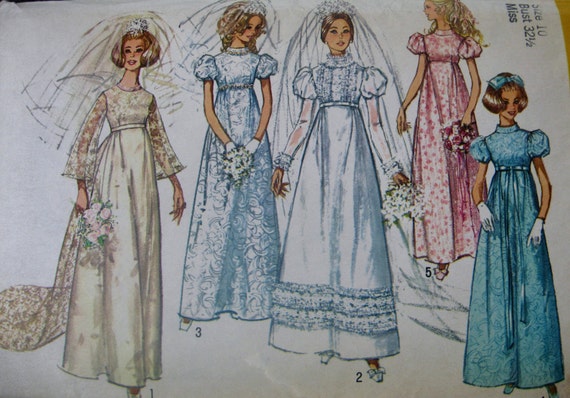
This is a totally shameless plug for my Etsy shop. I just listed some darn awesome 70s patterns. Hop on over and take a look! Here are a couple of my favorites.
| Classic shift dress in 3 lengths. How great is that keyhole neckline?! |
| 70s wedding? Yes, please! |
Friday, November 18, 2011
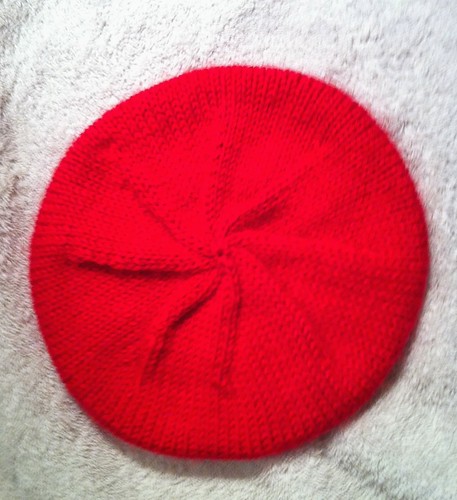
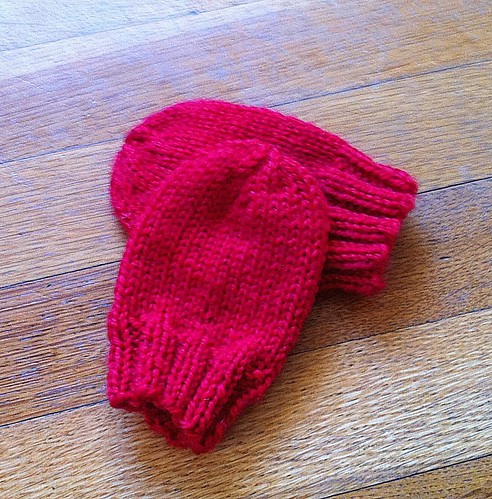
FO: Not-Quite-A-Baby hat and mittens
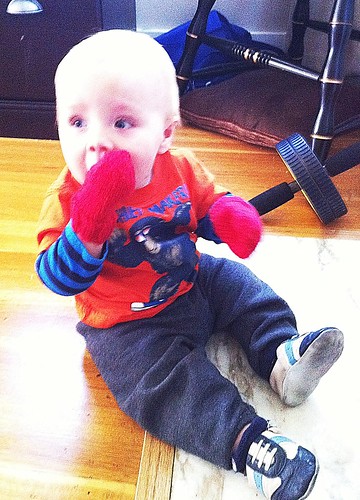
My little mannie was well equipped for the winter chill last year. My sister and I knit him many hats and mittens, but as this year started to get colder, I found myself unprepared. All of last year's gear was too small, but knitting patterns seem to be sized for newborns or toddlers, and Duncan is in between. So, I hitched up my big girl pants, and adapted a pattern for mittens. Then I got crazy and wrote one for a hat. So, lest there be other wee one year olds in need of headgear, I'd like to share my pattern with you.
The Not-Quite-A-Baby Hat
Yarn: Stitch Nation by Debbie Stoller Washable Ewe
Needles: US size 6 and 7 circular, 40 inch for Magic Loop or dpns
Gauge: 5 1/2 sts/inch & 8 rows/inch in stockinette stitch on size 7 needles.
Size: Intended for Duncan's 17 inch noggin
CO 104 stitches onto your size 6 needle and divide in half for Magic Loop or arrange evenly over your dpns. Join to knit in the round.
Knit k2 p2 ribbing for 9 rounds.
Switch to size 7 needles and knit even in stockinette stitch (knit all rounds) for 2 1/2 inches. If you want to extend the wear of your hat, knit for 3 3/4 inches and fold up the ribbed section. Then as not-quite-baby grows, you can fold down the ribbed section for more length.
For the decreases:
1) *k11, k2tog, rep from * to end (96 sts.)
2&3) knit
4) *k10, k2tog, rep from * to end (88sts)
5) knit
6) *k9, k2tog, rep from * to end (80 sts)
7) knit
8) *k8, k2tog, rep from * to end (72 sts)
9) knit
10) *k7, k2tog, rep from * to end (64 sts)
11) knit
12) *k6, k2tog, rep from * to end (56 sts)
13) *k5, k2tog, rep from * to end (48 sts)
14) *k4, k2tog, rep from * to end (40 sts)
15) *k3, k2tog, rep from * to end (32 sts)
16) *k2, k2tog, rep from * to end (24 sts)
17) *k1, k2tog, rep from * to end (16 sts)
18) *k2tog, rep from * to end
Break yarn, leaving a 6-8 inch tail. Thread your tail through remaining 8 sts and pull them tightly together. Weave in ends and lightly block.
For Duncan's little mittens, I adapted the excellent Baby Mitts pattern by Susan B. Anderson. I love this pattern because it is easy to knit, cute and very useful. I knitted a few pairs of these for Duncan for his first winter and they really came in handy. This year, they were all too small, so I sized up the pattern. Here is what I did.
Not-Quite-A-Baby Mitts
Same yarn and needles as the hat
Size: Fits my 1 year old as well as my 3 year old.
CO 32 sts onto your size 6 needle and join to work in the round.
Knit k2p2 ribbing for 9 rows.
Switch to size 7 needles and work even in stockinette stitch for 2 1/2 inches.
For the decreases:
1) *k2tog, k15, rep from * to end
2) *k4, k2tog, rep from * to end
3) knit
4) *k3, k2tog, rep from * to end
5) *k2, k2tog, rep from * to end
6) *k1, k2tog, rep from * to end
7) *k2tog, rep from * to end
Break yarn, leaving a 6-8 inch tail. Thread your tail through remaining 8 sts and pull them tightly together. Weave in ends and lightly block.
I hope this keeps your little Not-Quite-A-Baby warm and cozy!
Here is the Ravelry button -
Subscribe to:
Posts (Atom)