I've had
Vogue 1378 in my stash pretty much since it came out. The top is cool, but these pants are amazing. For some reason I just didn't get around to sewing them.
And then Sara of
The Pretty Pickle DID sew them! And I had to have them. Immediately.
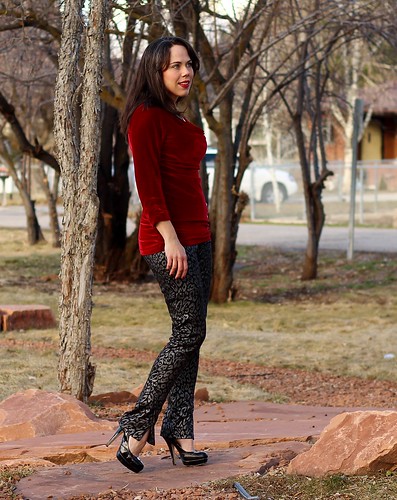
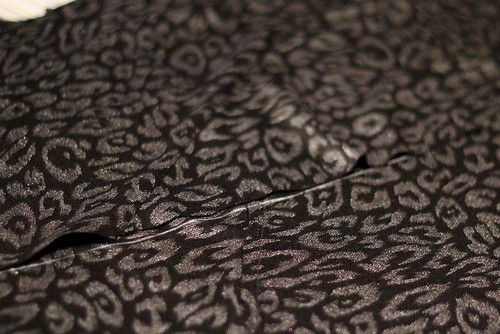
Of course, I used a printed black knit, so all the seam detail is lost. This fabric is awesome though, amirite? It's metallic printed
ponte from FabricMart.
Here's Vogue's line drawing. How freaking awesome are those pants?!! Donna Karan is brilliant.
I did make a few minor changes to the pattern. My typical changes for Vogue pants are to add an extra inch to the front and back rise and scoop out the rear crotch a bit. For these, I decided to use an exposed elastic finish that requires only about 1/4 inch of seam allowance, and the pant has a 1 inch allowance for the elastic casing, so Vogue pretty much did my alteration for me! Thanks! I do find that these are a bit lower in the back rise than I prefer. I'll raise them about 1/2 inch at CB next time.
Sometimes I have to add length, but Sara noted that they were drafted quite long, and my scientific method of holding the pattern pieces up to myself convinced me that the leg length was good. And it is.
The other rather major change I made was to cut my waistband elastic with negative ease (1 inch less than my actual waist measurement). Vogue wants you to add 3 inches to your waist measurement for your waistband elastic, but I'm pretty sure that's a recipe for failure. I like my pants to stay up, thankyouverymuch.
My favorite feature is the adorable front slit. It makes my legs look even longer, and my heels look even higher. Loves. So, what's keeping you from sewing this?? Worried about all those lapped seams, eh. Well, I took a few pics while I was putting these together, so hopefully that will help.
Today's Tip: Exposed edge construction lapped seams. This method is what I use when the fabric's raw edge will be exposed on the right side of the garment.
Start with the piece that will be on the bottom of the lapped seam. I used the pattern line drawing to keep track of what goes where. There are a lot of pieces to this pattern and many of them have a similar shape, so be sure to mark them well. On the bottom piece, I mark a placement line 2 seam allowances (in this case 5/8+5/8=1 1/4) from the cut edge.
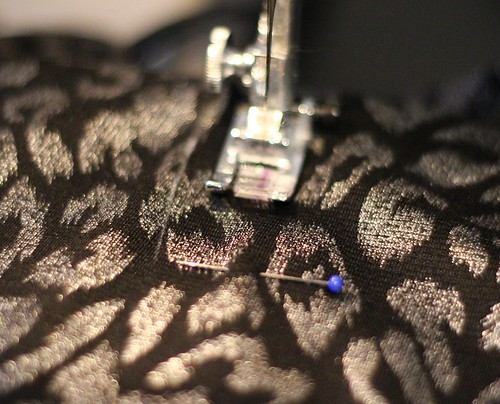
Now lay the overlay pattern piece with the cut edge aligned with the marking you made. Pin it together with your pins perpendicular to the cut edges. Pin frequently so that the edges don't shift. Hand baste if it makes you more comfortable.
Stitch along the 5/8 seam line. It may help you to mark the stitching line 5/8 inch away from the cut edge on the upper layer. For this ponte knit, I used a triple stitch for this line of stitching.
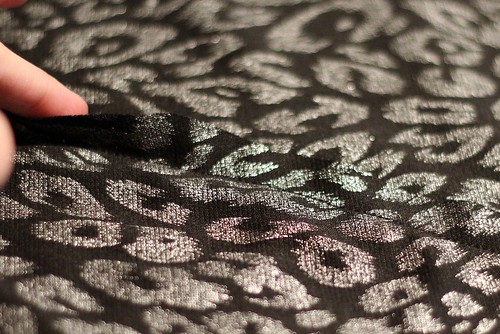
Here is how it looks once it has been stitched. There is a raw edge on the right side as well as one the wrong side (not pictured). If you want to add some decorative topstitching, this would be the time. I used my coverstitch machine to add another 2 rows of stitching, one line of stitching on either side of the first one.
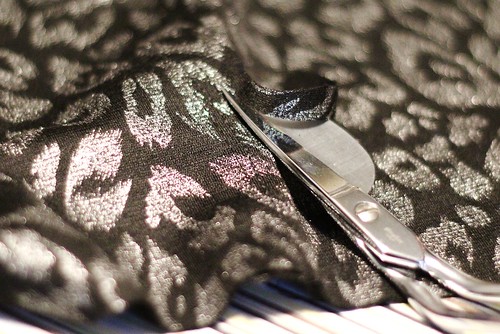
Once you are done with all the stitching, trim away any excess seam allowance close to the stitching. I like applique scissors for this step, as they protect the fabric underneath from an accidental cut. You can also trim away the excess seam allowance from the wrong side of the garment, if you choose.
When you finish, you should have a trendy, raw-edged seam!


30 comments:
Oh I use that VERY SAME scientific method of determining whether or not a pattern will be long enough for me! And I bought this pattern when it first came out to sew these pants and have yet to do so! Now I want metallic ponte knit pants like yours :-)
I agree with you, that fabric is fantastic! And those pants look great. I think the seaming is pretty cool looking.
I have that pattern, too!!! [in, perhaps a larger size . . .]
I have, thus far, only made the top, and I love it! the neckline is a tad low for me (can anyone say: "FULL disclosure"?), but it gives me and excuse to make & wear lace-edged camis underneath, so I'm not complaining.
I haven't made the pants, yet because 'negative ease' on my zaftig figure translates to 'second skin atop a jiggly, generous first skin'. As soon as I can find a couple of yards of PowerNet in a color I like -- I'm making them.
Although I probably shan't make them with an exposed lapped seam, because I only use that for leather. Anything else ravels and, trendy or not, I thinks ravels are tacky.
Yep, I'm old-fashioned that way.
Drafted for knits, Mom. Knits don't ravel. I considered using standard seams, but there is one very acute inset corner over a seam that would have been a royal PITA.
The seaming is definitely the coolest part! I need to make them again in a solid so the seams are visible.
True about knits not raveling (although I have occasionally been cursed with knit that shred when cut), but do these curl to the right side when cut????
Most single-knits do.
I knew I couldn't be the only one!! It's very precise. :)
You should definitely make these! They'd look great on you, and fabulous with all the tunic type tops you've been making lately.
I used a ponte double knit that doesn't curl. I think this pant would be an epic fail in a single jersey. They need a beefier knit, so as to skim over the jiggles.
Now that I take a closer look at the sketches -- if I lengthened the top quite a bit, or wore a loose tunic over it, it would cover the most flawed bits of my figure, but still showcase the great piecing in the pants.
wouldn't this be interesting in stripes or plaid, with some cut crossways, or on the bias, and some cut straight????
That would be fun!!
Gorgeous pants!!!!!!!!
Hi five, "scientific" sewing sister. I bow before your sexy pants. I'd completely missed this pattern and don't know why. All that seam is terrific! Thank you for your step by step process because I've never done a lapped seam before.
Your pants look great, and your mom is hilarious!
I'm sold on these super cute pants! Love them and your fabric section.
Fabulous! Too bad about all your work on the seams being camouflaged, but still fabulous pants.
Those are fabulous pants and a gorgeous top. Great job and wonderful pictures.
I don't know how I missed that pattern! I always watch the sales and go thru every category; it is now on my wish list! Thanks! Your outfit is so beautiful--love it!
Thank you!!
Dude, you'd rock these pants. Do eeet!!!
She's pretty awesome! ;)
Thanks!! They'd look great on you!!
Thank you, Lori!
Vogue made it up in black and you couldn't see any of the great details. I almost missed it myself!
I absolutely love love your pants:) I mentioned you and Dr. Fun (Sister) as my favorite bloggers over at Carolyn's blog posts top blogs.
Killer pants!! I love the seaming.
Wow - these pants are amazing. Thanks for including that line drawing - I would never have guessed that they had those seams. You look really great in them. Beautiful job!
Ah these are brilliant! What a fantastic pattern. Love the front slits, a really great feature. Thanks also for the lapped seams tutorial, very useful as I haven't done these before.
These are fantastic Katie! Love the fabric and the fabulous seaming in this pattern. And the hem slits!
I've mentioned this before, you have convinced me I want this pattern now.
Just saw this and, I agree, the design, especially the front slit, lengthens the leg. I love the fit. Any problem with the knees stretching?
Post a Comment