This post has been simmering in my head for some time, but I've been dragging my feet, mostly for reasons of nostalgia. The reality is, I'm not a blogger anymore. I've loved the sewing community and I'm not going to stop sewing, or sharing my makes on Instagram and in Facebook groups, but the blogging platform just doesn't feel like me anymore. When I started here - so many years ago - it was fun to take and edit pictures, to write a post and edit my content. It's not fun for me anymore - in fact, it's become a chore. And I don't want that weight to bleed into my sewing. As life has become more complex for me, discretionary time is a premium and I'd rather use it to sew, not photograph and write.
I did not arrive at this decision easily, but it feels like the right move at this time. If you're interested in continuing to follow along with my sewing, I do continue to post actively on Instagram at kid.md. My account is private, but I will accept requests from fellow sewists. I also post on several sewing related Facebook groups, particularly on Stashbusting Sewalong. I hope you'll keep in touch!
I am currently planning to leave the blog up, but will not be maintaining the Flickr account that I have used to host photos in the past. As a result, many of the posts will have broken picture links. It's possible I may go back an fix this in the future, but I have no immediate plans to do so.
I appreciate so much all of your support and feedback over the years, and I hope we can stay connected on other social media forums in the future.
Happy Crafting!
Wednesday, July 8, 2020
Tuesday, March 17, 2020
Fabric surgical style mask free pattern and tutorial
Surgical mask Pattern for teens and adults
Download the printable PDF of the pattern and these instructions here - https://drive.google.com/file/d/1tndLstvBlJlJdF7XKq2Ug6FjbtCF0mzi/view?usp=sharing


Disclaimers: This mask will NOT protect you from direct exposure to viruses or other pathogens including coronavirus. It is simply not possible, using DIY materials, to replicate the level of protection needed to filter out viral particles. This mask will help you avoid touching your face and will give you some protection from dust and particles. It is very important to remember that the surface of the mask, both the outer and inner parts, should be considered contaminated when they are worn, and should not be touched. If you touch the mask, wash your hands immediately. Once the mask has been worn, it should be laundered in hot water and the wearer and launderer should thoroughly wash their hands. This mask is NOT your primary line of defense!! Good handwashing is!! As a physician, I have made every effort to make this mask as protective as possible, but you should always seek the advice of your own physician when making medical decisions.
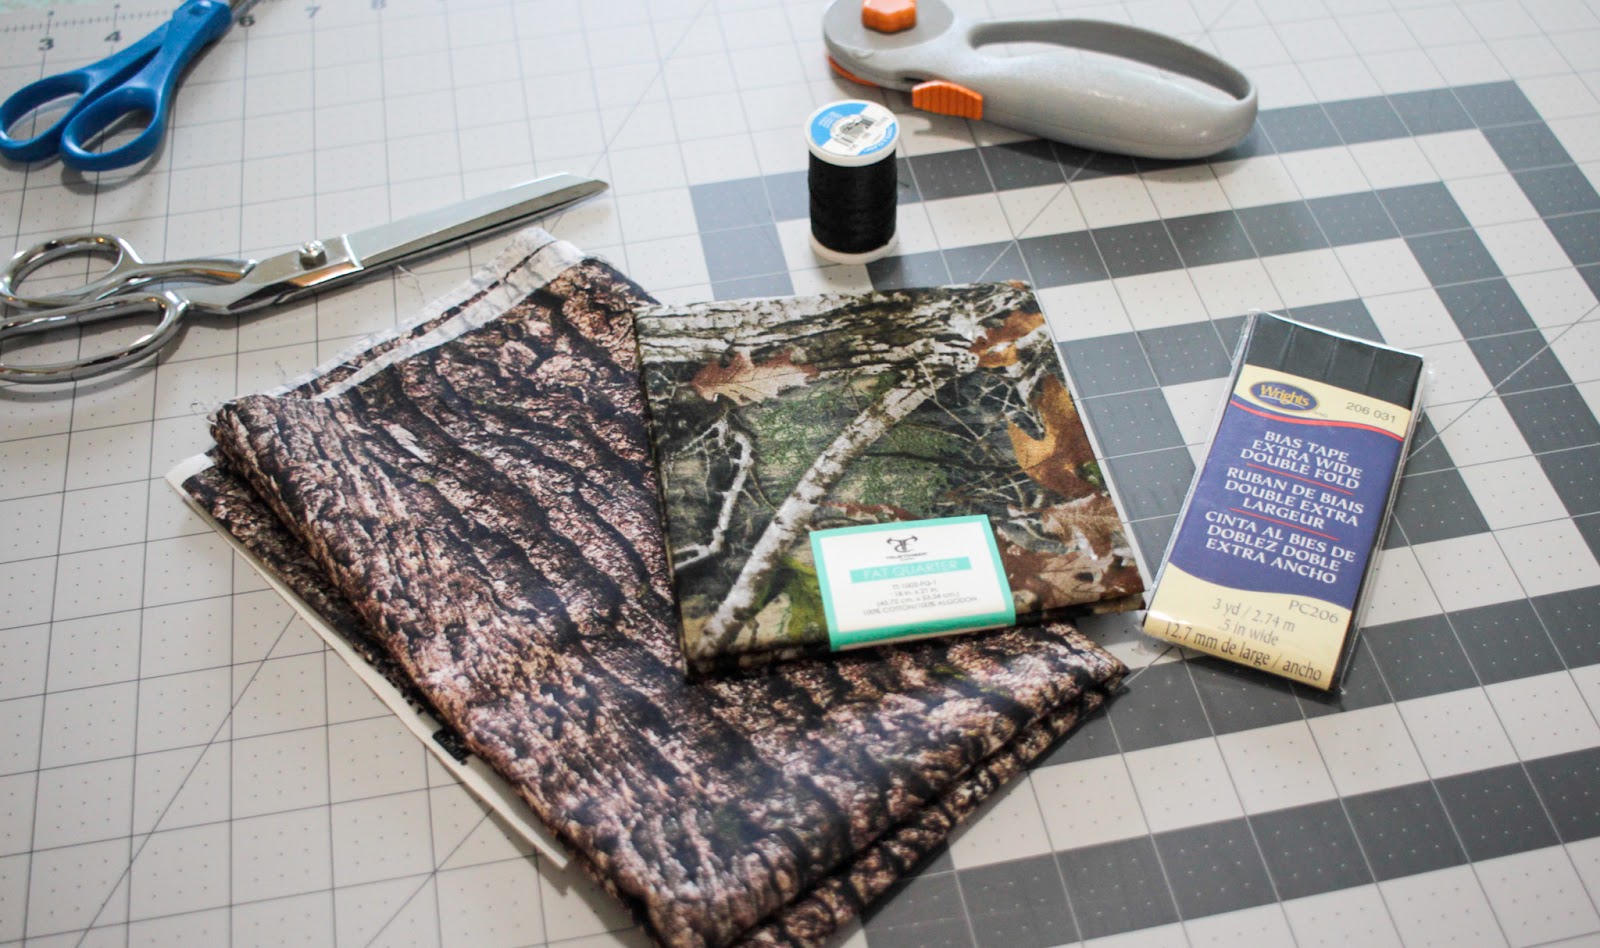
Supplies:
- 2 pieces of fabric around 8 inch square. These need to be tightly woven fabrics such as good quality quilting cotton, cotton and cotton blend poplin or other tightly woven fibers. Prewash your fabric in hot water, as that is how you will need to launder your completed mask. I do not recommend knit fabrics for this project as they are far more open in their construction.
- Nonwoven interfacing, an 8 inch square. A midweight fusible is what I am using. It should be the papery type of interfacing. Again, you want it to prevent the flow of particles, but not completely inhibit air flow.
- Bias tape for binding. Extra wide double fold is the easiest to work with. If you are making the style with elastic ear loops, you will need around 25 inches. For the style that ties on, you will need around 3 yards.
- A 6 inch wire twist tie (like for bread bags). This will provide structure around the nose and should not be omitted! In a pinch, straighten out one from a bread bag. They can be purchased on amazon.
- Elastic for ear loops, if you are making this style. Either ⅛ in elastic or elastic cord would be the best choice. ¼ inch elastic is a bit bulky and uncomfortable.

Tutorial:
Cut your fabric and interfacing per the pattern. Fuse the interfacing to your outer fabric if you are using a fusible product. If not, layer the interfacing with your outer fabric and treat them as one. Feel free to baste them together if needed.

Layer the fabric wrong sides together and pleat it per the pattern. You should fold out (with the insides of the mask together) along the top line of each pleat, and fold in on the lower line. The upper fold should come down to the dotted line. Your pleats should meet together along the mask. Press your pleats firmly with a hot iron. Trim the edge to even it out.

Apply binding to the pleated, short sides of the mask and sew it in place. I use a zigzag stitch to make sure I’m capturing both the front and back edges in a single pass.

Trim the binding across the top and bottom edge, trimming the edges cleanly at the same time. A rotary cutter is great for these trimming steps, but not essential.

If you are making the style with elastic loops, cut your elastic to the desired length. About 6.5 inches is what seems to work for the average adult. Align the binding along the top edge, tucking under the raw ends at each edge. You can baste it in place if you need to. Place the ends of each piece of elastic along the top edge and fold the binding over it. Tuck the wire twist tie under the binding in the center area of the mask. If you need to, glue or tape this in place so it doesn’t slip around.


Pin the binding in place. Stitch down the binding, being sure to stitch across the ends to secure the elastic.

Repeat this step on the bottom edge, omitting the twist tie, this time looping the elastic from the top down to the bottom on the same side, and enclosing the elastic in the same way as the top.

Stitch as for the top.

If you are making the style with ties, you will apply your binding to the top and bottom similar to the way you applied it on the sides, but this time, leaving long tails to form your ties. Cut a 48 inch piece of binding. Measure out your binding to 20 inches, then open the binding and sandwich the mask in place. Tuck the wire twist tie under the binding in the center area of the mask. If you need to, glue or tape this in place so it doesn’t slip around.

Pin the binding in place. Measure the second tie again to 20 inches past the other edge of the mask and cut your binding. Now stitch the entire length of the binding. You can tuck under the edges to finish them if you wish, or just stitch across them.

Do the same for the bottom edge, omitting the twist tie.

To wear the mask with ties, tie the upper ties around the head first, wrapping them securely to the back of the head, then tie the lower ties upward, ensuring a snug fit under the chin. Tie the ties on top of the head.

This mask is actually demonstrating poor fit as well. The mask is too large for her face, as you can see from the large gaps on either side. She also has a significant gap around her nose because the mask is too tall.

Much better! In order to create a mask that fit her petite face, I printed the pattern piece at 90% scaling and followed the same process to assemble the mask. With a smaller mask, she has a snug fit fit that will protect her much better. When the mask is worn, it should fit snugly around the nose and face. Use the wire on the top to fit the mask to your nose, and open the pleats to tuck the mask under your chin.
You’re done! Wear your mask in good health. And wash your hands!
Sunday, November 3, 2019
It's a Jalie Halloween!


Monday, July 1, 2019
Reversible Scrub Cap Tutorial with Free Pattern and SVG!

The pattern pieces (click here). Be sure to assemble the band piece by overlapping the two pieces and taping as indicated on the pattern pieces.
2 pieces of coordinating fabric, ½ yard each or a fat quarter will work
42 inches bias tape. I used extra wide for this tutorial, but if you prefer narrow, that also works
Thread
Something to use to cut - either shears or rotary cutter
A sewing machine
An iron
Press cloth
Pressing ham
1: Press your fabric! Particularly if you are using a fat quarter as they are often quite creased from being folded.

2. Cut out your pieces. You will need one top piece and one band (cut on the fold) out of each coordinating fabric. If you are using fat quarters, fold in half and cut the band first, then unfold to cut the top. As you are cutting, be sure to notch or mark the center front and back of the top and center front of the band at the upper (curved) edge. If you are using a cutting machine to cut your pieces, you will need a 12x24 inch mat, as this will cut out single layer.

3. Right sides together, match up the center front of the top with the center front of the band and pin.
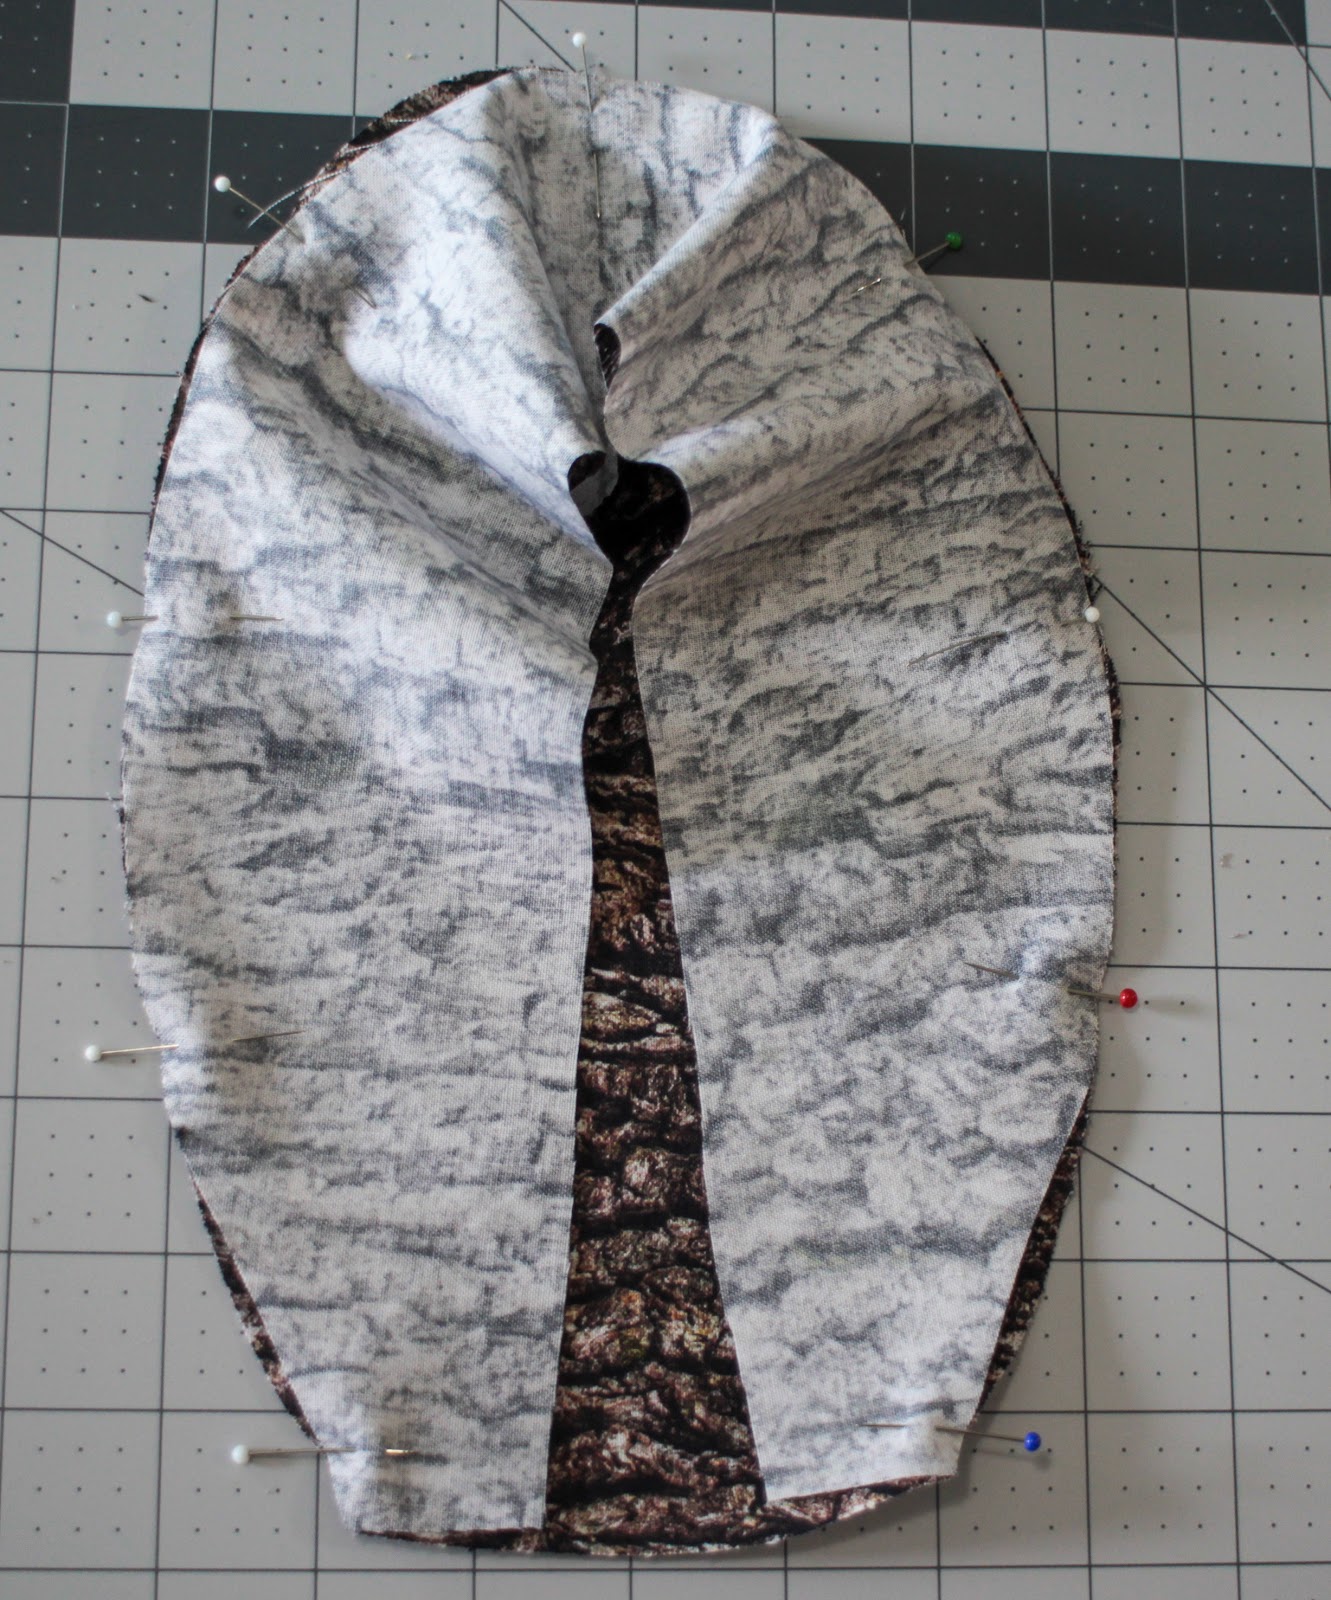
4. Going around the top, pin the band in place right sides together along the round edge. Sew with a 1/4 inch seam allowance all around the curved edge of the cap. Leave the bottom edge unsewn. Your band should match fairly closely, but as you are matching up curved edges, you may have to ease the top piece slightly into the band. Don’t worry about basting stitches or anything - it’s not that much. When you stitch this at your machine, be sure that the top is down against the feed dogs as your sew, and hold your work taught as it stitches. This will allow the feed dogs to ease in the top as needed.

5. Press your seam down toward the band. This is much easier if you have a pressing ham!
6. Now repeat steps 3-5 with your other coordinating fabric.

You should have 2 little caps!
7. Fold one wrong side out and the other right side out and nest them right sides together.
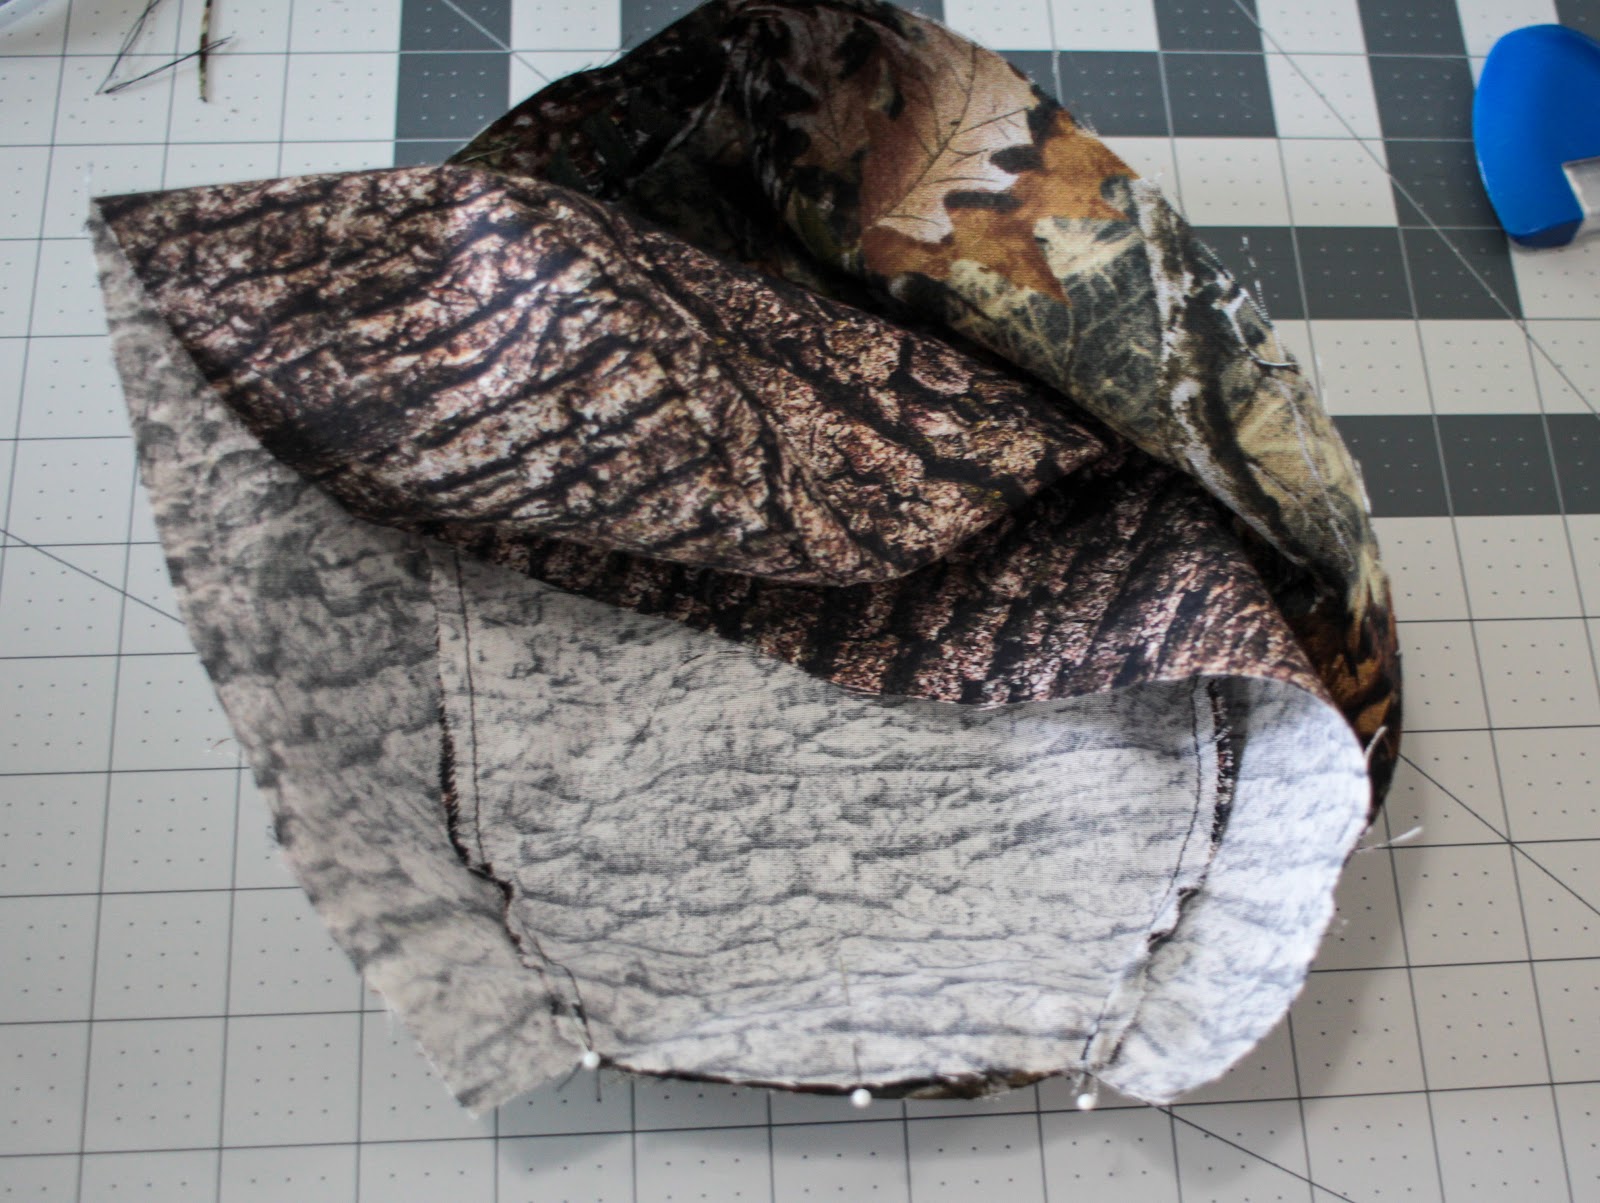
8. PIn and stitch the two layers together along the back edge of the cap, matching the center back and the seams.

9. Press the seam open, then nest the two layers WRONG sides together, folding at your newly pressed seam. Now Press the seam flat, making sure your fabric isn’t rolling to one side or the other.
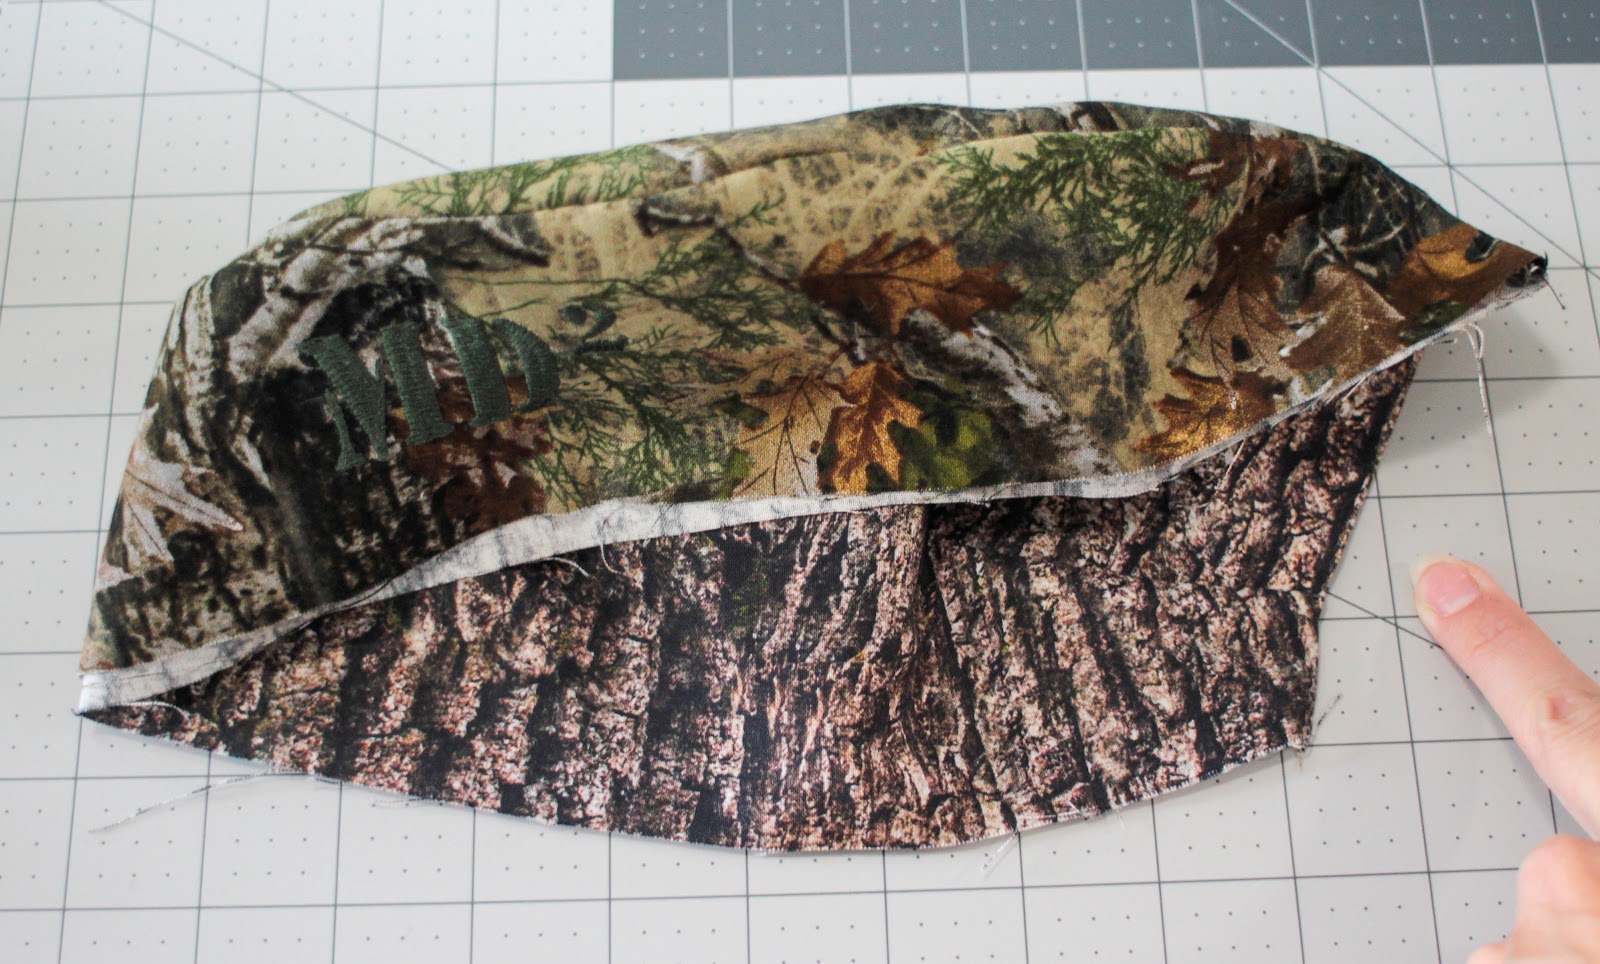
Now it’s starting to look like a cap! My finger is indicating your back seam. You still should have raw edges along the lower border of the cap. Let’s take care of that, as well as making ties all in one step.
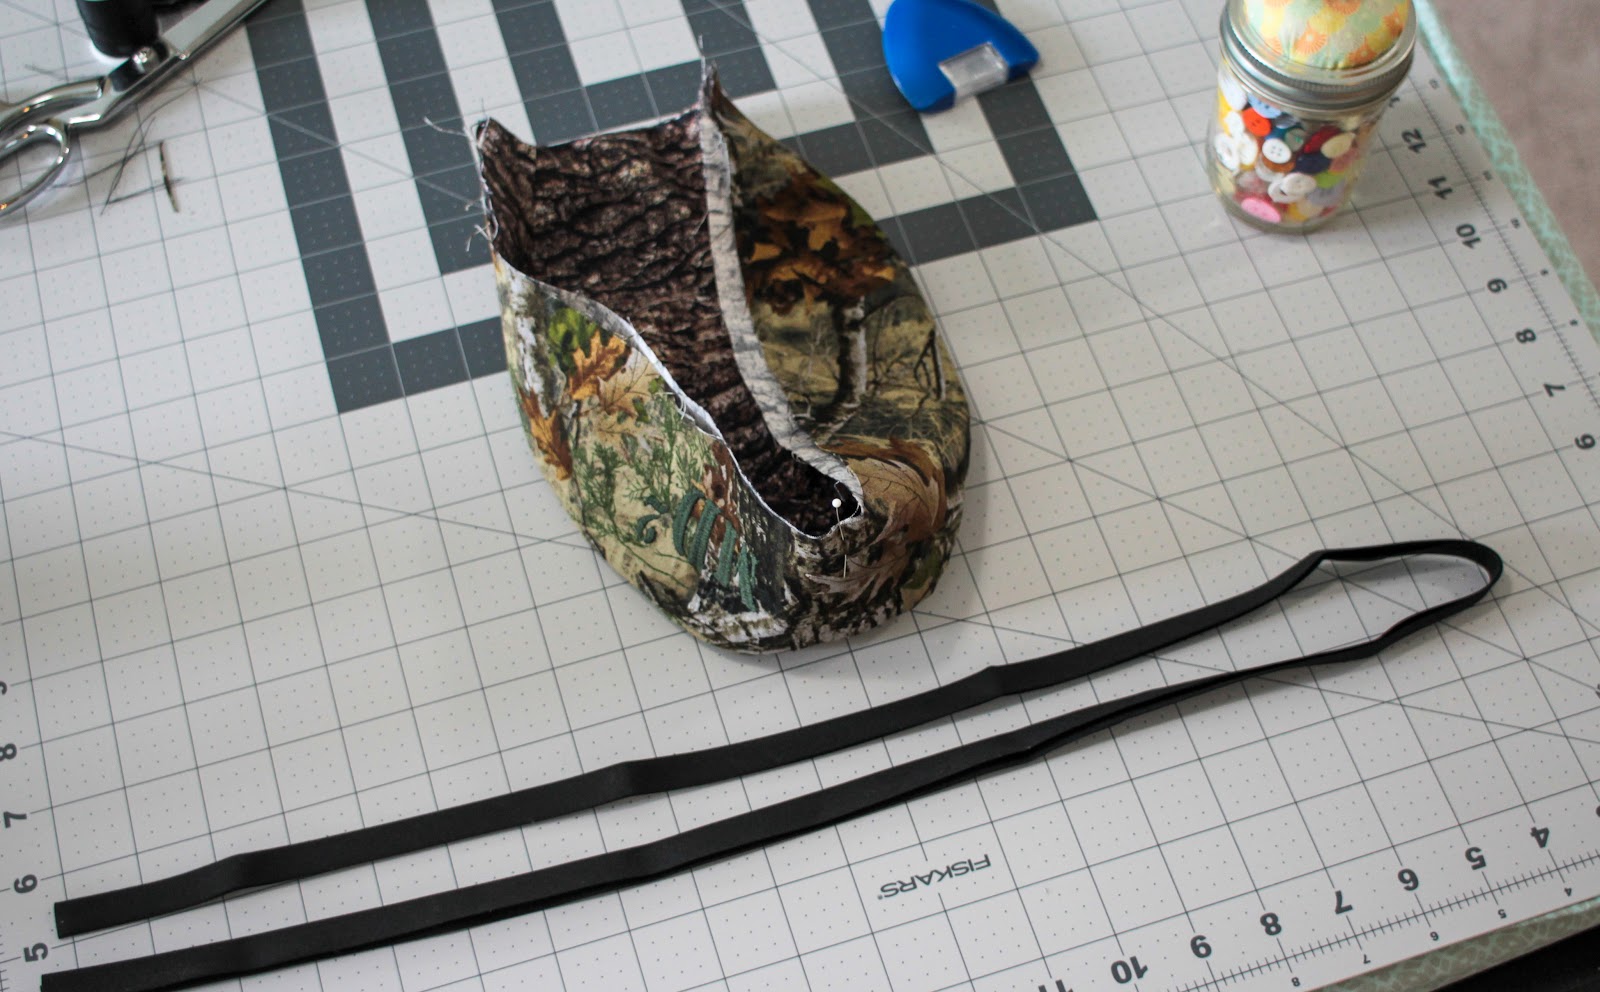
10. Make sure that the raw edges of your cap are aligned and place a pin at center front of the band. Get your bias tape and if you haven’t already, cut a 42 inch long piece and fold it in half to determine the center.

11. Matching the center of your tape with your center front pin, wrap the tape around the raw edges of your cap. You want to stick it in as far as you can, aligning the cut edge with the fold inside the tape. Pin the tape in place all around the cap. (Note: If you are a bias tape pro, you can do this without all the pinning. Your ties will be 10 inches long, so just stitch up the 10 inch ties first, and insert the cap at the point, and then stitch around, adding the second 10 inch tie at the end.)

12. Start stitching at one end of your bias tape. If you notice in the above picture, one side of the bias tape is less wide than the other. This is done intentionally at the factory to make it easier to apply. Be sure you are stitching with the “shorter” side up so that when you get to the cap section, you will be confident you are stitching through all the layers, since the bottom side hangs farther over. Stitch all the way down the edge of your first tie, around your cap and along the edge of the other tie, all the way to the end in one pass.
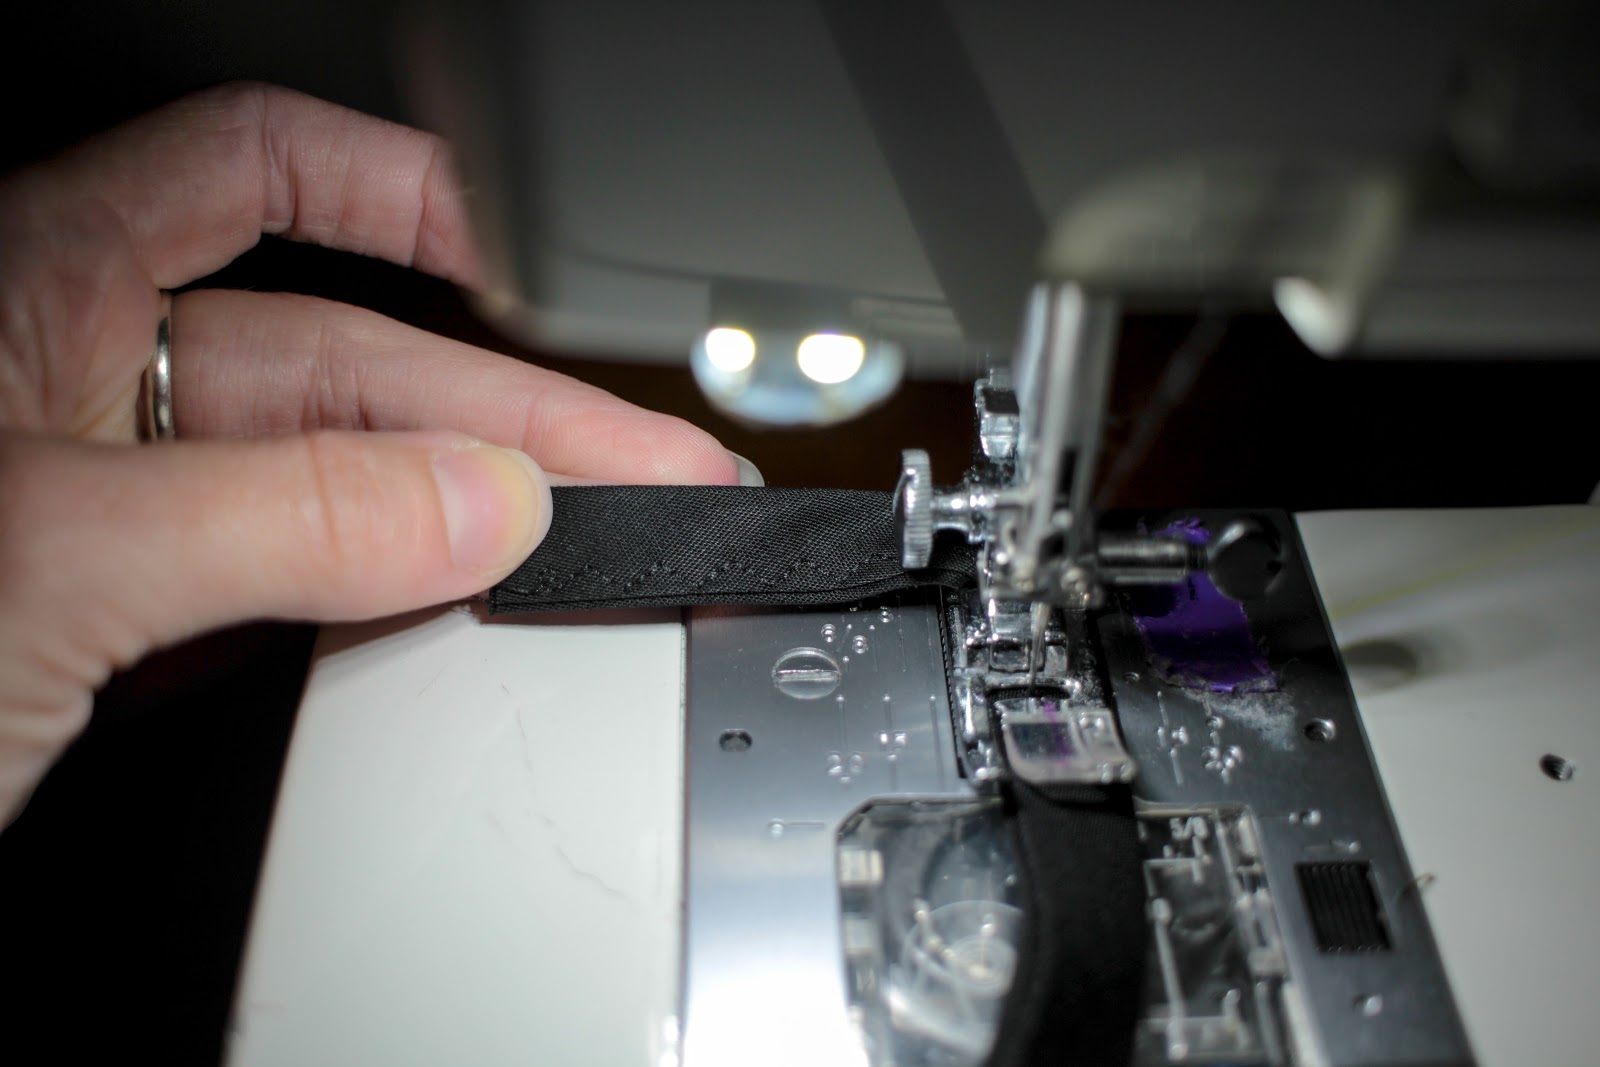
I like to use a 3 step zigzag stitch for this - I just like the way it looks - but you can choose any stitch you prefer. Some machines have interesting decorative stitches and this would be a great place to use them! Have fun!
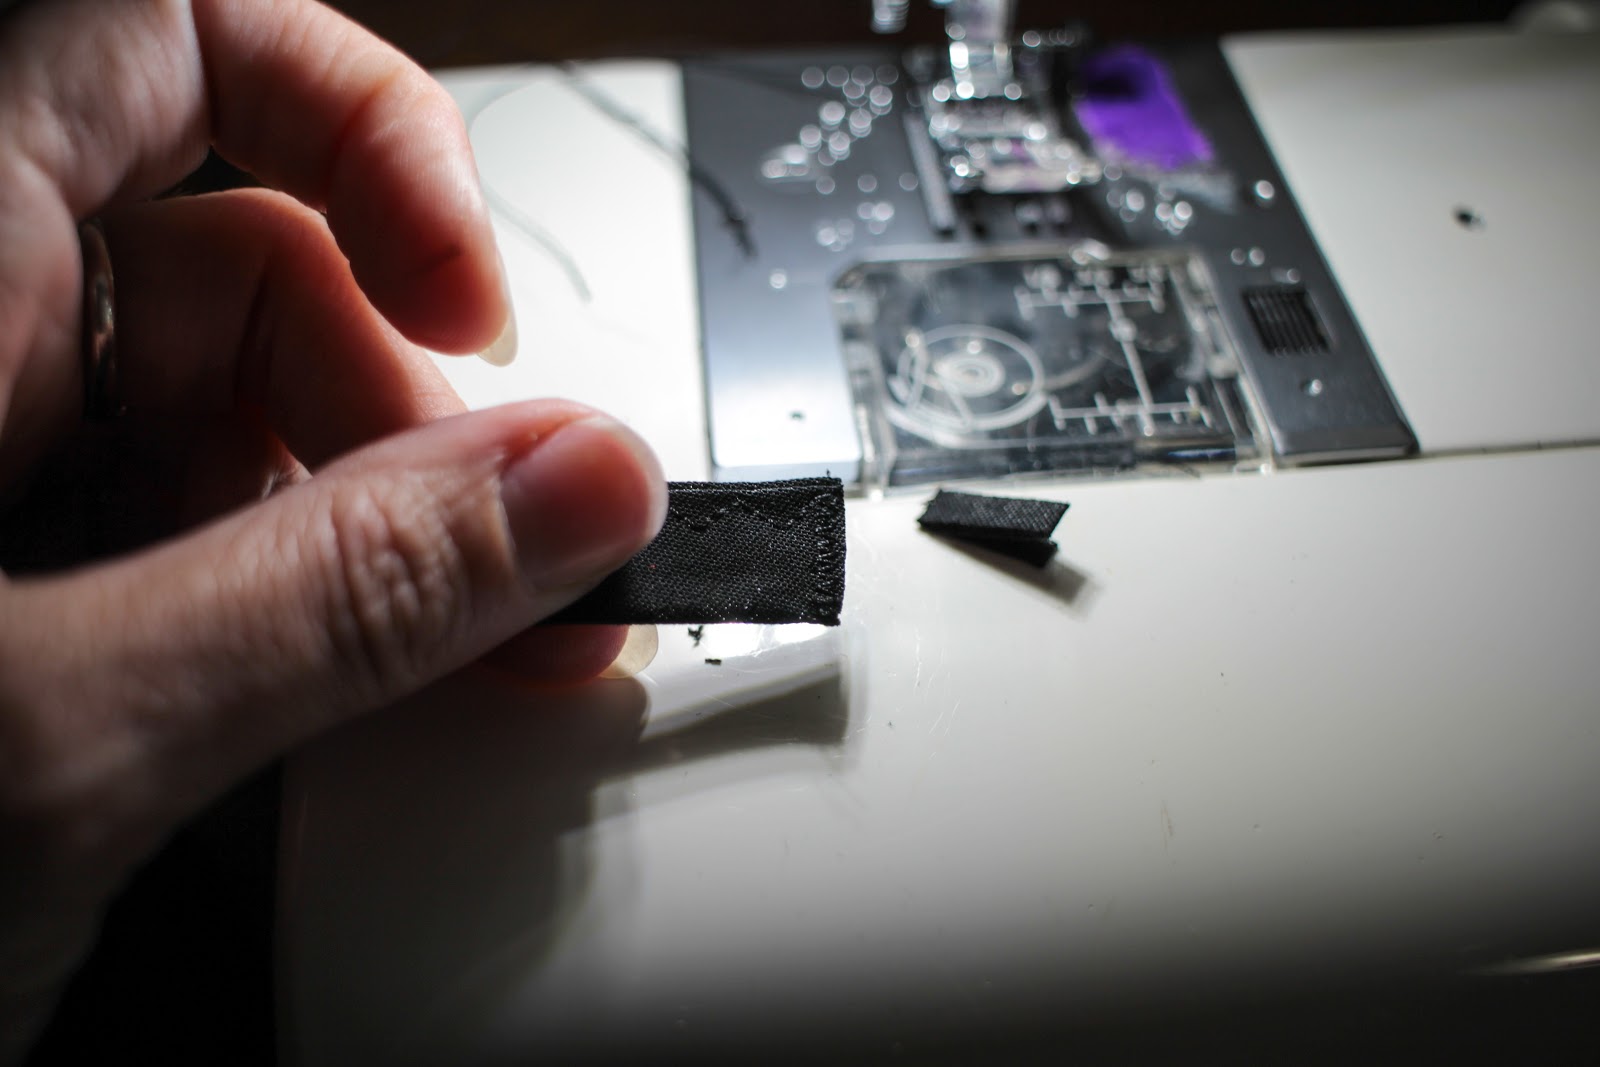
13. Finish the end of your bias tape ties by either narrowly hemming them, or zigzag stitching across the ends and trimming off any excess. I find hemming a bit bulky, so I go the zigzag route. You could also add a knot at the end, or even a decorative bead.
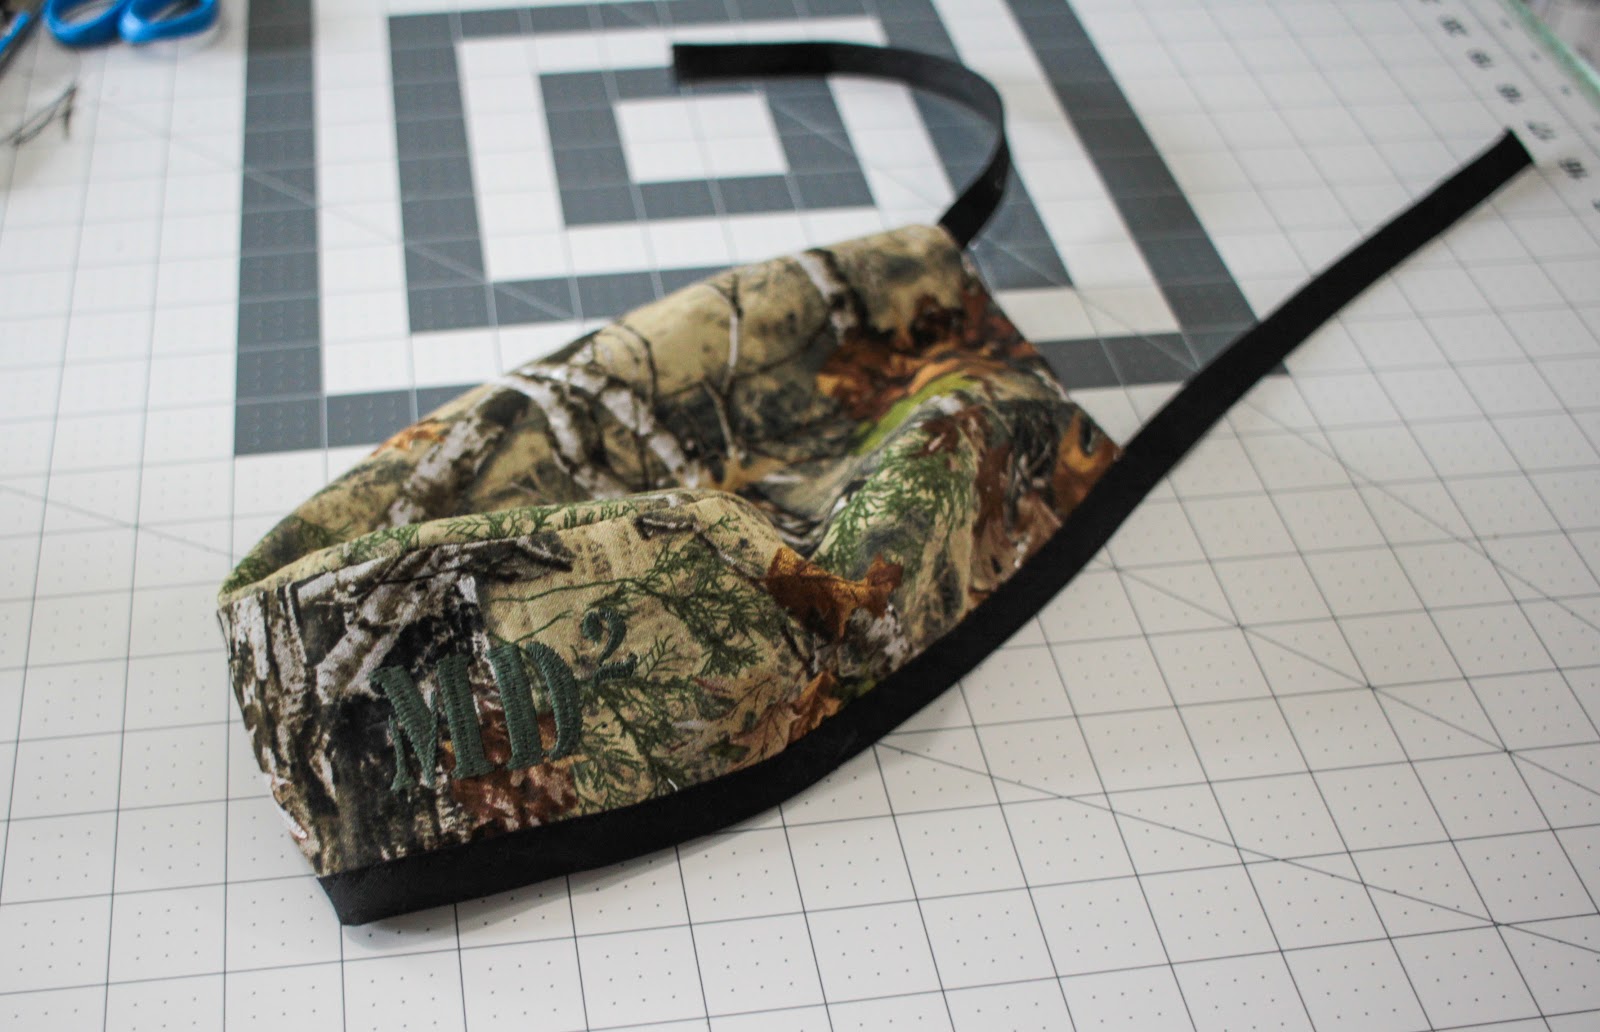
Look at that! You’re done! Now you’re the most stylish in the OR! I added some embroidery to mine, and if you are interested in embellishing your cap in some way, do so before you assemble the pieces. It’s much easier to embellish flat fabric!
ETA: Several of y'all have asked about making these caps in a single layer, which is a great way to conserve fabric and make them faster! My friend Kristine made a great video showing us all how to easily convert the pattern to a single layer. Even if you are doing a double layer cap, she has some great tips for sewing the pattern in general! Check out her video here!
To download the pattern pieces, and a pdf of the instructions, click below!
Pattern
Instructions
And just for kicks (and so I could play with my new Cricut Maker), I also created an SVG file for those of you who have cutting machines that can handle unbonded fabric. You can download the SVG here. If you need to resize, the band should measure 4.324in x 22.648in, and the top should measure 6.758in x 10.408in.
Note: the svg file will not open in your browser, so if you click on it, you will get a plain black screen and it looks like it doesn't work. You will need to right click on the link and download the file, then upload the svg file into your cutter software.
Thursday, June 6, 2019
Angela Wolf Ruched Tee


Subscribe to:
Posts (Atom)