
The pattern pieces (click here). Be sure to assemble the band piece by overlapping the two pieces and taping as indicated on the pattern pieces.
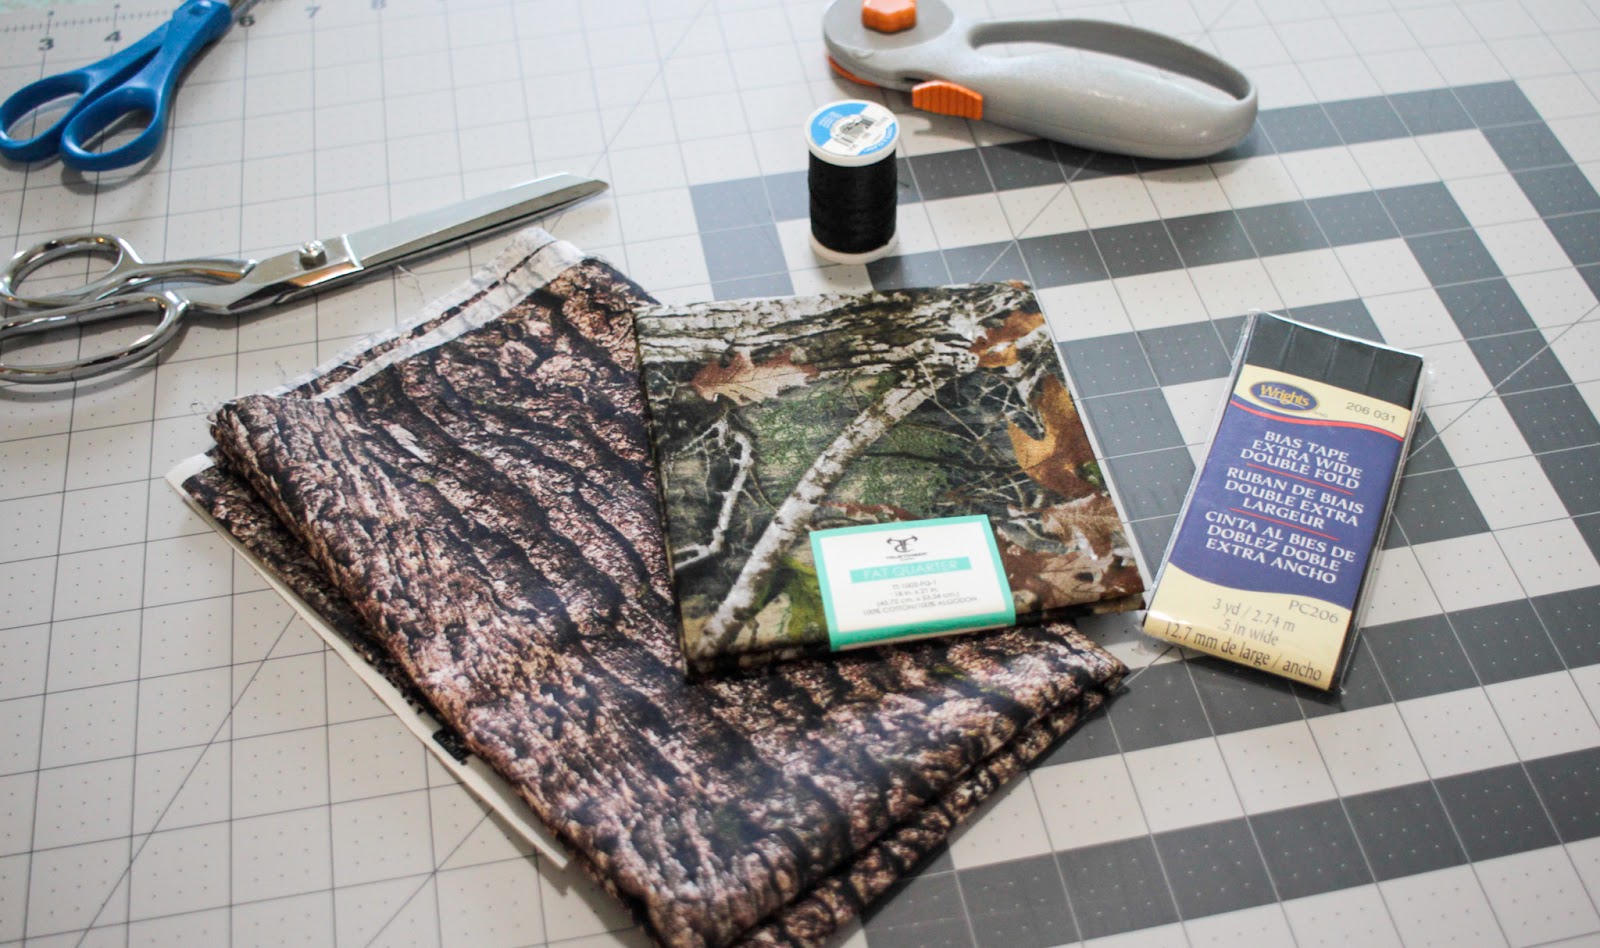
2 pieces of coordinating fabric, ½ yard each or a fat quarter will work
42 inches bias tape. I used extra wide for this tutorial, but if you prefer narrow, that also works
Thread
Something to use to cut - either shears or rotary cutter
A sewing machine
An iron
Press cloth
Pressing ham
1: Press your fabric! Particularly if you are using a fat quarter as they are often quite creased from being folded.

2. Cut out your pieces. You will need one top piece and one band (cut on the fold) out of each coordinating fabric. If you are using fat quarters, fold in half and cut the band first, then unfold to cut the top. As you are cutting, be sure to notch or mark the center front and back of the top and center front of the band at the upper (curved) edge. If you are using a cutting machine to cut your pieces, you will need a 12x24 inch mat, as this will cut out single layer.

3. Right sides together, match up the center front of the top with the center front of the band and pin.
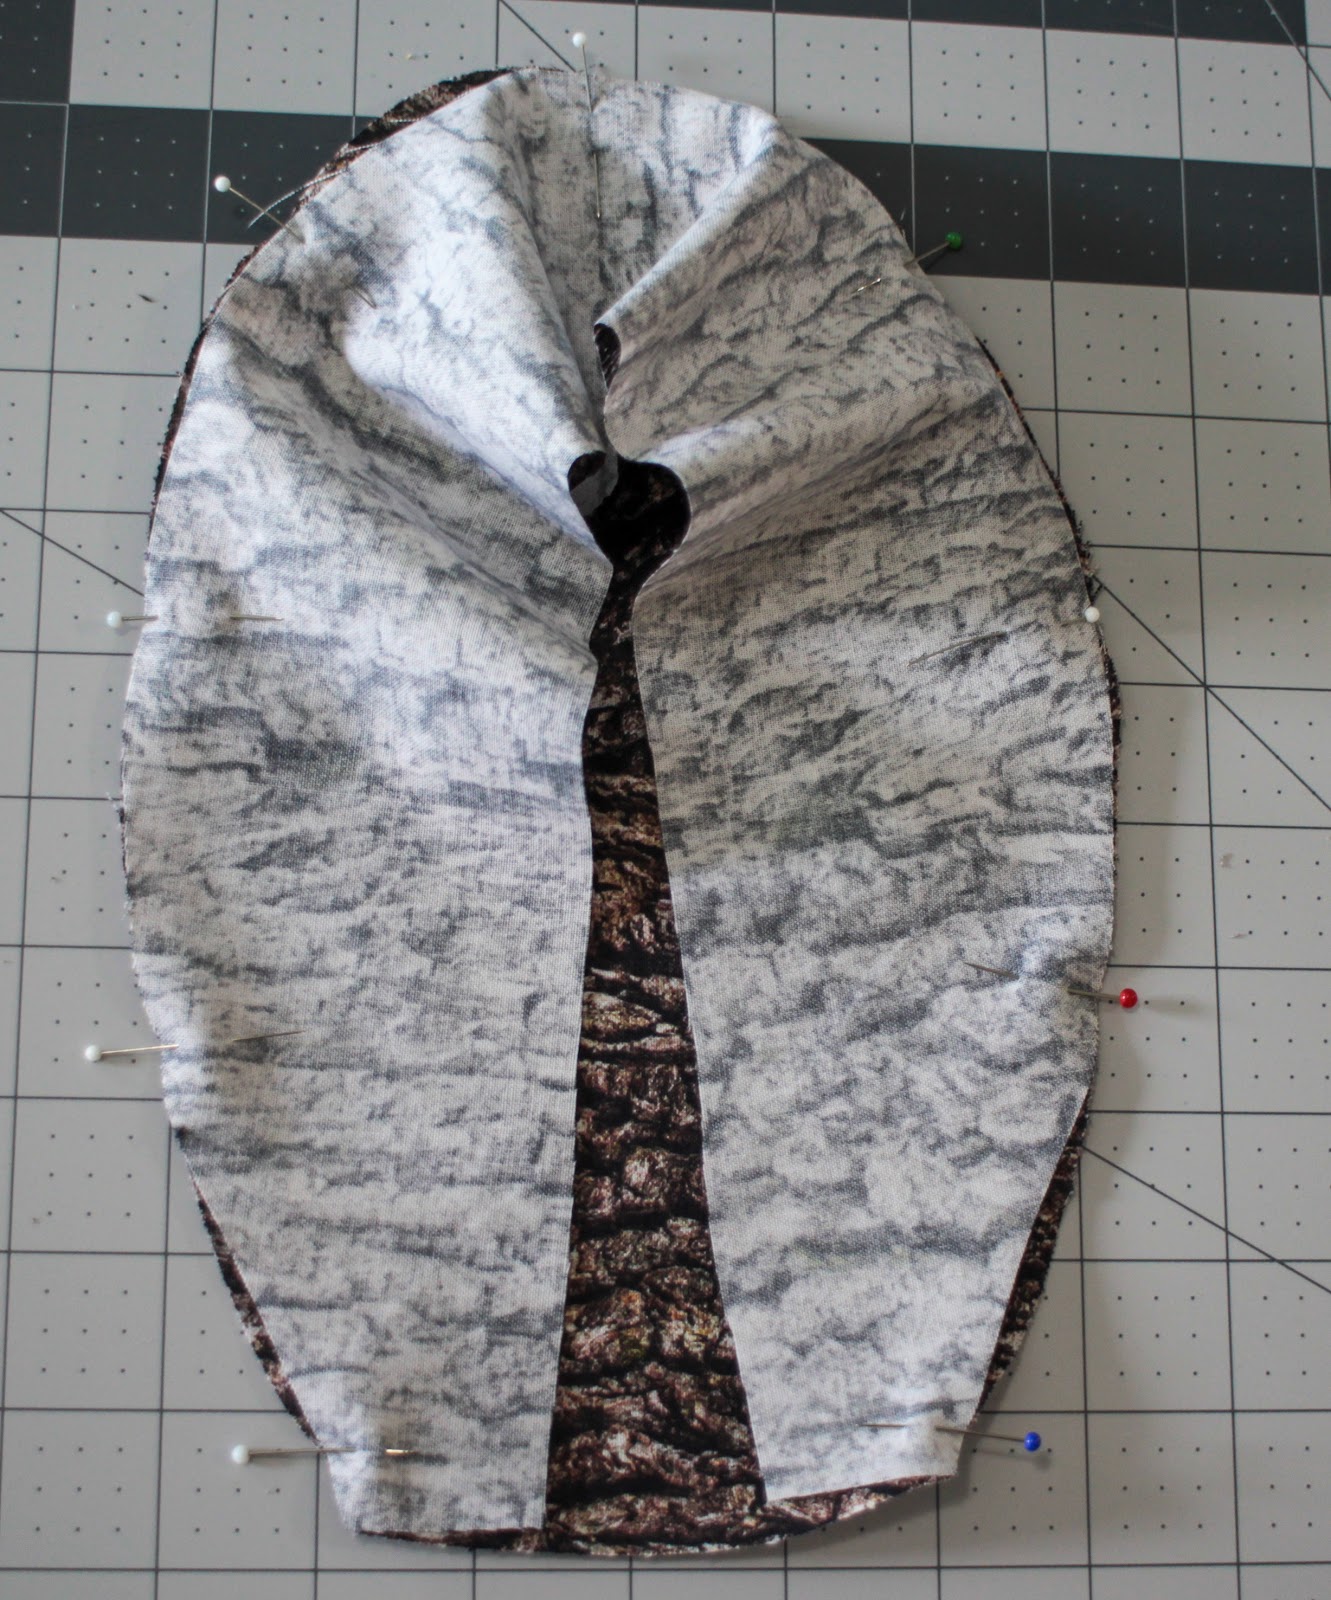
4. Going around the top, pin the band in place right sides together along the round edge. Sew with a 1/4 inch seam allowance all around the curved edge of the cap. Leave the bottom edge unsewn. Your band should match fairly closely, but as you are matching up curved edges, you may have to ease the top piece slightly into the band. Don’t worry about basting stitches or anything - it’s not that much. When you stitch this at your machine, be sure that the top is down against the feed dogs as your sew, and hold your work taught as it stitches. This will allow the feed dogs to ease in the top as needed.

5. Press your seam down toward the band. This is much easier if you have a pressing ham!
6. Now repeat steps 3-5 with your other coordinating fabric.

You should have 2 little caps!
7. Fold one wrong side out and the other right side out and nest them right sides together.
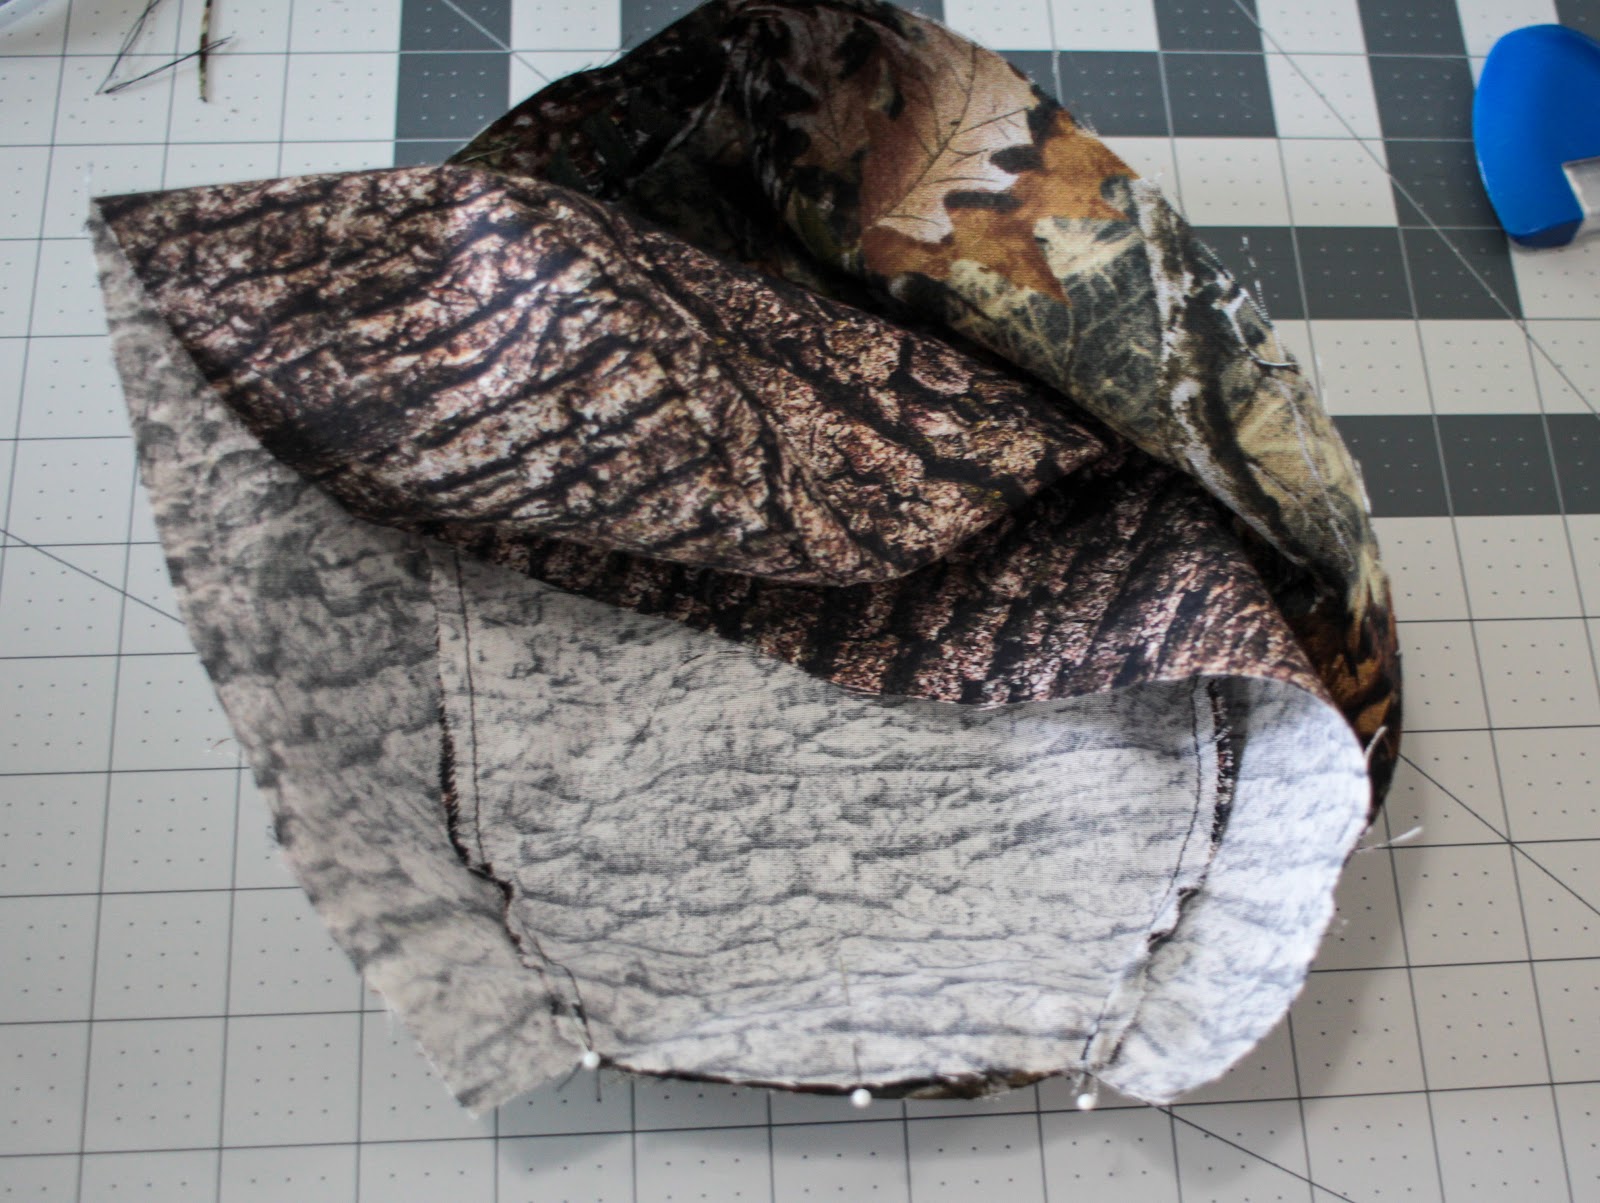
8. PIn and stitch the two layers together along the back edge of the cap, matching the center back and the seams.

9. Press the seam open, then nest the two layers WRONG sides together, folding at your newly pressed seam. Now Press the seam flat, making sure your fabric isn’t rolling to one side or the other.
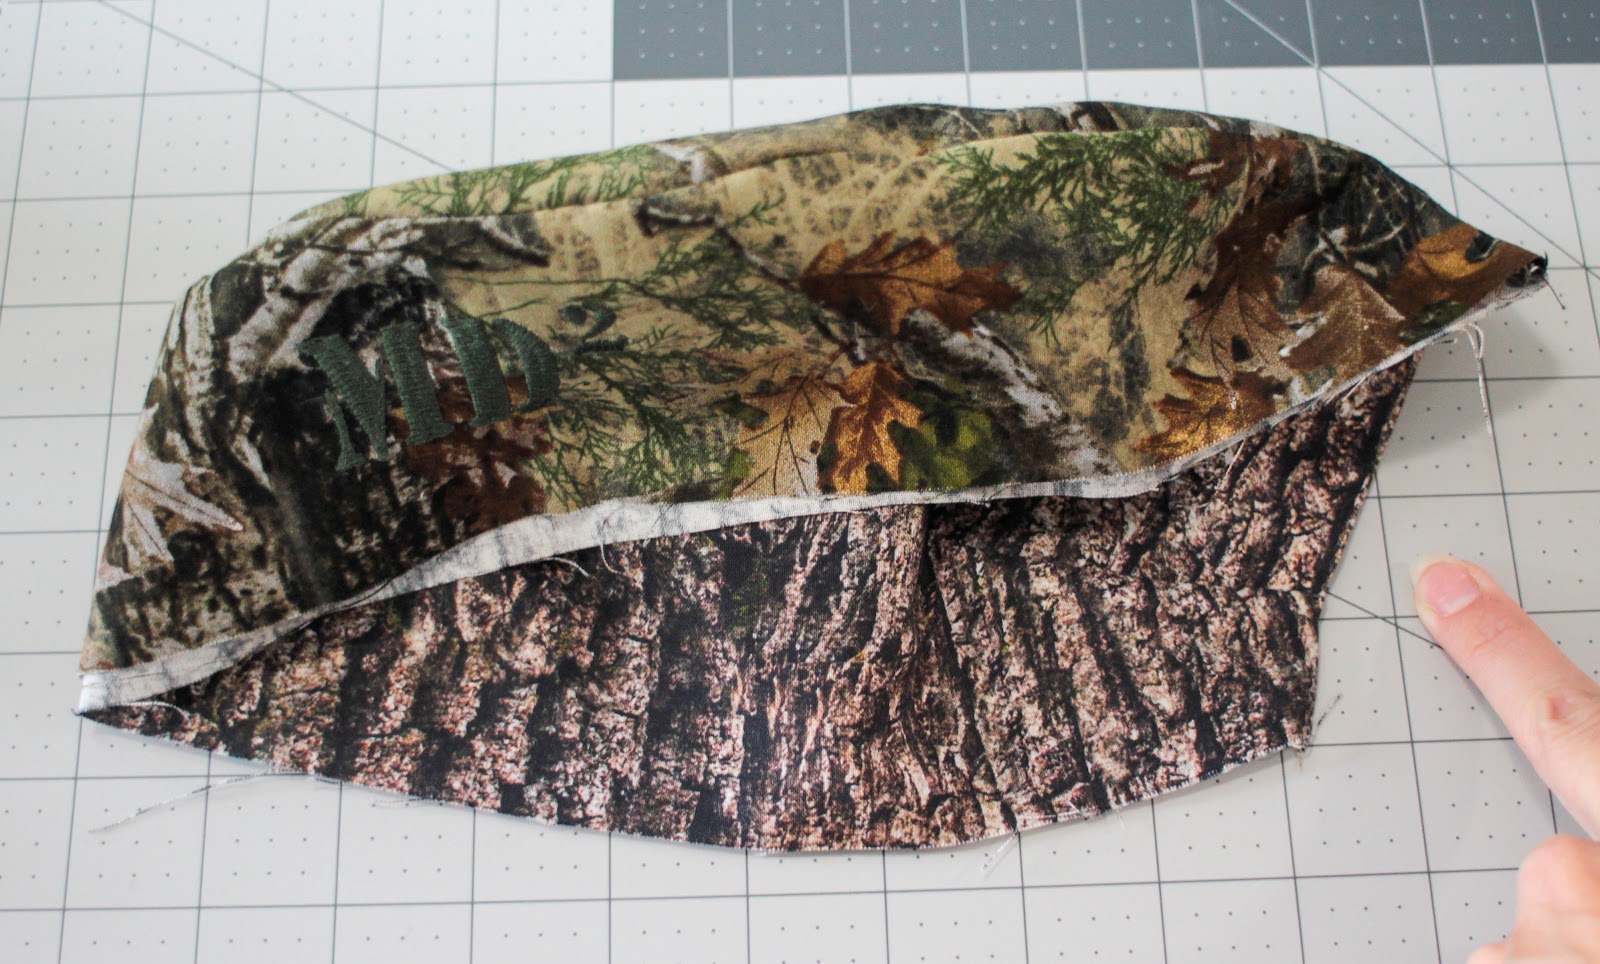
Now it’s starting to look like a cap! My finger is indicating your back seam. You still should have raw edges along the lower border of the cap. Let’s take care of that, as well as making ties all in one step.
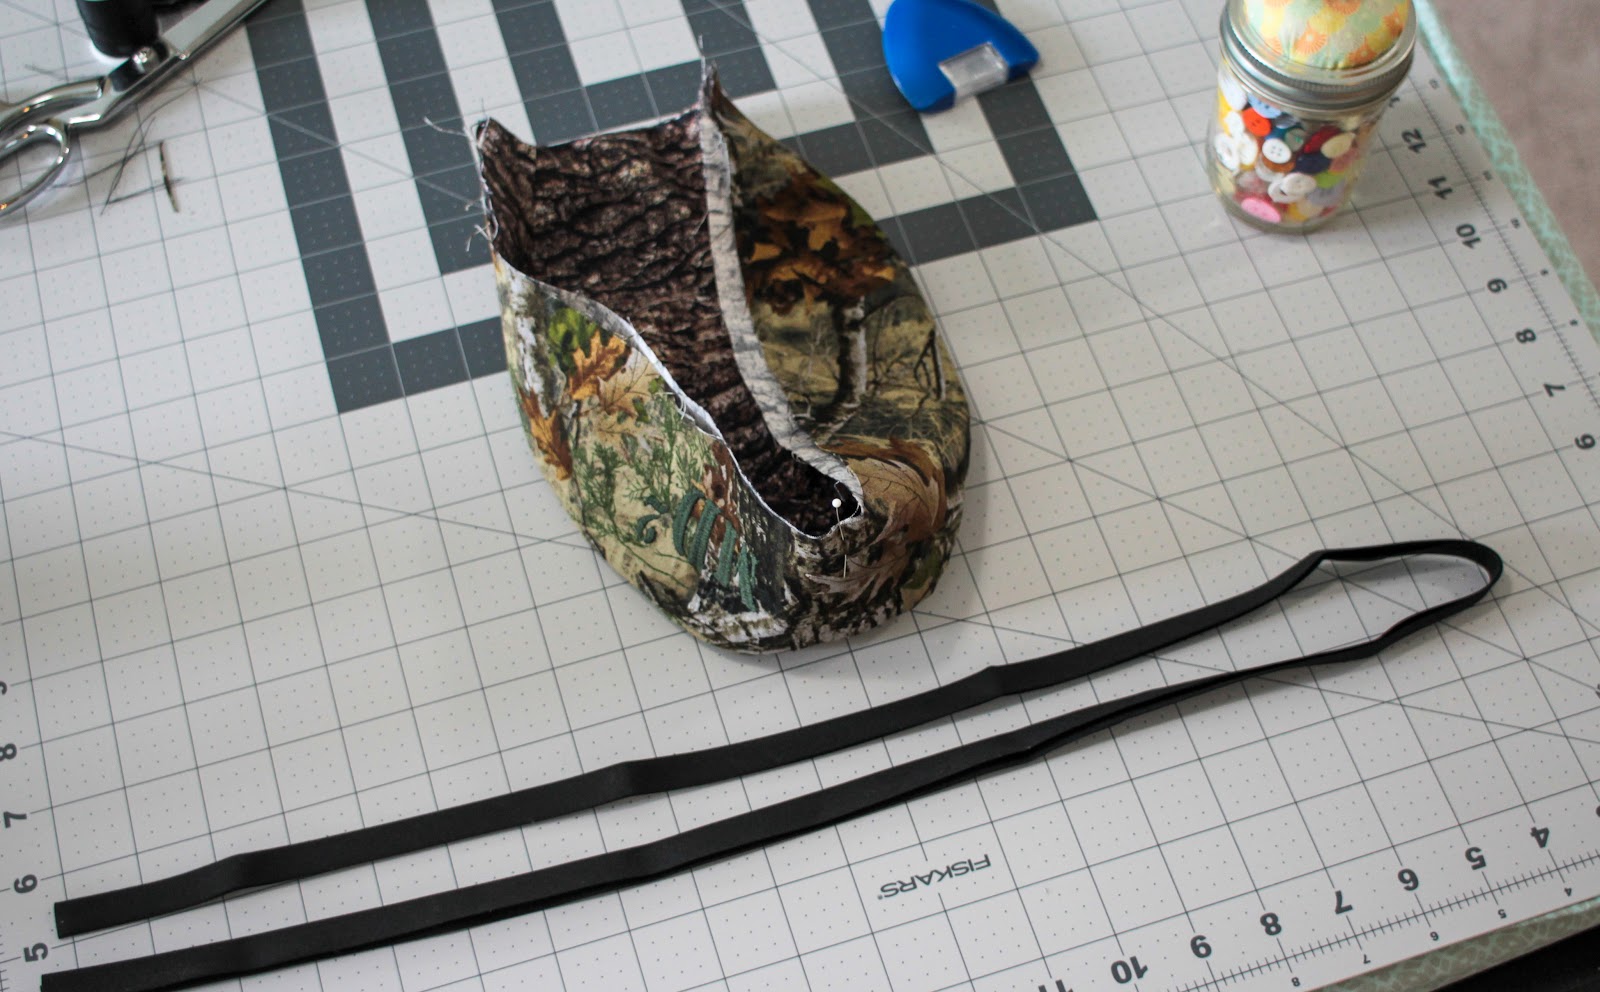
10. Make sure that the raw edges of your cap are aligned and place a pin at center front of the band. Get your bias tape and if you haven’t already, cut a 42 inch long piece and fold it in half to determine the center.

11. Matching the center of your tape with your center front pin, wrap the tape around the raw edges of your cap. You want to stick it in as far as you can, aligning the cut edge with the fold inside the tape. Pin the tape in place all around the cap. (Note: If you are a bias tape pro, you can do this without all the pinning. Your ties will be 10 inches long, so just stitch up the 10 inch ties first, and insert the cap at the point, and then stitch around, adding the second 10 inch tie at the end.)

12. Start stitching at one end of your bias tape. If you notice in the above picture, one side of the bias tape is less wide than the other. This is done intentionally at the factory to make it easier to apply. Be sure you are stitching with the “shorter” side up so that when you get to the cap section, you will be confident you are stitching through all the layers, since the bottom side hangs farther over. Stitch all the way down the edge of your first tie, around your cap and along the edge of the other tie, all the way to the end in one pass.
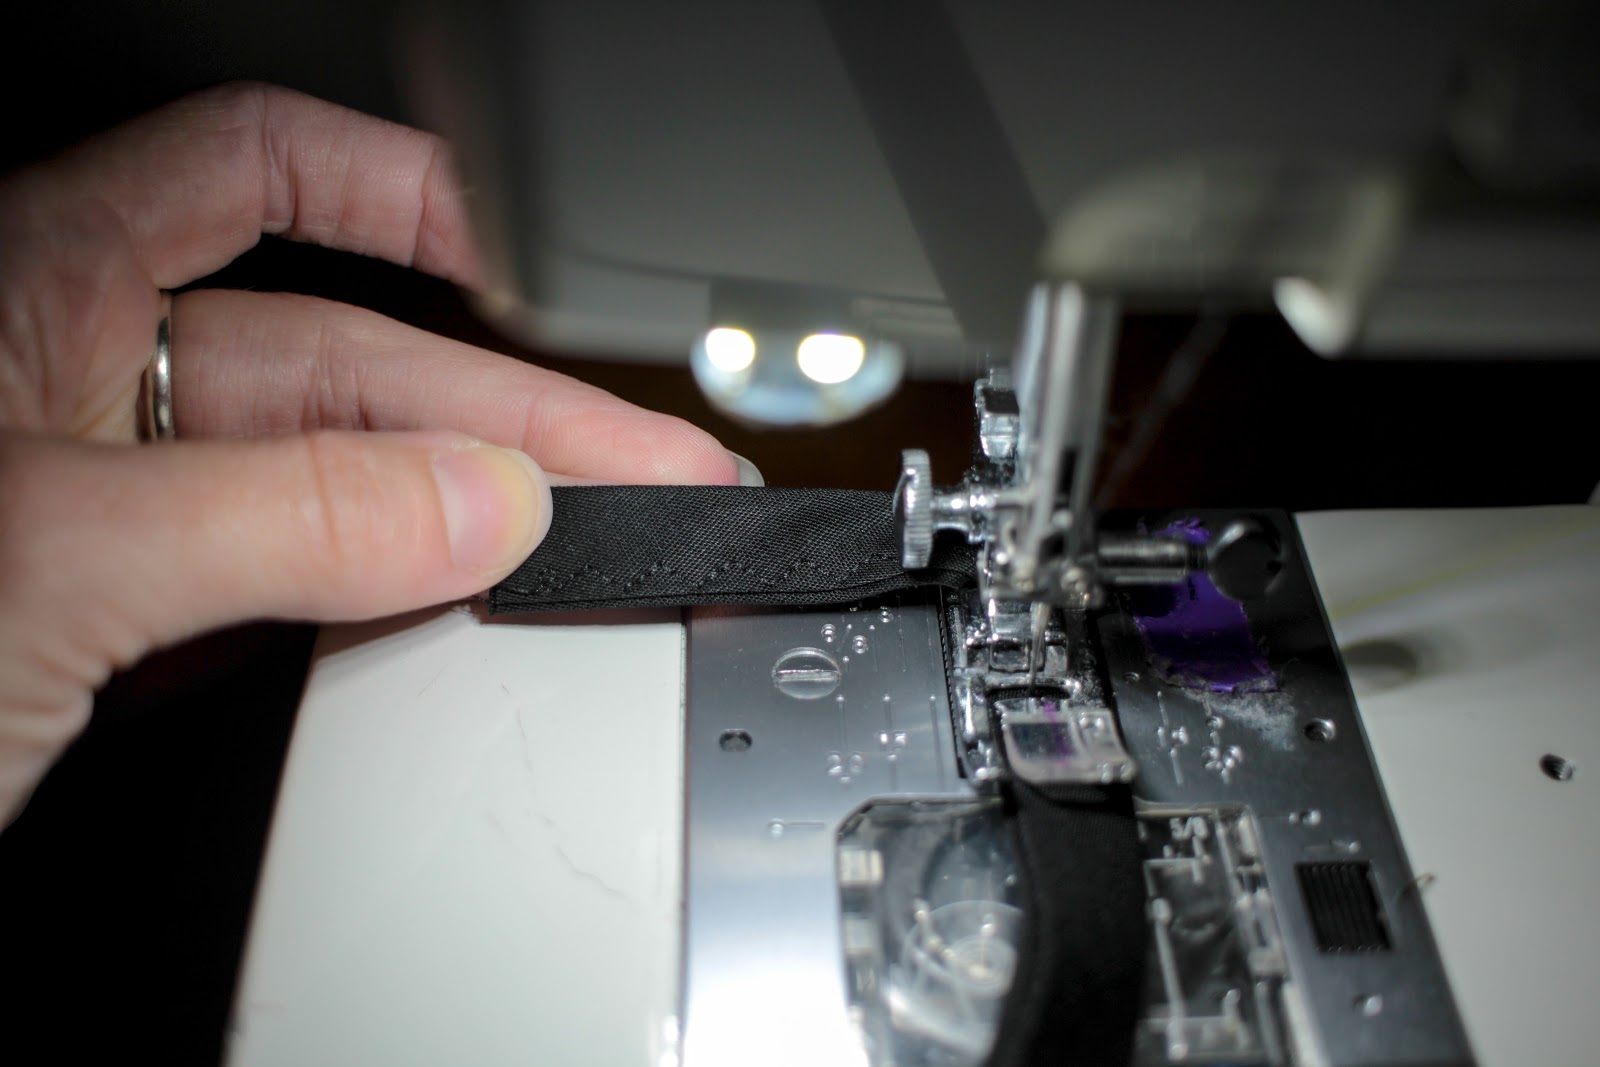
I like to use a 3 step zigzag stitch for this - I just like the way it looks - but you can choose any stitch you prefer. Some machines have interesting decorative stitches and this would be a great place to use them! Have fun!
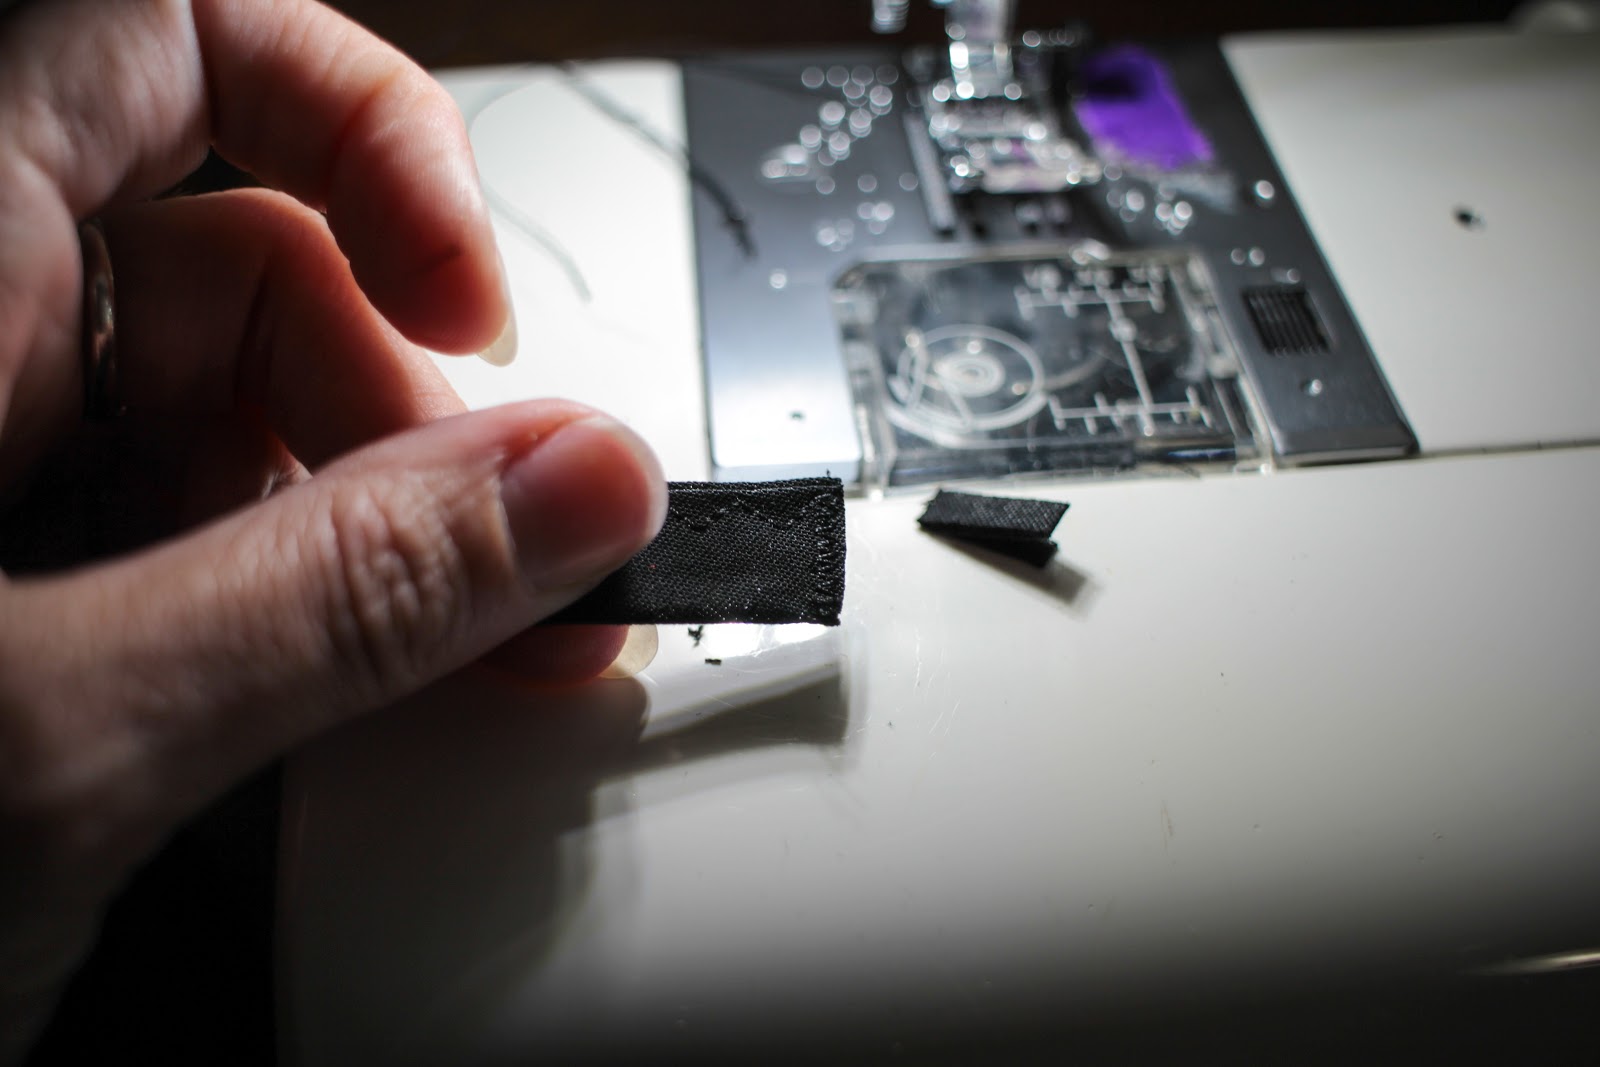
13. Finish the end of your bias tape ties by either narrowly hemming them, or zigzag stitching across the ends and trimming off any excess. I find hemming a bit bulky, so I go the zigzag route. You could also add a knot at the end, or even a decorative bead.
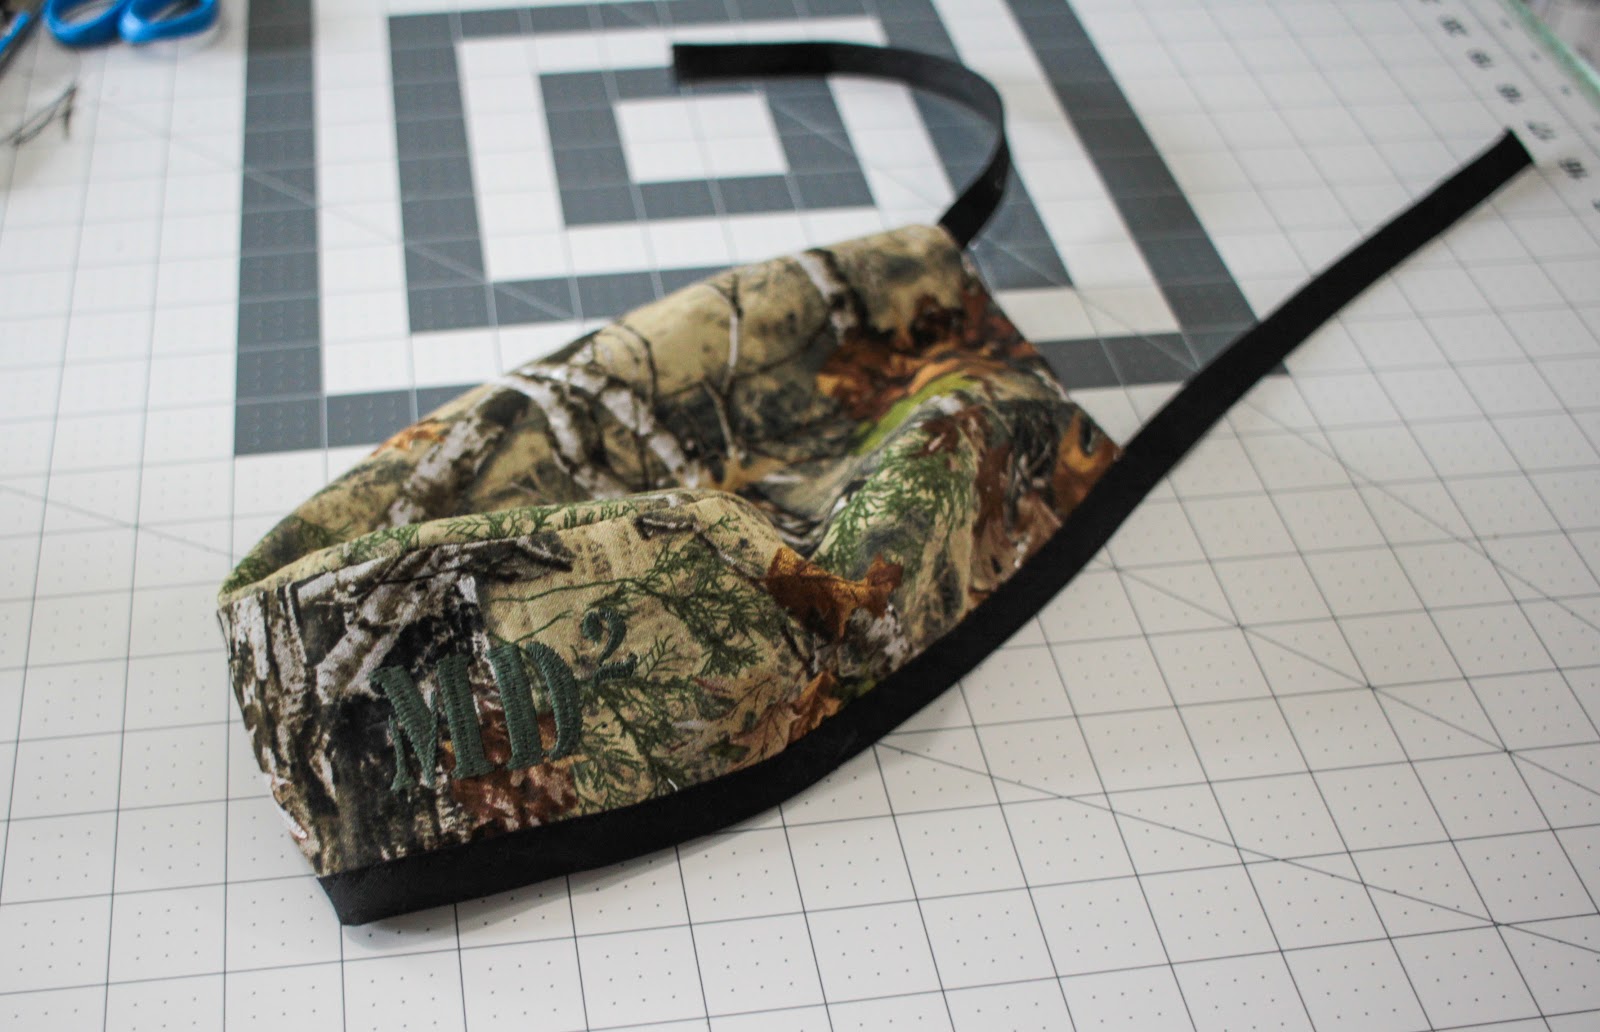
Look at that! You’re done! Now you’re the most stylish in the OR! I added some embroidery to mine, and if you are interested in embellishing your cap in some way, do so before you assemble the pieces. It’s much easier to embellish flat fabric!
ETA: Several of y'all have asked about making these caps in a single layer, which is a great way to conserve fabric and make them faster! My friend Kristine made a great video showing us all how to easily convert the pattern to a single layer. Even if you are doing a double layer cap, she has some great tips for sewing the pattern in general! Check out her video here!
To download the pattern pieces, and a pdf of the instructions, click below!
Pattern
Instructions
And just for kicks (and so I could play with my new Cricut Maker), I also created an SVG file for those of you who have cutting machines that can handle unbonded fabric. You can download the SVG here. If you need to resize, the band should measure 4.324in x 22.648in, and the top should measure 6.758in x 10.408in.
Note: the svg file will not open in your browser, so if you click on it, you will get a plain black screen and it looks like it doesn't work. You will need to right click on the link and download the file, then upload the svg file into your cutter software.
86 comments:
Super cool! I'm cutting one out tonight as a thank-you to the vet tech who's watching my kitties for me. But I'm guessing that will only be the first one I make....
I am having trouble downloading the image. It just shows up blank. Have you taken it down?
No, I haven't made any changes and all of the links are pulling up the PDF documents for me. There should be two separate docs - the pattern pieces PDF and the instructions PDF. The SVG comes up as a blank page if you try to open in on a phone or tablet, as you need graphic software like Inkscape or Photoahop or Cricut/silhouette software to open that file.
Making this tonight! Thanks for the pattern!
Is it recommended to prewash and fabric before measuring and cutting?
Yes!! Definitely prewash in hot water and dry in a hot dry cycle! These masks are meant to be laundered and reused so you want them to withstand rough treatment without shrinking.
Yes, just omit the inner layer of fabric and hem or bind the back edge to finish it.
Absolutely! Link away! Boost the signal!
Thank you for posting this pattern. It will be shared with a quilting group in Maryland for a hospital in need. We altered the pattern and directions just a bit to eliminate the need for so much seam binding. Thank you for your public service.
We will make sure to give your website credit.
Aww, the fat quarters I picked up from Joann to use for this pattern aren't wide enough for the band - They only measured 18" before I pre-shrunk them.. I'll make it work by piecing it together, but just wanted to give a heads up to anyone else that goes out and buys a pile of fat quarters for this! :)
Carol, could you please share what alterations you made? I'm looking to make some to donate to my local nurses and Dr's. Thank you!
So, anytime I have sewn previously it has been under the instruction of my grandmother. As such there may be an obvious answer to my question, but is the seam allowance already factored into the pattern pieces or should I add a 1/4" allowance?
The seam allowance is included. No need to add anything.
I used this pattern and the band is 2 inches too short. What did I do wrong? Thanks.
The band does not meet in the back. You should have about a 2 inch gap to allow the cap to fit different sized heads.
Do you have a pattern for ponytail scrub caps?
Do you have a pattern for ponytail scrub cap?
Do you mean the bouffant style cap? I do not, but they are pretty much just a large circle with elastic around the edges.
I have the pattern for bouffant style scrub cap but I saw a
bouffant pattern for ponytail cap.
Sorry I'm not sure what you're referring to. Most caps are intended to cover the hair, so a ponytail sticking out would defeat the purpose.
Can’t get the svg to work ☹️
I'm sorry to hear that! I've tried it on Cricut Design Space and have had no issues personally. If you can be a little more specific about what isn't working maybe I can help?
how do i get this pattern on my circut? i am waiting for the maker to come in the mail now but my friend is hoping to get me to do the cuts on the machine and was wondering how i do that on design space
Download the svg file, and then upload it into Design Space. If you haven't uploaded a file before, Cricut has an excellent step by step video on their website that shows you how it is done.
when i download the file, its a pdf and design space doesnt work with pdfs, is there a way to change that?
There are actually 3 separate files. Two are pdf - the pattern and instructions, and the final one is the svg. The link for it is embedded in the last paragraph of the blog post. You won't be able to open that file from the link, only download it. If you get to open it, it will look blank.
thank you! sorry for asking so many questions, im very new to this lol once i have it uploaded do i need to resize it or anything so it cuts the right size? or is the image uploaded in the right size already
Unfortunately, Design Space doesn't read size information from svgs, so it will have to be resized. I've included the dimensions you'll need in the blog post.
The pattern pieces state a 1/4” seam but the written instructions state a 1/2” seam. Which is correct please?
It's 1/4 inch. I'm not sure how I missed that error in the PDF! It's corrected now.
With this in mind would I wash and dry prepared bias tape too? I imagine not but wonder if it’s an issue to have hat fabric washed and dried and fabric of bias tape not. I ask because I’d like to use the few rolls of prepare bias tape I previously purchased versus making my own and I doubt it was washed.
Purchased bias tape is preshrunk, so you'll be fine to use it. Prewash if you're making your own.
Yes! Thank You for sharing that!!!
Thanks for this pattern! I got a request from a friend who's an ER doc for some scrub caps. The protective equipment they have to use now can chafe - so he sent this link to your tutorial. I thought for my first cap it didn't come out too bad! The instructions were very clear, thanks! Here's a picture!
Nice! I'm glad it was helpful!
Hello Katie! I just used your template and instructions above to create a set of scrub caps. Thanks soooooo much for this! I wanted to share this with a group of folks that are helping to make masks and scrub caps for the medical community. I've updated your pattern (with a link/credit to this tutorial). I've included the pattern and some initial photos of my completed caps here: https://calamitycat.com/reversible-scrub-caps/
Thanks again for doing this!!
Jen- you can fold your quarter diagonally and it will work. It will waste material, but if you’re into the design...it works.
You can add about 2 inches to the back at the top (kinda like a dove tail if that makes since.) make a casing at the end of that to put elastic there & it’ll make the ponytail version to cover hair for those with long hair. Keep the rest the same.
Hi Katie! Thank you for this pattern. i just used it to create some caps for a friend who is an RN. Your instructions were super easy to follow and I was able to crank a few out way faster than I expected even with adding a back flap to help protect her hair even more.
I'm so glad it was helpful!
Did you allow for the 1/4" seam allowance, or do I need to add it before I cut out the pattern?
seam allowances are included where they're needed. No need to add anything.
how do you close the ends of the cap(raw edges lower end of cap) #9
If you are doing the reversible version, the raw edges at the end are seamed together as per the pattern. If you are doing a single layer, you can do a narrow 1/4 in hem or bind the edge prior to applying the tie and binding strip to the lower edge.
Thank you for posting this!!
I added buttons on each side because hubby was already getting ER ear from mask straps. Of course then it is no longer reversible.
Any way to add photos to a comment? I don't see one. Well, here's a link to my Facebook post which has pictures.
Link
That's a great idea! Thanks for sharing!
May I send you six bucks somehow? That seems to be the going rate on Etsy for scrub hat patterns and yours is very good. :)
Thank you for the thought, but truly all I want is to do some small part to help.
You are!
Any relation to Cary Deshazer, by the way?
Not that I know of, but it's not a very common name!
Thanks
Carol
Can you share the modified version?
Thanks
Okay, last night I did try putting buttons (flat ones, without shanks) on both reversible sides and Barry tried it on here at home and thought it would be okay. We'll know for sure after his next shift. The fun thing was I got to pick two sets of 4 matching buttons to change it up inside and outside.
This was a good scrap busting project. I pulled out a bunch of odds and ends of quilting cottons and just sort of threw them into the pot, stirred, and saw what came out. I made 6 caps yesterday (have to put buttons on 2 yet). Used up scraps, and also got to dig around in my cigar boxes of old buttons. :)
Fantastic! Thanks for the update!
I appreciate your updated pattern PDF - that's what I'm using. I can send you where buttons would be placed for strap buttons if you like. Email is my name with a period between first and last at gee mail dot com.
Hi! Thank you for sharing this pattern. I was trying to get the SVG downloaded but it appears the link is broken. Is there anyway I can get the SVG emailed to me?
It does work, once it's downloaded. If you click the link, it appears blank because browsers can't open svg files natively. It has to be downloaded and then loaded into the software for your cutter.
Thanks so much for sharing this! I am attempting to make my husband a cap but this pattern is too small. If he wears a 7 3/4" hat, what do you suggest I do to enlarge your pattern?
As with any alteration, it will depend where it is too small. If it's too small overall, you should enlarge all the pieces by the same amount. If it's not deep enough, you should make the band taller. Be sure to test any changes before you use your nice fabric.
Thank you so much for sharing this with us!! I work in EMS and we are now trying to find ways to add to our PPE gear to make us less susceptible to getting contaminated.
Thank you so much for this much needed pattern!! Making this for a family member who is a respiratory therapist! Many are scrambling for extra protection. Holly, I just made this and added 1/2 inch all the way around the outline of the head and 1/2 inch around the band. Trim any access when attaching.
This works perfectly for a larger head. Also, if anyone is scrambling for fabric, men's shirts make great fabric for these scrubs hats.
Great tips! Thanks for sharing!
What types of material do you find work best for this? Wovens or Knits??
I have made it primarily with quilt weight wovens, but a nice medium weight, stable jersey knit would work well and be very comfortable.
I can’t get the svg file to open for when you’re using the Cricut maker. Is there any reason why?
It won't open in a browser, as that file type isn't supported by most browsers. The file looks blank. You need to download the file itself to your computer, then upload it into Design Space.
What width bias was used? Single or double fold?
I used extra wide double fold, but it also works with narrow. Just depends on the look you want and how wide you want your ties. It does need to wrap around your raw edges, so you'll want double fold if you aren't using a binding attachment.
Hi, what is the extra small square for? It says overlap band? I didn't notice it in the directions or comments and I'm making a bunch of these for my local ER in need. Thanks!
it's just a tab to allow the two band pieces to more easily taped together. It should go underneath the larger band piece when you butt the two lines together.
Thank you, thank you, thank you. Due to COVID, a friend was unable to order those paper thin caps and get them in time. She asked if I could recreate it, and this is SO MUCH BETTER. I am sewing 20 for the COVID testing team at our local hospital.
Thanks for the great pattern. I am working from home and needed to tame my long-overdue haircut hair. The cricut pattern worked perfectly, I can see a few more in my future.
Thank you so much! I'm using this for my nephew, who's a nurse in a hospital. They've started using washable cloth hats.
Thanks for sharing this pattern!! I’ve been making my ER girls caps and have found some patterns to just be difficult or oddly sized! This was perfect and the cut file saved the day!!
I made two of these according to the PDF pattern. I found that the band was a bit too short. So, I added one inch evenly across the bottom and the result is fabulous. The ER staff in my daughter’s hospital are fighting over them. I’m making them reversible. She told me that when the 12 hour shift is halfway over, they flip the cap to the other side! This is the best and easiest pattern I have found. I can’t make them fast enough. They offered to pay, but I said, “No way!” I’m also making reversible headbands with buttons. BTW, I’m a retired nurse, so helping my fellow nurse colleagues, who are true heroes.
As a nurse, I wouldn't recommend flipping the caps halfway through the shift as the purpose of wearing them (at least for me) when working with C19 patients is to keep the virus out of your hair. I would consider the outer side contaminated after visiting the first C19 patient. I love the idea of reversible though just for variety. Thank you for helping us nurses and good luck to your daughter!
I've tried to download the pattern but it keeps spinning. What can I do to get this to download for me?
I'm not sure what to tell you. I haven't heard of anyone having that particular problem. The link works when I try it. Maybe a device restart?
I cannot get the pattern to print. When I select print, the page is blank.
Any suggestions. Thanks.
Check and make sure you are clicking "Pattern" or "Instructions" in the blog post to bring up the PDFs. You also need to have a PDF reader installed on your device.
Thanks so much...the PDF info is what I needed.
I love this pattern. Is there any way to extend the pattern for long hair?
I haven't tried to lengthen it myself, but there was some discussion about that in the comments here, if you want to look.
A great big THANK YOU for sharing this pattern! I'm fairly new to sewing but have made many of these from the onset of the pandemic for my son who is an ICU nurse. Every one of them has turned out so well thanks to your pattern and easy to follow directions.
Thank you for sharing this super simple tutorial. It did seem small to me, so I adjusted the band with and it came out perfect
Post a Comment