Wednesday, April 29, 2009

Stuck.

I've been feeling a little creatively stymied lately. I can't tell you how long I've stared at this blank page trying to decide what to write about. It's also been a little crazy around here lately, so I haven't been sewing as much as I'd like. The blouse in my "My Current Project" sidebar box is still a pile of black stretch broadcloth. I did finish up the "Surprise" and I'll post about it once I've given it to it's intended recipient. Don't want to spoil the surprise... It's adorable, though. Stick around.

Anyway, despite my current state of crafter's block, I've been thinking a lot about applique. Logan has a book that we get from the library that he has memorized and LOVES, and it has gotten me thinking about making him some shirts with "I Love Trucks" appliques.As you can see, the illustrations are nice and simple, so I think they'd translate well to applique. The firetruck is his favorite. I think I'll be needing some red felt... And some free time. Sigh.

I also found some cute flowers that I think I'll translate into applique for Myra. Don't laugh - yes, this is a paper towel. But aren't the flowers fun? You have to take inspiration where you find it.On another crafty/family note, my brother and his wife are expecting their first baby, and just found out that it is a BOY! So, don't be too surprised to see a lot of cute boy stuff coming along. I'm excited about my first nephew!

Monday, April 27, 2009

New Look 6793

This is a cute little quickie from New Look. I really like their patterns. They are simple, inexpensive, but still cute and fashionable. This one is REALLY simple. The dress (sans applique) takes about 45 minutes from cutting to finished. The pattern included detailed instructions for how to do the appliques pictured on the envelope, but I think this is a great opportunity for some creativity!!
View A and B are the same, saving the hem details. A has a ruffle, while B has a contrast band. 
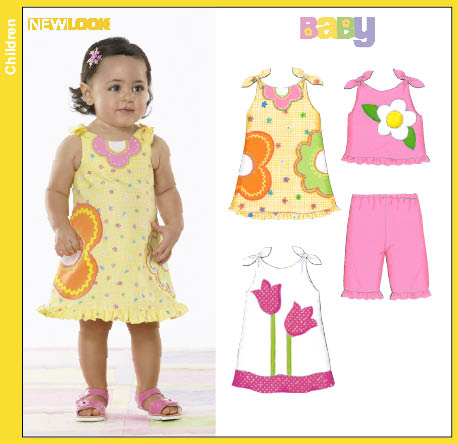
Here is view B - sans band and with my own applique. The matching shirt is Butterick 3475.This is View A, made of denim with a satin facing and ruffle. I love the look of the ties with a contrast facing! I think it is a little blah as is, so I'm thinking of adding a hot pink flower applique to the lower part of the skirt.
View C is a top, basically a short version of the dress, and D is a pair of ruffled pants. I made these out of red flannel last Christmas, and they went together easily as well. They are very simple pants with a ruffle at the hem.
Big brother's green pants are Butterick 4222.

This is a great pattern for a beginning seamstress. It is very simple, but there are some great techniques that you can learn. For the more advanced, it is still a fun, quick pattern, with lots of customizablity.

Sunday, April 26, 2009

My love affair...

with bias tape. Mitch knows all about it. He finds my in my sewing room, measuring, ironing, cutting, and he knows.

I really do love bias tape. It is wonderfully versatile. You can make curved casing with it, bind armholes and necklines, bind hems (yay! no hemming!!), make pretty edges, use it to make ties... There are more... I particularly love it for binding the edges of my ring slings. If you want to read more about slings, look here and here.
It is also cheap, which is nice. A package of three yards is only about a buck fifty, but, if you make it yourself, it is even cheaper, and you can make it out of any print you want! How awesome is that!? I usually get about 10 yards of 1/2 inch double fold (that's "extra wide" in the packages) bias tape out of a 1/2 yard piece of fabric.

Are you excited yet? Here's the kicker - it's not even hard to make. It can get a little tedious, as there is a lot of marking, but there are some awesome instructions here from the Dread Pirate Rodgers, and here are some tips from me. (and a cute baby, trimmed with handmade bias tape.)
1. Buy yourself one of these. It is a bias tape maker. It costs about five bucks at Hancock's. You'll find it in the quilting section. It will make pressing your tape SOOO much easier. I have done it both by hand and with the tape maker, and with the tape maker, it took about half as long. Go get one.

2. As you are pressing your tape, roll it onto something so that your creases don't fall out and you don't tangle the tape. Here I am using the top part of a blank CD container. Worked great. Empty ribbon spools are also good, as long as they are wide.

3. For your print, remember that you are cutting on the bias, and folding the tape into a small size, so a big print will get lost, and things that are lined up will look different on the tape. Polka dots, for example, look very different, and you may not like the effect. Take an edge of the fabric and fold it up, approximating the bias, so you aren't disappointed after you've worked so hard.

4. If you choose to make your tape by hand, and are making double fold, start by folding the tape in half, then tucking under the edges. It is easier than measuring the edges individually. then folding in half.

5. Read the instructions on the bias tape maker for pressing, if you are using it. They're right, although I did find that ironing with the point of the iron (rather than the long edge) was better when I ironed over seams.

6. Pay no attention to the instructions for cutting out your bias strips. Use the link above. Making individual bias strips and then sewing them together is ridiculously tedious. Don't do it!

7. Make extra. You'll use it.

Now get creative! Bias tape is awesome!!

I'd love to hear your tips and tricks, so please share!

Friday, April 24, 2009

Circle Skirt How-to

**If you surfed here looking for a half or 3/4 circle skirt, you can find a separate tutorial for drafting those patterns.  Just click here!

I wish all days could be like today. The kids (mostly) behaved. The weather was pleasant. And I finished the most fabulous skirt! I've been completely in love with the 50's fit & flare look, and so, a circle skirt was an essential piece to that look. I also have always liked the look of a black and white palette, and so, my black and white circle skirt was born.
I know that a circle skirt is pretty simple. Thanks to vegbee's awesome tutorial I had a place to start. Vegbee's version is great. It features and elastic waist, which is comfy, easy to do and easy on the fit. The only problem with an elastic waist is that it can add some bulk, if you have a significant difference between your waist and hip measurements, which I do. After two kids, I have enough bulk in the waist, so I decided that a waistband and zipper were the way to go for me. I also hate hemming. Especially curves. So, after reading about a hem facing on oliver + s, I decided to try that, too.
Let's learn together! I'll show you how it all went.
The first step is to create your pattern. Since a circle skirt is exactly what it says - a circle with a hole in the middle - two measurements and a little geometry is all you need. Don't worry, it's only a little geometry. The measurements you need are 1. your waist and 2. the length you would like your skirt to be, measured from the waist to the hemline. Since it is unlikely that you will be able to find fabric wide enough to make the entire circle, let's make our initial pattern piece a half circle. Your waist measurement is the circumference of the hole in the middle of your circle. So, take your waist measurement, divide by 3.14 (pi) and divide by 2. This is the radius of your center circle. I know this isn't making much sense without a visual. Fortunately, there's video...
OK, so once you have your half-circle, you can decide if you want panels or not. My skirt has six panels, with 2 alternating prints, so 3 of each. To cut out my actual pattern piece, I carefully folded my half-circle into thirds, then added seam allowances. This was the pattern for my 6 panels.
The other two pieces you will need are a waistband and a hem facing. The waistband is easy. It is a big rectangle, measuring (your waist + 2 inches (for the tabs) + seam allowances) long by (desired width x 2 + seam allowances). I used one inch for my desired width - that is, however tall you want your waistband to be. For the hem facing, you will need an exact copy of the bottom few inches of your skirt. I decided to do the facing in four parts, so that my seam allowances wouldn't overlap and get bulky. I again folded my half-circle, this time just in half, and traced the bottom 3 inches, then added seam allowances. Be sure to measure carefully - this needs to fit pretty exactly.
Now, let's put it together!!

For my six panels, I first attached them together in pairs. If you are alternating fabrics, make sure that when you are sewing your pairs together, that you have the same print on the top and sew the same side seam. So, in the picture, you can see that my three pairs are all together, with the black fabric on top. I seamed them all along the right side. I also installed my zipper at this point, between the first two panels that I seamed. I have a love-hate relationship with my zipper foot, so I am NOT going to talk about installing a zipper. There are excellent instructions included with the zipper when you buy it. Follow those. I should have.
Now attach all of your panels together. When you place them right sides together, they should alternate, as you can see below.
Pretty panels all in a row! Just one more seam to go!
Once you are all seamed together, it is time to add the waistband. Be sure to fuse some interfacing to the wrong side, within the seam allowances. Find the center of your waistband and pin it (right sides together) to the seam opposite your zipper, then pin all around.
When you finish, you should have a tab that hangs off the end. This is where your button or hook and eye will go.
Stitch down your waistband where you just pinned. Now press up about 1/2 inch on the free edge. This will become the inside of your waistband and will cover your seam allowance.
With right sides of the waistband together, seam the two overhanging ends.
Trim the seam allowances and clip the corner, then turn them right side out. It should look like this when you're done. You made a little "pocket" to hold your seam allowance!
Now press your waistband down, pinning it on the right side, making sure to catch the folded inside edge of the waistband as you pin. You can see my pin just where my iron has been.
Now from the right side, topstitch the waistband close to the seam. You can also stitch in the ditch if you don't want any topstitching to show, but make sure that you catch the underside of the waistband. It's a bit trickier. Attach your closure of choice to the tabs. I used a hook and bar.

Waistband done! On to the hem facing. Don't forget that with a circle skirt there are areas that are cut on the bias. Be sure that you hang your skirt for at least 24 hours to let the bias set before you hem it. Otherwise, your hem could ripple after the fact. OK, bias set - let's go. Seam all of your facing pieces together to make a BIG circle. Finish the inner edge of the circle with either a serger if you are so blessed or just an overcast stitch. Or I guess you could hem it, but that would defeat the purpose...
Now, this is the painstaking part. Pin it, right sides together, to your skirt. I laid it out on the living room floor while the kids where sleeping. Start at a random spot and just go around the skirt until you get it all lined up the way you like it. It took me three revolutions around the skirt.
Once it's pinned, sew away. Then clip the seam allowance every few inches. This will help it lie nice and flat when you flip it.
OK, now that it's all clipped, flip it wrong sides together and press. Be sure to press it so that you can see a bit of your pretty fabric on the inside, so that you know that no one can see your facing.
Now stitch down the facing and you are done!! I chose to hand stitch it because I wanted it to be truly invisible, but do whatever floats your boat.
See, it really is a circle!Now, let's see yours!

ETA 8/11/2010: I've noticed that quite a few of you are popping over see a half circle skirt, and since Anne commented that she was interested in a 3/4 circle, I added an additional mini-tutorial to include drafting the pattern pieces for a 1/2 and 3/4 circle skirt.  The math is a smidge more complicated, but hopefully the tutorial makes it clear.  Click here for the tute!

Thursday, April 23, 2009

My addiction

I can't ever seem to go to a store that sells fabric and return home empty handed. As a general rule, I don't go LOOKING for fabric when I go to Walmart, but they do have good prices on trim, and I needed red rick rack. And I came home with this.The green print on the top is my favorite, but I can't decide if Myra gets a new dress, or if it should be a top for me. What do you think?

Also, as a result of some other purchases, seen below, I may be MIA for a bit next week.

Yes, the time for potty training has come. Here's hoping...

Wednesday, April 22, 2009

Simplicity 2985

This is another in my pattern stash that I really enjoy making. And I think it turns out super cute! I was a little nervous about it, since it looks so detailed, but it goes together quite easily and the pattern instructions are very clear. I made this one in the smallest size for Myra to wear when she was first born. It is view C, but without the elastic cased into the edges of the sleeves. As a note, the pattern does feature set-in sleeves. In the smaller sizes, this is ridiculously difficult to do on a machine without a very narrow free arm. Be warned.At that, it was too big for her until she was nearly a month old. Logan picked out the fabric - classy, hey? I was worried that it wouldn't translate well into a girly dress, but I think this pattern made it happen. The only things that I would (and later did) change would be to get rid of the ties. It doesn't seem very comfortable to me for a baby who spends all her time on her back to have a knot there. They are cute, though.

This is my second outfit from this pattern. It is view F with pant G. The top went together like a dream. I LOVE those little half sleeves. The armhole is also bound with bias tape, which I like. The pants, however, caused no end of swearing!! Those curved hems were the devil to press and sew! I learned later that a little ease stitch around the curve would have solved my woes. As you can see, she's happy and comfy. Or maybe that's just because she's with Grandpappy.

I also used the pants pattern as a rough estimate when making vegbee's awesome wrap pants (Click for the tutorial).
I got around the rounded hem problem by just edging them with cute bias tape. I think the effect is fun, and Myra loves them!I will say that the pattern does run a bit large and the pant (which is supposed to be a capri) is long. The XXS (up to 7 lbs.) didn't actually fit Myra until she was closer to 10 lbs, and the Small (which is labeled a 6 month size) is still fitting her at 8 months, while she is wearing a 12 month size in ready-to-wear. I don't think of this as a drawback, since it means I'll be able to use the pattern for her into toddlerhood, just something to be aware of.

Tuesday, April 21, 2009

One week!

Today my blog is one week old! I had a little goal to post every day for at least the first week, and I made it! I still have tons of projects to talk about, but I think, for today, I'll just post a few pictures of some things that I've done. I hope you enjoy.
This is a princess cape I made for Logan's best friend, Anna, for her 3rd birthday.
Some monkey jammies for Logan.
This is an RTW top and skirt to which I added a little color (and some cleavage coverage!).
I made this teeny skirt when my little princess came home from the hospital and at just barely six pounds, didn't fit into ANYTHING. She wore this her first Sunday at church.
This was the first outfit I made for Myra.

Monday, April 20, 2009

Stars...

I usually sew clothing, and occasionally a baby carrier, but when we were getting ready for Myra's arrival, and moving she and Logan into the "big" room I realized that boring blue curtains were just not going to cut it for the little prince and wee princess. The curtains that came with the house were blue twill, obviously home sewn by a seamstress that is still learning, but they do keep out the sun, so I decided to just work with what I had. Since Logan's room had a bit of a dragon theme, and Myra's was all about princesses, I thought a castle would be a fun melding of the two, so that's where I started. I cut out big giant battlements from some sturdy twill and appliqued them onto the bottom two thirds of the curtain, then added stars and a moon to the upper two thirds. This was definitely the biggest applique job I've ever done and I did learn a few things. For the castles, I didn't interface at all, since the fabric was already so thick. That worked fine, and I think that the curtains have a nice drape as a result. The stars and moon were a thin broadcloth left over from another project. I attached them with stitch witchery. This was a bad plan. Should have used heat and bond or just interfaced them, but I didn't want any extra stiffness. Oh well, live and learn. They turned out really cute, and Logan loves them. When he looks up from his bed, he can always see the stars!
Don't they have a pretty "glow" with the sun behind them?
Another thing I learned is that my sewing machine is not a fan of Dual Duty thread. It kept skipping stitches and stripping the thread - even with a larger eye needle. Once I went and got some Gutermann, all was well.Sleep well!

Sunday, April 19, 2009

"Doctor" Scrubs

Scrubs. They seem like the perfect project for the home sewer. There are tons of patterns out there. The material is inexpensive. The patterns are simple. But, if you have ever tried to make scrubs for the doctor or medical student in your life, you've probably realized that there is a lot more to it then that. Did you get that funny look, with the half-hearted thank you, then the scrubs went to the bottom of the dresser, never to be seen again? Or did your loved one say, "Hmm, that's not quite what I was looking for." but couldn't explain why? Well then, you are in the right place. After 4 years of medical school and 3 years of residency, I've worn a LOT of scrubs, so here is how to make some scrubs that your medical professional will love.

The scrubs that are traditionally worn by physicians are very different then those worn by the nursing and ancillary staff. Your doctor, or doctor-in-training, realizes this, and doesn't want to look like a nurse (or the cleaning lady). I actually think that nursing scrubs are a lot nicer than doctor scrubs in many ways, but they're not what you want for this. Commercial pattern companies don't seem to realize this, and the pattern that are available all cater to the nursing staff. However, they can be easily modified. Here's how.

First of all, let's talk fabric. You are looking for a poly/cotton broadcloth. Thin - like a shirting weight, and fully saturated with color (ie, you can't tell the difference from the wrong and right sides of the fabric). They are made of this for a couple of reasons. Doctors tend to wear a lot of layers (scrubs, white coat, surgical gowns, etc), so it gets hot. Thin fabric isn't. Also, on the off chance that your doctor gets a chance to sleep on call, they need to double as PJs, and be fairly wrinkle resistant. And, they're reversible. More on that in a moment.

What color? There are lots of options out there for broadcloth, but for doctors, you really only have two. Blue, which is traditionally worn by the Medical subspecialties (Internal Medicine, Pediatrics, Family Medicine), and green, which is typically worn by the Surgical subspecialites (Surgery and all the specialties thereof, and OB/Gyn).

You might be tempted to get creative with the colors, but if you haven't talked about it with the person who will be wearing them, don't. I always wanted to wear pink scrubs, but as a young woman, it was hard enough to get taken seriously in boring medical blue scrubs.

Now, Reversiblity. Doctor scrubs are fully reversible, but not lined. I'm not sure why this is, but it is really convenient, and it is the way they are, so here we go. They are made reversible by using flat-felled seams, and by hemming and stitching the casing as close to the edge of the fabric as possible, with the raw edge turned under. Of course, you can tell which side is which up close, but not so much from normal conversational distances.They also have "reversible" pockets. Pockets are another important thing to discuss. There must be pockets, as every doctor will tell you. But don't get all crazy, remember - reversible. There should be two pockets on the rear right side of the buttock. So, you put one on the "right" side of the fabric and one on the "wrong" side. Looks like this -
As you can see, the pocket is on the right rear, and there is a visible stitching line from the other pocket that is on the inside. When the scrubs are reversed, it looks exactly the same - pocket on the right, stitching on the left. These are typically the only pockets on the pant, although I understand that cargo style pockets are becoming popular with some physicians. Be sure to ask if you aren't sure. The pockets should have squared off corners, and should be large enough to hold an 8 1/2 x 11 piece of paper folded widthwise (so, 6 x 6 or so).

The waist should be a cased drawstring. The idea material for the drawstring is cotton strapping. It hold a knot much better than polyester (which is slick) and MUCH better than a self-fabric tie. Trust me on this, when you have 6 pagers and phones on your waist and 14 pieces of paper and your PDA in your pocket, you need a drawstring that HOLDS.It also should crossover itself within the casing. So, when you are putting it in, start with the far buttonhole, case all the way around across the buttonhole where you started and out the near side so that the strapping is crossed. This makes it easier to tie, and also helps hold up all those pagers.

So, what pattern do you use? You can, of course, use a tradiational scrub pattern, just be sure to make the changes above. I use Butterick 6837. Yep, it is a pajama pattern, but the pants are PERFECT. There are no side seams, and only one pattern piece. You do have to add a few inches to the top for a casing, as this pattern calls for a separate waistband. I love it, and the scrub pants I made yesterday for Mitch are a big hit.

Finally! I made something that Mitch actually likes!!