Friday, April 27, 2012

Ottobre 03/2006-12

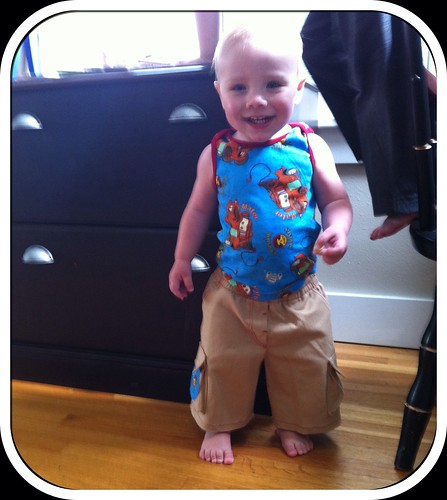
The KCWC is going great so far! Thanks to my sweet hubby, I have managed to sew at least an hour each day and I have caught up from missing Monday, so that is great. I just finished the most complicated of the projects I have planned for the week - Duncan's cargo shorts.
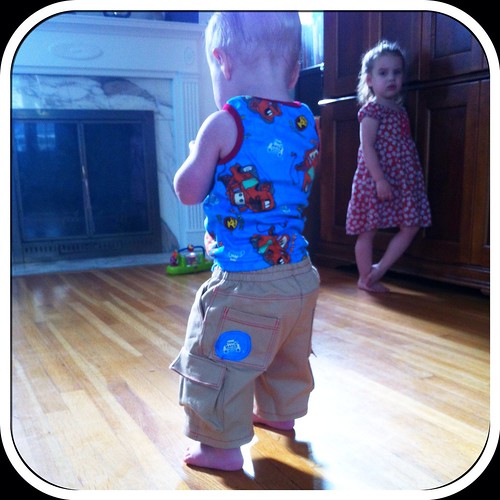
The pattern is Ottobre 03/2006-12, which is the same pattern that I used for his Easter shorts. This time, you can actually see all of the cool details, since I used a high contrast thread for topstitching.
The front has a nonfunctional fly, which is tacked down with decorative bar tacks. There are hip pockets, also topstitched, which are fully functional. For these I used a tip from Sandra Betzina's Power Sewing and cut out the pocket bags with the pocket opening on the straight grain, which puts the pocket bag on the bias. This gives you a nice stable pocket opening that won't stretch out of shape as well as a bit of give in the pocket itself.
From the side you can see the cute cargo pocket that I didn't use on the dressier pair. The pocket has little darts at the lower corners that add fullness. I used a square of velcro as a closure. Don't all boys love velcro? Rrrrrrip! I also added a couple of appliques from the Mater tee shirt fabric. Since they're knit, I just stitched them on without finishing the edges. Boy clothes are fun like that.
On the back, there are plain patch pockets. I added another small applique to one. All of my topstitching was done with a twin needle on my vintage Singer. She had a bit of trouble sewing this fabric at first, which is unlike her. I realized about halfway through that the presser foot pressure was turned up from 4 to 7. No wonder she was pulling on the fabric so hard! Once I lightened that up, she did fine. I pivoted the corners with my twin needle using this tutorial.
The fabric I used is a stretch twill that I think came from Hancock. It's been in the stash a while. It has a nice bit of stretch, which I hope makes these comfy. I've a coordinating pair for Logan cut out, and should have that to show you soon.

Thursday, April 26, 2012

Ottobre 03/2008-29 & 03/2011-6

Well, after a slow start, I'm getting some things done for KCWC. I started with the tee shirts for the boys, mostly because Logan has been really excited about the Mater fabric I found for him.
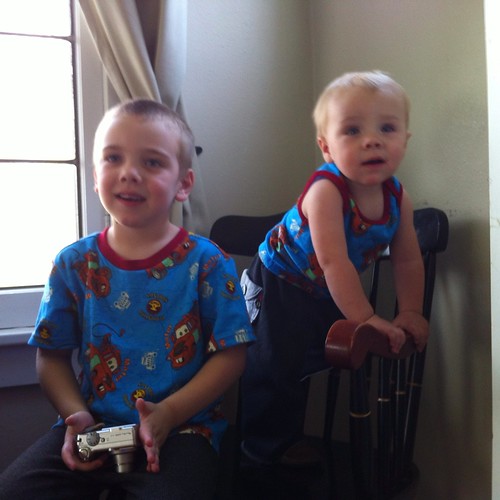
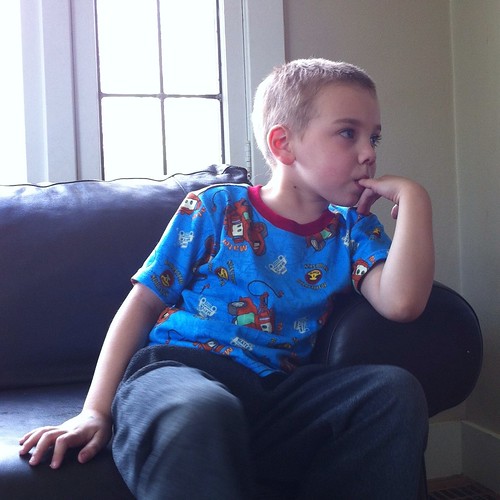
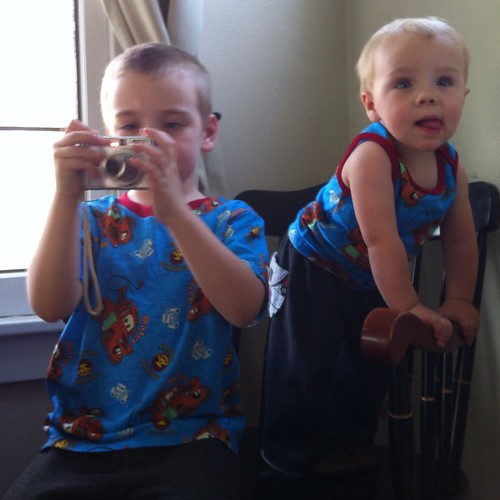
Here are my cuties in their coordinating shirts! The fabric is a cotton interlock from Print Knit Studio. It's a nice sturdy knit, but still soft. Perfect for kid's clothes. The ribbing is cotton rib knit from Fabric.com. I debated what color to use for the ribbing and binding. None of the blues I had seemed quite right, so I let Logan choose. He surprised me with the red! I really like it. So much so that I coverstitched all the hems with red as well.
Logan's shirt is from the 03/2008 issue of Ottobre. This was my first issue ever and I have sewn a ton from it. This is the first time for this particular shirt though. It is a basic tee with slightly forward shoulder seams, a rib knit neck band and stitched hems. The neckline is a little larger on this one, which is actually good for Logan, as he has a pretty large head and small necklines freak him out. It has a relaxed fit, which Logan also prefers. I did add 3/4 inch to the length of the sleeve. They looked a little short to me, and I think they were. The finished length here is just about right.
For Duncan, I used #6 from the 03/2011 issue of Ottobre. It is photographed in pink on a baby girl, but it looked like a good boy shirt to me. It is a sleeveless tee with an envelope style neckline. It is a great fit on Duncan without alterations. Since all of the neckline and sleeve edges are finished with binding, this was a super fast sew on the serger and coverstitch machine. It only has the two side seams to sew! Everything else is bound. I'm definitely going to make Duncan a few more of these.
Silly boys!
I did want to add just a little note about sizing in general. I've noticed that the newer issues of Ottobre (after about 2009) have a much closer fit, while the older issues are much more generously sized. You can really see that in play in these two tees. Both boys fall between sizes based on their chest and waist measurements. For both boys I used the larger size. Logan's tee (from a 2008 issue) is quite loose fitting with a slightly dropped shoulder line. Duncan's top (from 2011) has a very snug fit and the shoulder is right at his shoulder point. So, for those who sew with Ottobre, just be aware that the older back issues do tend to have a bit more ease built in to them. If you are looking for a closer fit, go with a style from a newer issue or size down

Linked up

Wednesday, April 25, 2012

Burda 7189

My final piece in the Wardrobe Basics SAL is done! And I accomplished a sewing goal that I have had for several years, so I'm doubly pleased.
I finally made an LBD!! The pattern I chose is Burda 7189, a shirtdress with interesting seaming, which of course you can't see in black. Erm. The fabric is a poly/rayon gabardine from FabricMart. It's quite nice and drapey, so I'm glad I bought a lot. You'll be seeing it again... This dress only took about a yard and a half.
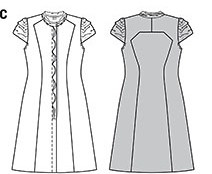
Here is the line drawing, so you can get an idea of what the seaming looks like. Cool, eh?
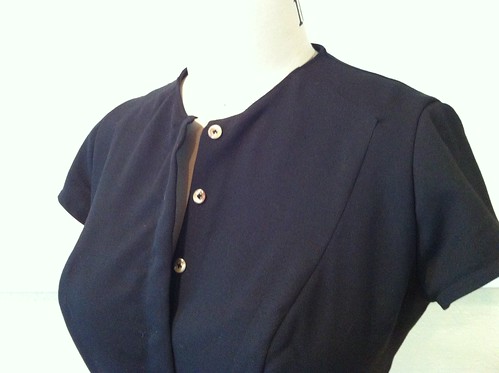
I lightened a couple of photos so you could see how it turned out in real life. Sewing the back was tricky, as you can imagine. Getting all those corners to be sharp and unpuckered was no mean feat, but I thought Burda's directions were actually really good here. Instead of the Big 4 method of reinforcing, clipping and trying to pivot right at the match point, Burda has you sew the seams in 2 passes, meeting at the point. It usually takes me several attempts to get corners right, but I did these in one try. Love that!

In front, you can see the single point and the neckline and button band. The neckline is finished with a bias strip, which is topstitched down. The pattern calls for an additional 2 strips of bias cut self fabric to be inserted into the neckline seam with "irregular tucks and folds". I could see how this would make for an interesting dress, but I wanted this to be a more versatile piece, so I skipped the decorative elements. The button band is interesting as well. Burda has you stitch the buttonholes into the facing only, then fold the facing back and topstitch it down so that the buttonholes are enclosed within the facing. The point here is to allow for another tucked and folded bias strip, which I again omitted, but the method leaves you with a nice clean line in front without visible buttons. It's a bit of a pain to button though.
I really like that the vertical seams provide a sort of princess seamline to allow for fitting. (I used my usual Princess FBA method described here.) I did make a few alterations to the design as well as for fit. The most obvious is the skirt, which is slimmed from an A line to a straight, more pencil style. I also lengthened the skirt 2 inches so that it would fall below the knee. The pattern calls for the lower front edges to be topstitched together, but I left them open, both for the  more traditional shirtwaist look and also because I needed some walking ease, since I took out the width provided by the A line skirt.
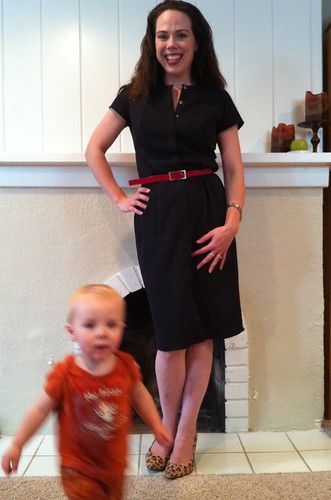
I'll leave you with a little outtake from my photo shoot. I usually take my pictures when the kids are sleeping, but this time I went for it during the day. Duncan was quite the helper. Can you see the purple yoghurt all over his front? Yeah, you turn your back for half a second... Guess I'll go back to the early morning photo shoots from here on out, eh?
Sunday, April 22, 2012

Kids Clothes Week! and some catchup

Tomorrow begins the Kids Clothes Week Challenge over at Elsie Marley. This is the third year she is hosting this challenge. I've wanted to participate before, but was always swamped with other things. This year, I am still swamped, but I decided to go for it anyway. My kids need stuff.
The official challenge is to sew 1 hour per day, 7 days a week. Obviously the plan is to sew kid's clothes during that week, which I really do need to do, particularly for my poor neglected boys. My plan is to make one outfit per child. Both boys will get cargo shorts and short sleeve tees, and Myra will get a dress (that counts as an outfit, right?) I'm not sure I'll crank all of that out in a week, but I know that once I start I will finish, and that's what counts here! I don't generally keep track of my sewing time, but I think it would be fun, in the spirit of the challenge, to be sure I really do log at least an hour a day. I'll report back how it went once the week finishes. What are your bets? Over or under??

Before I start the kids stuff though, I have to finish my LBD! All it needs is a sleeve, side seams, hems and buttons. Hopefully, I can get that knocked out Monday morning and dedicate the rest of the week to the kiddos. LBD sewing time won't count for the challenge, so getting my hour in on Monday might be tricky...

Wednesday, April 18, 2012

McQueen Knockoff skirt

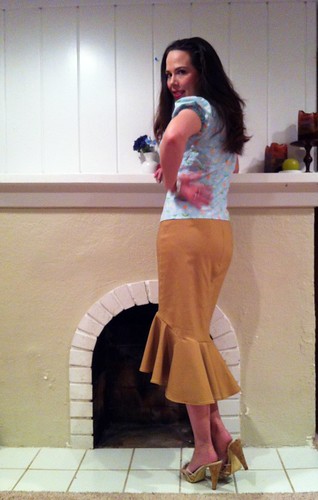
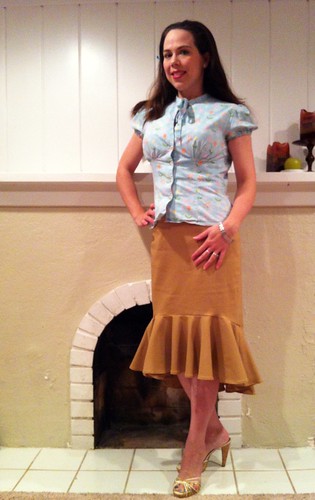
My second to last piece in the Wardrobe Basics SAL is done! I still need to make my LBD, but I think I'm going to come in just under the April 30th goal. Yay!
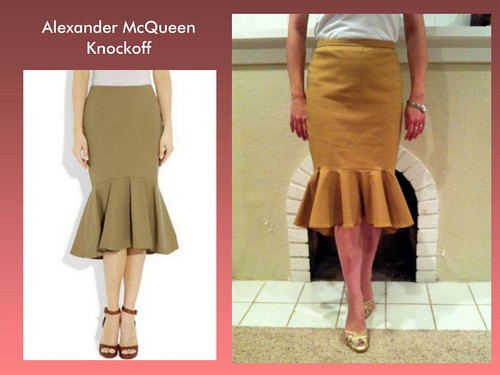
I fell in love with this Alexander McQueen skirt that floated around Pinterest and really wanted my own. I spent a lot of time contemplating this skirt and went back and forth on what pattern to use. Initially, I thought I'd use McCall's 3630, since it is a TNT for me, but it is a pretty straight skirt from the hip down, and the McQueen original is clearly pegged. I wasn't even thinking about it when I went in to Hancock's to pick up a couple of Burda's that had been on my list. When I brought home Burda 7248 I realized it was the perfect base for this knockoff.
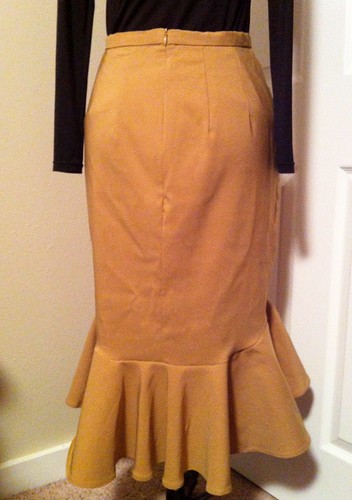
You can see the hi-lo shape of the flounce a little better from the back. Sassy! For the flounce, I used Vogue 1269. Drafting the flounce from scratch would have been pretty easy, but the Vogue was a perfect fit as it was, so I decided to go with it. In retrospect, and in comparing the pictures of the original with mine, I can see that my flounce is a little bit shorter, although since my skirt portion is a bit longer, I end up at the same place.
The original design closes with an invisible zip at center back, which I did. I deviated from the design in that I added a waistband. I prefer a stable waistband to a faced waist in general, but particularly with this fabric, which is a very stretchy bengaline, I didn't want to worry about it stretching out. But, in keeping with the feel of the original design, I installed the zipper to go all the way up to the top of the waistband, eliminating a button or other closure there.
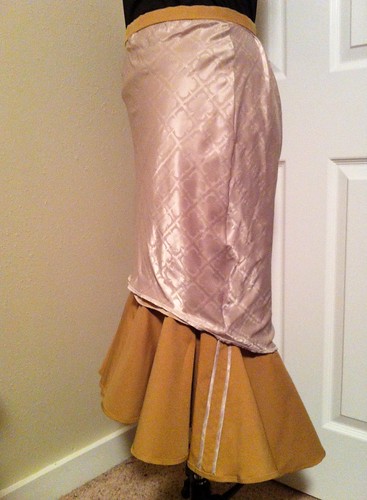
Although it isn't clear from the description if the original was lined or not, I suspect it probably was. I lined the upper portion with an acetate jacquard lining which I cut on the bias, so that it would have some stretch with the bengaline. You can see from the photos on Net-a-porter that the original flounce had Hong Kong finished seams, which I replicated. The original had a faced hem. I really wish I had done that or lined the flounce. I did a narrow machine stitched hem, but it was a serious pain. Since the flounce is circular, the edge  includes quite a few bias sections, all of which stretch in different ways. It was ugly. I think I did more ripping on the hem then I did sewing the entire rest of the skirt. Live and learn.
Overall, I am pleased with the skirt and with the success of the knock off. Not to mention that I actually used something I pinned!! Woo hoo!
Linked up.