Monday, April 16, 2012

Wedding Plans

My adorable Brother-In-Law recently discovered the girl of his dreams and they are tying the knot in August. We couldn't be more thrilled for them both. 
Aren't they cute!?! And I get to make the dress!!!! Yeah, I couldn't be more excited. Breanna wants a 50s style dress with a fitted bodice and a full, just below knee length skirt. Elbow length sleeves and a lace overlay will complete the picture.
We're going to start with New Look 6723, and alter from there. I think we'll need more volume and perhaps a bit more length in the skirt, but otherwise this pattern has really good bones. Y'all know how much I love a princess seamed bodice.

So, we've got the dress all figured out, but Steven and Breanna could still use a little help funding their dream wedding. You can help, too!! Just go over to http://www.tellyourstoryutah.com/ and vote for their video to help them win a $50,000 wedding package. They're couple #13! 

Sunday, April 15, 2012

Princess Seam FBA

I had a couple of questions regarding my princess seam FBA method, so I thought the easiest way to tell you about it was to show you how I go about it. I've spent some time really struggling with FBAs, particularly on garments with a waistline seam. The traditional method of doing an FBA, where you slash and spread, adding a horizontal dart, also adds width to the waist, which I don't need. (Don't be a hater - that's just the way I'm built.) I've dealt with this by deepening or adding a vertical underbust dart, which helps, but I end up with big honking darts that are tricky to sew without dimpled points. So a princess seamed bodice allows me to have a snug fit in the waist, while still allowing plenty of space for the girls, without gigantic darts.
We don't always want to look like this...
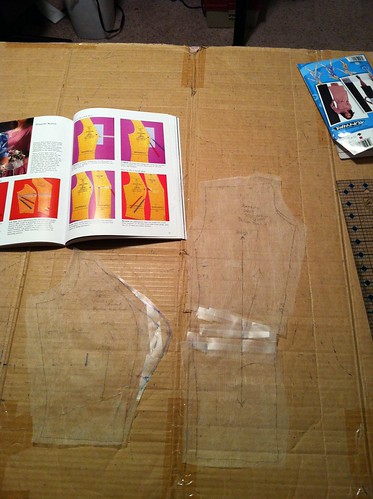
I've tried a lot of methods for doing an FBA on a princess seamed bodice, but many of them still add width in the waist, since they are basically just a slight modification of the traditional method. My favorite method (and the one I used on this dress and this dress) can be found in the book The Perfect Fit.
Basically, you add width to the side princess panel at the bust point (where you are the fullest) and then taper out to nothing at the notches. You do need to make sure to also lengthen the front princess panel, also at the bust point. I always have to shorten the neckline of my tops, so that is why my front princess panel isn't evenly lengthened.

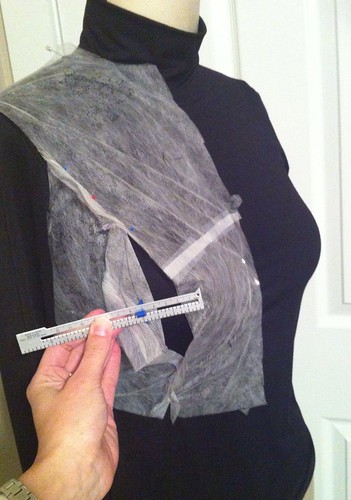
Another option is to muslin your bodice (or tissue fit) and leave the princess seam open between the notches. It will gape open over your bust when you try it on for fit. Measure the widest opening and add half of that measurement to your side princess panel, again lengthening the front princess panel to fit. If you have a lower bust, this is a particularly useful method, as you can easily move the bust point at the same time by adding fullness where you need it, without any regard for where the pattern has it.
My typical method is a combination of these. I make the flat pattern alteration as above, then make my muslin and alter it if I need to using the open seam method. It's taken me a few tweaks to get it just right, but I think it was worth it. Now I have a princess seamed bodice I can count on, and no more Madonna boobs.

Friday, April 13, 2012

New Look 6587 and Gertie's crinoline

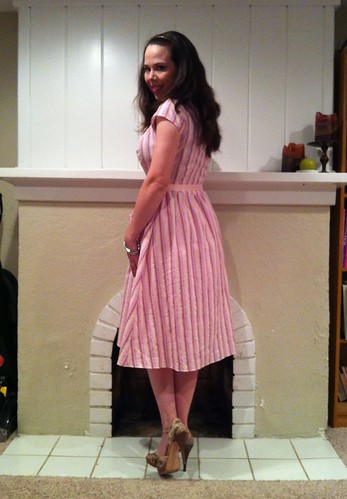
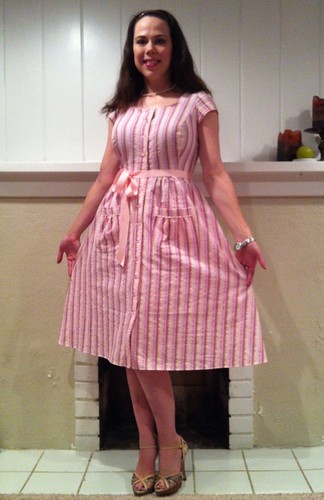
My first sundress of the season is finished!
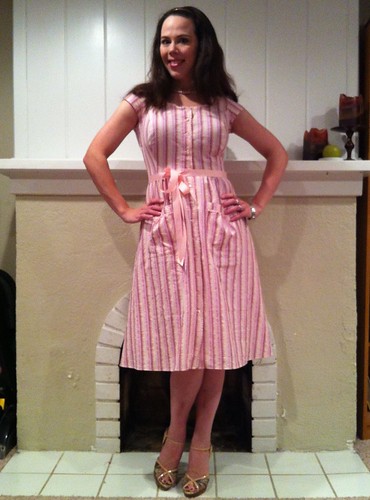
Isn't it fun? I'm really enjoying wearing it. I even got an unsolicitation  from a total stranger while I was out running errands! Yay! The fabric is a fun striped stretch seersucker from Fabric.com. It is very lightweight and comfortable.
The pattern is New Look 6587, and is one of the "New Vintage Looks" line that was recently released. I bought this pattern because it reminded me so much of a favorite dress from High School, although that dress was white.
I liked quite a lot about this pattern. It was a quick sew, since I left it unlined. Princess seams are lovely for shaping and easy to do an FBA on. I actually used the front bodice pieces from Simplicity 2403, since I had already altered them to fit. The major issue I had with it was the back neckline. It gaped horribly! I imagine that this would be less of a problem in the view with the collar, but it looked dreadful on this one. I took two half inch darts in the back neckline, which helped.
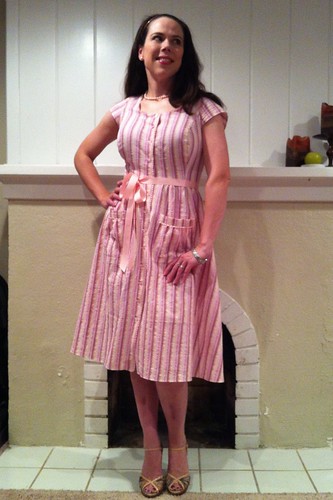
I love the pockets! The body of the pocket is gathered into a trimmed band. The placement markings on the skirt were strange though - too low and too close to the front bands. I was really glad I had waited to put the pockets on until after the dress was constructed. You can also see the trim on the dress in this shot. The entire front neckline and button band are trimmed with a ruffled grosgrain ribbon. I initially thought about piping here, but I'm glad I went with the little ruffle. The effect is sweet.
The skirt also isn't super full. It isn't a straight dirndl skirt, although there is a small amount of gathering at the waist. It is sort of a semicircular gathered skirt. I really like this, since it minimizes the amount of bulk at the waist, but I would have liked more fullness at the hem, which would be easy enough to accomplish by just slashing and spreading the skirt pattern at the hem, but leaving the waist measurement the same.
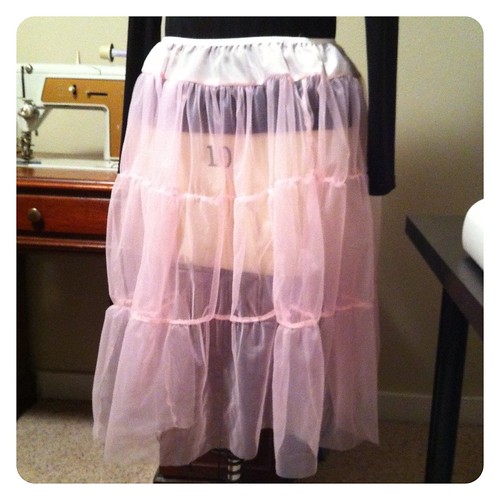
When I first tried the dress on, the skirt was limp and a little sad. This fabric doesn't have a lot of body on it's own. I considered horsehair braid at the hem, but I wanted fullness throughout the skirt without adding weight at the hem, so I decided to make a light crinoline. I didn't want it to be costume-y (the dress is already a little OTT), so I just lightly gathered some nylon organdy into three tiers, much like Gertie's Modern Crinoline. Mine has a much shorter yoke section and an extra tier, but the effect is the same.
For the waistband, I really wanted some picot elastic, but I only had black. I ended up using FOE, and I actually really like it. It isn't as pretty a picot elastic, but it is very flexible and comfortable, while still being sturdy enough to hold my skirt up.
Day to day, I'm usually a jeans and knit top kind of girl, but a few more dresses like this one could convert me. It is comfortable to wear, looks cute and I can even chase the kids in it! The length is good - I don't have to worry about a gust of wind showing off my unmentionables, but the skirt is full enough for movement.

Now that I have satisfied my urge for a random cute dress, I'm back to the Wardrobe Basics SAL. I've muslined my McQueen knockoff skirt and it's awesome, so I'll be sewing that up next, then my LBD. Stay tuned!

Thursday, April 12, 2012

And the winner is...

Thanks so much to everyone who commented on my blouse and who entered the giveaway. After wearing it all day, I find I like it rather more than I thought I would, so everyone wins!

Without further ado, the winner of the pattern (Simplicity 2614) is...
House of Pinheiro!!

And if y'all haven't been by her blog, be sure to click on that link. She does magic with her sewing machine.

She said,
I love a challenge to make a pattern look more exciting. Im in !
I can't wait to see what you do with it! Send me an email with your mailing address at katiedeshazer (at) gmail (dot) com and I'll get the pattern out to you.

Congratulations!

Monday, April 9, 2012

A New Space! (sort of)

After I finished up my sweater on Saturday, I had to pack up my sewing room in preparation for these...
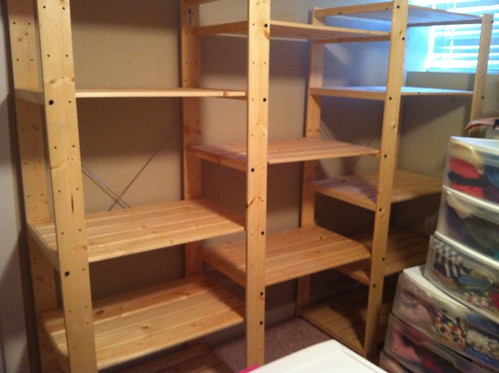
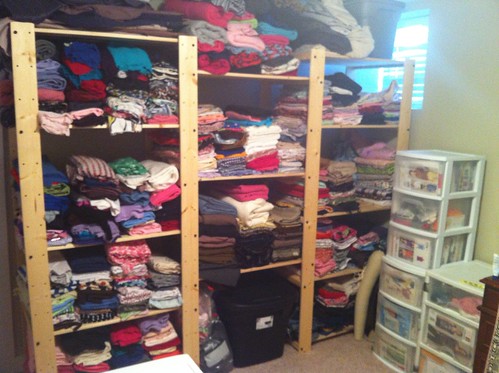
We went to Ikea and got a wall of shelving for my fabric! My sweet honey and the big kids spent all afternoon putting them together. Then I had to do something about this...
Don't judge, mmmkay? I spent most of the rest of the weekend putting everything away and organizing my room. I'm so thrilled with how it all came out, I want to show it to you.
Here is the finished fabric wall. My sewing space isn't that large, but for reference, the shelving is 90 inches wide. The fabric is loosely organized by type, with knits filling the entire left side unit, cotton prints, shirting, woolens and silk/silky fabric in the middle and linen, rayon and bottom weight fabrics on the right. Next to the fabric wall you can see my envelope pattern files. They are organized loosely by type.
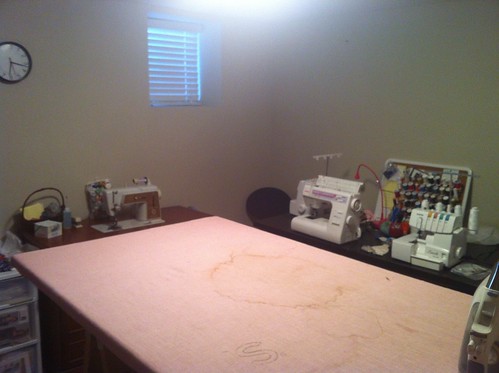
Across from the fabric wall are my machines. The Singer has her own table. I mostly use her for her superlative buttonholes, topstitching jeans and for sewing thicker fabrics that Janome has trouble with. You can see Janome in the middle. The coverstitch machine is behind her, and the serger is to the far right. I love having all my machines out and in a row. My chair is on wheels, so I can just scoot from one machine to the other. Totally awesome.
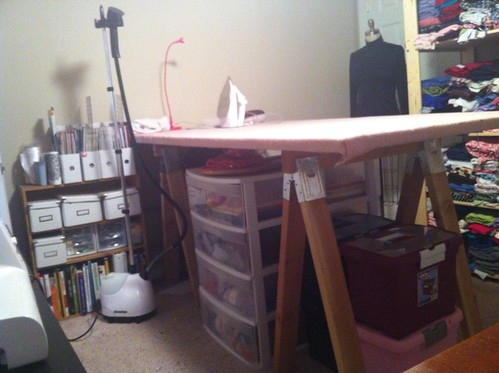
In the middle of the room is my ginormous cutting/pressing table. I love this thing so much. It is a 36 inch wide hollow core door that I padded with wool army blankets and covered with linen. My sweet honey made me two sawhorses that are the perfect height for me to stand comfortably and cut, trace and press at the table. Under the table, the are two sets of drawers that hold my yarn stash, some interfacing and larger tools and notions as well as cone thread. The file boxes in front are my Burda and Ottobre magazines. Sandra Dee is watching over all from the corner.

I'm so excited to sew in my "new" space! And I found some fabric I had forgotten I had! I love that I can see it all now. What to sew next?