Thursday, June 6, 2019

Angela Wolf Ruched Tee

Lately, I've been having a hard time feeling inspired. We're busy, and with summer vacation here, my sewing time is extremely limited, but I ran across some YouTube videos recently by Angela Wolf, which led me to her Facebook group, which resulted in this top. Sometimes inspiration takes roundabout paths, and you just have to go along for the ride.
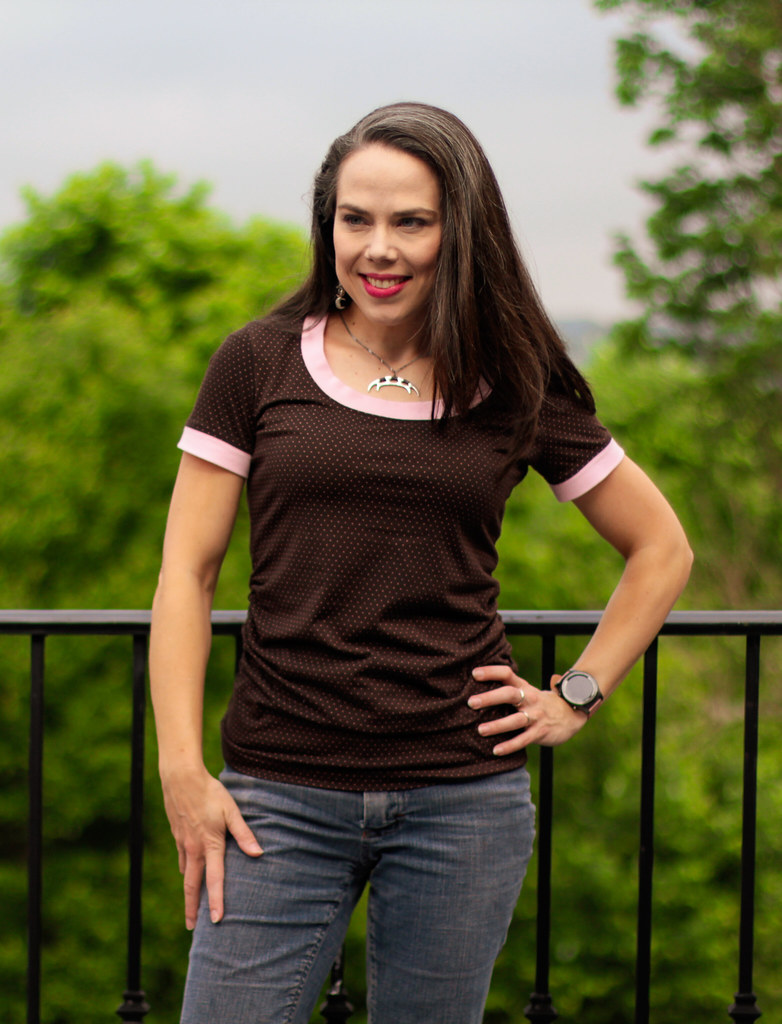
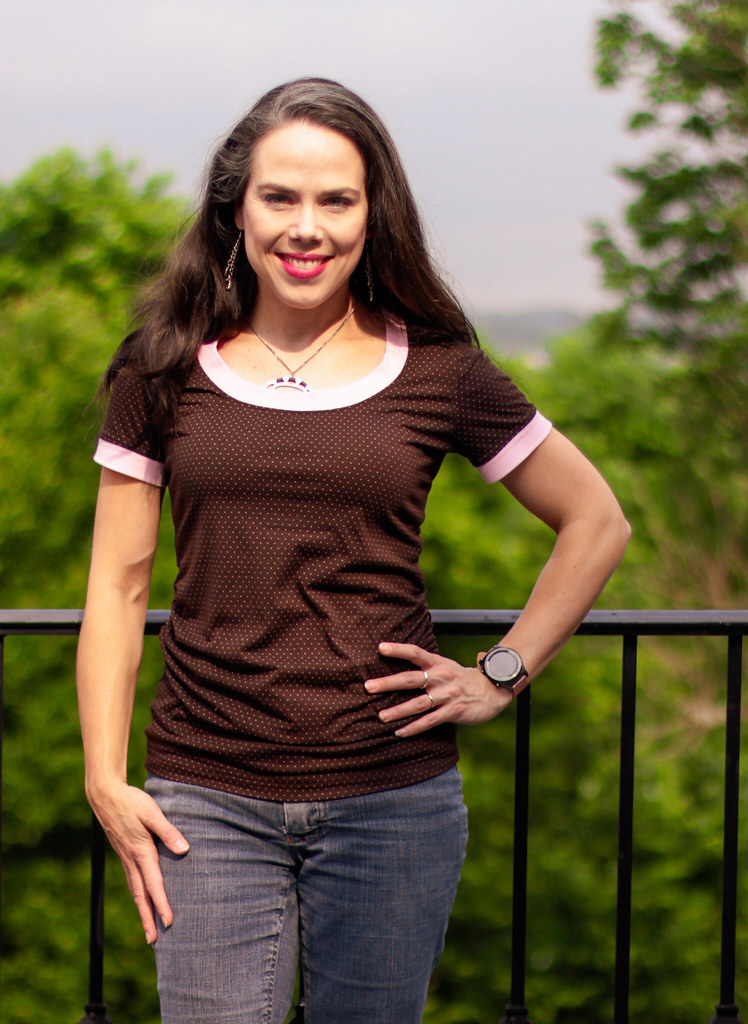
This is the Ruched Tee by Angela Wolf Patterns. I know, I have a zillion basic tee patterns, but every time I pulled one out, I just didn't want to sew it. And I really DID want to sew this one! I have no regrets.
The skinny on this pattern - it's a fitted scoop neck tee with sleeve and collar options. Since this was my first time sewing it, I went with the simplest options, which were a short sleeve and a narrow banded neckline.
Isn't that a lovely neckline? Wider bands can be troublesome sometimes, but this one lays nice and flat. Of course, I couldn't leave well enough alone, so I added a band to the sleeve hem as well, for a ringer tee look. Me likey.
The shaping is nice through the back, and the neckline hugs the back neck perfectly. I really like the finished length as well. I find it very flattering, but also allows easy back pocket access. Essential for me, as that's where I generally stick my phone.
Of course, it wouldn't be called a ruched tee if there wasn't ruching! The pattern includes options for ruching either or both side seams, as well as the longer sleeve lengths. The instructions were really fantastic. This is my first Angela Wolf pattern, but I was so impressed by the pattern quality that I've already ordered her jeans pattern as well. The instructions are in a lovely spiral bound notebook, and the pattern is printed on really nice quality paper. It was a pleasure to use!
This fabric has been in the stash so long I can't recall when I bought it, but it had a fabricmart sticker on it. It's a lightweight rayon lycra with a perfect drape for this top. The bands are a pink rib knit that perfectly match the teeny pink polka dots. I'm pretty sure it's from Chez Ami. I miss their fabric!
So, the verdict? This pattern is a huge win! I will definitely be making it again. There is a cowl neck option! Y'all, I love a cowl neck! And I can't wait to get my jeans pattern. I do love making jeans. You know, sometimes sewing inspiration can be tough to find. I'm glad my random path led me here. Back to the sewing machines!

Tuesday, April 16, 2019

McCalls 6122

Y'all, it's been so long since I sewed a Big 4 pattern, I wasn't sure I remembered what to do! But I'm struggling mightily with lack of time and lack of mojo, so when inspiration struck, I knew I needed to run with it.
And despite wrangling my usual alterations, and remembering how to sew a woven, I'm glad I did. It felt good to tackle something a little more challenging than leggings or a tee shirt.
So, this pattern is McCalls 6122, which is of course, long out of print. It's a Palmer/Pletsch  pattern, so I feel like the instructions were a little better than the run of the mill Big 4 which was nice, since the collar construction was a little unusual, and I didn't make it easy on myself by adding embroidery.
It's a pretty straightforward sew though, for the most part. The front bodice is cut on the bias, which looks pretty cool in my slubby chambray. The peplum has a narrow, curved hem, and the bodice shaping comes from vertical waist darts.
The button placket is interesting though. I've sewn concealed plackets, but generally I've seen them done as foldover plackets. Since the collar points are continuous with the facing and blouse front, that doesn't work here, so instead, the placket is pieced onto the blouse front and the facing, then tucked in like a long, narrow in seam pocket. That works out well both to keep the placket from interfering with the collar, and also to eliminate any issues that might arise from the bodice front being on the bias, since the placket piece is cut on grain.
In back, you can see the wrinkles from this morning's car ride with my kids, as well as the nice shape back here. There are vertical darts for shaping, as well as the waist seam. You can also sort of see the collar. There is an undercollar there, but the upper part is continuous with the front facing, much like constructing a shawl collar.
One of the reasons I selected this pattern was that I wanted to embroider! And those collar points were just begging for some subtle motifs. The design is from Urban Threads, and is intended to look like jewelry, but I went for shades of blue for a tonal look. I did stitch the "gem" in the center in pink, with an overlay of pink metallic. It's subtle, but pretty.
But what of the fit? Well, I'm not overjoyed, but I'm not entirely unhappy either. I did my usual Big 4 alteration - shortening above the bust and slimming down the sleeve cap. That part isn't bad, but the collar buckles somewhat, which tells me I should have shortened it a little bit more, or taken a wedge out of the neckline. I also think that armhole gaping is telling me an FBA was in order. Dang it. I should have gone with my gut and done one, but it fit so well in the tissue! I wonder how many more times I'm going to have to learn that lesson...
So, it's not perfect, but it is comfortable and cool, and I'm feeling pretty good about tackling something not so easy. Now if only my kids would stop asking for leggings and tee shirts....

Tuesday, February 26, 2019

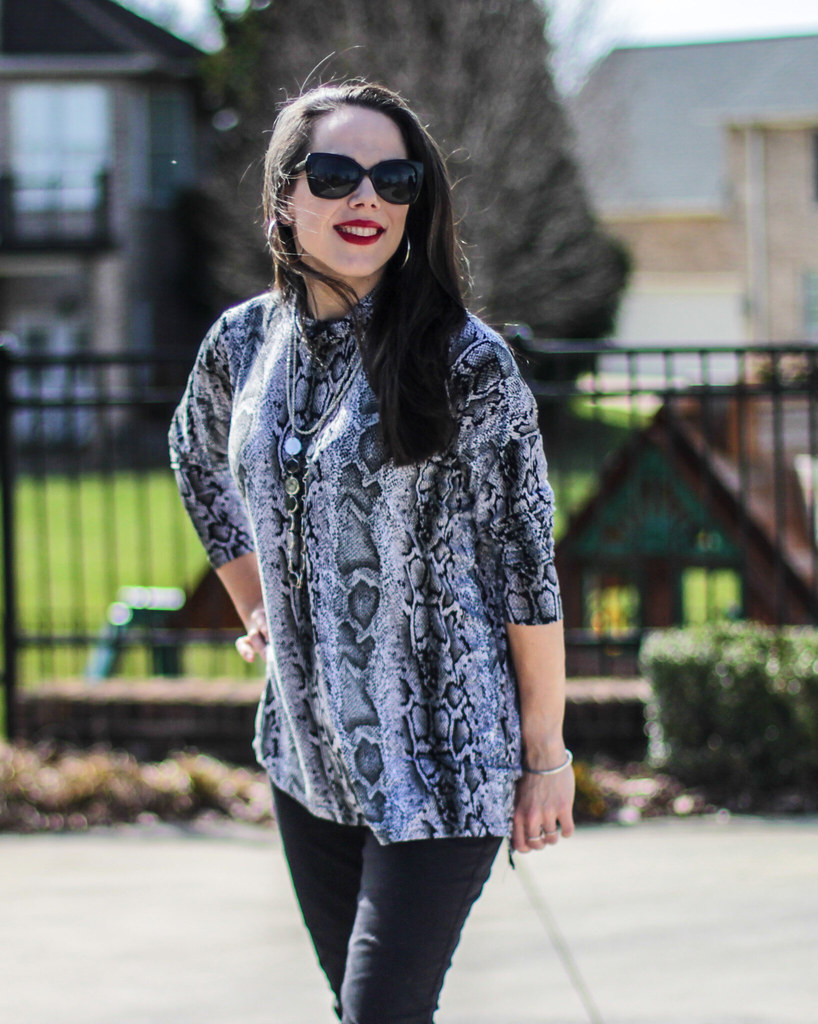
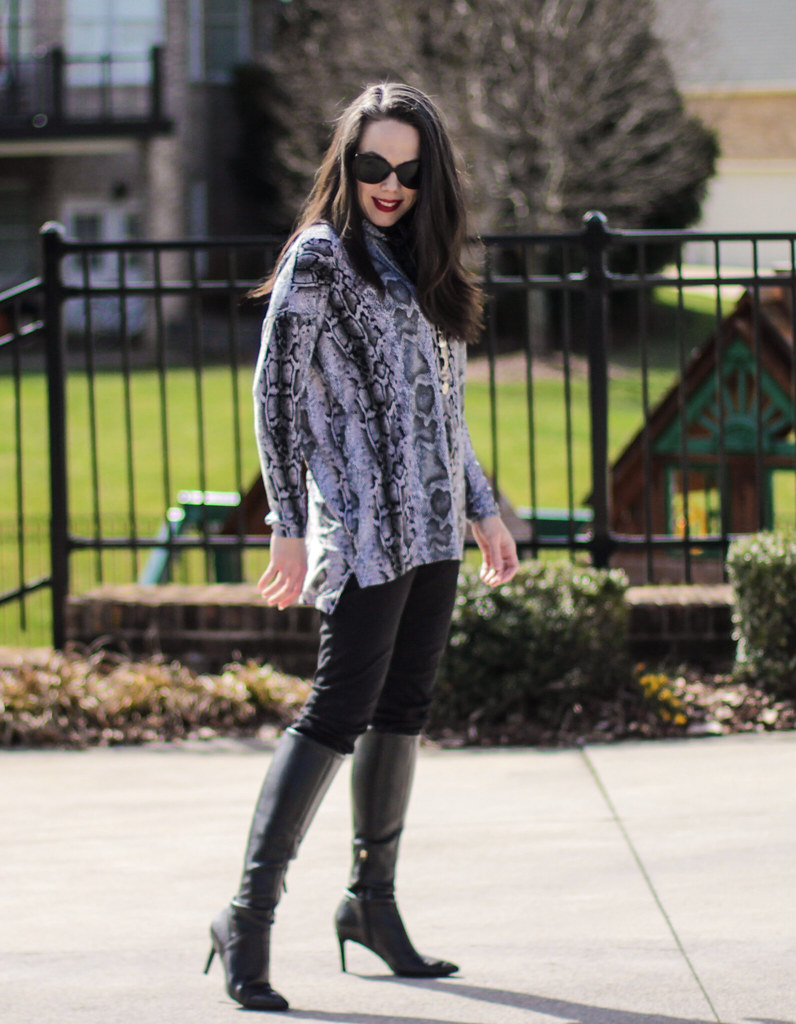
Jalie Eleonore and Yoko, a match made in heaven!

So, y'all probably have noticed by now that I'm a bit of a Jalie fangirl. I sew their patterns a lot for everyone in my family, and I have always been happy with my results.
So, when Jalie released the Yoko top for FREE, naturally I was quick to download it!! And then I sat on it, because I just haven't had the time to sew that I wish I had.
But then I made a pair of Eleonores in basic black, because everyone needs black pants, right? I've made quite a few pairs of these (see here), so I won't go into great detail about them, but I did do a few fun things...
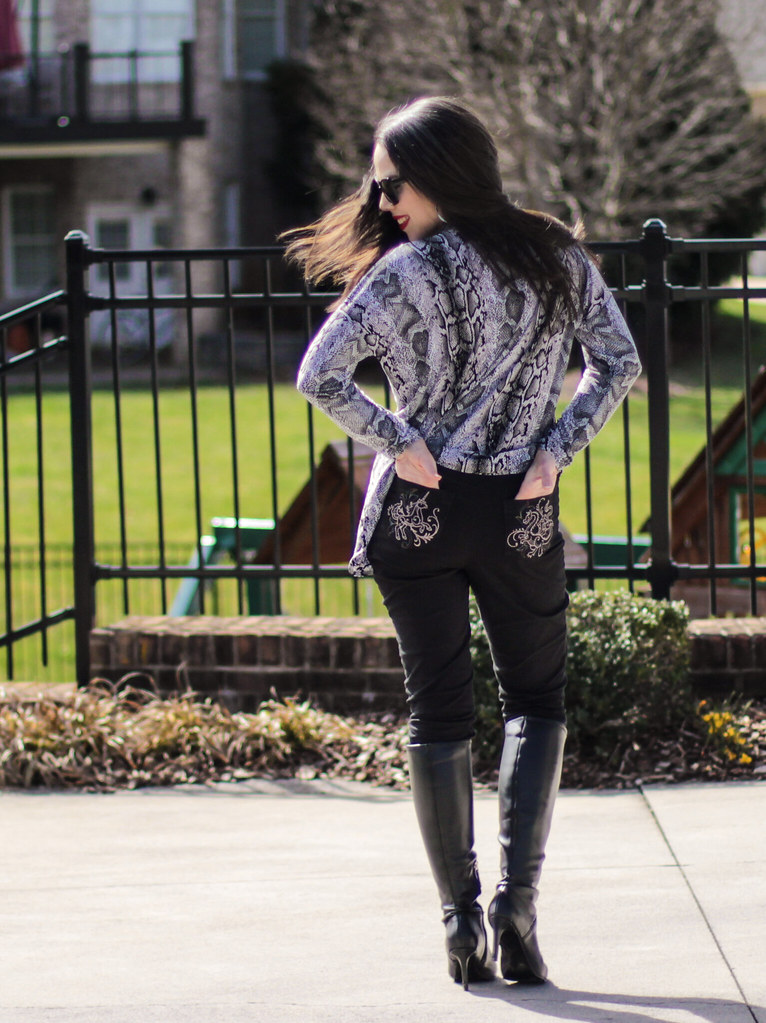
Rainbow metallic unicorn and dragon pockets were a must! I love fun back pockets, even on "basic" black pants.
I also added real pockets to the front. The pattern is drafted with a faux pocket, which is kind of a pain to sew, and also irritates me every time I try to put my hand in it. Now they are real pockets! Jalie offers an add-on to the pattern, if you want your own front pockets. I drafted them myself though.
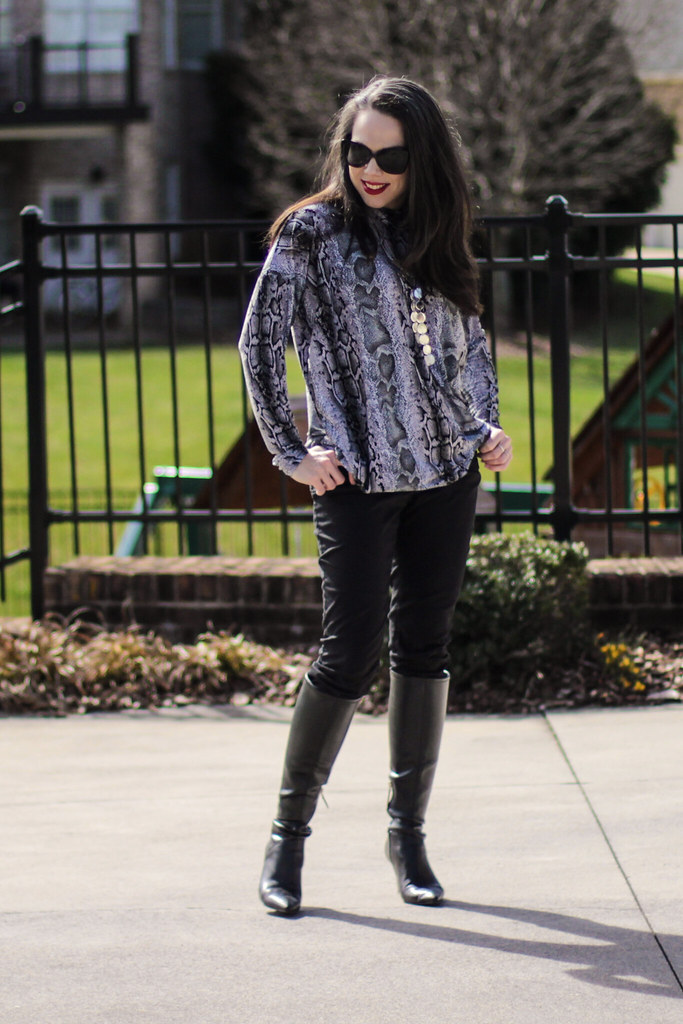
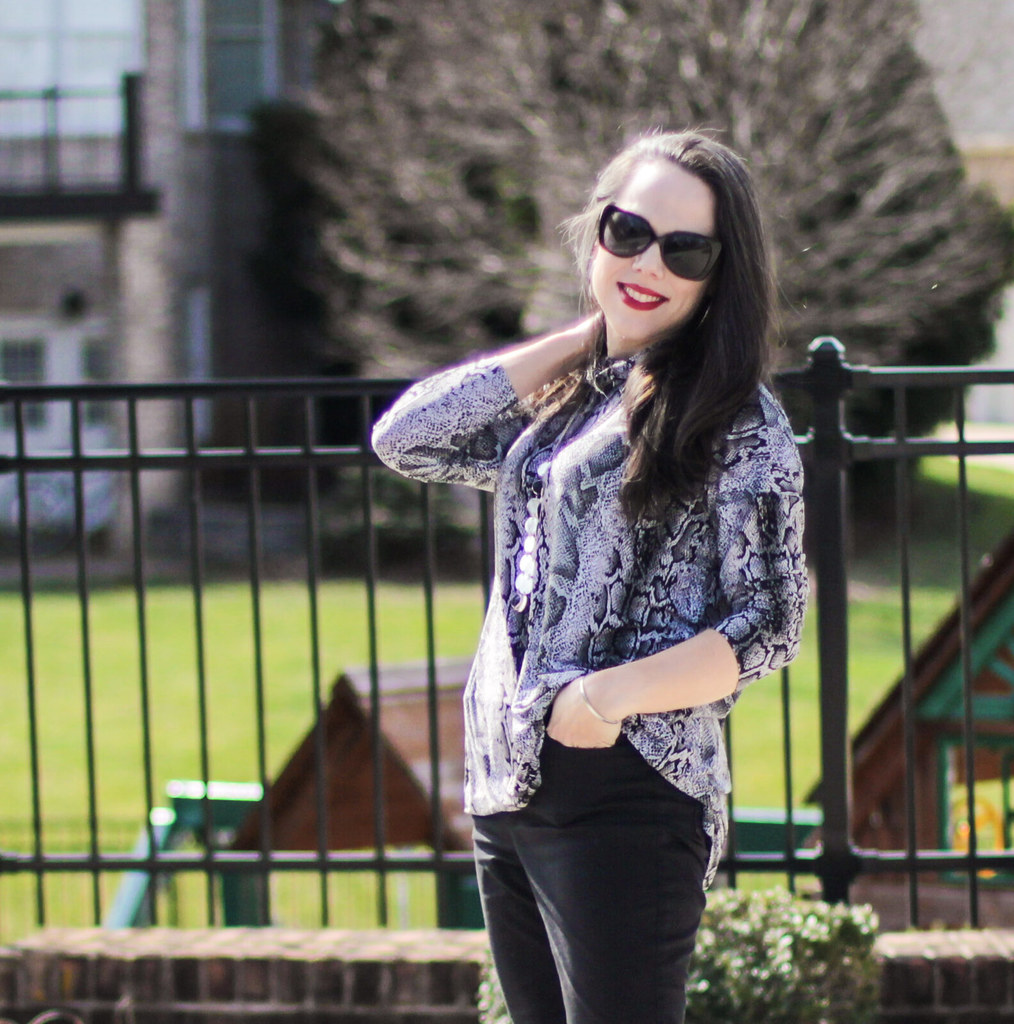
But this blog post is about the Yoko! Did I mention it's a free pattern?! Go download it! It's a basic loose fitting tee with a dropped shoulder, long sleeves and a turtleneck. It's a super quick sew!
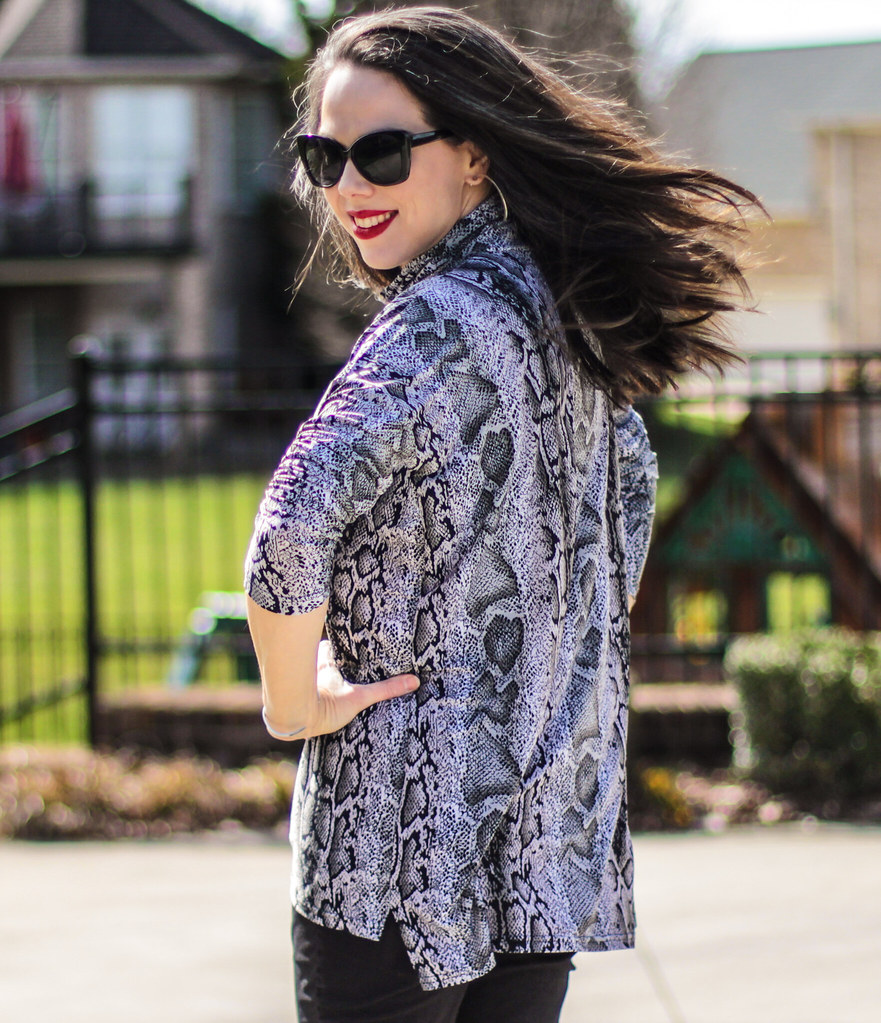
I made mine out a a nice, slinky ITY jersey. I love how it flows when I wear it! I've seen it made out of pretty much every knit imaginable, and it always looks awesome.
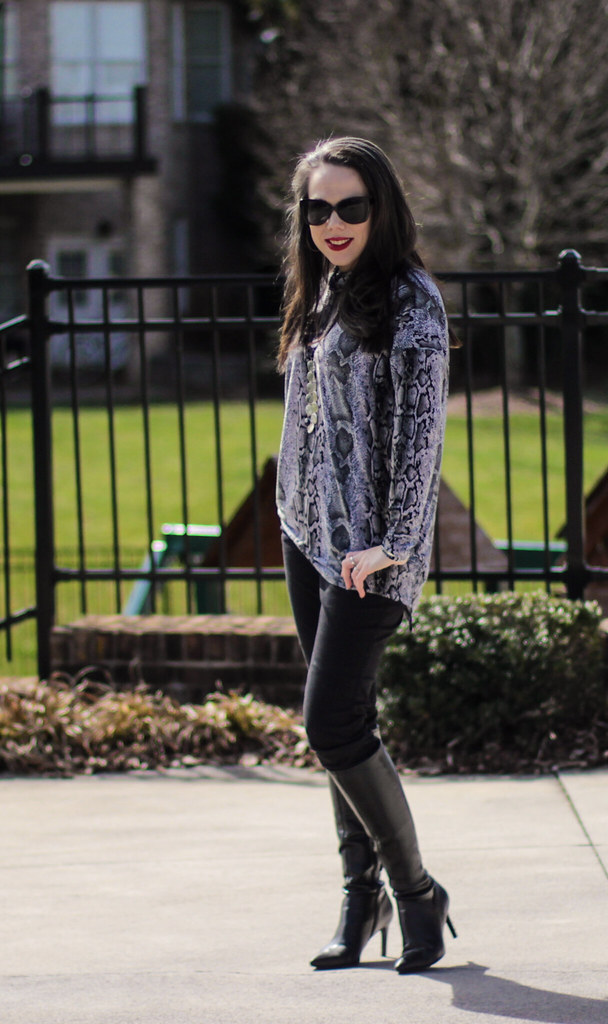
I did make on wee alteration to mine - I just can't leave well enough alone. Since I was planning to wear it with skinny jeans, I wanted more of a tunic look, so I added 2 inches to the length in front and 4 inches in back. When I sewed the side seams, I left the last couple of inches open as a vent. The top is loose enough that I don't need it for ease, but I like the look.
You can see it here as well. Another feature I love about this top is the sleeve. It's nice and long, but snug enough that I can push it up to get a 3/4 sleeve look as well.
I may have started out to sew basic pants, but I don't think I ended up with anything basic at all! I love this outfit, and feel like a total rock star in it!

Tuesday, October 23, 2018

Disco Fever!

As you may have noticed, blogging hasn't been a big priority lately. But I had such fun sewing this, I wanted to write about it. Let's see if I remember how to do this...
It all started with the jeans. I really needed jeans. I love my Jalie jeans, but you know, sometimes a girl needs something new and fun. So, this is Simplicity 7146, published in 1974. I seriously love all the fun details in this pattern. And that super high waistline! So me.
The back yoke is SO COOL! It curves down to the side seams in such a flattering way. It was not the funnest to sew... But worth it!! I did add the back pockets. They may not have needed a place for their phones back in '74, but I do! I echoed the yoke stitching in my pocket design. I didn't want to lose that nice curve. I also added star shaped rivets. Because fun.
Those wide legs!! I love them!!! Alexa has played so much disco lately, both as I sewed and then again for pictures. Gotta get into the groove, baby!
For fit, I compared the pattern to my trusty Jalie, and it was an exact match. Like, seriously, I'm tempted to go find every pants pattern Simplicity published in 1974. How often do pants fit right out of the envelope?? I have lost a few pounds since the last pair of Jalies I made, so I took out 5/8 inch from the side seams before I added the waistband, but no other changes were needed. *Cue chorus of angels*
I'm seriously loving the high waisted rear view. I think the higher pockets and stitching are really flattering. This 40 year old butt will take all the visual lift it can get!
Sadly, my wardrobe is deficient in appropriately retro tops!! Burda magazine to the rescue. A peasant top has such an awesome 70's vibe, I flipped through at least a decade of burda back issues before I found the perfect one in 02/2010.
I think the cropped, blousy top is a nice complement to the wide leg jeans. I love the waistband, which reduces the likelihood of wardrobe malfunctions that might arise in a cropped top, and does a nice job visually cinching the waist.
The fabric is a mystery synthetic given to me years ago. It's stretchy and reasonably drapey, so there's gotta be some lycra in there somewhere. The print is a paisley in muted pinks and burgundy, with pops of bright apple green. You can see here that the top is quite voluminous. I don't think it would be very flattering in a crisper fabric, but it works in this.
Since the style is pretty unfitted, I didn't bother with an FBA, but I did shorten the neckband by about 2 inches and gathered it in tighter so that the neckline wouldn't drape off the shoulder as the pattern intended. Worked a treat! The neckline shape is very nice and hugs the body well.
You can see the pattern details a bit better in back. The neckband and waistband are shirred with elastic to give the pattern shape. I used my Singer 127 treadle to do the shirring. It was quite a workout, but really fun. The sleeves are gathered into bands which gives them nice puffiness without too much volume.
I've already worn these jeans a ton, so I know they're going to be a wardrobe workhorse. I love it when truly retro/vintage items work so well in a modern wardrobe.

Tuesday, May 22, 2018

Jalie mashup swim tank

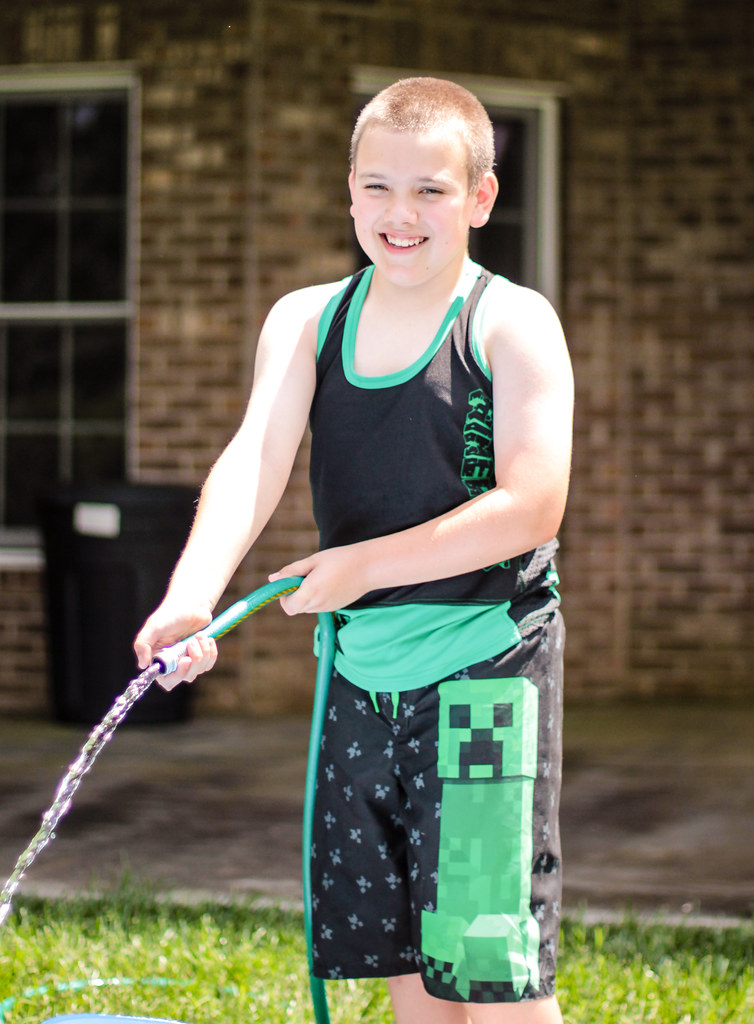
It's that time of year again! School is out in a few days and my kids are looking forward to lots of swim, sun and playing outside. Logan needed new swim togs this year, and while he found some cool Minecraft trunks he liked, we came up empty for a top.
Mom to the rescue. Logan specifically wanted a tank top, not a sleeveless shirt. And I wanted it to be wicking polyester so it would dry quickly and be comfortable in the heat. Neither requirement was an easy one...
The fabric turned out to be the least challenging. After searching at my usual favorite spots and coming up empty, I just did a Google search and found an impressive line of wicking jersey at Wazoodle. They had a range of colors and weights to pick and choose from. I went with the classic Minecraft color scheme of black and green. Shipping was fast and the quality is excellent, so I'll be shopping there again.
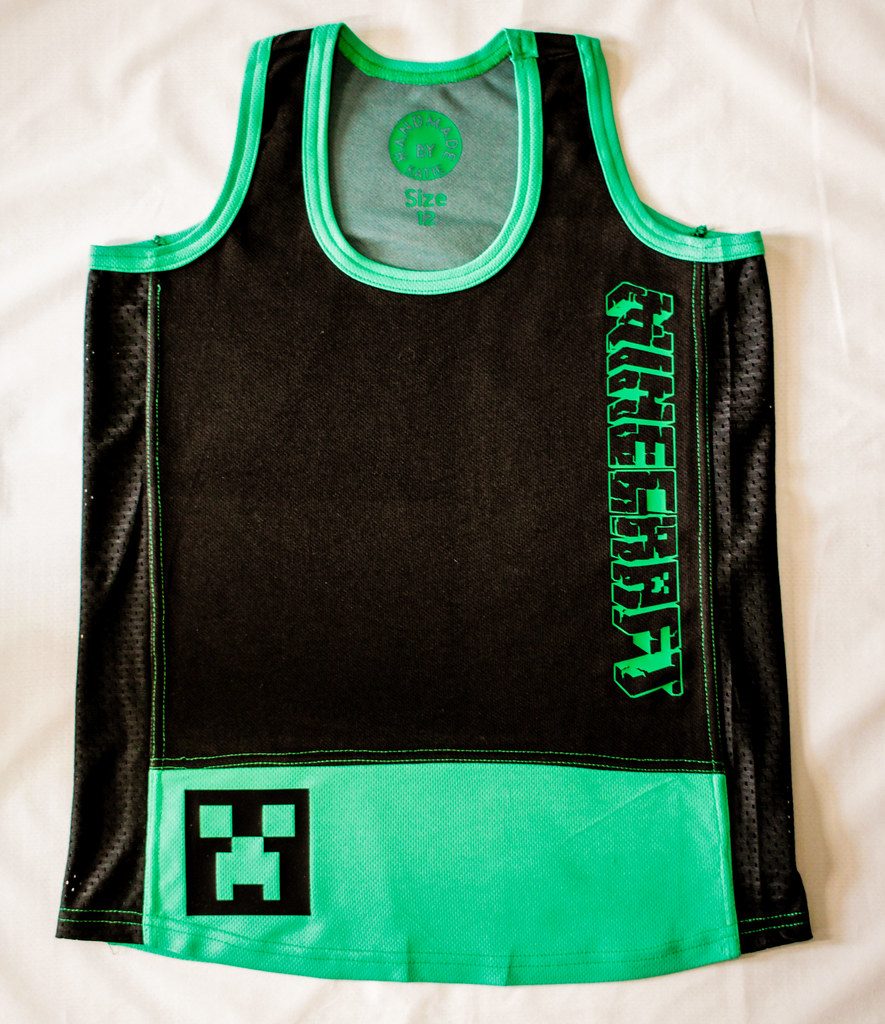
The larger challenge was the pattern. Boys tank top patterns fizzle out after the toddler sizes and Logan isn't quite big enough for mens sizing yet. Even Ottobre failed me! Logan was very specific about wanting a tank top and not just a sleeveless shirt. So, I had to get a little creative. I decided to start with the ladies racer back tank by Jalie (3245). But since it has decidedly feminine lines, I used the Jalie Nico raglan tee to get a more masculine shape, blending the two patterns together at the underarm. And since I was hacking up a couple of patterns anyway, I decided to do some color blocking and add mesh side panels for comfort. All in a day's work.
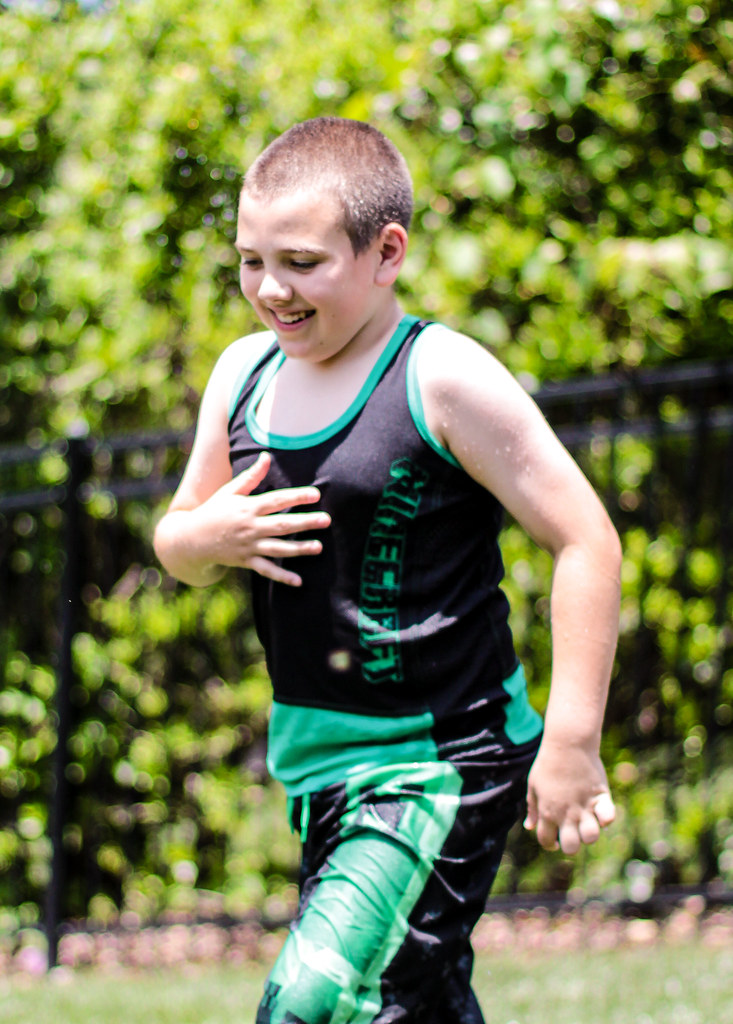
Logan is very happy with it. He loves the way it looks and fits and says it is very comfortable. I even got a hug from my not physically demonstrative boy. I think as I look at him that the armhole could be slightly lower, but really, it's a pretty good fit.
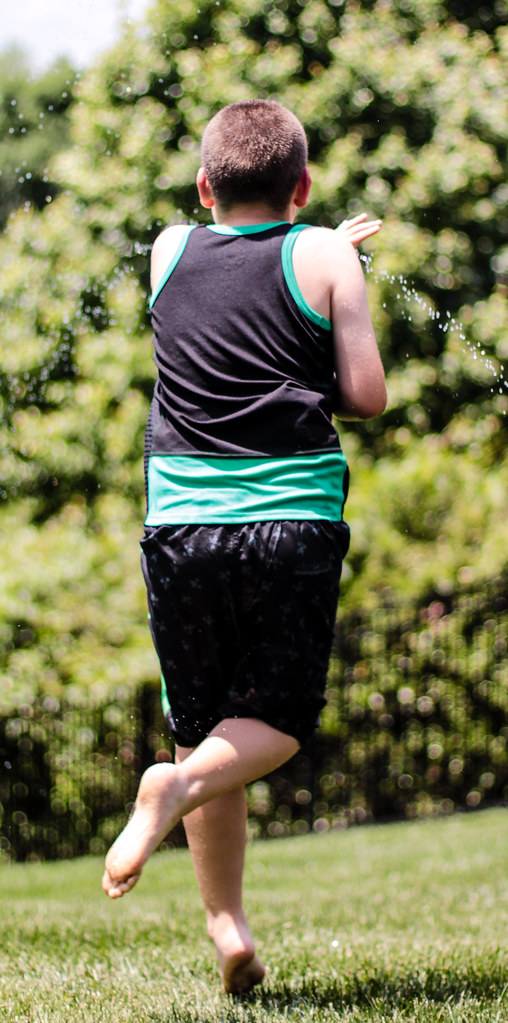
The fit through the back is pretty good though, and it looks well proportioned overall.
On the side, I added 4 inch wide panels of athletic mesh - the sort with large holes that jerseys are made of. It gives the tank some more breathability as well as a cool sporty look. I also color blocked the front and back with green on the lower 6 inches of the tank, and used the same green jersey for the neck and armhole bindings.
I got my Cricut in on the party for some finishing touches with a creeper face and Minecraft logo. I used a silicone HTV that has a slick feel. It's a cool texture that goes with water play well. I also coverstitched all the seams, both for a touch of contrast stitching, and to be sure the insides were nice and soft. No itchy seams!
It was a little more patternwork than I have been doing lately, and it was nice to use that part of my brain. Logan loves his tank, so that's the most important thing. I had fun making it, too.