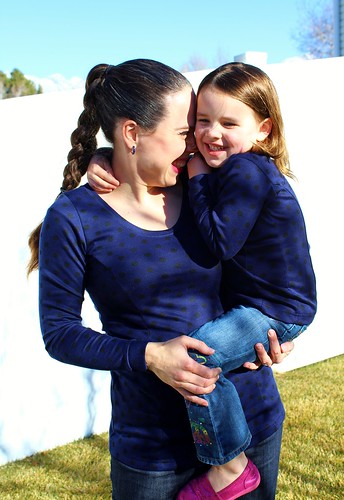
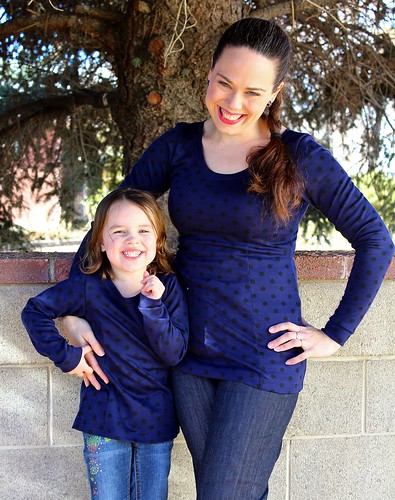
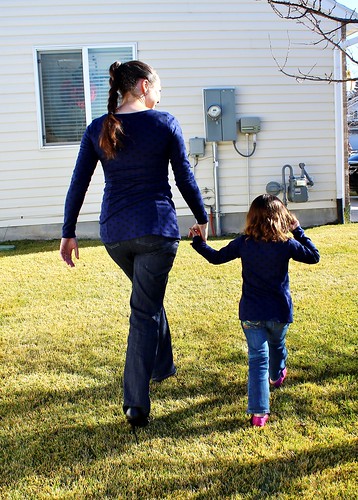
Of course, the Penny Pinafore had to have a pint sized equvalent. Introducing the Mini Penny Pinafore!
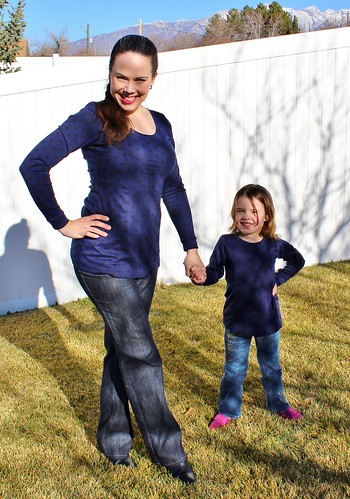
Here they are in tunic length and with long sleeves. The pattern includes options for three lengths in the adult sizes and two in the girls' range, as well as three sleeve lengths. Myra is wearing a size 5Y and I am wearing a size 3. This was my first version for myself, so I've made a few minor fit tweaks for later versions, but I'm really pleased with how well it fits me here without alteration.
The pattern is based on the Skater dress/Lady Skater block, so you'll find the fit is about the same, and any alterations you needed on the Skater are easily transferred to the Penny Pinafore, but with the added fit options provided by the panel seams.
I made our tunics from a mid-weight Ponte knit from fabric.com. It has maybe 10-15% stretch, so you can definitely get away with using those heavier knits for this design. Stay tuned though for a look at how it works in a thinner jersey and in some other lengths.
Myra and I are both very happy with our tunics. They are comfortable, cute and super fun to sew! In fact, one of these whips up in about an hour, whatever length you make!
Come on, Myra. Let's go make a couple more Penny Pinafores. What are you waiting for? Go get your pattern! Here is the Penny Pinafore and the Mini Penny Pinafore. Download your PDF and get sewing!
Tuesday, December 17, 2013
Monday, December 16, 2013
Kitschy Coo Penny Pinafore
Are you ready for the most amazing pattern ever??
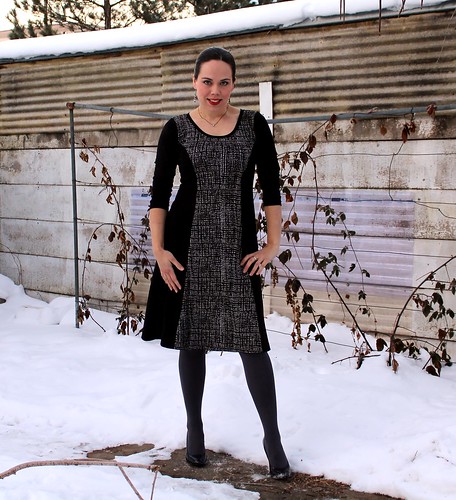
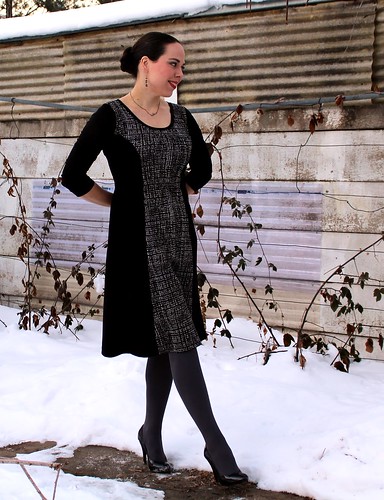
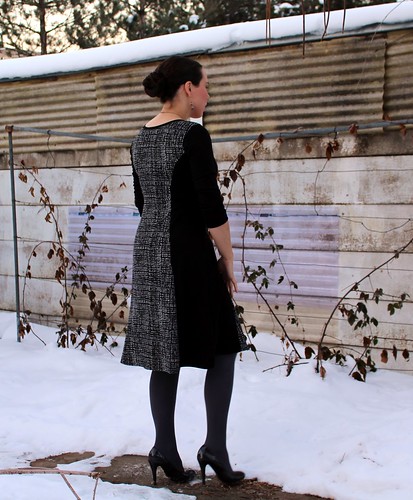
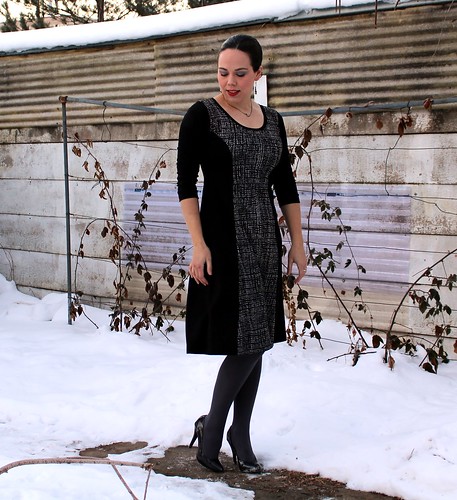
Introducing the newest pattern from Kitschy Coo - the Penny Pinafore!! This is a beautifully designed dress (also available in tunic and mindress lengths) with shapely princess seaming, perfect for color and print blocking.
My fabric for this dress is a combination of two double knits. The solid black is Sophia double knit from Vogue Fabrics. This stuff is the cadillac of double knits - soft and drapey but sturdy and with great recovery. The print I used for the center panels is a Maggy London double knit from FabricMart. It's just as nice as the Sophia, although it doesn't have quite as much stretch. The print is super cool though. It reminds me of the Matrix.
The skirt in the dress length is nice and swirly. Amanda has designed this pattern brilliantly, with separate cutting lines at the hip for the tunic and dress lengths, which gives you a sleek, fitted look for your tunic and a nice A-line skirt for your dress and minidress.
I cannot get over how beautifully this pattern glides over my curves in back. Mitch spent all morning telling me how much he loves the way this dress fits. Win!
I've already made a few *ahem* so you'll be seeing more before the week is out. What are you waiting for! Go get yours! It's available here as an easy to download and assemble PDF!
Introducing the newest pattern from Kitschy Coo - the Penny Pinafore!! This is a beautifully designed dress (also available in tunic and mindress lengths) with shapely princess seaming, perfect for color and print blocking.
My fabric for this dress is a combination of two double knits. The solid black is Sophia double knit from Vogue Fabrics. This stuff is the cadillac of double knits - soft and drapey but sturdy and with great recovery. The print I used for the center panels is a Maggy London double knit from FabricMart. It's just as nice as the Sophia, although it doesn't have quite as much stretch. The print is super cool though. It reminds me of the Matrix.
The skirt in the dress length is nice and swirly. Amanda has designed this pattern brilliantly, with separate cutting lines at the hip for the tunic and dress lengths, which gives you a sleek, fitted look for your tunic and a nice A-line skirt for your dress and minidress.
I cannot get over how beautifully this pattern glides over my curves in back. Mitch spent all morning telling me how much he loves the way this dress fits. Win!
Thursday, December 12, 2013
PJ-Palooza, Phase 1: Boys
Logan always seems to need pajamas in multiples. He outgrows them all at once, so I make them all at once, thus perpetuating my problem...
But I can't refuse that sweet face.
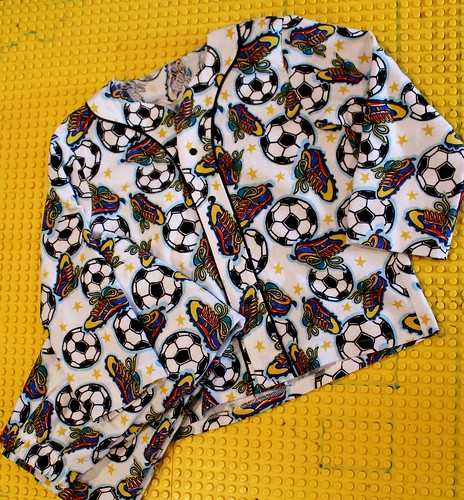
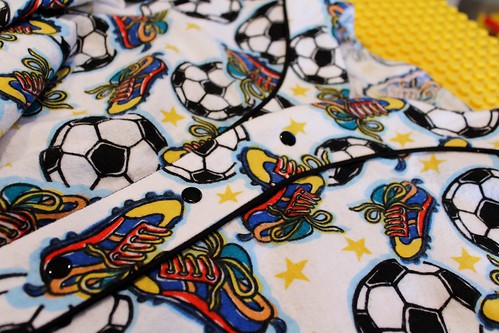
I pulled some stash flannel that I think was given to me several years ago. There wasn't any identifying mark on the selvage, so I don't know where it came from , but both pieces were very soft and thick. Perfect for PJs.
I used the Goodnight Sweetheart PJ pattern from Sewing for Boys. Logan and I have been really happy with it. It looks great and the external facings are perfect for my sensitive guy. I used prong style snaps for the closure.
I made the pants a little long, so hopefully he'll be able to wear them a while.
They're great for jumping!
Today's Tip
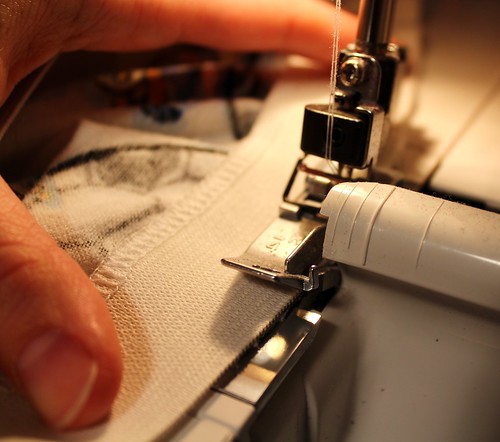
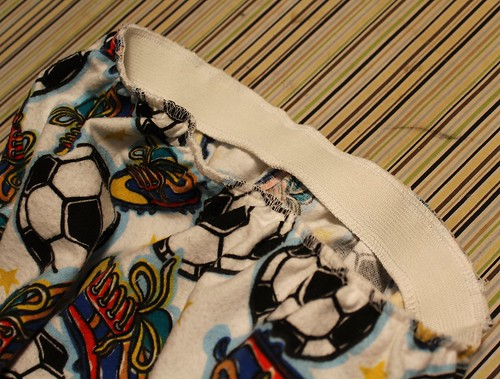
The PJ pant has an elastic waist, and the pattern calls for a casing, but I prefer to attach the elastic in the round and fold it over for a more RTW finish that doesn't shift, bunch, twist or curl. I've had trouble doing this with my serger, but I found a method that works for me and I wanted to share it.
For my serger, it seems like it is critical for the blade to be disengaged and the elastic to be on top for a clean serge. Before I begin, I drop the upper blade. This is a quick operation on my serger, but check your manual for how to do it to your machine. Since the blade can't trim, you have to make sure your fabric and elastic are aligned well with nothing hanging off the edge. Then stretch the elastic to fit the waistline and serge it on!
The serger does a nice job cleanly finishing the edge for you.
Once it's folded over and stitched down, it looks totally pro.
But I can't refuse that sweet face.
I pulled some stash flannel that I think was given to me several years ago. There wasn't any identifying mark on the selvage, so I don't know where it came from , but both pieces were very soft and thick. Perfect for PJs.
I used the Goodnight Sweetheart PJ pattern from Sewing for Boys. Logan and I have been really happy with it. It looks great and the external facings are perfect for my sensitive guy. I used prong style snaps for the closure.
I made the pants a little long, so hopefully he'll be able to wear them a while.
They're great for jumping!
Today's Tip
The PJ pant has an elastic waist, and the pattern calls for a casing, but I prefer to attach the elastic in the round and fold it over for a more RTW finish that doesn't shift, bunch, twist or curl. I've had trouble doing this with my serger, but I found a method that works for me and I wanted to share it.
For my serger, it seems like it is critical for the blade to be disengaged and the elastic to be on top for a clean serge. Before I begin, I drop the upper blade. This is a quick operation on my serger, but check your manual for how to do it to your machine. Since the blade can't trim, you have to make sure your fabric and elastic are aligned well with nothing hanging off the edge. Then stretch the elastic to fit the waistline and serge it on!
The serger does a nice job cleanly finishing the edge for you.
Once it's folded over and stitched down, it looks totally pro.
Labels:
boys,
PJs,
Sewing for Boys
Tuesday, December 10, 2013
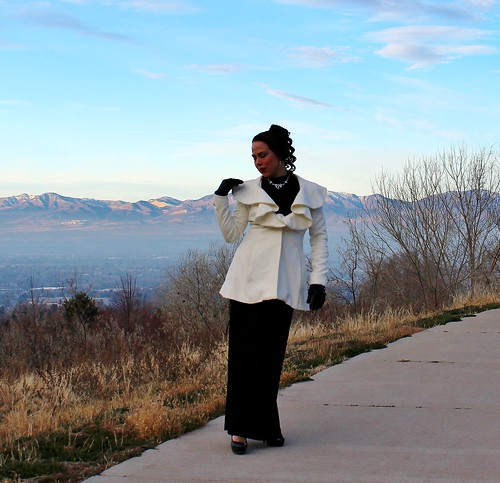
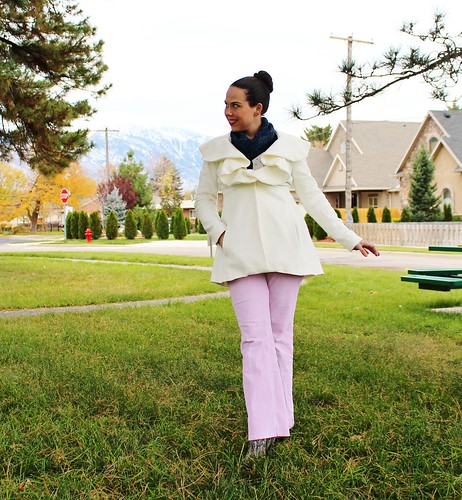
Lolita Spearmint Coat
I have had the hardest time keep this pattern under wraps
until it was released, and I’m sure you can see why.
THIS COAT!! Seriously, y’all. I’m so in love with this
design.
From the dramatic, ruffled collar, down to the flared,
twirly hem, I love everything about it.
Enough teasing, may I present, the latest pattern in the
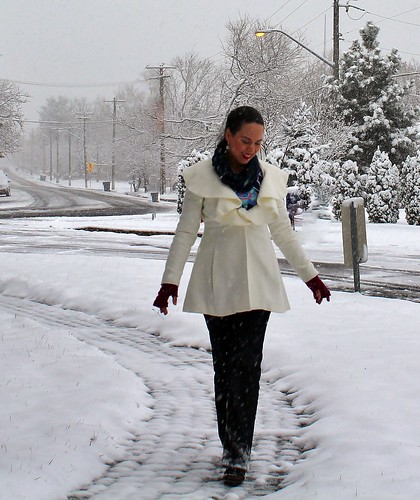
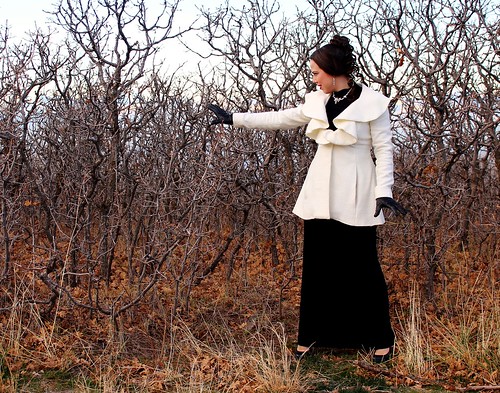
fabulous Lolita Pattern line, Spearmint! She’s a stunning coat featuring a slim
fit shaped with princess seam, long, slim sleeves and a full, ruffled collar.
The most amazing feature isn’t on the outside though. No
indeed, Spearmint is fully lined BY MACHINE! Yes, that’s right, the only hand
stitches on this entire coat are to attach the button. The technique is
ingenious. I’ve already used it on Myra’s Rosy Red coat, and it worked beautifully
without any alterations to the pattern. Amity is a genius.
You even get a perfect jump hem! The first time you do it
is a little mind bending, but the instructions and diagrams are very clear and
easy to follow.
Spearmint also has deep pockets, inserted into the princess
seams. The pockets are faced, so your lining fabric doesn’t have a chance of
peeking out. There are several lengths available. I made mine short,
but you can also choose a knee and calf length option for even more drama.
But this collar, y’all. How gorgeous is this?? The collar is
a circular flounce, given body with fusible hair canvas (which Amity is also
stocking in her shop at an amazing price). The neckline is quite low, but the
collar fills it in beautifully and it is perfect to showcase a spectacular cowl
or scarf.
From the back, you can see how closely fitted the coat is.
Princess seaming gives you a beautiful line and a very comfortable fit.
I made my Spearmint from a winter white wool blend coating I
scored at Hancock. It is interwoven with eyelash and Lurex yarns for texture
and drama. Since the weave is a bit loose, I underlined it with Imperial
Batiste. The lining is rayon satin from FabricMart.
I’m so in love with this coat. I get compliments on it
wherever I go. I know you’ll love sewing and wearing your Spearmint. Head over
to Lolita Patterns and put in your pre-sale order now! For a limited time, you can even get Spearmint bundled with Gunmetal and Sugar Plum for a discounted price!
Saturday, December 7, 2013
Grunge Revisited: Butterick 5924 and Ottobre 02/2007-3
When the Sewcialists started tweeting about the Grunge Sew Along last month, I knew there was no way I could miss that.
Grunge was my daily uniform all through high school and some of college. Of course, that means that I had to find a way to make the look work for me now. As a grown up.
I'm not sure I was fully successful, but I'm feeling pretty nostalgic, and I'm loving it!
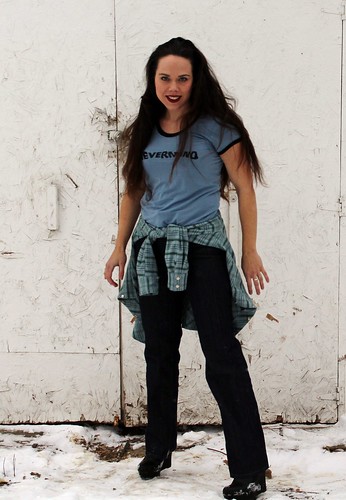
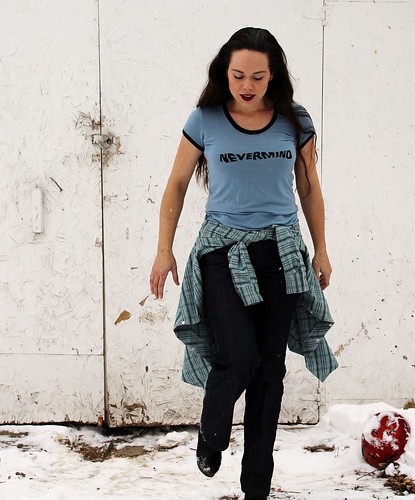
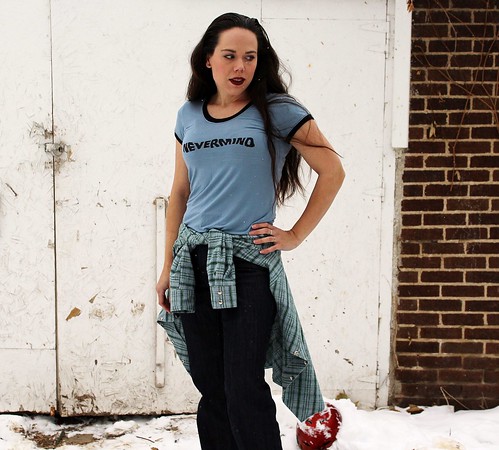
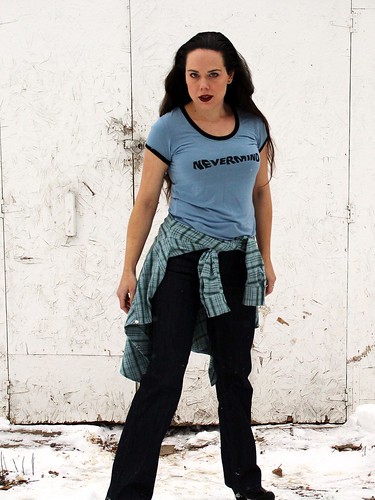
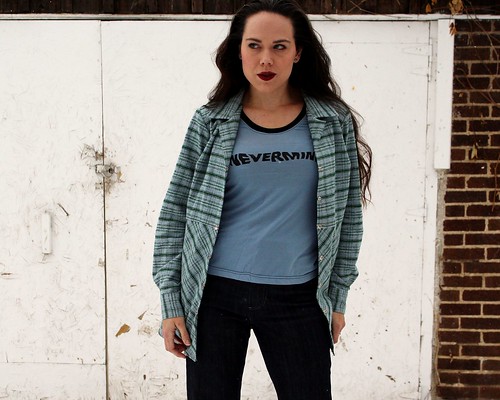
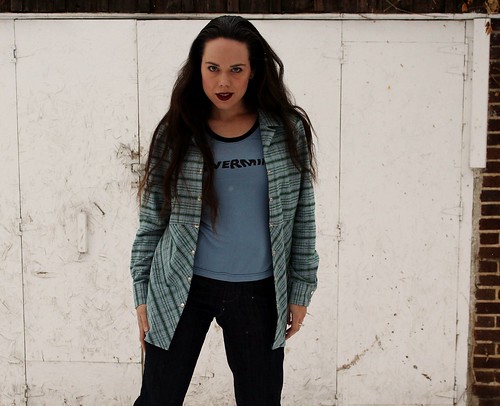
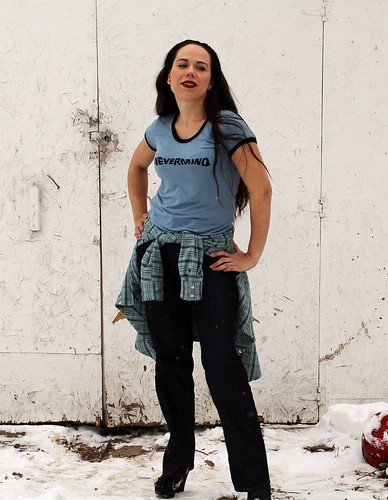
Phase one (once I had my jeans) was a tee shirt. Back in the day, I wore a lot of oversized, man shaped concert and band tees, often layering several at a time.
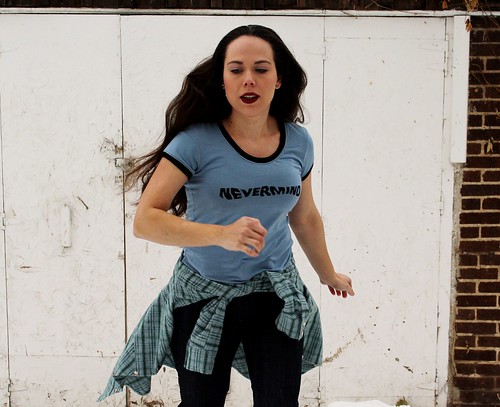
As a nod to those layered tees, I decided to make a fitted tee with contrast sleeve and neckbands in a muted cornflower blue.
I added the iconic "Nevermind" from Nirvana's album. I thought it would be a recognizable, but not totally obvious logo.
The pattern I used is Ottobre 02/2007-3. I shortened the sleeve to cap length and added a hem band. I used a freezer paper stencil and fabric paint to make the logo. The fabric is a soft rayon jersey from FabricMart.
Of course, no proper grunge outfit was complete without a flannel shirt. Most of mine came from the thrift store back in the day. For my look, I wanted something with some shape, and maybe an interesting detail to set it apart from the lumberjack flannels I once wore.
I chose Butterick 5924 for the cool bias panels on the lower half of the shirt, and also for the bust dart, which adds a bit of shape. I love the chevron in back. The fabric is a cotton flannel from FabricMart.
I used brushed nickel snaps as the closure. I never buttoned up a flannel shirt, and I don't expect I will this one, so I like the flash of metal the snaps provide on both sides.
I think I managed recognizably grunge without the unfortunate two sizes two big look I sported as a teen. I am actually having a lot of fun wearing this today, and the flannel shirt is totally cozy as I watch more snow fall.
Grunge was my daily uniform all through high school and some of college. Of course, that means that I had to find a way to make the look work for me now. As a grown up.
I'm not sure I was fully successful, but I'm feeling pretty nostalgic, and I'm loving it!
Phase one (once I had my jeans) was a tee shirt. Back in the day, I wore a lot of oversized, man shaped concert and band tees, often layering several at a time.
As a nod to those layered tees, I decided to make a fitted tee with contrast sleeve and neckbands in a muted cornflower blue.
I added the iconic "Nevermind" from Nirvana's album. I thought it would be a recognizable, but not totally obvious logo.
The pattern I used is Ottobre 02/2007-3. I shortened the sleeve to cap length and added a hem band. I used a freezer paper stencil and fabric paint to make the logo. The fabric is a soft rayon jersey from FabricMart.
Of course, no proper grunge outfit was complete without a flannel shirt. Most of mine came from the thrift store back in the day. For my look, I wanted something with some shape, and maybe an interesting detail to set it apart from the lumberjack flannels I once wore.
I chose Butterick 5924 for the cool bias panels on the lower half of the shirt, and also for the bust dart, which adds a bit of shape. I love the chevron in back. The fabric is a cotton flannel from FabricMart.
I used brushed nickel snaps as the closure. I never buttoned up a flannel shirt, and I don't expect I will this one, so I like the flash of metal the snaps provide on both sides.
I think I managed recognizably grunge without the unfortunate two sizes two big look I sported as a teen. I am actually having a lot of fun wearing this today, and the flannel shirt is totally cozy as I watch more snow fall.
Subscribe to:
Posts (Atom)