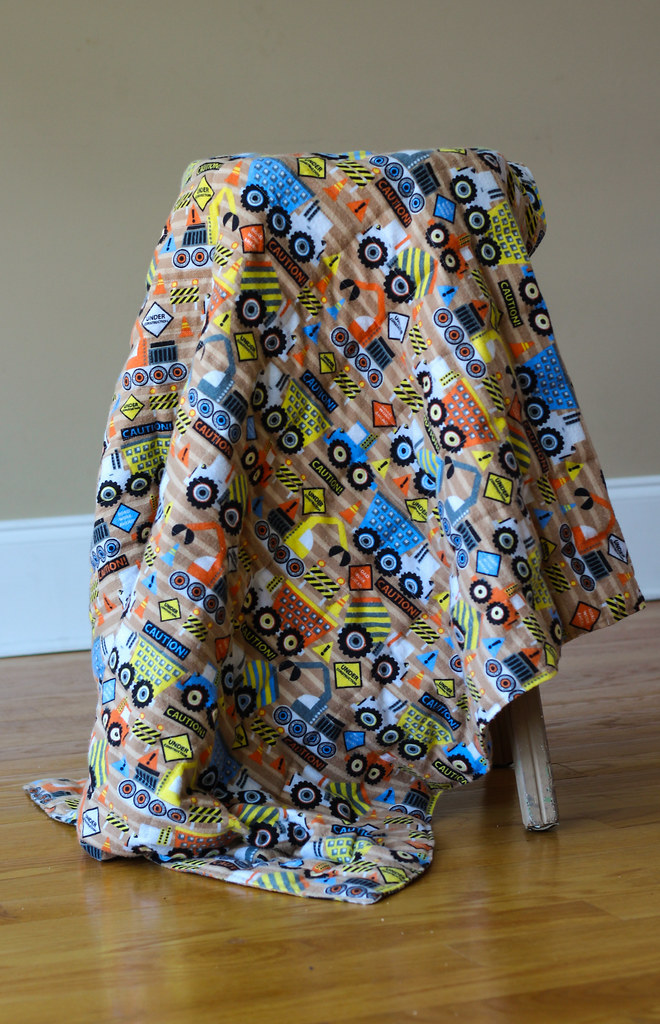
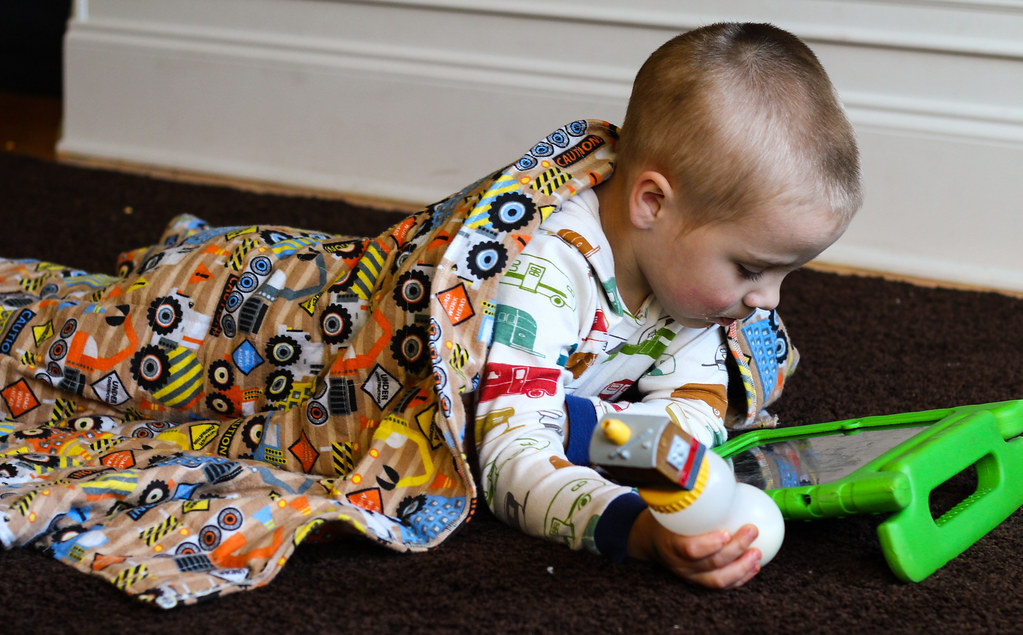
So, I know it's been a while since my last post. I'll get to that at the end, and for those not interested, you can skip it. Now for the sewing! I've mentioned in the past that my oldest son is on the autism spectrum and has some sensory issues. The same is true for my Duncan. Duncan has sensory seeking behaviors, which means he wants all the feels! It makes it very hard for him to focus on a task (even if that task is just eating breakfast) because he wants to feel all the things. His OT recommended a weighted blanket for him. They're sort of insanely expensive and since they're heavy, they're also costly to ship. So, I made him one.
And I'm so glad I did. We've only had it 12 hours and I can already see that it is helping him regulate. Why did I wait so long?!
And the answer is that I hate sewing straight lines and the process of filling 350 teeny pouches of flannel with itty bitty plastic beads filled me with dread. But it wasn't as bad as all that, and if you are considering making one for your little person, please let me encourage you to do it now! And I'll throw in a few tips I learned as I made this one.
I started with
this tutorial on the Dandelion Mama blog. I made some alterations to make this work for us. I made my blanket a little longer than hers, so I used 1 1/2 yard lengths of fabric. I also used flannel rather than quilting cotton. While this makes for a very snuggly and soft blanket, it was also extremely difficult to fill each pouch with the pellets, since the fabric sticks to itself. A smooth quilting cotton would have been much easier.
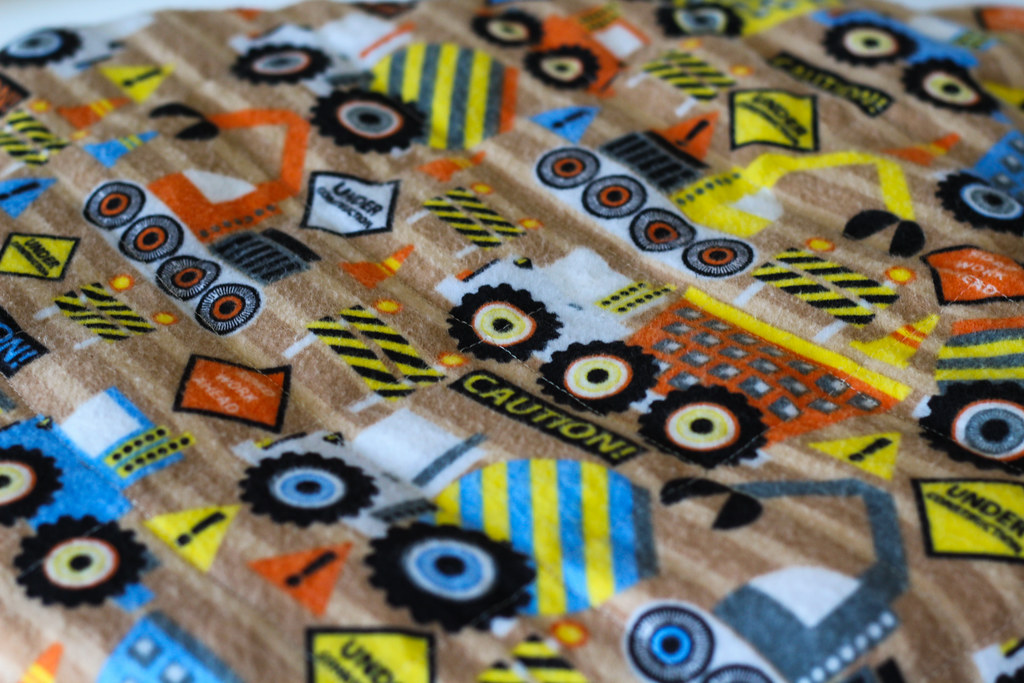
The individual pouches are a little difficult to see. For Duncan's blanket, I made 3 inch wide channels (which I marked with a Frixion pen) and then 2 inch "boxes" to capture the pellets. I marked my lines before I started sewing so that the grid was there before I began. The trickiest part is definitely sewing closed those little packets of pellets, but if you go slow and feel along your stitching as you go, it's not too bad. I actually managed to sew up this blanket without breaking any needles. I just went slowly.
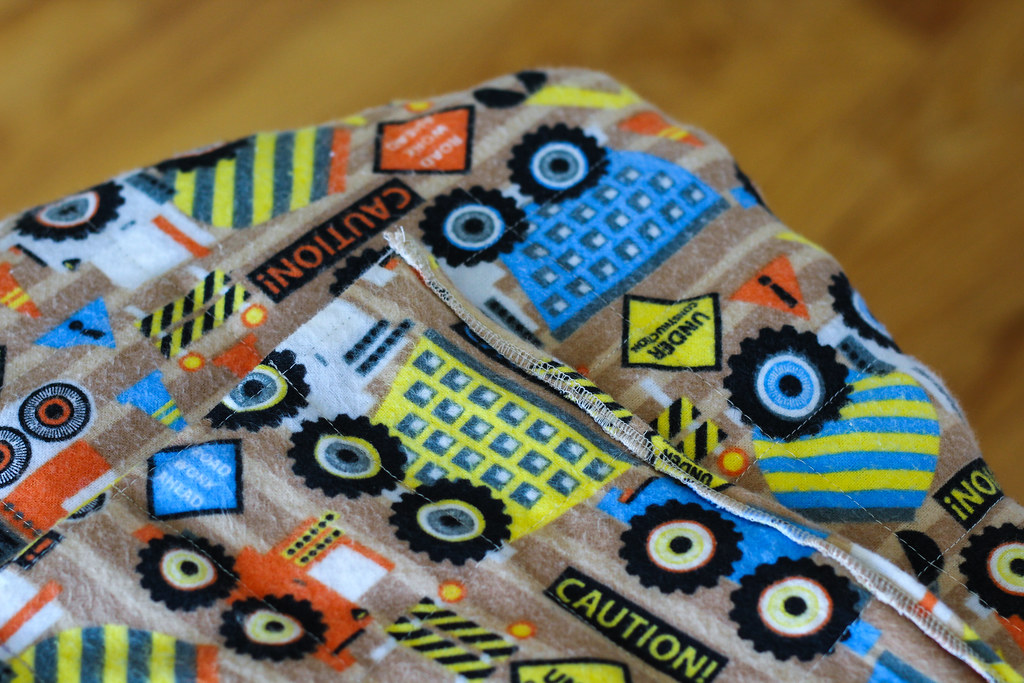
I left myself a little extra room at the top, which turned out to be a good thing, because keeping the pellets under control gets a little tricky as you run out of space in the channels. After I closed the last line of pouches, sealing in the pellets, I serged off the extra length and turned it under and stitched it. I'm not sure it is the prettiest finish I could have managed, but it is secure! I don't want those pellets escaping.
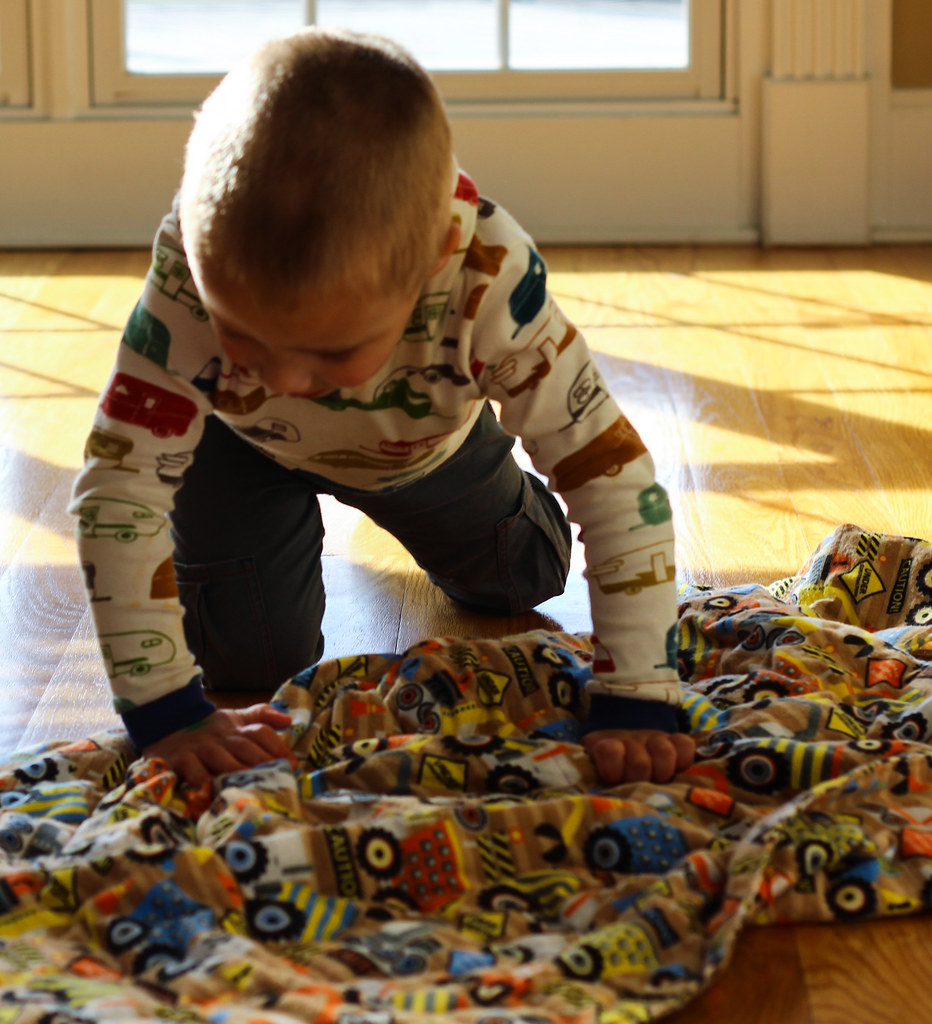
When I first gave it to him, he spent a lot of time exploring the feel of it. The pellets give it an interesting texture, and the flannel is very soft. He touched it with his hands, then explored it with his feet.
But it wasn't long before he figured out how good it felt to be enveloped in all that weight.
He carried it around everywhere yesterday. He even brought it with him in the car when we went to get the big kids from school, and he snuggled in it to go to sleep. I left it on him all night, and he slept an unprecedented 11 hours, and then woke up cheerful! Just for a restful night's sleep for all of us, I have to give this blanket a big win.
So, that's the sewing, You can skip the rest if you wish, but I wanted to put it out there. If you've been following me for long, you've probably noticed that my posting has really dropped off. I hate it when bloggers disappear without any explanation (I worry!) and I'm not planning to disappear altogether, but I just haven't been feeling the yen to blog lately. I've still been sewing. A lot. Because I have to sew like I have to breathe. I know you guys understand that. Blogging just hasn't been a priority. I'll still blog bigger projects (like this one) or new patterns, but really, do you want to read about my 400th Renfrew? Yeah, me either. So, that's it. I'm fine. I'm still here. Tweet at me and say Hi! I'll be around! But the blog might be a little quieter. That's all.