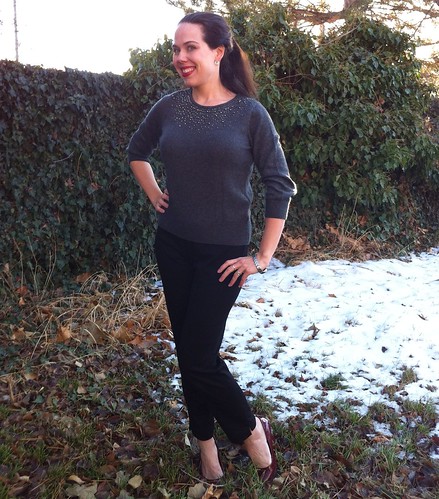
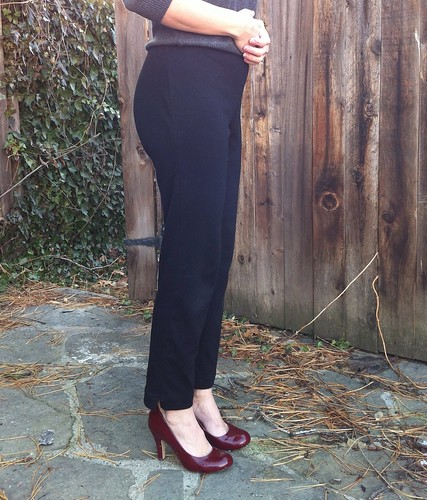
My first item in the Wardrobe Basics SAL is black slim pants. The show that this SAL is based on called them ponte pants, and that sounded great to me.
The pattern is New Look 6082, which is a wardrobe pattern with several nice pieces. I made view D, which are ankle length (although there is no way to tell that from the drawing) slim pants with vents at the outer hem.
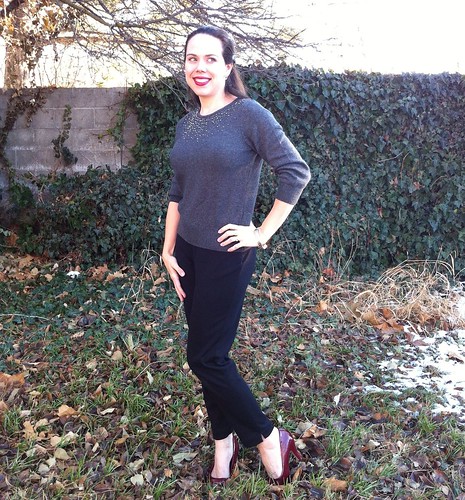
I was going for an Audrey sort of vibe. Except that I don't wear flats.
The fabric is a black ponte knit from Fabric Mart. I really have been impressed with the quality of Fabric Mart's ponte knit, particularly for the price. So often inexpensive ponte is plasticy and reminds me of my cheerleading costume from Junior High. This knit is soft and drapey, without the plastic feeling. I really like it.
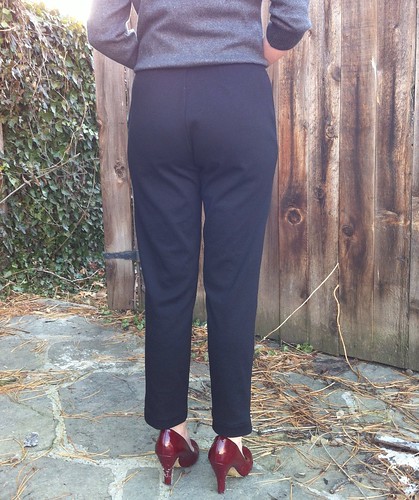
Since the pattern envelope doesn't show the pants on a person, I was sort of at a loss as far as what to expect with regard to fit. I compared the pattern to my Vogue 8330 skinny jeans pattern. These were significantly wider, but I decided I could always lop off some width as I sewed them. I transferred the crotch alterations I generally make and went ahead and cut without a muslin. I basted them together to get a sense of the fit, and the legs were quite large. I cut off a total of 1 3/4 inches per leg below the hip to give them a slim shape. I also nipped in 1 1/2 inch in the back waist. The fit in the rear isn't perfect, but it is OK and comfortable.
Since the pattern is drafted for a woven, and I was using a knit, I was on the fence about the zipper, I did install an invisible zipper, but because I was being lazy, I didn't interface the zip area and it bubbled terribly at the end. Not a good look. Since I wasn't sure how I felt about that zipper from the beginning, I didn't firmly interface the yoke. Instead, I used a tricot interfacing and added a strip of wide elastic cut to the length of my waist which I attached to the facing at the waistline to stabilize it there. This way, when I took the zipper out, I could still pull the pants on since the waistline was able to stretch.
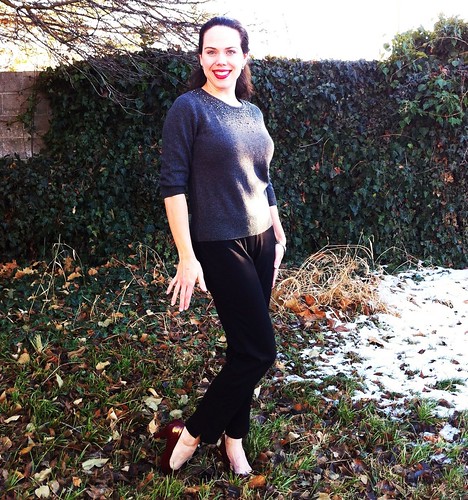
Although the pattern claims that these pants are supposed to fall 1 inch below the natural waistline, they hit right at my belly button, which is about 1/2 inch inch below my waist. I am very high waisted, so these pants may fall a bit higher on others.
When I first put these on, Mitch wasn't thrilled with them. He tried for subtle with. "Well, they're different than what you usually wear." I like them though and although he's right that my usual vibe is fit and flare or very fitted, I think these fill a wardrobe niche that I didn't have anything for before, and they will liberate a few orphans that I have collected.
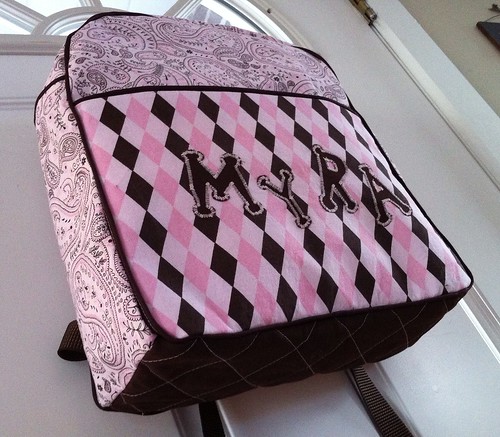
When Logan started preschool, I made him a backpack. He chose all the fabric and notions and he still loves that backpack. Although Myra hasn't started preschool yet, she insists on taking a bag whenever we take Logan to school. So, even she won't start until next school year, I made her backpack already.
I let her raid the stash for fabrics, and she chose these two pink and brown cotton prints. We hit the store for notions, but the pinks that were available didn't match, so we went with brown. And I love it. I also added a front pocket - coloring book sized - with her name appliqued in brown. I used the same pattern pieces as I had for Logan's, which I had enlarged to accommodate a folder or binder for school.
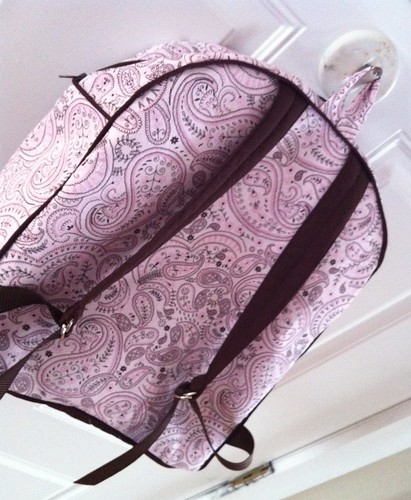
Here is the back, with straps and hanging loop. I love how professionally this pattern comes together. And I am so pleased that we were able to find nylon strapping that was a perfect match to both the piping and the accent fabric. So awesome!
For structure, I interfaced the bag out fabric with craft fuse, which is also what I used on Logan's backpack and it has really held up well. It is kind of stiff and papery at first, but softens nicely with wear. The bottom of the bag is quilted, and the accent fabric is a densely woven poplin, so it should be nice and sturdy.
In the years since I made Logan's, Rae has added instructions for lining the bag, which I did. It looks so nice on the inside, and I imagine it will wear even better than Logan's (which is holding up really well). She can take it to college. :)
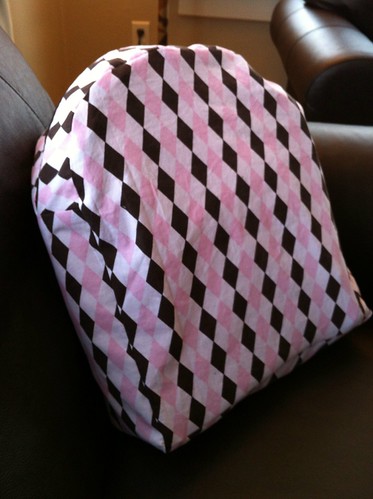
I finished it in the morning before Myra got up, so of course, she had to try it out as soon as she got out of bed. Pardon the morning hair and PJs. She loves it.
And so does Duncan. Looks like I need to make a little one for my little guy. How cute is that kid??
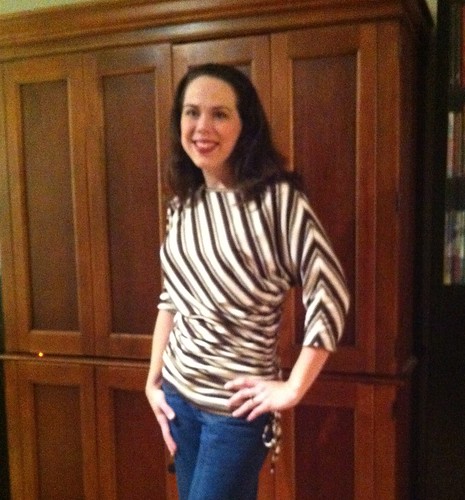
For Christmas, one of my gifts was a gift card to Hancock's fabrics, and when I saw a fabulous brown and metallic gold uneven striped knit there, I immediately thought of Kwik Sew 3694, which I have wanted to make in a stripe since I made it a few months ago (here). It was quite a thin knit, and I was concerned that I wouldn't like it, since my first version is a beefy rib knit and I love it. I even mentioned in my review on PR that I thought this top would be best rendered in a heavier knit.
I'm going to have to go back and edit my review. I love this in a thinner knit!! And the stripes are so fun. I love the way they wrap around and chevron at the seams.
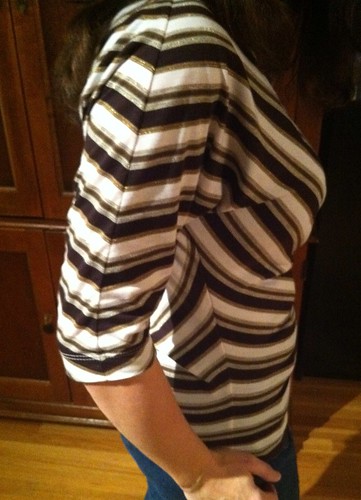
Here is a close up of the sleeve and side seams. Matching the stripe on this top initially was a head scratcher for me, but I was really just overthinking it. All you have to do is be sure that your hemline (which is straight across the cross grain, and therefore parallel to a horizontally striped knit) is lined up at the same stripe in your pattern repeat, and the rest of the stripes will fall into place.
I'm not sure how many more of this style top I need in my wardrobe, but I love this pattern so much, I might have to make another. I'll definitely be trying out the cap sleeved version without the ties for summer.
Next up I am making a pair of black ponte knit pants as my first piece in Lori and Lynne's Wardrobe Basics Sew Along.
I definitely need some wardrobe basics! Hopefully this will help keep me from getting distracted by the next shiny fabric that comes my way...
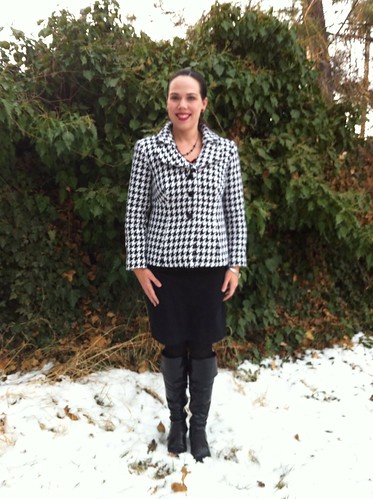
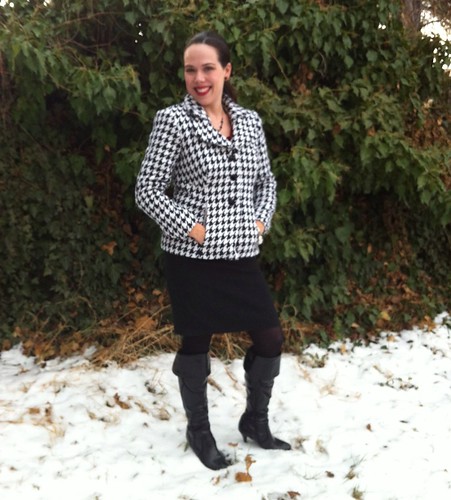
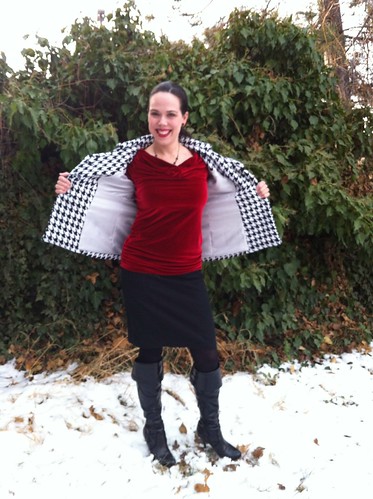
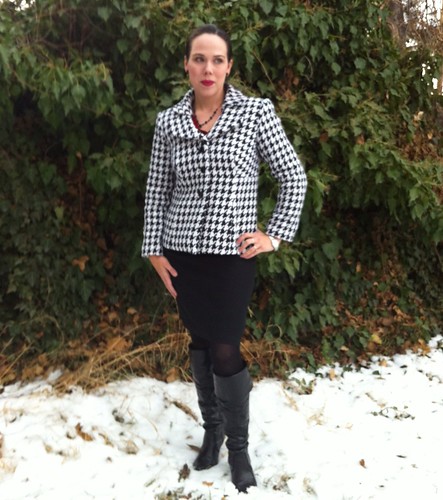
Thanks to everyone for all the wonderful comments on my jacket. I really love it and enjoyed making it. I'm glad I got to share a bit with all of you.
**********************************
As predicted, Logan has been wearing his Woody costume shirt to church since Halloween. While I am glad it is getting worn, and also that he is leaving the vest at home (Whew!) it was quite fitted when I made it and now it is just too small. I have been trying out other patterns for dress shirts for Logan, but this time I came back to an old favorite from the 04/2004 issue of Ottobre.
This is #14, the "shirt for little boys". I made it for Logan in 2009 and I just love all of the wonderful details it has. It really is pretty much the perfect little man shirt.
It has cool darted pockets. I left off the flap, since I matched the pocket stripes perfectly and I was afraid to mess with a good thing. I do think it looks more grown up without the flaps, but the corner darts leave plenty of room for trains and cars.
I love the sleeve plackets. I just adore how much these make a little man shirt. And this issue of the magazine has detailed instructions with diagrams for putting in the sleeve placket. I forget all the fiddly details since I don't do this all the time, so it is really great to have the reminder of all the steps. Also - how about that stripe matching across the placket, eh? Mad skills. And magic tape.
The shoulder yoke comes forward of the shoulder seam and is curved into the front. Pam mentioned recently on Facebook how much she likes this feature in a man's shirt, and I have to agree. I think that it gives it a much more high end look. It's the little touches, you know?
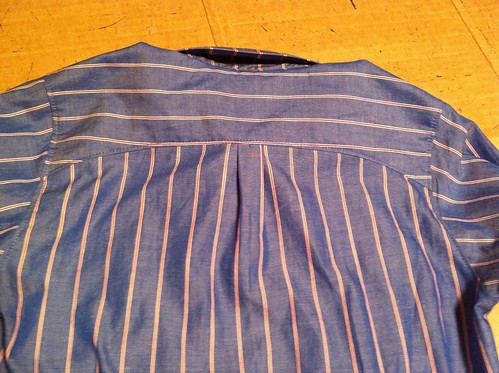
The back yoke also curves down, mirroring the front and there is a center back pleat, just like Daddy's shirts. I'm really glad that Ottobre drafted this shirt all the way up to size 170. I just love it.
ETA: I just enabled threaded comments on the blog (Thanks Amanda, for showing us how it's done!). Please let me know (email - katiedeshazer (at) gmail (dot) com) if you can't comment or the blog is acting funny for you. I think it would be great to respond to each other's comments, but not if there are problems with blog functionality. Thanks!
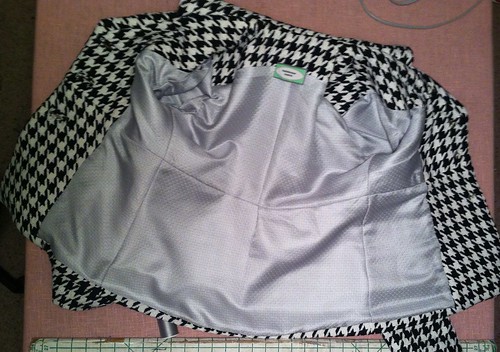
Lining any garment makes it more luxurious to wear, easier to put on and lengthens it's life. Nowhere is this more important than in a jacket or coat, where the garment is pulled over clothing several times a day and often the wrong side is seen. A lining also covers up the inner evidence of your tailoring work, leaving a clean and beautiful inner finish. Lining a jacket isn't difficult, but it does require some pattern preparation as well as some additional sewing.
My lining was inserted using a modified hand technique, which you can find in Connie Long's Easy Guide to Sewing Linings. This book would make it on my Take to a Desert Island short list (right after the Reader's Digest Guide to Sewing). It covers lining techniques for nearly any garment you can imagine, starting with drafting you lining pattern and going all the way to finishing techniques. The Tailoring book I referenced yesterday also has a brief discussion of linings, but this is much more step-by-step. Essentially, the lining is assembled and attached to the facings by machine, then hand sewn at the hems. The finish is beautiful, and it is surprisingly easy to do.
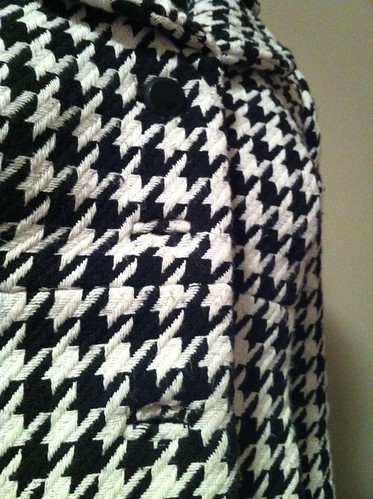
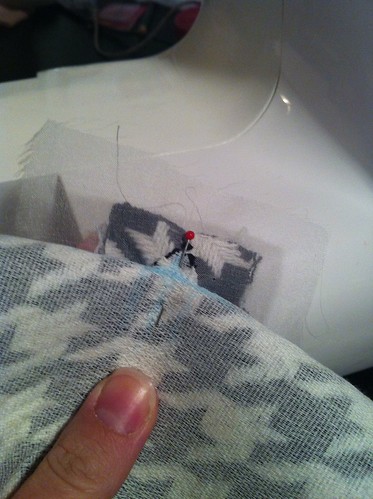
Another beautiful finish you can add to your garment is bound buttonholes. They look very intimidating, but are also surprisingly easy to make, after a little practice! I made 3 sample buttonholes before I was ready to actually cut (gasp!) my fabric. Gertie's Bound Buttonhole tutorial was what I used to make my buttonholes. The only thing I would add to her tutorial would be my hint for getting your welt lips to be evenly positioned within your window.
After slipstitching the welts in place, I would still get a little bit of slipping, but by placing a single pin through the point of my clipped triangle and pinning between the lips, they stayed centered every time.
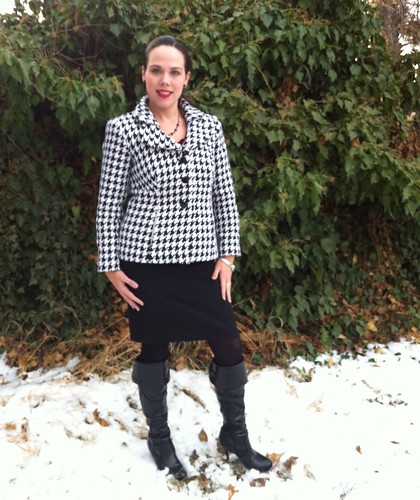
I hope this little series has helped you to be a little more comfortable with tailoring and coat making if you weren't before, or has added a little to the knowledge base that you have. I am so happy that I finally sewed my own coat. It is beautiful and fits me perfectly, which I know I would never have been able to find off the rack.
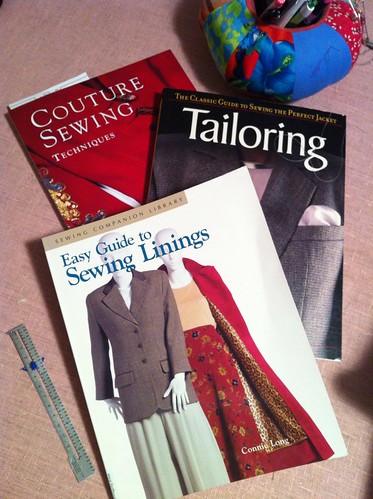
Tailored clothing has been shaped by a variety of techniques involving everything from interfacing to hand sewing. I know as a new sewist, I was very intimidated by these techniques, but there are a lot of resources out there to help you learn them.
Here are some of the books that I used in tailoring my coat. All of these were useful to me in some ways, although if you only have Tailoring:The Classic Guide to Sewing the Perfect Jacket, you'll have what you need. This book takes you step-by-step through the process of making a beautifully tailored jacket using hand, machine and fusible tailoring techniques, which you can mix and match to meet your needs.
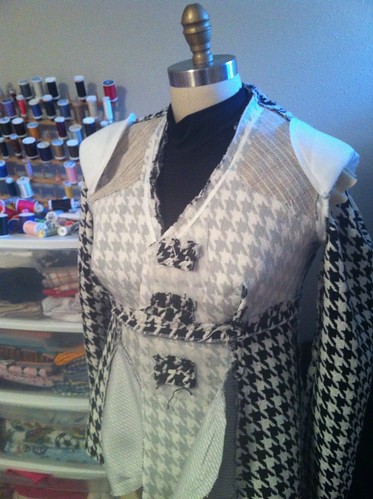
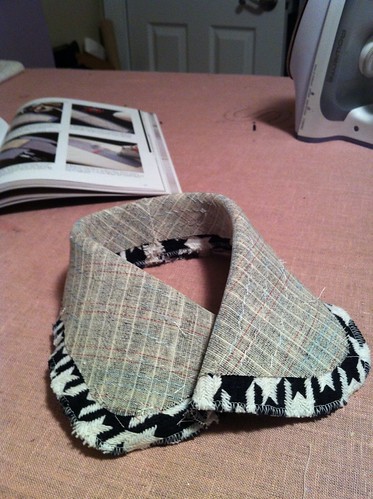
Here is the coat sans lining so that you can see the structural components that I included in the body of the coat. I used a combination of fusible interfacing to block fuse the bodice. I machine stitched on my hair canvas chest piece, but hand sewed the taping on the roll line (which in my case was also the neckline seam).
The undercollar (and the lapel facing, although that is not pictured here) were interfaced with hair canvas and padstitched by hand. Although there are machine and fusible methods for shaping the undercollar, I really think that you can't beat the shape you get by hand tailoring here. This was one of the things that really put me off of had tailoring a garment though. I was afraid of the padstitching! Once I saw it done in person, though I realized that it was easier than I was making it out to be. I wish I could come and padstitch with each of you, but since I can't, I made a video so that you could see what it looks like.
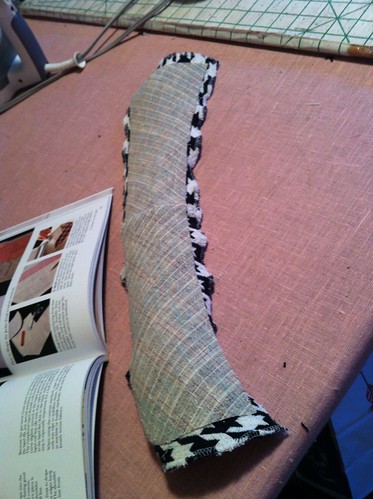
Once all the stitching is done, you can see the shape that it gives the undercollar.
See how much structure it has? That curved shape will allow it to lay close to the body and maintain its shape.
After your padstitching is done, you want to steam your undercollar into shape around your tailor's ham. You just pin it on, with the stand folded down along the roll line and blast it with your steam iron until it is damp. You will then want to let it completely dry, so set it aside and work on something else.
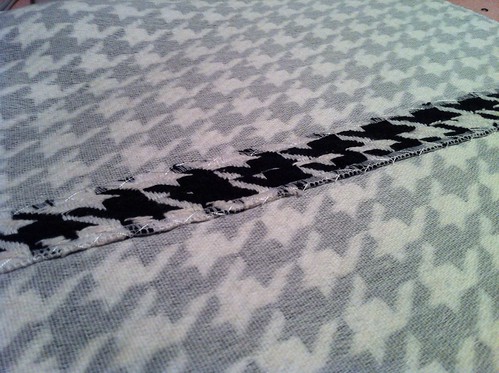
Another useful technique that I used on this coat was catchstitching the seam allowances by hand. In this bulky coating, it really helped control the loft of the fabric to give a really precise and flat seam.
Can you see the difference? These are the shoulder seams of the coat. Both seams have been sewn, pressed and steamed, but the seam on the left has also been catchstitched in place. See how much smoother and flatter it lies? It was a bit time consuming, but I think the results were worth the effort.
Obviously, one blog post won't teach you everything you need to know about tailoring, but if you are interested in learning more, I highly recommend the book I referenced above as well as a few blogs that I found useful:
Made By Hand - The Great Sartorial Debate - This is a wonderful blog, written by a professional tailor. He showcases his own amazing work as well as taking apart bespoke garments to examine. Fascinating! Sherry's RTW Tailoring Sew Along - A collection of tutorials to help achieve a high-end RTW finish to your tailored garments. The focus is on industry secrets, many techniques are by machine rather than hand. Gertie's Lady Grey Sew Along - Gretchen, of Gertie's New Blog For Better Sewing, takes us along as she hand tailors her Lady Grey coat. She has tons of tips, tricks and great tutorials.
Tomorrow I'll talk about a couple of finishing touches - lining your jacket and making bound buttonholes. Stay tuned!
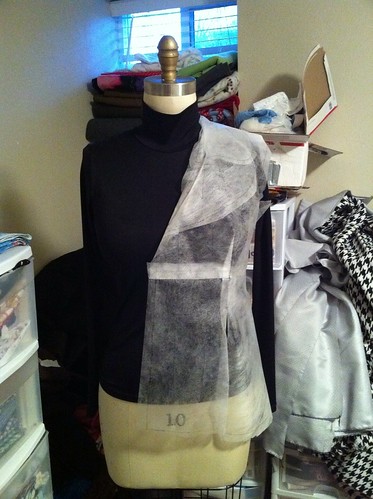
The first step in any sewing project is to get a perfect fit. If you aren't happy with the fit of your garment, then you have wasted your own time, money and fabric! This is a lesson it took me a lot of time (and wasted fabric!) to learn, but I know that spending a little time getting the fit just right before you cut your fabric will save much pain and suffering later. I always start by tissue fitting my pattern on my dress form to see if I need to make any major changes.
I trace all my patterns onto tracing medium (Soil Separator paper is my personal favorite), then sew it together to see how it looks. You can just cut out your pattern tissue in your correct size and pin it together on the seamline as well. After making any major changes to the tissue pattern, I cut out a muslin. Now, I don't always muslin every pattern, although there are certainly sewists who do. For this project, since I knew I would be putting a lot of work into it, I wanted to get the fit absolutely perfect before I cut into my precious coating.
My first muslin wasn't too bad, particularly since I had already fixed the swayback in the tissue. In the heavier fabric I used for my muslin, it was clear that I needed a little more room in the bust,
As well as some additional ease across my broad back. After a 3/4 inch FBA and a 5/8 inch broad back adjustment, I made a quick bodice only muslin to check the darts and alignment. I also tried out gathers in place of the darts, which didn't work at all, so I'm glad I muslined it first. After finalizing the dart placement, I sewed muslin #3.
And it worked! I'm happy now with the dart placement and the amount of ease in the bodice.
In back, the adjustment there gives me enough ease to move, without being to large. You can see on the sleeveless side, I tried a shoulder dart, but didn't like the way it looked, so I ended up easing the back shoulder (which I had lengthened with my broad back adjustment) into the front. One thing to remember is that even if you don't think you'll need to adjust the sleeve, you need to set them in to make sure that the back of your garment fits well, as the sleeve effects the fit there.
So in the end, I only had to make a few adjustments to this pattern and they were all pretty standard adjustments for me. I did a small FBA, a broad back adjustment and a small swayback adjustment.
The Perfect Fit: The Classic Guide to Altering Patterns - This book has great fit methods, but is often a little light on the explanations. I wouldn't use it as my primary fit resource, but I've learned a lot from it about alternate ways to fit a garment. It is particularly helpful in "non-standard" situations.
Fast Fit by Sandra Betzina - This book helps "diagnose" fit problems by focusing on how an ill fitting garment might appear and what the problem is. Her fit solutions are good, although they don't always apply to every situation.
Debbie Cook's FBA tutorials - Debbie taught me how to do an FBA! I cannot recommend her tutorial's highly enough. They are clearly written and easy to follow. She covers how to do and FBA for many different situations, such as on a dolman sleeve or a twist top.
Sigrid's Sewing Tutorials - Sigrid has collected many sewing tutorials from all over the web and collated them into one blog. Very helpful!
I hope this is helpful. Tomorrow I'll chat a little about tailoring. Stick around for that!
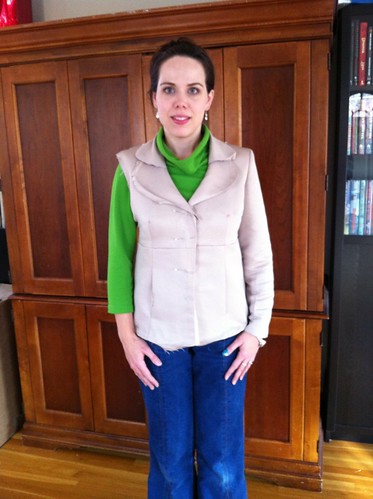
It seems like this has been the season for the coat in blogland. Did you see Karen's? Wow. Or Kristine's? A-MAY-ZING! I've been thinking about sewing a coat for some time, but between fear of tailoring and living in Texas, it hasn't happened until now.
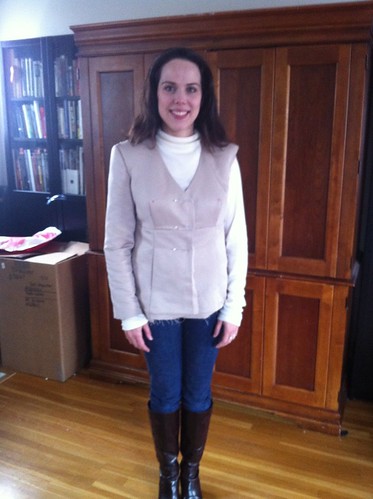
I'm really more of a jacket length kind of girl, so I decided on Simplicity 2256 as my pattern. I fell in love with this style as soon as I laid eyes on it. I love the curved, layered collar, the empire line and the simplicity of style. I think it has a nod to a vintage look, without actually feeling like it came from a particular era.
And look - pockets! I love these sneaky little in-seam pockets. The pattern was a pleasure to sew - beautifully drafted and well fit. The instructions were good and although I generally find that Project
Runway patterns can be a little difficult to follow, as they can jump around a
little, this one wasn’t that way at all. I had no trouble following it. I did
mark the instruction sheet to make it easier to follow the components that I
was including.I'll talk more tomorrow about the few fit changes I made, but they were minor and typical for me. I only had 2 issues with the pattern. The first was that it is unlined. Truly, if you saw this jacket/coat in a shop and it wasn't lined, you'd never buy it.
I did draft a lining for it, of course. It would have been nice to have one included. My other complaint was the pocket bags. Then pattern only includes one size piece for the pocket bags, and it is miniscule. Admittedly, the size of the pocket is limited by the size of the lower front panel, but the included pattern piece was just silly small. I don't think you could even fit your keys in there, much less your entire hand. I enlarged the pattern piece to fit within the front panel, and it is just the right size for my keys on one side, phone on the other with just enough space to keep my hands toasty too.
The fabric is a heavy wool coating from Hancock's. I absolutely love it and have been hoarding saving it for about 2 years. The lining is a silver brocade that came from a Fabric Mart mystery bundle. It acts like polyester, but is fairly heavy, which was a good pairing with the heavy coating.
There is a lot more to say about this coat, and tailoring in general, so I'm going to spread it out over the next 3 days. Tomorrow we'll talk about fit, tissue fitting and muslin making, then I'll discuss structure and shaping with some tailoring techniques (and a video - don't miss it!), then I'll discuss a couple of finishing touches - bound buttonholes and lining.
If you've come by from Simplicity's Facebook Fan Page - Welcome!! I'll be posting to the Fan Page with little tips throughout the next few days, as well as answering any questions. If you don't already "Like" Simplicity on Facebook, you are missing out on some serious fun, sew alongs and a great community! Click on over to their page now!
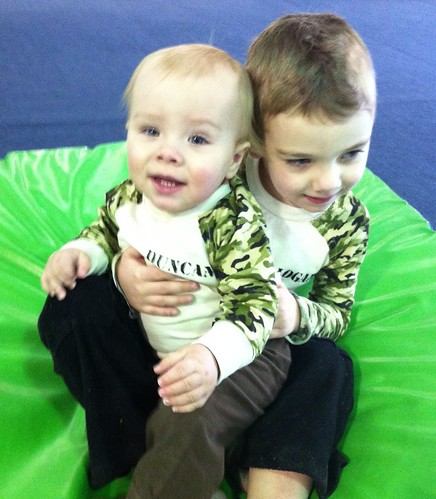
I got my two boys to wear their new tees yesterday.
Aren't they sweet. Both tees worked out well, size-wise. For Logan, who is a pretty average sized 5 year old, I made the size 6/7 from the Sewing For Boys book. It is a very slim fit shirt, even though I made a size larger than I should have needed for him. The length is good, but Logan likes his shirts long. It comes down fairly low on his hips.
Duncan is 13 months old, but on the small side (he was 71 cm long at his 12 month checkup). He is wearing the size 74 and it is a perfect fit in the body, but the neckline was a bit snug over his giant (and I say that clinically - his head circumference is off the growth chart) melon. Further versions of this tee will use the snap placket in the raglan seam to get it over his big brains.
Of course, the important thing is that both boys like their shirts and are comfortable in them. Win.
And the coat? Come by tomorrow. I might have something exciting to show you...
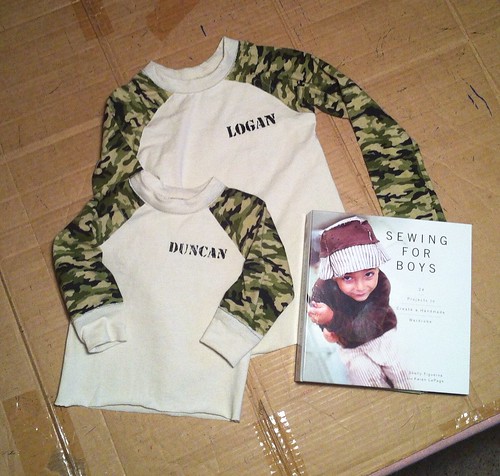
I haven't done a "What I got for Christmas" post because I thought it would be more fun to spin things out as I used them and tell you what I thought. One of my gifts from dh's parents was the book Sewing For Boys. By way of introducing the book, and as a part of the Sewalong over at Boy, Oh, Boy, Oh, Boy, I thought I'd show you my first project from the book.
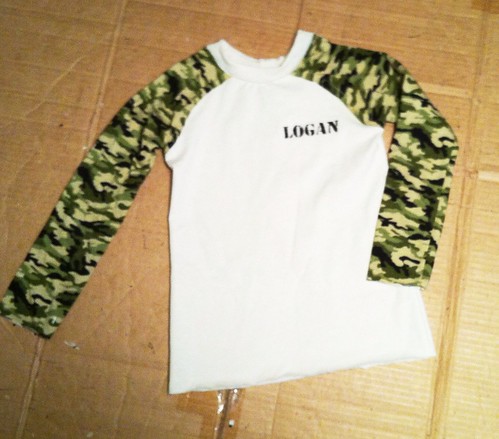
This is the Raw-Edge Raglan, which is the first pattern from the book. In terms of the book itself, it is not typical of this type of project oriented book, in that there are no general sewing instruction. I think that is great!! I've never found that a project book does a great job at teaching sewing, and this way there is more room for the patterns. For this project, I found the pattern itself well drafted and the instructions were clear. You'll be seeing more from this book, I guarantee.
I liked the results so much, that I had to make one for my littlest guy, too! The pattern in the book is only graded down to a size 2-3 and Duncan is a 12-18 month size, so I used an Ottobre pattern (04/2010-1 if you're interested) for the basic pieces, and the assembly instructions from the book.
Overall, the book is easy to use (love a spiral binding!) and nicely arranged, with glossy pictures of all of the pieces, mixed and matched in various ways. The patterns are in a tidy envelope in the front of the book. The patterns are nested by size, but not overlapping like Burda or Ottobre, so tracing is a breeze. The instructions for each pattern are well written and illustrated with line drawings. As a bonus, they use very technical sewing terms, you know, like "wonky". I love that!
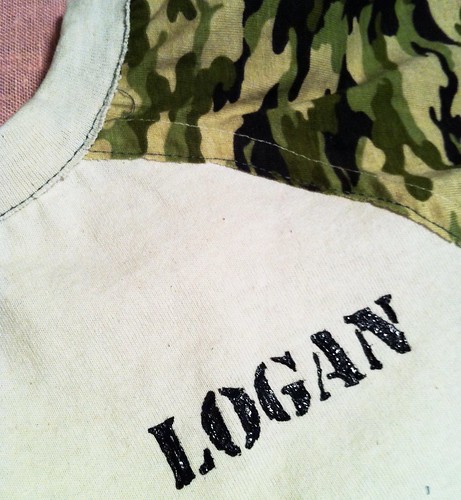
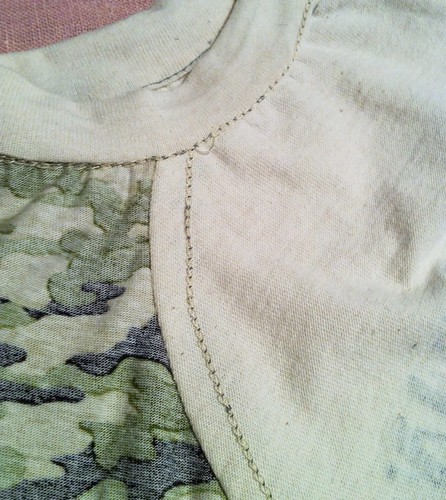
And here is why it is called the Raw-Edge Raglan! The seams are sewn wrong sides together, then topstitched down for a slightly deconstructed look. To mine, I added Logan's name, stenciled on with freezer paper. I was going for a sloppily spray painted on the side of a Hum Vee sort of look, so I didn't use a paintbrush. I just sort of smooshed the paint on there to give it some texture. I think it turned out pretty cool.
I did a similar stenciled embellishment on Duncan's tee, and also added cuffs. The Otto pattern I used included cuffs and I thought that would be cute, not to mention adding a bit of warmth. I applied the cuffs the same way that the neckband is applied, which is to stitch the band to the wrong side, flip it the the right side and topstitch. That left me with a TEENY little loop to try to topstitch down. Way too small for the free arm on my machine, so I basically sewed it blind. It turned out reasonably well, but I don't think I'll be doing that again...
As a cool side effect of the inside out seaming, the inside of the shirt is incredibly smooth. For Logan, who has some sensory integration issues and does not like anything itchy to touch his skin, this is an extra bonus.
And here is my inspiration for this shirt! This is my Dad, taken after he returned from some sort of overseas mission, the details of which were classified, but involved growing a beard.
This song ran through my head the entire time I was sewing. Makes me cry like a baby every time...