It's that time of year again. School is out for us next week, so it was time for me to come up with something to give the teacher's who have worked so hard all year teaching and loving my children. They both had amazing teachers this year, and truly nothing can really express how grateful I am for them.
I feel like making something with my own hands in some small way expresses how important they have been to us. But without sizes and measurements, it's hard to personalize a garment, so I decided instead to make bags. I'm not at all a bag maker generally, but I think these turned out pretty darn cute.
The pattern I used is the
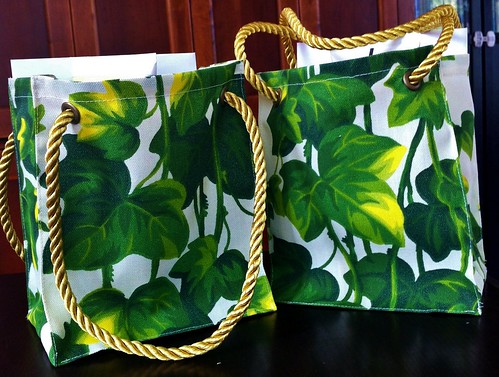
Go To Gift Bag, from
Go To Patterns. The pattern includes 3 sizes of basic gift bags, a quilted wine bag and a gift card holder. This is the "medium" sized bag, which was the perfect size for a greeting card, and a few products from Burt's Bees. The bags have a boxed bottom and bias finished top edge. For the fabric, I elected to use a heavy weight upholstery fabric, since the pattern doesn't call for any interfacing. The upholstery fabric has plenty of body on it's own, so the bags stand up nicely.
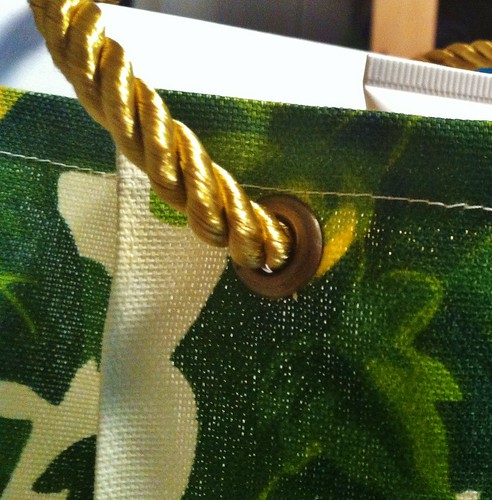
The pattern includes a couple of strap options. I decided to go with grommets, into which I threaded gold drapery cord. I really like the way this turned out. When I first pulled out the pattern, I was a little dismayed to see that the bag was unlined, since I think the inside of a bag really needs to look nice, but I needn't have worried.
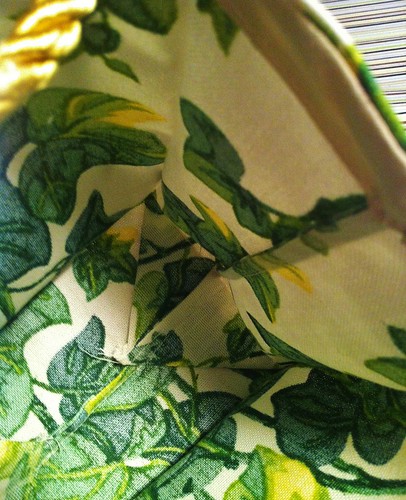
All of the seams are french seams, so the raw edges are fully enclosed. There was one thing that I changed about the construction, and that was the inner boxed corners. I am just not a very precise seamstress, so when I went to stitch down the corners, nothing lined up. It was a hot mess, and I ended up stitching the corners down in the ditch of the bottom seam, so they don't look too great in there.

For the other two bags, I stitched the corner as a french seam - stitching the first pass wrong sides together at 1/8 inch in from the seam line, then flipping the seam wrong sides out to stitch a 1/8 in seam right sides together. I'm much happier with the way it looks this way. Another feature I really loved about this pattern was the edgestitching along the corners of the bag. This keeps the bag nicely structured and helps it hold it's shape. Despite the nice seam finishes and bias binding, these bags were super quick to whip up, less than 1/2 hour each. I'll definitely be using the pattern again.

6 comments:
Nice. I did bags for my teacher appreciation gifts, too. Yours look very elegant.
These bags are terrific-I have made a note of the pattern. Thanks!!
Those will be very much appreciated. The bags would make a nice present for other occasions, as well.
Katie - Love the bags! Great job! I've always wanted to make my own too - thanks for the link to the pattern - by the way, I've been having trouble posting comments since moving to Bloglovin - I've tried a few other comments I think never showed up. . it may be my computer (I use blogger and a Macintosh).
They are very pretty. I'm sure they will love them!
Very lovely! I'm off to look at the pattern right now; thanks!
Post a Comment